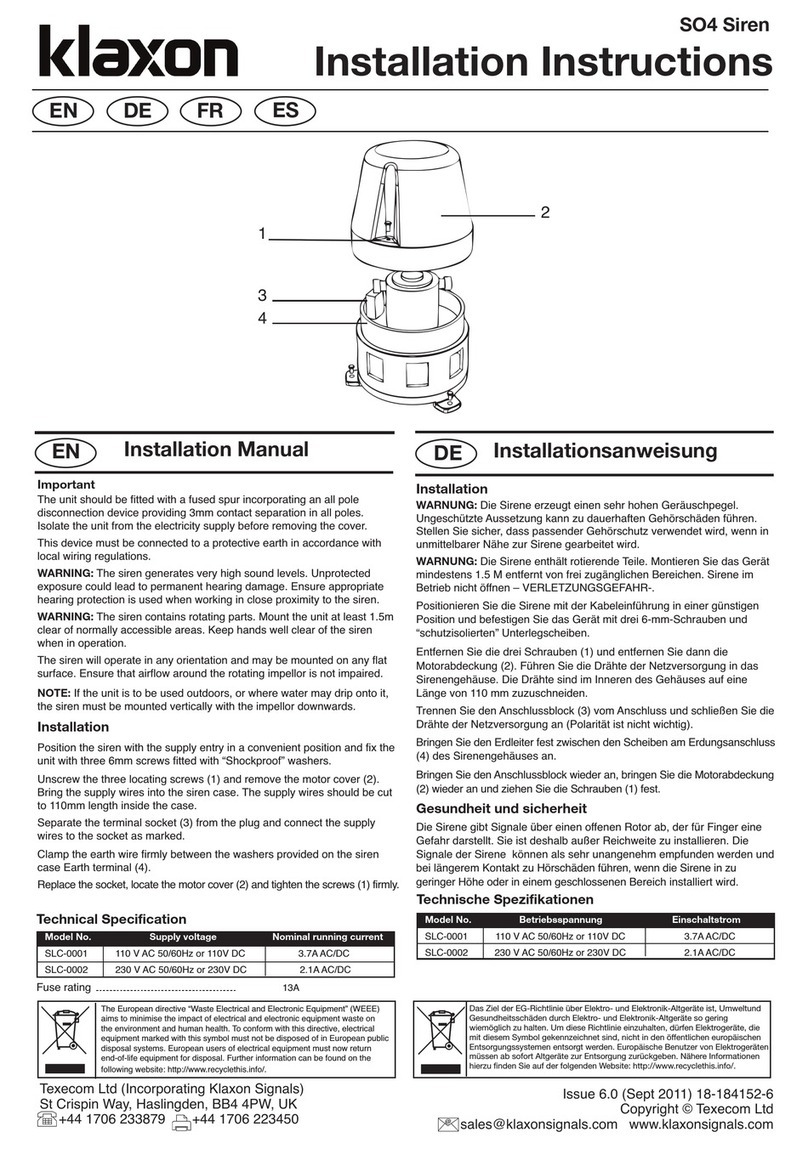
DEGREE CONTROLS Rooster Monitor100 User manual

Rooster™ Monitor100 USER MANUAL
Rooster™ Monitor100 USER MANUAL 62310MN000-A04 1 of 33
User Manual
This is proprietary information of Degree Controls Inc., contents are protected under US copyright laws © Degree
Controls, Inc. 2020.
High Performance Airflow Monitor
with Full-Color Touch Screen Display
Version 1.04
Complete Kit includes:
oAlarm Module
oChoice of Sensor Type
oPower Supply

Rooster™ Monitor100 USER MANUAL
Rooster™ Monitor100 USER MANUAL 62310MN000-A04 2 of 33
Contents
Contents ........................................................................................................................................................................2
Product Overview ..........................................................................................................................................................3
Hard Button Overview ...............................................................................................................................................3
Soft Buttons and Home Screen Layout ......................................................................................................................4
Feature Overview ......................................................................................................................................................4
Rear Panel Layout for Advanced Connections...........................................................................................................7
Technical Specifications.................................................................................................................................................8
Connection and Wiring Information..............................................................................................................................8
Sash Input..................................................................................................................................................................9
Night Setback Input...................................................................................................................................................9
Alarm Outputs .........................................................................................................................................................10
Mechanical Information ..............................................................................................................................................10
Alarm Module..........................................................................................................................................................10
Probe Sensor............................................................................................................................................................11
Sidewall Sensor........................................................................................................................................................11
Inline Sensor ............................................................................................................................................................11
Installation...................................................................................................................................................................12
Back Plate Mounting Options - Alarm Module........................................................................................................12
Installation Procedure .............................................................................................................................................12
Probe Sensor............................................................................................................................................................13
Sidewall Sensor........................................................................................................................................................14
Single Walled Cabinet .........................................................................................................................................14
Dual Walled Cabinet ...........................................................................................................................................16
Inline Sensor ............................................................................................................................................................17
Boot Up Procedure ......................................................................................................................................................18
Access Tier Privileges: USER, EH&S & CERTIFIER ........................................................................................................19
Set/Change Passwords ................................................................................................................................................20
Calibration Procedure..................................................................................................................................................20
Calibration Troubleshooting....................................................................................................................................22
Alarm Threshold Configuration ...................................................................................................................................23
Alarm Troubleshooting............................................................................................................................................23
Alarm Controls.............................................................................................................................................................24
Night SetBack ..........................................................................................................................................................24
Alarm Ringback .......................................................................................................................................................24
Alarm Delay.............................................................................................................................................................25
Startup Delay...........................................................................................................................................................26
Latch Alarm .............................................................................................................................................................26
Alarm Tone Settings ................................................................................................................................................26
Backlight Dimming.......................................................................................................................................................27
Airflow Sensitivity........................................................................................................................................................27
Airflow Resolution .......................................................................................................................................................28
I/O Polarity...................................................................................................................................................................28
Import/Export..............................................................................................................................................................29
EEPROM...................................................................................................................................................................29
Event Log .................................................................................................................................................................29
USB Field Upgrade Procedure .....................................................................................................................................30
Soft Reboot Procedure to Upgrade Rooster TM Monitor100 Operating System .......................................................30
Power Cycle Procedure to Upgrade Rooster TM Monitor100 Operating System ......................................................30
Factory Reset Procedure .............................................................................................................................................31
GUI Map.......................................................................................................................................................................32
Warranty......................................................................................................................................................................33

Rooster™ Monitor100 USER MANUAL
Rooster™ Monitor100 USER MANUAL 62310MN000-A04 3 of 33
Product Overview
Congratulations on your purchase of the RoosterTM Monitor100. The RoosterTM Monitor100 is a
next-generation airflow monitoring and alarm system for use in a variety of critical containment
applications, where airflow is required to be viewed, monitored, alarmed, and communicated to
building and laboratory systems.
A brief overview of the RoosterTM Monitor100’s many features, including but not limited to:
Glove-friendly touchscreen.
Best in class air velocity sensing.
Sensor for canopies, negative pressure cabinets, and for use in
hospital/laboratory/kitchen.
Quick, 2 step calibration process.
Bright backlit display.
Password protected access tiers limit access to critical functions for authorized users.
Data and event logging for your airflow safety compliance needs.
Import/export configuration file to save setup time and ensure consistency among all
RoosterTM Monitor100s in your facility.
The RoosterTM Monitor100 is the first airflow alarm monitor that allows USB-based plug and play
firmware upgrades, to keep your product current and operating to the latest standards.
This manual will guide you through installation, calibration procedures, firmware upgrades,
alarm control settings, and the full range of features for the RoosterTM Monitor100.
Hard Button Overview
MUTE
Mutes the audible alarm, any time it is sounding. When the alarm has
been muted, a mute icon [ ] will appear in the top center portion
of the home screen. Just like a snooze button, the audible alarm will
re-sound, when the configurable time-out is reached if ringback has
been enabled.
HOME
Returns the user to the home screen when pushed from any menu or
info screen. *Cannot be used to abort the calibration procedure and
some critical system functions.*
LED
A red LED will flash while an airflow alarm is active. The red LED will
also flash if Sash High and Night Setback alarms are active. In all
other cases, this LED will remain off.

Rooster™ Monitor100 USER MANUAL
Rooster™ Monitor100 USER MANUAL 62310MN000-A04 4 of 33
Soft Buttons and Home Screen Layout
Feature Overview
CUSTOM ASSET TAG
Users logged in as EH&S can change default “Asset Tag” to a custom tag. This is useful
for naming the chemical fume hood, or company asset, or laboratory. A 12-digit numeric
asset tag can be set with the provided on-screen keypad, OR plug in a USB interface
keyboard to enter a 12-character alphanumeric tag. Users can enable or disable display of
the Asset Tag.
Home> Settings>System>Advanced>Configure Asset Tag
CLOCK
Users logged in as EH&S or Certifier can set time, date and change clock to display in 12
or 24-hour format.
Home> Settings>System>Date & Time>Date & Time Settings
KEYPAD AND BUTTON SOUNDS
Users may toggle keypad and button beep sounds on and off.
Home> Settings>System>Alarms/Sound>Key Beep
DEVICE VOLUME
Users can toggle through low, medium or high alarm volumes. If logged in as EH&S or
Certifier, a global minimum volume threshold can be set. This restricts a standard user
from setting an alarm volume too low for particular facility safety requirements.
Home> Settings>System>Alarms/Sound>Device Volume
Startup Delay Indicator
Night Setback/Mute Indicator
Asset Tag
Air Temperature
(touch to toggle units)
Face Velocity
(touch to toggle units)
Settings Menu
USB input for keyboard
and firmware upgrades
Time of Day
Alert Banner
Quick access to current
configuration settings
including: alarm thresholds,
calibration date, and
firmware version
Status Color (Green, Yellow
or Red)

Rooster™ Monitor100 USER MANUAL
Rooster™ Monitor100 USER MANUAL 62310MN000-A04 5 of 33
ON-SCREEN ALERT BANNERS
A yellow banner will appear beneath on-screen velocity readings to alert users regarding
various scenarios: Low Airflow, Power Failure
Home
TOGGLE VELOCITY UNIT TYPE
Instantly toggle displayed velocity units from m/s to fpm, or vice versa, by pressing on the
displayed velocity reading on the home screen.
Home
TOGGLE TEMPERATURE TYPE
Instantly toggle displayed temperature units from Fahrenheit to Celsius, or vice versa, by
pressing on the displayed temperature reading on the home screen.
Home
PASSWORD-PROTECTED ACCESS TIERS: CERTIFIER & EH&S
Password protected access tiers enable advanced configuration options and features.
Home> Settings>System>Advanced>Change Passwords
USB INTERFACE FOR UPGRADES, DATA EXPORT & SETTINGS IMPORT/EXPORT
Firmware upgrades can be installed on-site via USB flash drive. See the USB Field Upgrade
section of this manual for more information.
Users can export the event log in .csv format to a USB thumb drive.
RoosterTM settings can be saved to a USB thumb drive for future use or for download
onto neighboring RoosterTMs.
CUSTOMIZABLE BOOT SCREEN
Our engineers can configure your unit with a custom image or logo file (240x320) in
portable network graphic (.png) format to display on bootup. Contact our sales team to
get started: sales@degreec.com
NIGHT SETBACK
EH&S or Certifier users can configure 3 convenient modes (Audible, Muted, or Off) of
operation.
The RoosterTM Monitor100 is a normally open device. To trigger audible or muted night
setback, the dry contact relay must be closed. See the Calibration Procedure for

Rooster™ Monitor100 USER MANUAL
Rooster™ Monitor100 USER MANUAL 62310MN000-A04 6 of 33
instructions on how to setup night setback alarm thresholds.
Home> Settings>System>Alarms/Sound>Alarm Controls>Night Setback
ALARM LATCHING
EH&S or Certifier users can setup latched alarms to indicate that a low airflow state has
occurred in the “Alarm Controls” menu. User must then enter a EH&S or Certifier
passcode to unlatch an alarm.
Home> Settings>System>Alarms/Sound>Alarm Controls>Latch Alarm
ALARM RINGBACK
EH&S or Certifier users can configure the amount of snooze time before an alarm rings
again after being muted in the “Alarm Controls” menu. Optionally, the audible alarm can
be turned off completely.
Home>Settings>System>Alarms/Sound>Alarm Controls>Alarm Delay Settings>Ringback
BACKLIGHT DIMMING
Users can toggle the brightness setting, as well as the brightness of the screen when set
to “dim”. A “time before dim” option is available that sets the screen to dim after a
predetermined amount of time has expired.
Home> Settings>System>Brightness
AIRFLOW RESOLUTION
EH&S or Certifier users can select the units of measurement displayed for the resolution
of air velocity in either meters per second or feet per minute.
Home>Settings>System>Airflow Settings>Airflow Resolution
TWO POINT CALIBRATION
For greater accuracy and performance, the RoosterTM Monitor100 uses a two-point
calibration procedure to collect both a high velocity and low velocity reference point. The
low velocity reference point is collected by leaving the sensor cover in place while
performing this calibration step (note: for probe sensor calibration only). See the
Calibration Procedure section of this manual.
Home>Settings>Calibration>Calibrate

Rooster™ Monitor100 USER MANUAL
Rooster™ Monitor100 USER MANUAL 62310MN000-A04 7 of 33
Rear Panel Layout for Advanced Connections
Figure 1 Connections
Connection
Description
Connector Type
Mating Connector
Power Entry
2-Pin, polarized, Phoenix
Contact
Included and attached to AC/DC power supply
Sensor Connection
RJ-11
Included as part of sensor assembly
Output Connection
8-pin, polarized, Phoenix
Contact
*2-position connectors will fit
Not included
8-position orderable Part Number: Phoenix Contact 1803633
2-position orderable Part Number: Phoenix Contact 1803578
Input Connection
10-pin, polarized, Phoenix
Contact
*2-position connectors will fit
Not included
10-position orderable Part Number: Phoenix Contact 1803659
2-position orderable Part Number: Phoenix Contact 1803578
Table 1 Connections - Rear Panel of Display Module
Optional Sash Switch kit, Degree Controls P/N: 62310AS004 includes 10-postion Phoenix
Contact connector.

Rooster™ Monitor100 USER MANUAL
Rooster™ Monitor100 USER MANUAL 62310MN000-A04 8 of 33
Technical Specifications
Connection and Wiring Information
Degree Controls recommends 18-24 AWG wire be used for all wiring connections to the input
and output connectors. The Sensor and Power Entry connections have been prepared for you,
and merely need to be pulled through the openings and connected to the display module. If the
Sash Switch option is purchased, this is pre-connectorized for you as well.
The RoosterTM Monitor100 has additional input and output capabilities for night setback and
customers using their own sash switch. These cable harnesses should be prepared by the client,
using the orderable mating connectors listed above.
The I/O connectors present on the RoosterTM Monitor100 have some pins deactivated as these
are reserved for future Rooster TM models designed for more advanced control functionality:
oOutput Connector, Pins 5-8
oInput Connector, Pins 7-10
Leave these pins non-connected.
Alarm Module Size
82mm x 135mm x 19mm (3.2” x 5.3” x 0.7”)
(without back plate)
LCD Display Area
57mm x 70mm (2.3” x 2.7”)
Airflow Velocity Range
30-2,000 fpm (0.15- 10.0 m/s)
Response Time
< 1 second
Supply Voltage
24VAC/VDC & Wall Adapter
Night-Set Back Input
Dry Contact Closure (0V)
Pins 5-6
Sash Switch Input
Pin 1= +15V Power (For Proximity SW)
Pin 2= SASH (Contact or Proximity)
Pin 3= GND (Contact or Proximity)
Relay Outputs
Qty. (2), 1A, 24VDC
Pins 1-2 Air Alarm
Pins 3-4 Sash Alarm
Power Adapter
90-250V
Red LED indicator
160° viewing angle
Alarm Volume
0 - 85dB (adjustable)
Relative Humidity
(non-condensing) 5 - 95%
Operating temperature
5°C - 60°C (40°F - 140°F)
Storage temperature
-40°C - 85°C (-40°F - 185°F)
Weight
<170g (<6oz)
Compliance Standards
CE, RoHS

Rooster™ Monitor100 USER MANUAL
Rooster™ Monitor100 USER MANUAL 62310MN000-A04 9 of 33
Sash Input
This sash position input is a digital input, and the default I/O polarity of this input is normally
open. The design intent is as follows:
When the sash is in a safe position, the proximity sensor should not detect metallic
object/strip.
Sash position input logic may be reversed using the I/O polarity menu on the Rooster™
Monitor100 to achieve a different result, and any proximity sensor may be implemented.
Degree Controls can provide you with an optional Sash Position Sensor comprised of (1)
inductive proximity sensor and (1) 10-position connector which mates to the input connection
of the display module. This inductive proximity sensor switches state when it contacts metal
surfaces. This sash sensor is a normally open device, meaning it closes upon sensing metallic
objects.
The DegreeC Sash Position Sensor (Part# 62310AS004), comes with three stripped and tinned
wire leads:
Brown = +15V
Black = Sash
Blue = Ground
Wire these in their respective positions 1, 2, and 3 on the input connection block.
Note: For implementation support, or for users preferring to use a micro-switch for sash alarm
activation, please contact Degree Controls.
Night Setback Input
The RoosterTM Monitor100 allows the user to connect to a digital input, dry contact, on positions
5 & 6 of the Input Connector, for Night Setback. The purpose of the Night Setback input is to
provide the user with the ability to send a remote signal to all RoosterTM Monitor100s
simultaneously, to change their behavior during low flow conditions. This signal is normally
initiated by a Laboratory or Building Management System (BMS).
Once the wiring connections are made, the user can assert, and also remove, the Night Setback
signal via the BMS. Three Monitor100 night setback states can be selected.
Audible: In this state, when a Night setback signal is asserted, the Monitor100 will still
audibly alarm when airflow drops below the NSB trip threshold. Note: NSB threshold is
independently set.
Muted: In this state, when the Night Setback signal is asserted, the Monitor100 will
alarm (screen will display a red background, and the LED will flash) when airflow drops
below the NSB trip threshold, but the alarm will be muted.

Rooster™ Monitor100 USER MANUAL
Rooster™ Monitor100 USER MANUAL 62310MN000-A04 10 of 33
Off (default): In this state, when the Night Setback signal is asserted, the Monitor100
will ignore it.
Alarm Outputs
The RoosterTM Monitor100 alarms for airflow and sash position. The Alarm outputs are relay
outputs available on the output connection of the display module. I/O polarity logic of outputs
may be reversed as well. See the I/O Polarity menu of the Rooster™ Monitor100.
Mechanical Information
Alarm Module
Figure 2 Alarm Module with Wall-Mount Back Plate

Rooster™ Monitor100 USER MANUAL
Rooster™ Monitor100 USER MANUAL 62310MN000-A04 11 of 33
Probe Sensor
Figure 3 Probe Sensor
Sidewall Sensor
Figure 4 Sidewall Sensor
Inline Sensor
Figure 5 Inline Sensor

Rooster™ Monitor100 USER MANUAL
Rooster™ Monitor100 USER MANUAL 62310MN000-A04 12 of 33
Installation
Installation of the RoosterTM Monitor100 involves selecting and preparing appropriate locations
for the alarm module and sensor, wiring and connecting the unit, and then mounting both the
alarm module and sensor securely.
Back Plate Mounting Options - Alarm Module
The RoosterTM Monitor100 is mountable to a cabinet or wall panel by first securing the back plate.
Once this is complete, the RoosterTM is easily aligned to the back plate and secured with bottom
captive screw. Two back plate versions are available:
1. Wall Mount: This back plate sits directly on the wall or cabinet surface, and is secured by
self-tapping screws, or industrial Velcro. Sensor and control wiring access is at the back,
while access for power in from the wall mount power supply is at the bottom of the back
plate.
2. Semi-Flush: This back plate sits partially inside a standard electrical gang box, allowing the
RoosterTM to be recessed and sit approximately 15mm [0.6”] proud of the mounting surface.
Self-tapping screws secure it, and there is open back access to accept building power.
Figure 6 Wall Mount (left), Semi-Flush Mount (right) - for Alarm Module
Installation Procedure
1. Determine mounting locations for the RoosterTM Monitor100 alarm module and sensor.
2. Choose alarm module mounting method: Wall Mount or Semi-Flush.
3. Mark the surface where the RoosterTM Monitor100 alarm module will be located, and
make the necessary drills/cutout.

Rooster™ Monitor100 USER MANUAL
Rooster™ Monitor100 USER MANUAL 62310MN000-A04 13 of 33
4. Secure back plate.
5. Mount the sensor. See below for sensor installation descriptions with different sensor
styles.
6. Feed power and sensor wire harnesses through the opening(s) and make connections to
the RoosterTM Monitor100 alarm module. Make any other optional connections to the
alarm module.
7. Align top of alarm module with tabs on back plate, and secure in place with captive
screw at bottom of alarm module.
Figure 7 Wall Mount Back Plate Mounting
Figure 8 Semi-Flush Back Plate Mounting
Probe Sensor
The Probe sensor should be located in the duct system in the
best laminar (stable) flow possible. The sensor should be
placed at least two duct diameters away from duct elbows and
constrictions, and follow ASHRAE best practices.
Probe sensor installation steps:
1. Drill 16mm [5/8”] hole.

Rooster™ Monitor100 USER MANUAL
Rooster™ Monitor100 USER MANUAL 62310MN000-A04 14 of 33
2. Adjust insertion depth and tighten (A) gland nut onto sensor probe.
3. Insert into duct hole, with wider flange first, and then rotate into position.
4. Tighten mounting nut (B) in left-hand direction.
5. Make sure the sensor head faces airflow by positioning the probe elbow in the flow
direction.
A gland fitting is included with the Probe sensor. (Gland Fitting, Degree Controls P/N: HA1203)
Sidewall Sensor
When determining the face velocity of a negatively pressurized
cabinet, the Sidewall sensor is often the best choice, as it measures
clean, temperature-controlled, laboratory air. This is preferable to
measuring potentially heated, dirty air in the exhaust duct. The
Sidewall sensor has a removable air screen, which is washable and
provides the sensor with a level of protection against tampering.
Single Walled Cabinet
When an airflow channel only needs to pass through a single sheet metal panel, the “single wall”
installation method is required. This is most typical when the Sidewall sensor is mounted on the
side of a cabinet, and airflow simply travels through the sensor body with no need for additional
ducting. In this case, the user will not need to use the PVC flex tubing, nor the end cap, which is
included in the RoosterTM Monitor100 assembly.
A
B
Figure 9 Probe Sensor Installation
Single hole drilled
16.1mm (5/8”) Dia
Figure 10 Align Sensor Head Into Direction of
Airflow
Curve in sensor
probe aligns wire
and sensor head
into direction of
airflow

Rooster™ Monitor100 USER MANUAL
Rooster™ Monitor100 USER MANUAL 62310MN000-A04 15 of 33
Figure 11 Sidewall Sensor on Single Walled Cabinet
Figure 12 Sidewall Sensor Mounting –Single Walled Cabinet
Figure 13 Sidewall Sensor Mounting Dimensions
Self-tapping
mounting screw
Extends through wall,
no ducting needed
RJ11 connection to
RoosterTM Monitor100
10-16 x 1”
self-drill screw

Rooster™ Monitor100 USER MANUAL
Rooster™ Monitor100 USER MANUAL 62310MN000-A04 16 of 33
Dual Walled Cabinet
For those installations where the Sidewall sensor will be on the front face of the fume hood, and
a duct is needed to create an airflow path from the front face to the inside face of the cabinet,
the “dual walled” installation method is required. This method is also required for installations
where the Sidewall sensor is mounted on the side, but there are two sheet metal walls for the air
flow to travel through. In both of these scenarios, the Sidewall sensor will need to be installed
according to the “dual walled” method depicted in the diagram below. The dual walled solution
simply involves the use of the supplied PVC tubing and end cap.
Figure 14 Sidewall Sensor on Dual Walled Cabinet
Figure 15 Sidewall Sensor Mounting –Double Walled Cabinet
10-16 x 1”
self-drill screw
Flow-through
tube
Exterior cabinet
surface
Interior cabinet
surface
RJ11 connection to
RoosterTM Monitor100
10-16 x 1”
self-drill screw

Rooster™ Monitor100 USER MANUAL
Rooster™ Monitor100 USER MANUAL 62310MN000-A04 17 of 33
Figure 16 Mounting Dimensions –Wall 1 (Front) Figure 17 Mounting Dimensions –Wall 2 (Rear)
Inline Sensor
We recognize that certain airflow monitors, already installed in cabinets,
may have failed in the field or do not meet the level of safety required in
recent years. In addition, in some installations, the equipment manager
may require a sensor installation where tampering is prevented, by
moving the sensor assembly out of sight and away from any tool access.
For this reason, the RoosterTM can be ordered with an inline sensor which
is quickly connected by splicing into the existing ½” flow tube being
used by another monitor. The suggested installation procedure is
depicted below. *Inline sensor includes sensor and tubing only. Call
Degree Controls for pricing on additional installation components.

Rooster™ Monitor100 USER MANUAL
Rooster™ Monitor100 USER MANUAL 62310MN000-A04 18 of 33
Figure 19 Suggested Inline Sensor Installation
Boot Up Procedure
The RoosterTM does not have a power-on switch and will become energized as
soon as it is plugged in. The RoosterTM boots to the screen depicted on the
right, with a slot for a custom logo. The boot screen is designed to support a
custom image or logo file in portable network graphic (.png) format with
(240x320) dimensions. This feature must be requested and is not setup for
manual configuration. Once the start procedure has completed, the Home
screen will appear with two system buttons and an “Uncalibrated” message on
the yellow status banner across the screen. Before performing a first-time
calibration of your unit, you will need to setup password-protected access
tiers for advanced system functions (Calibration requires a Certifier passcode). This is explained
in the “Access Tier Privileges” section below.
The RoosterTM Monitor can be rebooted at any time by pushing the hard “Home”and “Mute”
Buttons simultaneously until the boot screen reappears.
10-16 x 1”
self-drill screw
Flow-through tube
for ½” tubing
connections
Exterior cabinet
surface
Interior cabinet
surface
RJ11 connection to
RoosterTM Monitor100
Figure 18 Inline Sensor Includes
Sensor with Cable and Tubing Only

Rooster™ Monitor100 USER MANUAL
Rooster™ Monitor100 USER MANUAL 62310MN000-A04 19 of 33
Access Tier Privileges: USER, EH&S & CERTIFIER
Users have the ability to customize their containment
cabinets within a defined set of options for each
authorization level. There are three levels of access to the
RoosterTM: User, EH&S/Facility Manager and Certifier.
These are managed by logging in with a 4-digit
numerical passcode. The User access level does not
require a passcode.
Access Privileges Defined
Function
Passcode Required
Adjust Alarm Volume
None
Set Minimum Alarm Volume Threshold (superceded by Alarm Tones
Settings)
EH&S, Certifier
Alarm Ringback Setting
EH&S, Certifier
Alarm Delay Setting
EH&S, Certifier
Startup Delay Setting
EH&S, Certifier
Alarm Latching Setting
EH&S, Certifier
Alarm Tones Settings
EH&S, Certifier
Mute Live Alarm
None
Perform Calibration
Certifier
Set Asset Tag
EH&S
Set Time / Clock Format
EH&S, Certifier
Import / Export
EH&S, Certifier
Toggle between Fahrenheit or Centigrade Temperature Units on Home
Screen
None
Toggle between Metric or Imperial Air Velocity Units on Home Screen
None
Toggle ON/OFF Keypad Sounds
None
Unlatch Alarm (if Alarm Latching is set to Password)
EH&S
Manufacturer default passcodes:
EH&S = 8377
Certifier = 6425

Rooster™ Monitor100 USER MANUAL
Rooster™ Monitor100 USER MANUAL 62310MN000-A04 20 of 33
Set/Change Passwords
To change or set a password, follow this GUI path to trigger the password change sequence:
Home> Settings>System>Advanced>Change Passwords
You will have to enter an EH&S or Certifier passcode to get access to the “Advanced” menu. To
change either the EH&S or Certifier passcode, you must first re-enter the old passcode. Please
note that if you have authorization to perform both EH&S and Certifier functions, you may set
an identical passcode for both access tiers to make logging in and accessing key functions
easier.
Calibration Procedure
Once you have installed and booted up your RoosterTM Monitor100, you must perform a first-
time calibration to set the alarm threshold and establish both low velocity and normal
operational velocity set points. Follow this procedure to get your unit calibrated:
1. Before calibrating your unit, you must first make sure that the system clock and date are
accurate, because the RoosterTM saves the date and time of calibration for quick
referencing. Follow the path below, and set an accurate date and time (you may choose
to set the clock in 12 or 24-hour format).
Home> Settings>System>Date & Time>Date & Time Settings
2. Navigate to the Calibration screen by following this path:
Home> Settings>Calibration
3. Push the grey “Calibrate” button to enter the Calibration menu screen.
Home> Settings>Calibration>Calibrate
4. In order to proceed, you will need to enter your “Certify”password. If
you have not set a custom password, the factory default is “6425”
Home> Settings>Calibration>Calibrate
5. For your initial calibration, keeping the default "Normal" value for
"Allowed Turbulence" is recommended. Setting the “Allowed
Turbulence” to “High” will help you overcome cabinet-level airflow
instability issues. In most cases, changing this setting to “High” is not
necessary. It should be reserved for rare circumstances where there is difficulty achieving
stable, laminar airflow.
Home> Settings>Calibration>Calibrate>Allowed Turbulence
Table of contents
Popular Security System manuals by other brands

Velleman
Velleman DWH G955 Installation and operation instruction manual

ADEMCO
ADEMCO VISTA-48D Installation and setup guide
Argus
Argus TAURUS TW-CP-R-01/916 quick start guide
E2S
E2S SPECTRA H110 T instructions

Hella
Hella 3SL 996 139-101 installation instructions
Haake
Haake HST-TZ2 Installation and operating manual
