DELIVITA Eco Gas Hale Grey User manual
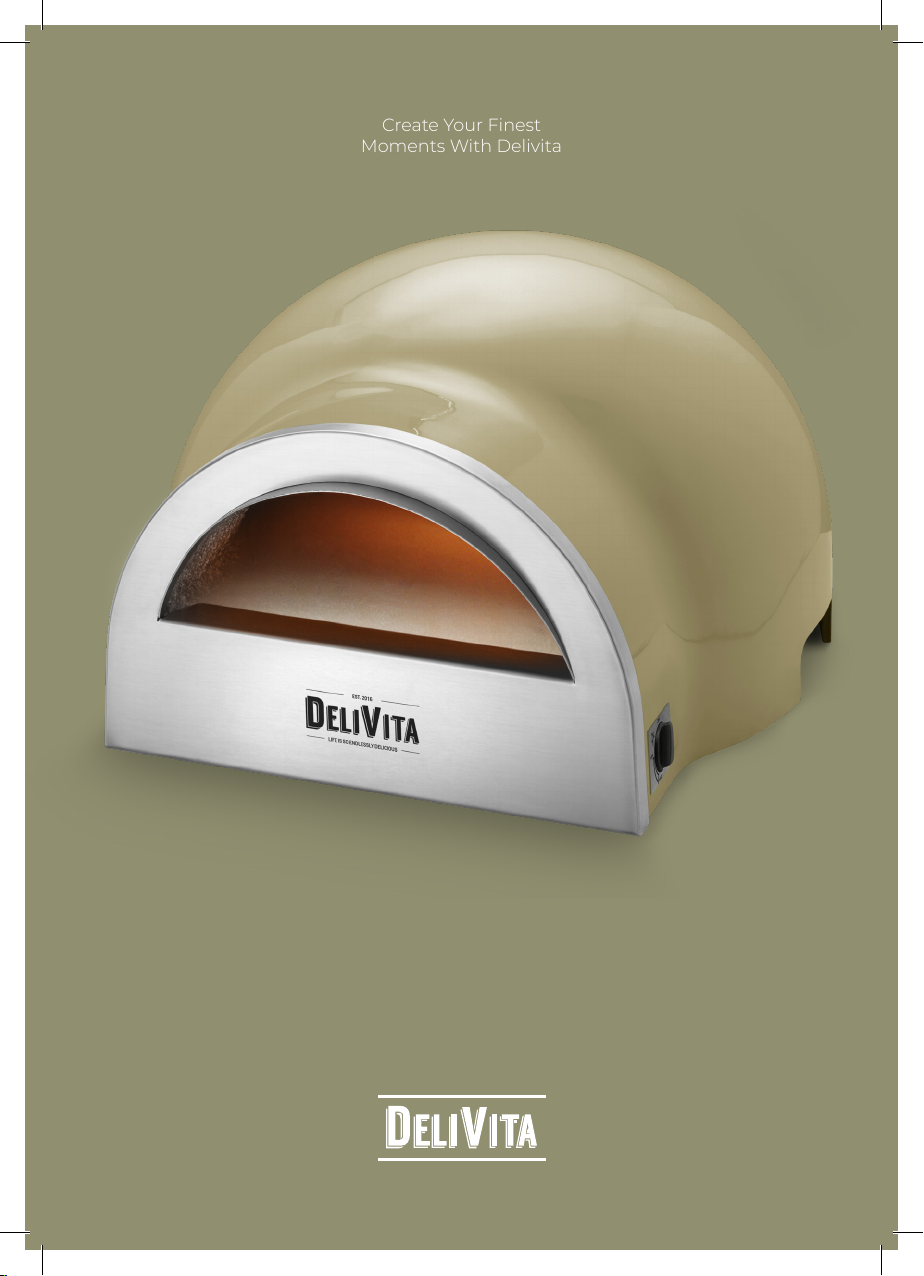
Create Your Finest
Moments With Delivita
DELIVITA ECO GAS
INSTALLATION AND INSTRUCTIONS
2

ENGLISH
3
WELCOME TO THE WORLD OF DELIVITA INSPIRED
BY ITALY AND HANDCRAFTED IN YORKSHIRE
CONTENTS
Thank you for choosing our DeliVita Eco Gas Oven,
we hope it brings you years of fun-lled delicious meals that can
be enjoyed by you, your family and friends. Please read our guidelines
before using your DeliVita.
1. What’s in the box?
2. Introduction and safety
3. Installation
The oven – set-up, materials
4. User Instructions
The oven - lighting, cooking and curing
5. DeliVita equipment and accessories
6. Care of the oven
7. FAQs

4
1. WHAT’S IN THE BOX?
Please check all the items in the box against this list:
• Your DeliVita Oven
• How to Guide
• Recipe Book
• Any accessories you have purchased
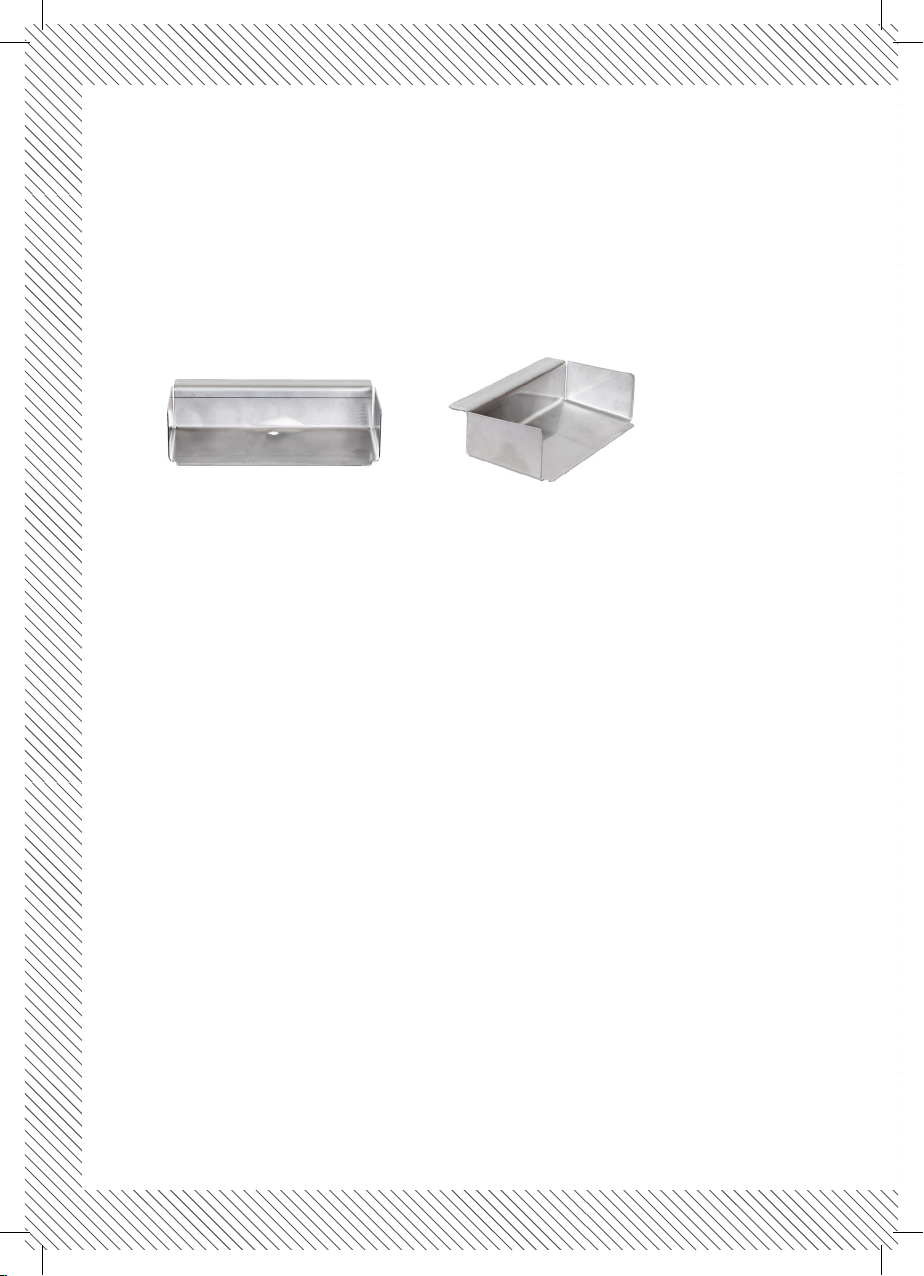
• Gas Burner Cover
Please note: if you have ordered the Fold Away Oven Stand, Dough To Go or other
accessories, these may be dispatched separately.
Retain this manual for future reference.
2. INTRODUCTION AND SAFETY
Please read all the guidelines before installing and using your oven.
GAS LEAKS MAY RESULT IN FIRE OR EXPLOSION AND CAUSE SERIOUS PERSONAL
INJURY OR DEATH, OR PROPERTY DAMAGE.
CARBON MONOXIDE
Carbon monoxide (CO) is a highly poisonous gas which can be produced if an
appliance is not working correctly. It is difcult to recognise as it has no colour, smell or
taste. (Carbon Monoxide detectors (complying with BS:EN:50291) are widely available,
and it is recommended that every property has one). Symptoms of CO poisoning
are similar to that of a viral infection. It affects the mental ability causing a person to
become incapable without knowing.
SYMPTOMS OF EXPOSURE TO CARBON MONOXIDE
• Tightness across the forehead.
• Headache.
• Severe headache, weakness, dizziness, nausea, vomiting.
• Coma, intermittent convulsions.
• Depressed heart action, slowed respiration.
If the exposure has been severe, it may cause death.

ENGLISH
5
IF YOU SMELL GAS:
1. Turn the gas off and isolate the appliance.
2. Put out any live re or ames.
3. Open the door to the oven.
4. Consult a qualied gas engineer.
• WARNING improper installation, adjustment, alteration, service or maintenance
can cause property damage, injury or death. Read the installation, operating and
maintenance instructions thoroughly before installing or servicing this equipment.
• CHECK there are no obvious defects in the oven, such as cracked oor tiles or
damage to the outer shell. Please contact us immediately if a defect is found.
• ALWAYS handle the oven with care and DO NOT DROP the oven.
• ALWAYS ensure the oven is sited on a level solid base and does not overhang. If you
are using the Fold Away Oven Stand, ensure it has been erected correctly and that it
is stood on level and stable ground.
• FOLLOW the instructions for curing the oven carefully. Failure to cure the oven
correctly can cause damage and will void the warranty.
• CAUTION is required when the oven is in use, as the mouth and inside of the oven
gets very hot with temperatures possibly reaching over 550°C.
• ENSURE all accessories, tools and materials used in the oven are appropriate for
high temperatures. All DeliVita accessories have been designed to work with the
oven and can be purchased on our website.
• PLEASE TAKE EXTREME care when using the oven, use the right accessories, tools,
gloves, and gauntlets to avoid any injuries and burns.
• ALWAYS ensure that children and pets are kept at a safe distance from the oven,
both during and after operation.
• WARNING if this appliance is not being used turn off the gas at the Gas Bottle or
isolation tap.
FLAME DISCOLOURATION WHEN USING GAS
The ame should under normal conditions burn yellow / orange in colour on LPG
(Propane or Butane), this colour normally on the upper part of the ames that will
cook your Pizza / Food to a perfect standard. On Natural Gas, expect all ames to be
blue and sometimes with yellow tips.
If the burner connected is LPG and exhibiting a complete blue ame, it is not burning
correctly. You should avoid cooking in this situation and turn off your appliance. As
previously said, complete blue ames are permissible for NG burners, as the oven is
designed for that purpose. Reducing the air into the appliance generates a ame lick
across the roof, still blue in colour but with yellow tips. This will heat up the appliance
much more evenly and allow the Pizza / Food to cook evenly also.
It is a balance between the best cooking experience and watching for soot build up.
LPG is worse than natural gas.

6
FIRE
Fire is generally caused by a few issues and can be easily prevented. Build-up of grease
and fat, improper gas connection, high winds. Along with cleaning, maintenance of
the appliance should aways be a consideration for regular attention.
If a re does occur, turn off the gas at the bottle and or the on / off valve as required.
Use a re extinguisher on any ame or heat source that continues to burn, the
extinguisher you select should depend on you application and situation. If the residual
grease and fat deposits are alight, avoid direct water jet to this area as it could disperse
the re to other areas, however using a water supply to dampen down the immediate
area around the re could be a consideration.
DO NOT
• MODIFY THE OVEN in any way from the manufacturer’s design and specication.
• USE THE OVEN INDOORS, in tents, marquees or any enclosed spaces. It must be
used in a well-ventilated area to avoid inhalation of smoke and fumes.
• LEAVE THE OVEN OUT IN THE RAIN or allow it to become extremely wet. If the oven
becomes wet, follow the curing instructions again..
• BURN RUBBISH in this appliance.
• USE ANY TYPE OF FLAMMABLE LIQUIDS OR FUELS in this appliance. These
include, but are not limited to relighter uid, petrol, diesel, kerosene, oil, or any other
ammable chemical compounds.
• KEEP ANY COMBUSTIBLE MATERIAL near, on top of, or within range of the oven
at any time. This includes furniture, tea towels, clothing, electronics, ammable
materials, etc.
• PLACE HANDS OR ARMS INSIDE THE OVEN during use or after when the oven is
still hot. If any burns or scalds occur, immerse in cold water immediately and seek
medical advice.
• USE THE OVEN FOR EXCESSIVELY LONG PERIODS over 3 hours at very high
temperatures (400ºC plus). Allow the oven to rest for 30 minutes.
• USE WATER to cool the oven, except in an emergency. This will result in severely
damaging the components of the oven.
• LEAVE THE OVEN OUTSIDE WITHOUT ITS ALL WEATHER COVER. Protect the oven
from sun damage, cold and damp as this may cause the oven interior to crack, or the
exterior to discolour or crack.
• USE THE OVEN DOOR whilst the oven is operating at temperatures of over 200ºC
for the rst 8 times of use, and NEVER use the door when the oven is operating at
temperatures of over 400ºC.
• COVER the oven with anything until the interior is completely cooled.
• STORE unused or empty gas cylinders near the appliance.
• USE DISHES OR CONTAINERS MADE OF PLASTIC MATERIAL. The high
temperatures inside the oven will melt or burn the plastic, damaging the appliance.

ENGLISH
7
EXCLUSION OF LIABILITY
Correct and safe use of the DeliVita oven is the responsibility of the owner/user.
Neither the manufacturer, DeliVita Ltd, nor its distributors can be held liable for any
personal injury, damage, or loss incurred caused by the operation of the DeliVita oven
and other DeliVita products. The owner/user accepts responsibility for safeguarding
others, including third parties. Please keep these instructions to hand and refer to
them when using your DeliVita.
DO NOT OPERATE THIS APPLIANCE IN HIGH WINDS
Wind directly affects the burn of the ame, this in turn will result in irregular air
pressure and could cause the ame to blow out of the front of the appliance. Watch
for the wind direction. Avoid cooking while head-on winds towards the front of the
oven. Winds to the side or the back of the oven, will not affect the oven’s performance.
WHAT IS CLASSED AS HIGH WINDS?
• 4 to 12mph wind is Force 2-3, and the appliance can be used safely.
• 13 to 18 mph Wind is Force 4, and the appliance can be used safely.
• -18 mph and greater is over Force 4. It is not recommended that the appliance is
used in these conditions
• 18 mph and greater is over Force
Height: 370mm
Depth: 640mm
Width: 600mm
Width: 450mm
Width: 350mm
PRODUCT DIMENSIONS

8
TECHNICAL DETAILS
Country of use:
Country Natural
AT Austria I2H, G20 at 20 mbar
BE Belgium I2E+, G20/G25 at 20/25 mbar
BG Bulgaria I2H, G20 at 20 mbar
CH Switzerland I2H, G20 at 20 mbar
CY Cyprus I2H, G20 at 20 mbar
CZ Czech Republic I2H, G20 at 20 mbar
DE Germany I2ELL, G25 at 20 mbar
I2E, G20 at 20 mbar
DK Denmark I2H, G20 at 20 mbar
EE Estonia I2H, G20 at 20 mbar
ES Spain I2H, G20 at 20 mbar
FI Finland I2H, G20 at 20 mbar
FR France I2E+, G20/G25 at 20/25 mbar
GB United Kingdom I2H, G20 at 20 mbar
GR Greece I2H, G20 at 20 mbar
HU Hungary
HR Croatia I2H, G20 at 20 mbar
IE Ireland I2H, G20 at 20 mbar
IS Iceland
IT Italy I2H, G20 at 20 mbar
LT Lithuania I2H, G20 at 20 mbar
LU Luxembourg I2E, G20 at 20 mbar
LV Latvia I2H, G20 at 20 mbar
MT Malta
NL The Netherlands I2L, G25 at 25 mbar
I2EK, G25.3 at 25 mbar
I2(43.46 -45.3 MJ/m3 (0°C)), G25.3 at 25 mbar
NO Norway I2H, G20 at 20 mbar
PL Poland I2E, G20 at 20 mbar
PT Portugal I2H, G20 at 20 mbar
RO Romania I2E, G20 at 20 mbar
SE Sweden I2H, G20 at 20 mbar
SL Slovenia I2H, G20 at 20 mbar
SK Slovakia I2H, G20 at 20 mbar
TR Turkey I2H, G20 at 20 mbar

ENGLISH
9
Country LPG
AT Austria I3P(50),G31 at 50 mbar; I3B/P(50),G30/G31 at 50 mbar
BE Belgium I3+,G31/G31 at 28/37 mbar; I3P(37),G31 at 37 mbar;
I3B/P(30),G30/G31 at 30 mbar
BG Bulgaria I3B/P(30),G30/G31 at 30 mbar
CH Switzerland I3P(50),G31 at 50 mbar; I3+,G31/G31 at 28/37 mbar;
I3P(37),G31 at 37 mbar; I3B/P(50),G30/G31 at 50 mbar
CY Cyprus I3+,G31/G31 at 28/37 mbar;
I3B/P(30),G30/G31 at 30 mbar
CZ Czech Republic I3P(50),G31 at 50 mbar; I3+,G31/G31 at 28/37 mbar;
I3P(37),G31 at 37 mbar; I3B/P(50),G30/G31 at 50 mbar
DE Germany I3P(50),G31 at 50 mbar; I3B/P(50),G30/G31 at 50
DK Denmark I3B/P(30),G30/G31 at 30 mbar
EE Estonia I3B/P(30),G30/G31 at 30 mbar
ES Spain I3+,G31/G31 at 28/37 mbar; I3P(37),G31 at 37 mbar
FI Finland I3P(30),G31 at 30 mbar; I3B/P(30),G30/G31 at 30 mbar
FR France I3+,G31/G31 at 28/37 mbar; I3P(37),G31 at 37 mbar;
I3B/P(30),G30/G31 at 30 mbar;
I3B/P(50),G30/G31 at 50 mbar
GB United Kingdom I3+,G31/G31 at 28/37 mbar; I3P(37),G31 at 37 mbar;
I3B/P(30),G30/G31 at 30 mbar
GR Greece I3+,G31/G31 at 28/37 mbar; I3P(37),G31 at 37 mbar;
I3B/P(30),G30/G31 at 30 mbar
HU Hungary I3B/P(30),G30/G31 at 30 mbar
HR Croatia I3P(37),G31 at 37 mbar; I3B/P(30),G30/G31 at 30
IE Ireland I3+,G31/G31 at 28/37 mbar; I3P(37),G31 at 37 mbar
IS Iceland
IT Italy I3+,G31/G31 at 28/37 mbar; I3P(37),G31 at 37 mbar;
I3B/P(30),G30/G31 at 30 mbar
LT Lithuania I3+,G31/G31 at 28/37 mbar; I3P(37),G31 at 37 mbar;
I3B/P(30),G30/G31 at 30 mbar
LU Luxembourg
LV Latvia
MT Malta I3B/P(30), G30/G31 at 30 mbar
NL The Netherlands I3P(50),G31 at 50 mbar; I3P(30),G31 at 30 mbar;
I3P(37),G31 at 37 mbar; I3B/P(30),G30/G31 at 30 mbar

10
NO Norway I3B/P(30), G30/G31 at 30 mbar
PL Poland I3P(37),G31 at 37 mbar
PT Portugal I3+,G31/G31 at 28/37 mbar; I3P(37),G31 at 37 mbar
RO Romania I3P(30),G31 at 30 mbar; I3B/P(30),G30/G31 at 30 mbar
SE Sweden I3B/P(30), G30/G31 at 30 mbar
SL Slovenia I3+,G31/G31 at 28/37 mbar; I3P(37),G31 at 37 mbar;
I3B/P(30), G30/G31 at 30 mbar
SK Slovakia I3P(50),G31 at 50 mbar; I3+,G31/G31 at 28/37 mbar
Product Identication Number : 2575/DM/31370

ENGLISH
11
G20
I2H,I2E
GAS TYPE G20/G25
I2E+
G25/G25.3
I2L/ I2EK
I2(43.46 -45.3
MJ/M3 (0°C))
G20/G25
I2ELL
20
Supply
Pressure mbar 20 / 25 25 20
4,7
Nominal Heat
Input
Gross (Hs)
kW 4.7 / 4.2 4.2 3.8
4.2
Nominal Heat
Input
Nett (Hi) kW 4.2 / 3.8 3.8 3.4
0.44
Consumption m³/hr 0.44 / 0.48 0.48 0.44
18.5
Burner
Pressure
(hot) mbar 18.5 / 23 23 18.5
Injector Marking 280
G30/G31
I3B/P
(30)
GAS TYPE
30
Supply
Pressure mbar
4.5
Nominal Heat
Input
Gross (Hs)
kW
4.2
Nominal Heat
Input
Nett (Hi) kW
0.12
Consumption m³/hr
28.5
120
G30/G31
I3B/P
(50)
50
4.8
4.4
0.13
49
100
G30/G31
I3+
30 / 37
4.5
4.2
0.12
28.5
120
G31
I3P(50)
50
4.8
4.4
0.13
49
100
G31
I3P(37)
37
4.5
4.2
0.145
36
120
G31
I3P(30)
30
3.8
3.5
0.115
28
120
Burner
Pressure
(hot) mbar
Injector Marking
12
3. INSTALLATION
Remove the packaging and use the side handles to lift the oven out of the box.
Place your oven onto a stable surface; it can be positioned on the Fold Away Oven
Stand or a solid hard level surface (such as a wooden table). The Fold Away Oven
Stand or table must be situated on a solid and even surface and must be able to hold
the oven weight of around 30kg.
WARNING - there is a risk of toppling over if the oven is not placed on level ground or
if sited on soft ground. Make sure the oven is at a safe distance from any ammable
items or surfaces and that there is enough space around the entrance of the oven for
smoke and fumes to disperse.
WARNING – the outer surfaces of this appliance can reach temperatures above 50°C
(120°F). No ammable materials must be used within 1 meter of this appliance.
WARNING - The base of the oven can reach up to 60°C. Please position the oven on a
non-ammable base.
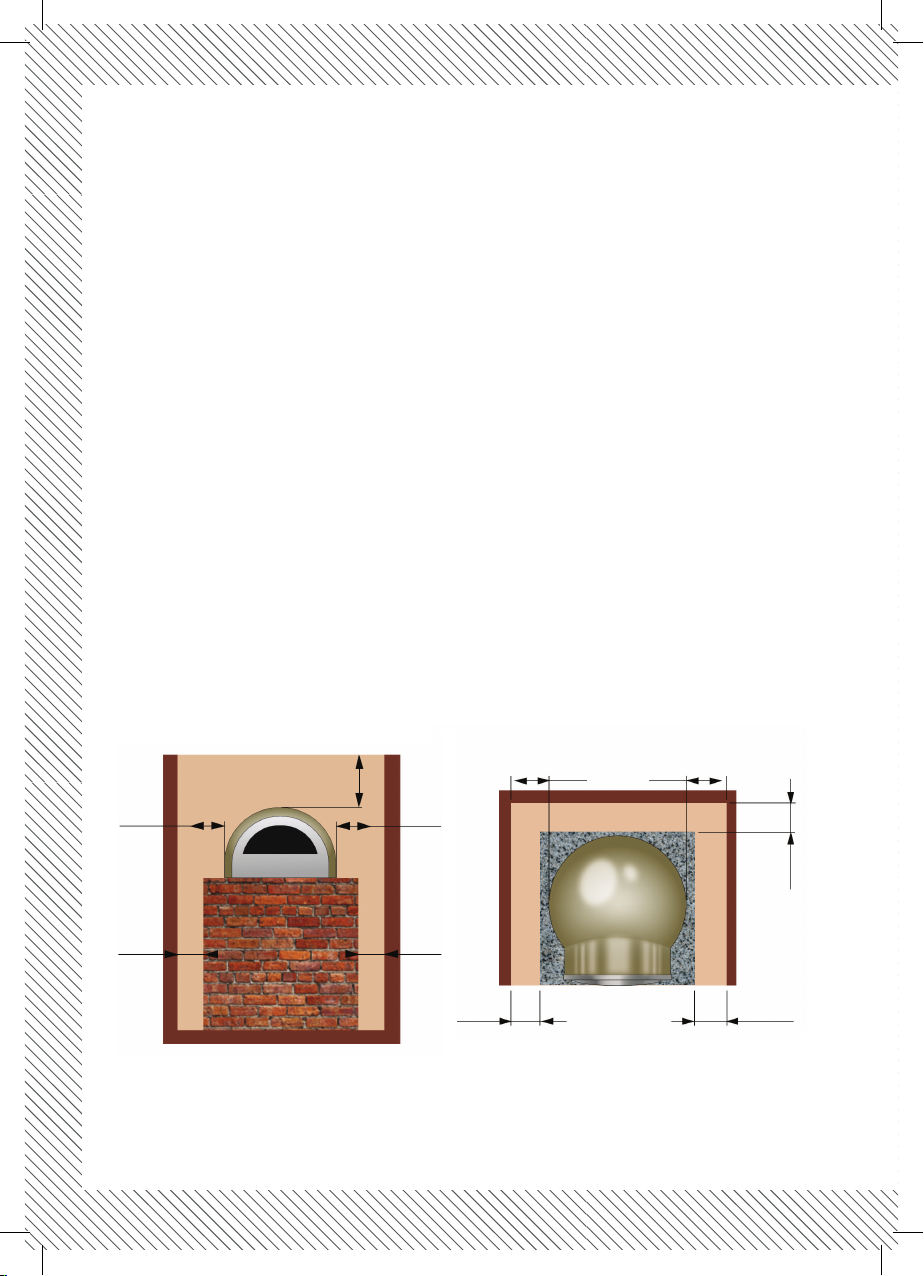
FRONT VIEW TOP VIEW
FITTING CLEARANCE
50 cm
20 in
20 cm
8 in
50 cm
20 in
50 cm
20 in
50 cm
20 in
20 cm
8 in
20 cm
8 in
20 cm
8 in
20 cm
8 in
100 cm
40 in
ENGLISH
13
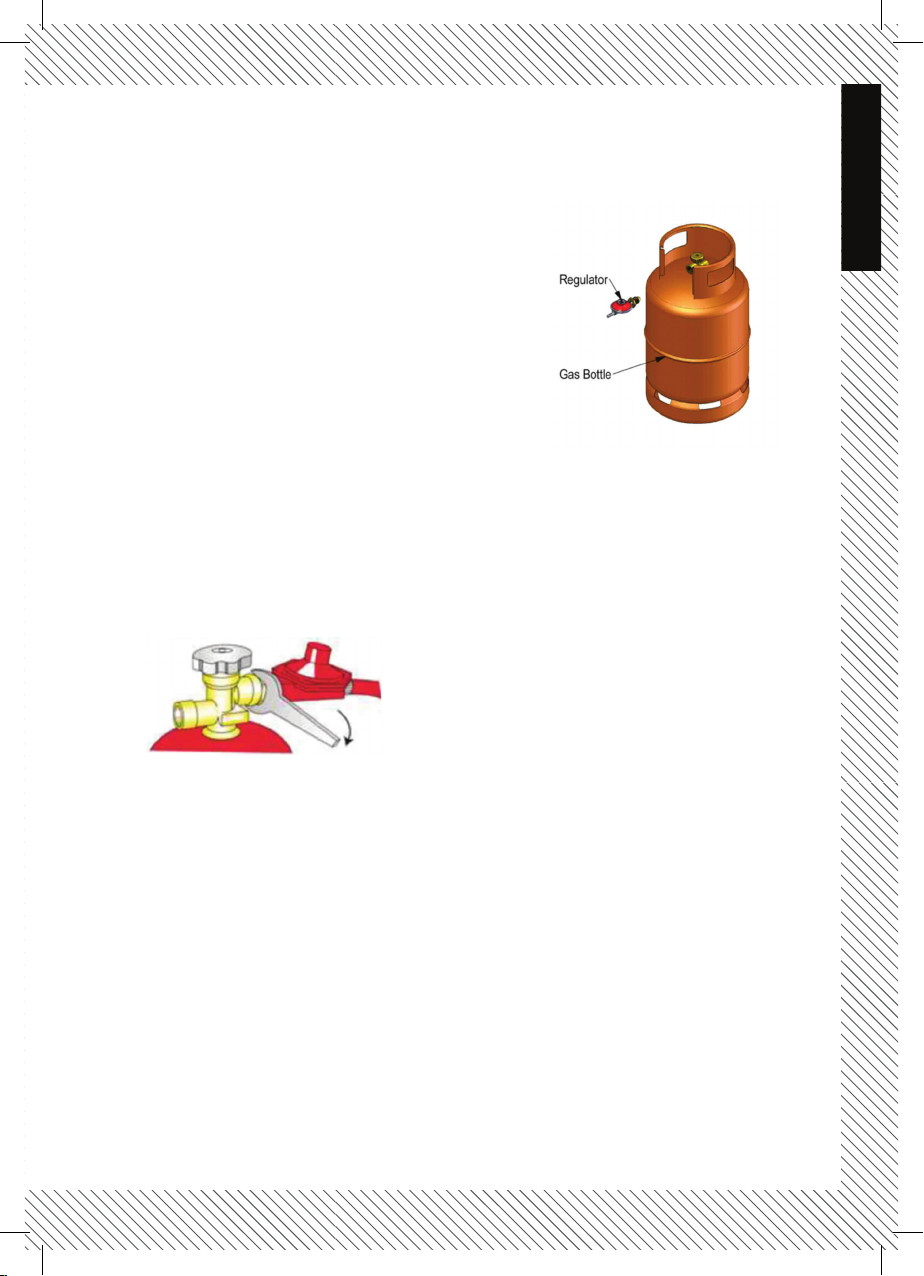
CONNECTION FOR LPG
Parts required (not included):
• Gas Bottle 13 – 47 kg recommended
• Pressure regulator - Gas G 30 28-30 mbar
• Gas G 31 30 – 37 mbar
• Flexible Hose ؽ”, 1.5m (maximum). Use only
hoses that are certied to BS:3212, BS:EN:1763-1 or
BS:EN:16436-1 or stainless steel convoluted hoses
certied to EN:10380 as LPG attacks and erodes
natural rubber.
Propane cylinders have a “female” valve
connection. Check the connection is clean and
undamaged. This is a “face to face” seal and requires the correct size spanner and is to
be fully tightened. (Left hand thread).
1. Check that the valve hand-wheel is OFF by turning clockwise.
2. Remove the protective plug and leave hanging to replace later.
3. Inspect the bull-nose connection of the regulator for damage before connecting.
4. Fit the connecting nut (left hand thread) to the cylinder, using the correct spanner.
Note that Propane cylinder connections must be tight.
5. Ensure the appliance is turned off.
6. Connect the Flexible pipe to the Input of the Gas Valve (on the under-side of the
appliance).
7. Connect the second end of the exible pipe to the output of the regulator.
8. Turn the hand-wheel to ON by turning anti-clockwise.
9. Check all connections for leaks using a leak detection uid. (Bubbles in the Leak
detection Fluid will indicate a leak, and its location).

14
CONNECTION FOR NATURAL GAS
Before Proceeding with the installation, ensure that the appliance is setup for Natural
Gas. Connecting to an improper gas type will result in poor performance.
An External Isolation valve must be installed on the outside of the building, as the gas
supply exits. The natural gas supply must be made with Ø1/2” (minimum) galvanized
pipe, copper pipe or MDPE pipe. It is recommended that a Leisure Point is installed
close to the site of the DeliVita, this Leisure Point should ideally have a quick release
bayonet tting.
Your local approved Gas Engineer will know how to install underground gas pipes, we
recommend that the feed should be as close to the meter as possible.
Warning - Failure to adhere to the local standards in place may invalidate your
insurance and will be illegal.
Connect the DeliVita supply stud (Ø8mm) to the Leisure point using a exible pipe,
Ø1/2” (minimum), with the Bayonet quick release.
ENGLISH
15
4. USER INSTRUCTIONS - GAS OPERATION
Before use, ensure that the oven and burner are free from blockages (e.g. food residue
and insect nests – Ants, Bees, Wasps etc.). If an insect is found, they can be dangerous
and must be cleaned out thoroughly. Please refer to Care of the oven for guidance.
Should the appliance go out for any reason, no re-ignition should be attempted within
5 minutes.
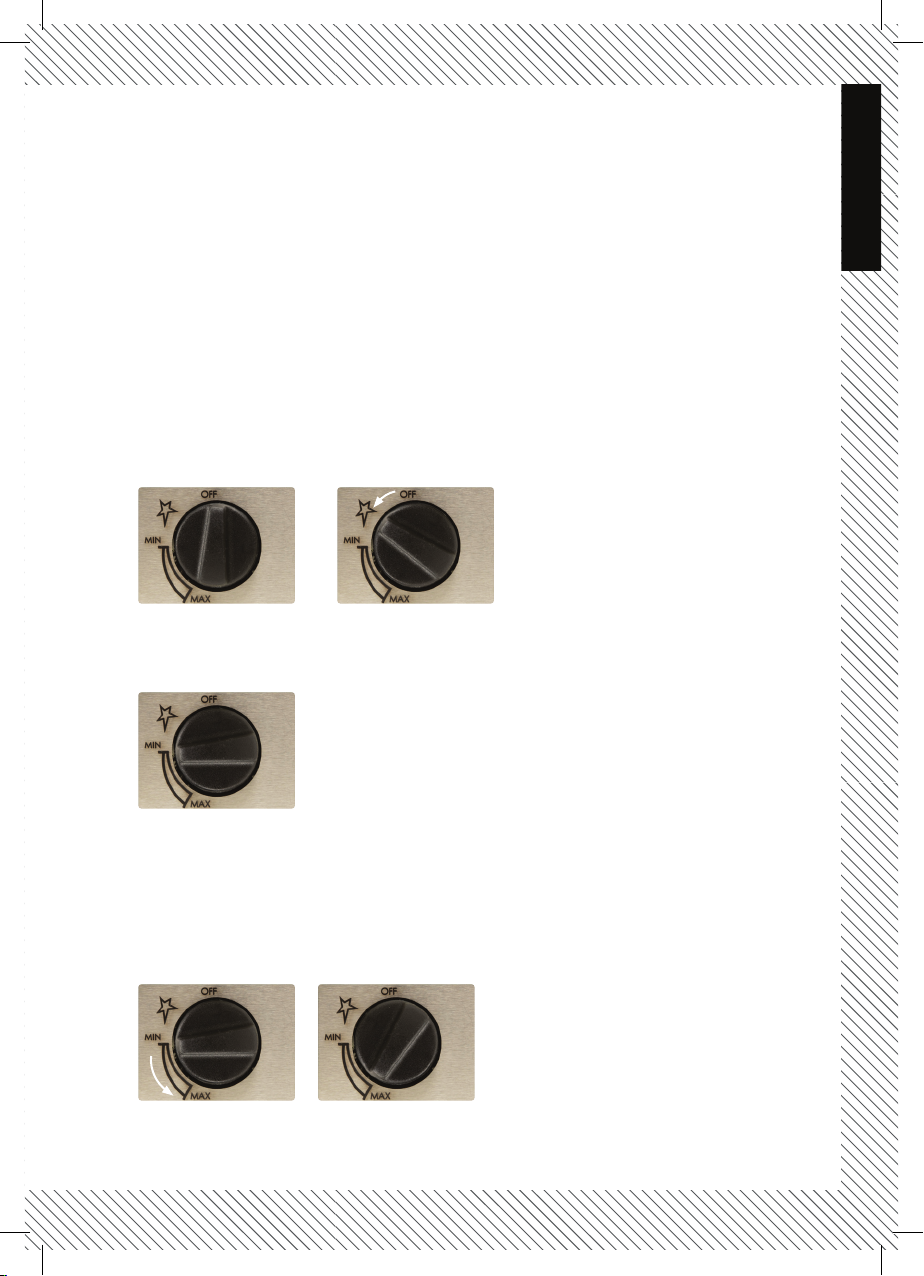
Lighting the Pilot
From the OFF position, Depress the control knob and hold in for 10 seconds, this will
allow gas to ow to the Pilot, turn the control knob Anti-Clockwise through the “Spark”
decal to the “MIN” logo.
The Pilot should now light, if not repeat the process. Continue to hold the control knob
in for a further 10 seconds and release.
Turn on Main Burner
From the pilot position, turn the right-hand control knob to the large ame decal. The
Main burner should not light.
Adjusting Heat Setting
Leave the control knob set to the “MAX” decal.

16
Turn the control knob Anti-clockwise to increase the ame height and thus
temperature setting. Turn the control knob Clockwise to decrease the ame height
and thus the temperature setting.
Turn OFF the burner
From any heat setting, turn the control knob fully clockwise to the “OFF” mark.
If the appliance is to be left unused for a prolonged period, turn off at the Gas Cylinder
or turn the Isolation Valve off for natural gas.
CURING THE OVEN
Your DeliVita oven is made from heat-resistant clay, the water used to form the clay
must be slowly dried out before your oven can be used. This process is called curing.
The rst step involves drying the water out of the clay and the second is tempering the
clay.
When curing, small hairline cracks can appear on the surface of the clay, the oven can
smell of plastic, and small amounts of water may leak from the sides when curing and
during rst uses. This is completely normal and will not affect the oven’s performance,
however, the water could stain wood and furniture. Please protect your furniture from
warm water during the curing process. Ovens should be cured when they are new,
become damp, or as a precaution if stored for several months. Please do not leave the
oven unattended while curing.
SET GAS TO MINIMUM FOR AT LEAST FIVE HOURS BEFORE INITIAL USE
Gas curing is an essential and the only method of curing the oven. To effectively carry
out the task, it is important to follow the instructions below.
First, light your oven (see page 15), set the dial to minimum and run for 2.5 hours.
Afterwards, allow the oven to rest for 3 hours. To ensure optimal results, repeat this
process for another 2.5 hours, running the oven at minimum.

ENGLISH
17
Please note: During the rst curing session, you may notice white smoke or a
burning smell coming from the burner unit. This is due to excess heat in the burner
unit while curing. Please note that this is a normal process.
To view ‘How to
Cure you Eco Gas
oven’ scan this code

18
Cooking
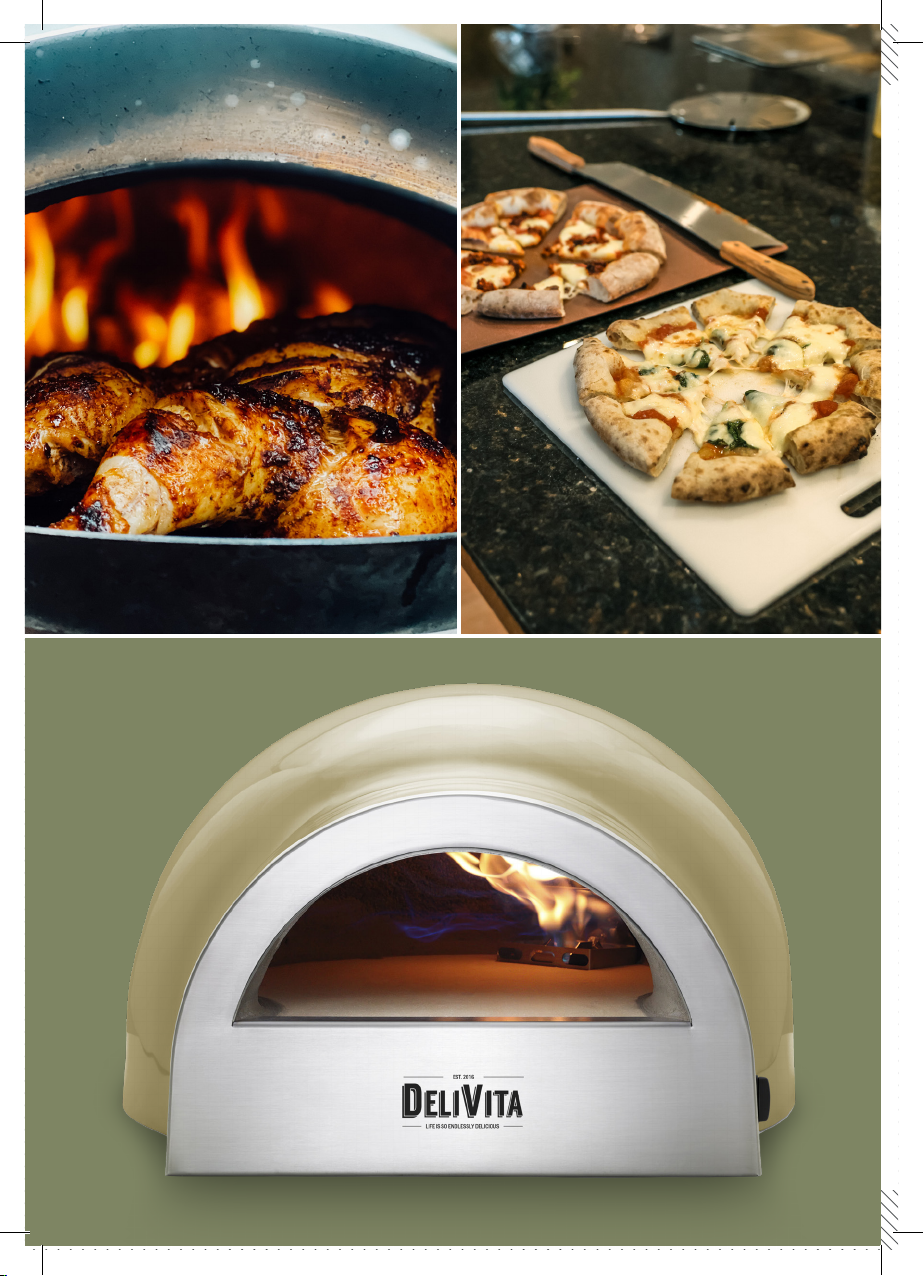
To cook in your DeliVita Eco Gas simply bring the oven to around its maximum
temperature (500ºc). The ideal cooking temperature will depend on what you are
wanting to cook.
For tips see our website or YouTube videos. You can use your DeliVita to bake, roast,
smoke, slow cook, and grill.
Pizza
Maintain a stable cooking temperature. The center base of the oven oor should read
about 300°C+ on your infrared thermometer. There should not be any visible black
carbon build-up on the ceiling of the oven and the rolling ames should reach the
middle of the oven ceiling. Clean the oven oor in between cooking each pizza with
the oven brush.
Place your pizza near to the re, ensuring you rotate it regularly. Your pizza should
cook within 60 seconds (depending on toppings). For best results follow our dough
stretching tips and don’t overload the centre of the pizza base.
Roasting
Prep your oven to reach a high temperature for searing meat (certain foods may
need covering with foil to avoid burning). Allow the temperature to drop to around
150°C - 220°C for slow roasting.
If you require a higher temperature, simply adjust the control knob accordingly. The
rear of the oven retains most of the heat.
However, if you require a slower cooker, ensure your food is positioned to the front of
the oven.
For many inspirational recipes or ideas, please visit our website to purchase one
of our Wood Fired Cookbooks. Visit www.delivita.com/accessories

ENGLISH
19
5. DELIVITA EQUIPMENT AND ACCESSORIES
In order to use your oven safely and efciently, and for ease of cooking, it is essential
to have the correct equipment. You will need to ensure that your equipment and
accessories are suitable for high temperatures.
TOP TIP Accessories
Eco Door - helps get the oven to temperature quicker and is ideal for slow cooking.
Temperature Gun - The digital infrared thermometer -50°C~420°C / -58°F~788°F..
Non-contact laser temperature gun
DeliVita sell a range of accessories specically designed for our eco oven, these include:
• Professional Pizza Peel
• Professional Pizza Turner
• Professional Oven Brush
• The DeliVita Fold Away Oven Stand
We are constantly adding exciting new products to our range. You can nd
these, as well as great tips and recipe ideas, featured on our website:
www.delivita.com
20
6. CARING OF YOUR OVEN
Caring for your oven is very easy and requires little effort. After each use, and when
the oven has cooled down, use the oven brush to remove any debris on the stone
base. Do not use any cleaning products inside the oven as the high temperatures will
kill off any bacteria; any trace left over food spillages will be burnt off. When not in
use, its recommended to put the gas cover over the burner to avoid debris.
Whilst the oven is still warm, but safe to touch, clean the stainless-steel front panel
with warm soapy water and a clean cloth. Use an abrasive sponge scourer pad
(do not use metal scrubs) on the stainless steel or stainless-steel cleaner to remove
any blackening. When using an abrasive sponge, follow the stainless steel grain.
To maintain a shiny nish, with a clean cloth, apply a little olive oil and gently wipe the
stainless-steel nish.
Once cooled down, to maintain a perfect nish to the outer shell, use a damp cloth
and warm soapy water. For deeper scratches, we recommend using T-Cut from your
local car accessory store, then give it a quick polish.
Once cooled down, for a perfect nish, cover your DeliVita with a DeliVita Oven Cover.
WARNING: Do not use water inside the oven as this could permanently damage
the interior components.
As your oven is a gas appliance, the gas burner will require servicing every 12 months
for domestic use or every 6 months for commercial use. To service your burner, we
recommend you contact your local registered gas-certied engineer or service agent.
As our ovens are hand-crafted, your DeliVita may fade or discolour slightly over time,
and a hairline crack may appear on the base of the oven, along with very small air
pockets/black dots may be visible on coloured surfaces.
HAVE FUN AND ENJOY
This manual suits for next models
7
Table of contents
Other DELIVITA Oven manuals


Popular Oven manuals by other brands

Brandt
Brandt FC 222 user manual

aumate
aumate TOA20M04N-1E instruction manual

Maytag
Maytag CWE4100AC - 24" Single Electric Wall Oven Dimension Guide

Kernau
Kernau KBO 1076 S PT B instruction manual

Bosch
Bosch HB 37 N Series User manual and installation instructions

Electrolux
Electrolux EOD5420AA user manual


