manuals.online logo
Brands
  1. Home
  2. •
  3. Brands
  4. •
  5. DeLonghi
  6. •
  7. Vacuum Cleaner
  8. •
  9. DeLonghi XTD 3080E User manual

DeLonghi XTD 3080E User manual

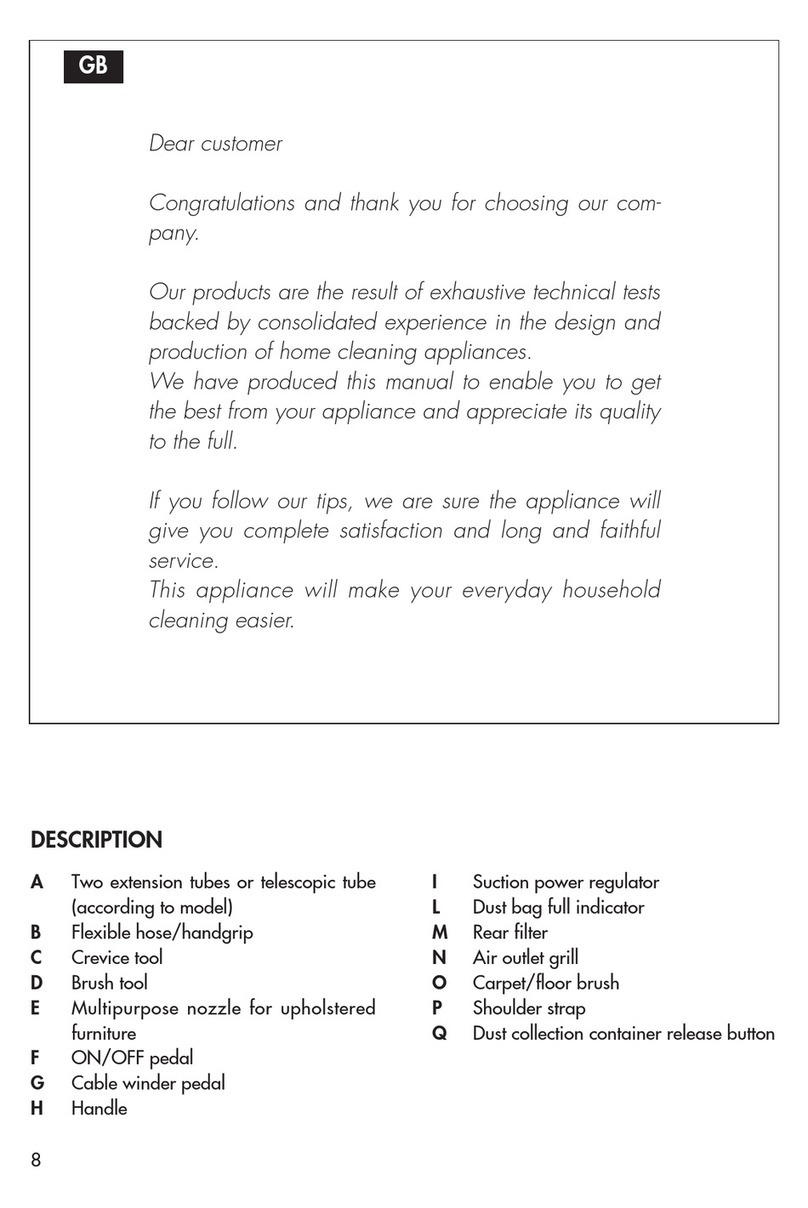
DESCRIPTION
10
Dear customer,
Congratulations and thank you for choosing our company.
Our products are the result of exhaustive technical tests
backed by consolidated experience in the production of
home cleaning appliances.
We have produced this manual to enable you to get the
best from your appliance and appreciate its quality to the
full.
If you follow our tips, we are sure the appliance will give
you complete satisfaction and long and faithful service.
This appliance will make your everyday household
cleaning easier.
GB
A Brush tool
B Crevice tool
C Carpet/floor brush (depending on
model)
D Telescopic tube
E Hose/handgrip
F Handgrip extraction tabs
GON/OFF pedal
H Cable wind pedal
I Air outlet grill with microfilter
L Electronic power regulator
M Dust bag full indicator
N Handle
O Tool compartment
P Dust bag compartment opening lever
IMPORTANT SAFEGUARDS
11
• Read this manual carefully and keep for
future reference.
• Before using the appliance, check that
the mains supply voltage corresponds to
the voltage indicated on the rating plate.
• Connect the appliance to sockets with a
minimum current rating of 10 A only.
• When not in use or before cleaning or
maintenance, always unplug the
appliance from the mains socket.
• Never clean the appliance with triethyle-
ne or other solvents.
• Never vacuum up liquids.
• Never leave the appliance turned on
when unattended. Keep away from chil-
dren and unfit persons.
• Use the appliance for domestic use only
as described in the instructions.
• If the appliance appears defective, do
not use.
• Do not pull the power cable out beyond
the point indicated by the red mark.
The yellow mark before the red mark
indicates that the cable is about to run
out.
• For repairs or to buy accessories, con-
tact an authorised technical service cen-
tre only.
• The manufacturer cannot be held
responsible for any damage caused by
tampering or improper or incorrect use
of the product.
• To replace the power cable, contact an
authorised service centre only.
The manufacturer reserves the right to modify appliances and tools without warning.
Never unplug the appliance
by pulling the power cable
or the appliance itself.
Do not run the appliance
over the power cable. Never vacuum up matches,
ash or cigarette ends when
still lit.
Never use the appliance on
wet surfaces. Avoid obstructing the air
intake or air vent grill.
Never vacuum up needles,
staples or pieces of string.
ASSEMBLY INSTRUCTIONS
Hose (fig. 1)
Attach the connector to the coupling and
insert until it locks into place (fig. 1).
To remove, press the release button on the
connector and pull.
Telescopic tube (fig. 2)
The telescopic tube enables the hose to be
extended to the required length (fig. 2).
Tool compartment (Fig. 3)
The crevice tool and multipurpose nozzle
are housed in the tool compartment.
USING THE CLEANING TOOLS
• Two position carpet/floor brush
Pos. 1: to clean hard floors, bristles out
(fig. 4).
Pos. 2: to clean carpets and rugs, brist-
les in (fig. 5).
• Crevice tool (fig. 6)
to clean radiators, corners, edges, dra-
wers, etc.
• Brush tool (fig. 7)
The brush tool is ideal for removing
dust from fabric, furniture books, cur-
tains, frames and clothing.
12
INSTRUCTIONS
Before using the appliance, extract the power cable completely and plug into the mains. To
rewind the cable, unplug and press the cable winder pedal (H) (fig. 8) .
Operation
To turn the vacuum cleaner on, press the pedal switch (G) lightly (fig. 9).
Electronic suction power regulation (fig. 10)
The electronic regulator enables suction power to be varied according to the type of surface to
be cleaned.
The maximum power of the appliance can therefore be exploited to vacuum dust from carpets
or hard floors (marble, ceramics, cotto, etc) and a lower suction power to clean curtains or other
light fabrics.
Mechanical suction power regulation (fig. 11)
The hose handgrip incorporates a mechanical suction regulator. This enables suction power to
be varied rapidly and practically by simply moving the slide.
CLEANING
Dust bag full indicator (fig. 12)
The dust bag full indicator (M) indicates when
the dust bag needs changing or the vacuum
hose is blocked.
You should change the bag before the full
length of the indicator turns red to guarantee
optimum hygiene and the quality of the air
emitted into the environment.
Replacing the dust bag
To change the paper dust bag, pull the bag
compartment opening lever (N) (fig. 14) and
lift the cover. Remove the bag carefully by
pulling the fixing lever towards you (fig. 15).
This moves the bag backwards and enables it
to be removed easily. Slide the new bag into
the guides and push as far as it will go (fig.
16).
Hook the bag holder back in place and close
the cover of the appliance exerting light pres-
sure.
You should change the dust bag frequently
when vacuuming up very fine dirt such as
flour, talcum powder, etc.
NB:
The appliance has a safety device which pre-
vents the dust bag compartment cover being
closed when there is no dust bag in place.
Motor protection filter
To extend the working life of the appliance
and protect the motor, it is vital to keep the
motor protection filter clean.
To access the filter, open the dust collection
container, extract the dust bag and remove
the filter holder (fig. 17). If the filter is not
excessively dirty, simply remove the dust. If
the filter is very dirty, wash and dry.
Make sure the filter is perfectly dry before
replacing it. Make sure it is positioned cor-
rectly.
Air outlet microfilter
Depending on the model, your appliance is
fitted with a microfilter or high efficiency filter
(HEPA Filter**)
This is housed under the air outlet slits. To
replace, press and lift the grill (fig. 18).
Remove the filter (fig. 19).
Replace the filter by resting it in position then
close the grill exerting light pressure until the
clips click into place.
You should replace the filter at least every five
dust bag changes. For HEPA filter models,
replace the filter every four dust bag chan-
ges.
** The HEPA Filter (High Efficiency Particulate Air)
removes impurities down to a size of 0.3 microns,
filtering all types of particle and even bacteria.
"PARKING" POSITION
The appliance is provided with a hose tidy
system on the bottom to enable it to be put
away safely and tidily. (Fig. 20).
If you have to interrupt cleaning for a brief
period, the appliance has a convenient hose
"parking" system. Insert the bracket on the
brush joint into the housing on the bottom of
the appliance (Fig. 21).
IMPORTANT WARNING
Malfunction of the appliance (low power, unusual noise or
complete breakdown) could be caused by obstructed
nozzles or hoses or faulty electrical components.
Check the nozzles, dust bag and motor protection filter.
To remove obstructions from the hose, detach the hose
from the handle and connector by pressing the tabs (F)
(fig. 13) then extract the hose. To reassemble the hose,
handle and connector, press the tabs and re-insert the
hose.
If this does not resolve the problem, take the appliance to
an authorised service centre.
13
Other DeLonghi Vacuum Cleaner manuals

DeLonghi PENTAVAP User manual

DeLonghi

DeLonghi PENTAVAP User manual

DeLonghi XLR32LMD User manual

DeLonghi

DeLonghi XLR32LMD User manual

DeLonghi XLR32LMD User manual

DeLonghi

DeLonghi XLR32LMD User manual

DeLonghi XL150.41 User manual

DeLonghi

DeLonghi XL150.41 User manual

DeLonghi M 29 User manual

DeLonghi

DeLonghi M 29 User manual

DeLonghi DRY VACUUM CLEANER User manual

DeLonghi

DeLonghi DRY VACUUM CLEANER User manual

DeLonghi Upright Vacuum Cleaner Installation instructions manual

DeLonghi

DeLonghi Upright Vacuum Cleaner Installation instructions manual

DeLonghi Vacuum cleaner User manual

DeLonghi

DeLonghi Vacuum cleaner User manual

DeLonghi XLM51 Series User manual

DeLonghi

DeLonghi XLM51 Series User manual

DeLonghi Colombina XLF 1500NBM User manual

DeLonghi

DeLonghi Colombina XLF 1500NBM User manual

DeLonghi XTXS 160E User manual

DeLonghi

DeLonghi XTXS 160E User manual

DeLonghi XLM21LE User manual

DeLonghi

DeLonghi XLM21LE User manual

DeLonghi EB1000 User manual

DeLonghi

DeLonghi EB1000 User manual

DeLonghi XL125.21 User manual

DeLonghi

DeLonghi XL125.21 User manual

DeLonghi XE 130ZD User manual

DeLonghi

DeLonghi XE 130ZD User manual

DeLonghi WF1500E User manual

DeLonghi

DeLonghi WF1500E User manual

DeLonghi XTR 1600M User manual

DeLonghi

DeLonghi XTR 1600M User manual

DeLonghi COLOMBINA User manual

DeLonghi

DeLonghi COLOMBINA User manual

DeLonghi DHV5060 Series User manual

DeLonghi

DeLonghi DHV5060 Series User manual

DeLonghi WFZ 1300SDL User manual

DeLonghi

DeLonghi WFZ 1300SDL User manual

DeLonghi XLR18LM User manual

DeLonghi

DeLonghi XLR18LM User manual

DeLonghi XLR32LMD User manual

DeLonghi

DeLonghi XLR32LMD User manual

DeLonghi XLC6550M User manual

DeLonghi

DeLonghi XLC6550M User manual

DeLonghi XL125.20 User manual

DeLonghi

DeLonghi XL125.20 User manual

Popular Vacuum Cleaner manuals by other brands

Midea P7 FLEX Installation instructions & user guide

Midea

Midea P7 FLEX Installation instructions & user guide

Electrolux Pro Z910 user manual

Electrolux

Electrolux Pro Z910 user manual

Eureka AS1100 series owner's guide

Eureka

Eureka AS1100 series owner's guide

Makita DRC300 instruction manual

Makita

Makita DRC300 instruction manual

Shark NINJA NZ801EUT instructions

Shark

Shark NINJA NZ801EUT instructions

Bosch GAS 55 M AFC Professional Original instructions

Bosch

Bosch GAS 55 M AFC Professional Original instructions

Black & Decker NW7220 manual

Black & Decker

Black & Decker NW7220 manual

DeWalt DXV04A instruction manual

DeWalt

DeWalt DXV04A instruction manual

Bissell 17N4P Series user guide

Bissell

Bissell 17N4P Series user guide

yeedi K781 instruction manual

yeedi

yeedi K781 instruction manual

Eureka NES210 Series owner's guide

Eureka

Eureka NES210 Series owner's guide

Makita VC3211MX1 instruction manual

Makita

Makita VC3211MX1 instruction manual

Samsung SC7820 operating instructions

Samsung

Samsung SC7820 operating instructions

Philips Jack FC6082 Instructions for use

Philips

Philips Jack FC6082 Instructions for use

Kenmore 116.32721 Use & care guide

Kenmore

Kenmore 116.32721 Use & care guide

Sencor SVC 8936TI Original manual

Sencor

Sencor SVC 8936TI Original manual

Starmix GS 2450 Oil & Metal operating instructions

Starmix

Starmix GS 2450 Oil & Metal operating instructions

Sencor SVC 7550TI 4AAAA ECO POWER Original manual

Sencor

Sencor SVC 7550TI 4AAAA ECO POWER Original manual

manuals.online logo
manuals.online logoBrands
  • About & Mission
  • Contact us
  • Privacy Policy
  • Terms and Conditions

Copyright 2025 Manuals.Online. All Rights Reserved.