Delta Light 300 90 009 User manual

Installation Instruction
BLUETOOTH 4CH PUSH BUTTON INTERFACE
A
A
B
B
A
+
1
Ref: 300 90 009
Beschermd tegen vaste voorwerpen die groter zijn dan 12 mm
Protégé contre les objets solides de plus de 12 mm
Geschützt gegen Festkörper größer als 12 mm
Protected against solid objects greater than 12 mm
Protegido contra objetos sólidos superiores a 12 mm
Protetto contro oggetti solidi più grandi di 12 mm
Warning!
Only qualified professionals should make
the connections.
!
Description
Enkel geschikt voor toestellen op zeer lage spanning (minder dan 50 V-AC / 120 V-DC)
Convient uniquement pour les produits à très basse tension (moins de 50 V-AC / 120 V-DC)
Geeignet für Güter mit sehr niedriger Spannung (unter 50 V-AC / 120 V-DC)
Only suited for goods at very low voltage (below 50 V-AC / 120 V-DC)
Se recomieda únicamente para aquellos productos de tensión muy baja (menos de 50 V-AC / 120 V-DC)
Vale unicamente per i prodotti a tensione molto bassa (inferiore a 50 V-AC / 120 V-DC)
15 mm
38 mm
38 mm
100 mm
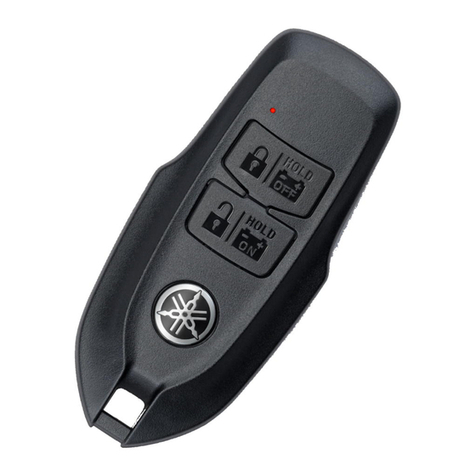
This interface is designed to connect any ‘normal open’ push
button to a casambi network. Powered by a battery the
interface doesn’t need more cabling then the wires between
the interface and the push buttons. 1 to 4 push buttons can be
used and they can be con!gured in the app to control a lamp, a
group of lamps, a scene/animation or just control all lamps in
one press.
The box is small enough to fit any wall box and the wires are
a size that will fit any screw terminal. The interface is compa-
tible with all products that are compatible with the casambi
bluetooth network.
Each time a button is pressed the module will be activated for
a few seconds and then goes automatically in a standby mode.
This in order to preserve the battery capacity. Battery status
can be checked in the app onthe ‘switches’ screen.
To ensure a long battery life this interface will not be active in
the bluetooth mesh the whole time. You can’t use this as a
mesh repeater’
Battery replacement
Warning!
Only change battery with same type and rating
!
When battery indicator is showing a
low level a new battery will be needed.
Battery is available as spare part.
- Remove the cover (1) from the box (2).
- Pull out the pcb (3) slowly untill the battery
(4) can be removed.
- Replace battery and assure it is locked before
sliding the pcb back in and putting the lit cover.
1
W
arning!
Only change battery with same type and r
!
ery
ery
before
cover.
1
2
3
4
Connection diagram
Wires connected to the external push buttons
We suggest to keep the wires long enough, so battery
replacement is possible witouth disconnecting the push buttons.
164 19 24 10 45
Bluetooth 4CH push button interface
Push button 1:
Push button 2:
Push button 3:
Push button 4:
Common :
Black
White
Blue
Orange
Red
Contains CR2450 battery replace only
by same type and rating
Push button 1
Push button 2
Push button 3
Push button 4
External push buttons
Last Update ALLU 16/02/2018

2
Ref: 300 90 009
Installation Instruction
UNPAIR AND UPGRADE/UPDATE
Wires connected to the external push buttons
If you are using only one external push button, make sure to connect the second push button to the first one.
Press the first two pushbuttons during 10 seconds, to unpair your set-up in combination with the CASAMBI APP.
164 19 24 10 45
Bluetooth 4CH push button interface
Push button 1:
Push button 2:
Push button 3:
Push button 4:
Common :
Black
White
Blue
Orange
Red
Contains CR2450 battery replace only
by same type and rating
Push button 1
Push button 2
Push button 3
Push button 4
External push buttons
164 19 24 10 45
Bluetooth 4CH push button interface
Push button 1:
Push button 2:
Push button 3:
Push button 4:
Common :
Black
White
Blue
Orange
Red
Contains CR2450 battery replace only
by same type and rating
Push button 1
Push button 2
External push buttons
Setup your push button interface
Follow these simple steps to configure your device into a network.
1. Open the casambi app and login to your network. If you do no have a network yet we recommend
to configure the casambi ready output module first. By this you wil generate a network.
2. Power up the push button interface by continious pressing on any button you want.
For example connect red en black wire with each other. By doing this the module will start.
You can now find the modules in the “nearby devices” screen.
3. Tap on the switch icon and ad the device to the desired network.
4. Now the device is added to the network you can add functions to the buttons. Open up the ‘more’ screen.
5. Tap on switches 6. Tap on the switch you just added
7. You will see an overview of the buttons 8. choose the functionfor the button
Range
Casambi uses mesh network technology so each
output module acts also as a repeater . Longer ranges can
be achieved by using multiple casambi ready output units.
50 m 1)
Up to
40 m 1)
1) Range is highly dependant on the surrounding and obstacles, such as walls and building materials.
Power
Battery type CR2450 - 3V
Push button input
Max. current:
0.2 mA
Radio transceiver
Operating frequencies: 2,4...2,483 Ghz
Maximum output power: +4 dBm
Operating conditions
Ambient temperature, ta: -20...+45°C
Storage temperature:
-20...+75 °C
Max. relative humidity: 0...80%, non-cond.
Wires
Wire type 22AWG
Mechanical data
Dimensions: 38 x 38 x 15 mm
Weight: 0,05 Kg
Degree of protection: IP20 (indoor use only)
Technical data
Partnumbers
Bluetooth 4ch push button interface
Spare battery CR2450
164 19 24 10 45
199 26 01 12 23
Compatible devices:
iPhone 4S or later
iPad 3 or later
iPod Touch 5th gen or later
Android 4.4 KitKat or later devices
produced after 2013 with full BT
4.0 support
Casambi App
The must have app for configuring casambi ready products
