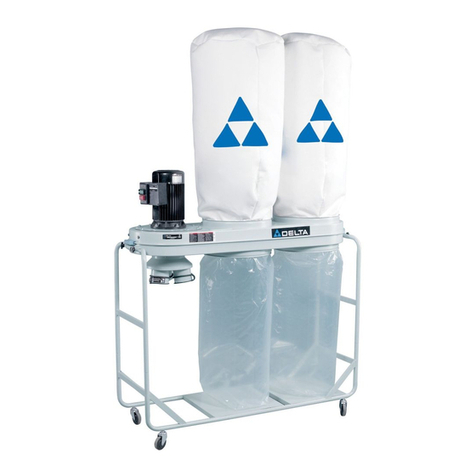
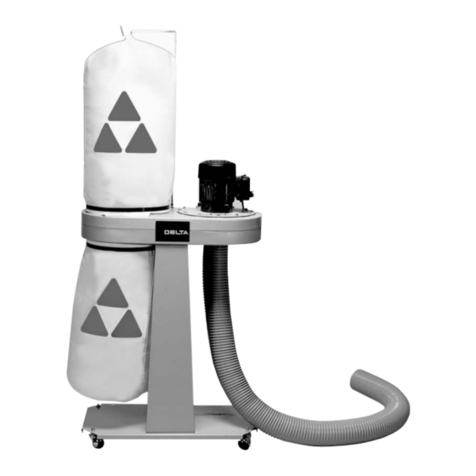
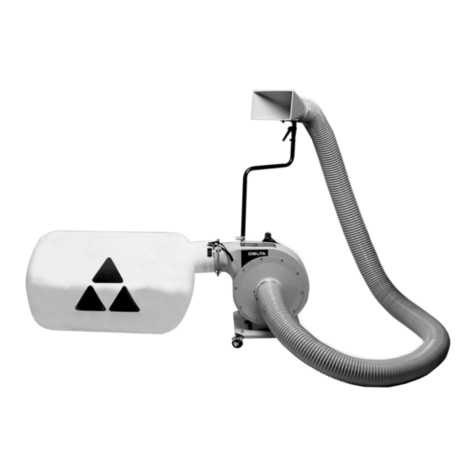
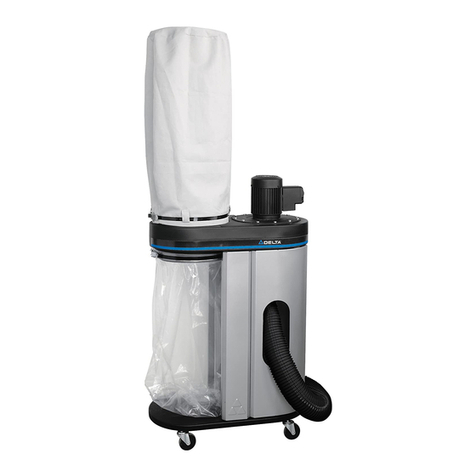
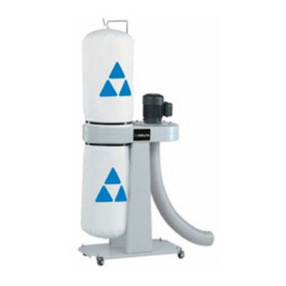
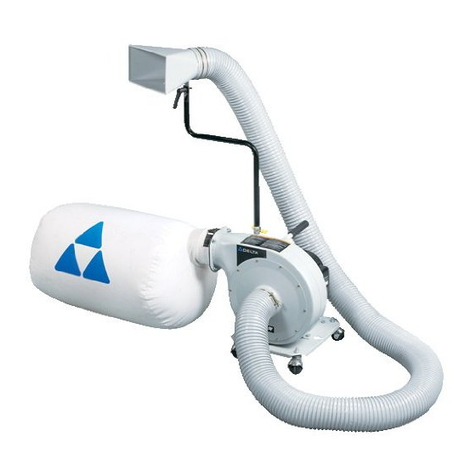
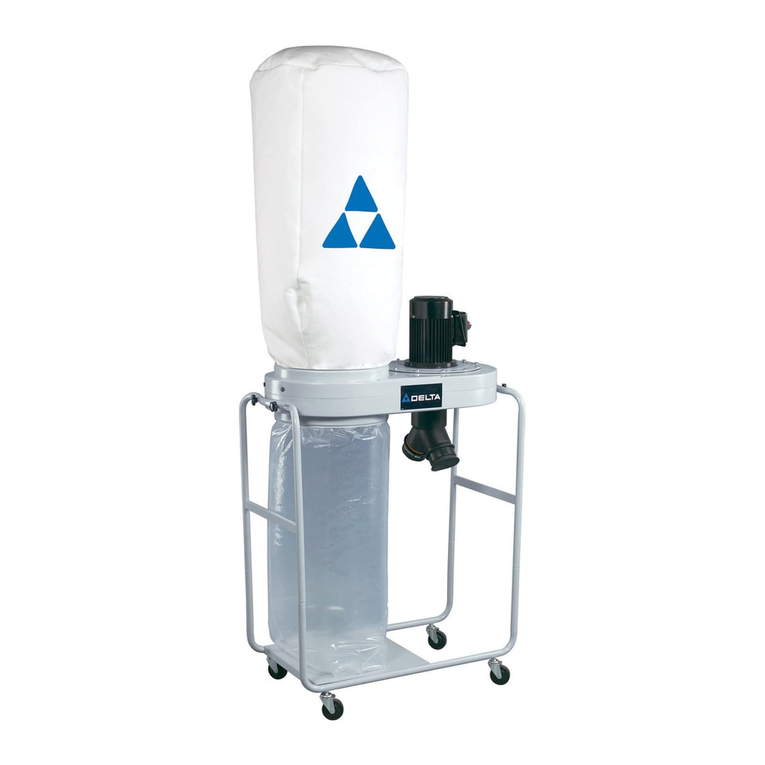
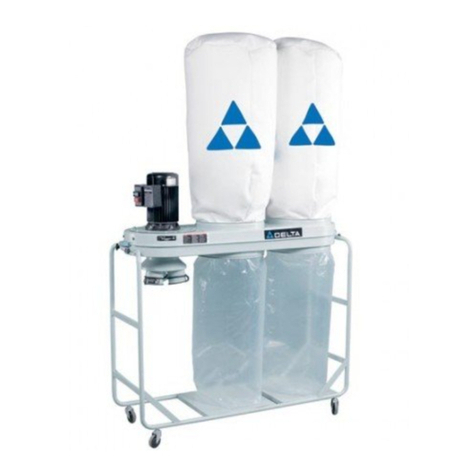
Delta 1-1/2 H.P. DUST COLLECTOR 50-786 User manual

Instruction manual
Manuel d’utilisation
Manual de instrucciones
50-786
Français (17)
Español (33)
INSTRUCTIVO DE OPERACIÓN, CENTROS
DE SERVICIO Y PÓLIZA DE GARANTÍA.
LÉASE ESTE INSTRUCTIVO
ANTES DE USAR EL PRODUCTO.
www.deltaportercable.com
1-1/2 H.P.
Dépoussiéreur
Recolector de polvo
de 1-1/2 H.P.
1-1/2 H.P.
DUST COLLECTOR

2
IMPORTANT SAFETY INSTRUCTIONS
When using the dust collector, basic precautions should
always be followed, including the following:
READ ALL INSTRUCTIONS BEFORE
USING DUST COLLECTOR
To reduce the risk of fire, electric shock, or
injury:
FIRE AND EXPLOSION HAZARD. Do not use
this unit to filter metal dust. Combining wood and metal dust
can create an explosion or fire hazard. This unit is intended to filter
non-explosive atmospheres only.
FIRE AND EXPLOSION HAZARD. Do not
use this unit to dissipate fumes or smoke. Explosions or fire
can result. This dust collector is intended for use where only
dry airborne dust is present. Its use should be limited to non-
explosive, non-metallic atmospheres.
FIRE AND EXPLOSION HAZARD. Do not use
the dust collector to pick up flammable liquids such as gasoline.
Do not use the dust collector near flammable or combustible
liquids. Explosion and/or fire can occur.
FIRE HAZARD. When using this dust collector,
do not pick up anything that is burning, smoldering, or smoking
(matches, cigarettes, or hot ashes).
EXPLOSION HAZARD. Do not use this unit to
vacuum combustible explosive materials (coal, grain, or other
finely-divided combustible material).
HEALTH HAZARD. Do not use this unit to
vacuum hazardous, toxic, or carcinogenic materials (asbestos,
pesticide, or lead-based paint debris).
TABLE OF CONTENTS
IMPORTANT SAFETY INSTRUCTIONS .....................2
SAFETY GUIDELINES - DEFINITIONS ......................2
FUNCTIONAL DESCRIPTION ......................................6
CARTON CONTENTS....................................................6
ASSEMBLY ..................................................................7
OPERATION ................................................................13
TROUBLESHOOTING ...................................................14
MAINTENANCE .............................................................14
SERVICE.........................................................................15
ACCESSORIES..............................................................16
WARRANTY ...................................................................16
FRANÇAIS......................................................................17
ESPAÑOL .......................................................................33
IMPORTANT SAFETY INSTRUCTIONS
Read all warnings and operating instructions before using any tool or equipment. When
using tools or equipment, basic safety precautions should always be followed to reduce the risk of
personal injury. Improper operation, maintenance or modification of tools or equipment could result in
serious injury and property damage. There are certain applications for which tools and equipment are
designed. This product should NOT be modified and/or used for any application other than for which it
was designed.
If you have any questions relative to its application DO NOT use the product until you have written DELTA Machinery
and we have advised you. Contact us online at www.deltaportercable.com or by mail at End User Services, DELTA
Machinery, 4825 Highway 45 North, Jackson, Tennessee 38305. In Canada,125 Mural St. Suite 300, Richmond Hill, ON,
L4B 1M4)
Information regarding the safe and proper operation of this tool is available from the following sources:
www.powertoolinstitute.com
www.ansi.org - ANSI 01.1
Safety Requirements for Woodworking Machines
www.osha.gov
SAVE THESE INSTRUCTIONS!
SAFETY GUIDELINES - DEFINITIONS
indicates an imminently hazardous situation which, if not avoided, will result in death or serious injury.
indicates a potentially hazardous situation which, if not avoided, could result in death or serious injury.
Indicates a potentially hazardous situation which, if not avoided, may result in minor or moderate
injury.
NOTICE
AVIS
AVISO
fr
sp
indicates a practice not related to personal injury which, if not avoided, may result in property
damage.

3
• Do not leave dust collector when plugged in. Unplug
from outlet when not in use and before servicing.
• To reduce the risk of electric shock, do
not use outdoors or on wet surfaces.
• Do not allow to be used as a toy. Close attention is
necessary when used by or near children.
• Use only as described in this manual. Use only
manufacturer’s recommended attachments.
• Donotusewithdamagedcordorplug.If dust collector
is not working as it should, has been dropped, damaged,
left outdoors, or dropped into water, return it to a service
center.
• Do not pull or carry by cord, use cord as a handle,
close a door on cord, or pull cord around sharp edges
or corners. Do not run dust collector over cord. Keep
cord away from heated surfaces.
• Donotunplugbypullingoncord.To unplug, grasp the
plug, not the cord.
• Donothandleplugordustcollectorwithwethands.
• Do not put any object into openings. Do not use with
any opening blocked; keep free of dust, lint, hair, and
anything that may reduce air flow.
• Keephair,looseclothing,fingers,andallpartsofbody
away from openings and moving parts.
• Turnoffallcontrolsbeforeunplugging.
• Do not operate this unit until it is completely
assembled and installed according to the instructions.
A unit incorrectly assembled can cause injury.
• Obtain advice from your supervisor, instructor, or
another qualified person if you are not thoroughly
familiar with the operation of this unit. Knowledge is
safety
• Follow all wiring codes and recommended
electrical connections to prevent electrical shock or
electrocution.
• Do not pull this unit by the power cord. Do not
allow the power cord to come in contact with sharp
instruments or edges, hot surfaces, or oil or grease.
Do not place any weight on top of the power cord. A
damaged power cord can cause electrical shock or
electrocution.
• Maintaintheunitintopcondition.Keep fan area clean
for best and safest performance. Clogged filters can
increase the potential for fire or explosion. Follow all
instructions for changing and cleaning filters. Also, ensure
that the intake and exhaust areas are clear prior to starting
the unit. Clogged intakes or exhausts can cause an
explosion and/or fire.
• Keep arms, hands, and fingers away from the fan.
Avoid all exposure to rotating parts to prevent injury.
• Do not operate this unit without the dust collection
bag in place and properly secured. Sawdust and other
debris can provide the potential for fire and/or explosion
and can also cause inhalation problems.
• Static shocks are possible in dry areas or when the
relative humidity of the air is low. This is only temporary
and does not affect the use of the vacuum. To reduce the
frequency of static shocks, add moisture to the air with a
console or installed humidifier.
• To avoid spontaneous combustion, empty dust
collection bag after each use.
• Inspect the dust bag for cuts, rips, or tears. Replace
damaged bags or vacuum hoses. Sawdust and other
debris can provide the potential for fire and/or explosion
and can also cause inhalation problems.
• Do not attempt to remove or replace the dust
collection bag(s) while the unit is connected to the
power source. Exposed fan blades can cause severe
injuries.
• Store this unit in a location that eliminates the
potential for damage to the power cord. A damaged
power cord can cause shock or electrocution. Safely store
power cord on the unit to eliminate tripping hazards.
• SEVERE LACERATION HAZARD.
Turn the unit "OFF," disconnect the unit from the power
source and wait 2-1/2 minutes to allow time for internal
rotating components to stop before installing or removing
accessories, before adjusting or changing set-ups,
clearing clogs or when making repairs. An accidental
start-up can cause serious injury.
• Turn the unit “OFF”, disconnect the unit from the
power source, and clean the work area before leaving
the area.
• Do not place open end of dust collection hose
anywhere near the eyes or ears while operating.
• Keep your work area clean and well lit. Cluttered
benches and dark areas invite accidents.
• Avoid body contact with grounded surfaces such as
pipes, radiators, ranges and refrigerators. There is an
increased risk of electric shock if your body is grounded.
• Some wood contains preservatives which can be
toxic. Take extra care to prevent inhalation and skin
contact when working with these materials. Request and
follow any safety information available from your material
supplier.
Always use eye protection. All users and
bystanders must wear eye protection that conforms to ANSI
Z87.1.
Always wear proper personal hearing
protection that conforms to ANSI S12.6 (S3.19) during use.
Under some conditions and duration of use, noise from this
product may contribute to hearing loss.
ALWAYS use safety glasses. Everyday
eyeglasses are NOT safety glasses. Also use face or dust
mask if cutting operation is dusty. ALWAYS WEAR CERTIFIED
SAFETY EQUIPMENT:
• ANSIZ87.1eyeprotection(CAN/CSAZ94.3),
• ANSIS12.6(S3.19)hearingprotection,
• NIOSH/OSHA/MSHArespiratoryprotection.
This product contains chemicals, including
lead, known to the State of California to cause cancer, and
birth defects or other reproductive harm. Wash hands after
handling.
Some dust contains chemicals known to the
State of California to cause cancer, birth defects or other
reproductive harm. Some examples of these chemicals are:
• compoundsinfertilizers
• compoundsininsecticides,herbicidesandpesticides
• arsenicandchromiumfromchemically-treatedlumber.
To reduce your exposure to these chemicals, wear approved
safety equipment such as dust masks that are specially
designed to filter out microscopic particles.
SAVE THESE INSTRUCTIONS.
Refer to them often and use them to instruct others.
4
POWER CONNECTIONS
where the ground wire is attached to an earth ground. The circuit should be protected by a circuit breaker or time delay
fuse. NOTE: Time delay fuses should be marked “D” in Canada and “T” in the US. If an extension cord is used, use
only 3-wire extension cords which have 3-prong grounding type plugs and matching receptacle which will accept the
machine’s plug. Before connecting the machine to the power line, make sure the switch (s) is in the “OFF” position and
be sure that the electric current is of the same characteristics as indicated on the machine. All line connections should
make good contact. Running on low voltage will damage the machine.
SHOCKHAZARD.Donotexposethemachinetorainoroperatethemachineindamplocations.
VOLTAGE AND CIRCUIT PROTECTION
Specifications
.............................................................. 120/240 Hertz.....................................................................
................................................................ Single Minimum Branch Circuit Requirement ................15Amps
Fuse Type.......................................................... Time Delay
Risk of Overheating. Certain electric motors can be operated on a 15 amp circuit if the following
conditions are met.
• VoltagesupplytocircuitmustcomplywiththeNationalElectricalCode.
• Circuitisnotusedtosupplyanyotherelectricalneeds.
• Extensioncordscomplywithspecifications.
• Circuitisequippedwitha15ampcircuitbreakeror15amptimedelayfuse.NOTE:Ifthemotorisconnected
toacircuitprotectedbyfuses,useonlytimedelayfuses.Timedelayfusesshouldbemarked“D”inCanada
and“T”intheU.S.
If any of the above conditions cannot be met, or if operation of the electric motor repeatedly causes
interruption of the power, it may be necessary to operate it from a 20 amp circuit. It is not necessary to
change the cord set.
MOTOR SPECIFICATIONS
make sure the switch is in the “OFF” position.
GROUNDING INSTRUCTIONS
SHOCK HAZARD. This machine must be
grounded while in use to protect the operator from electric
shock.
1. All grounded, cord-connected machines:
In the event of a malfunction or breakdown, grounding
provides a path of least resistance for electric current to
reduce the risk of electric shock. This machine is equipped
with an electric cord having an equipment-grounding
conductor and a grounding plug. The plug must be plugged
into a matching outlet that is properly installed and grounded
in accordance with all local codes and ordinances.
Do not modify the plug provided - if it will not fit the outlet,
have the proper outlet installed by a qualified electrician.
Improper connection of the equipment-grounding conductor
can result in risk of electric shock. The conductor with
insulation having an outer surface that is green with or without
yellow stripes is the equipment-grounding conductor. If repair
or replacement of the electric cord or plug is necessary, do
not connect the equipment-grounding conductor to a live
terminal.
Check with a qualified electrician or service personnel if the
grounding instruction are not completely understood, or if in
doubt as to whether the machine is properly grounded.
Use only 3-wire extension cords that have 3-prong grounding
type plugs and matching 3-conductor receptacles that accept
the machine’s plug, as shown in Fig. A.
GROUNDED
OUTLET BOX
CURRENT
CARRYING
PRONGS
GROUNDING BLADE
IS LONGEST OF THE 3 BLADES
GROUNDED OUTLET BOX
GROUNDING
MEANS
ADAPTER

5
GROUNDED OUTLET BOX
CURRENT
CARRYING
PRONGS
GROUNDING BLADE IS
LONGEST OF 3 BLADES
Fig. D-1
Fig. D-2
MINIMUM GAUGE EXTENSION CORD
Ampere
Rating Volts
Total
Length of
Cord in
Feet Gauge of Extension
Cord
0-6 120
up to
25 18 AWG
0-6 120 25-50 16 AWG
0-6 120 50-100 16 AWG
0-6 120 100-150 14 AWG
6-10 120
up to
25 18 AWG
6-10 120 25-50 16 AWG
6-10 120 50-100 14 AWG
6-10 120 100-150 12 AWG
10-12 120
up to
25 16 AWG
10-12 120 25-50 16 AWG
10-12 120 50-100 14 AWG
10-12 120 100-150 12 AWG
12-16 120
up to
25 14 AWG
12-16 120 25-50 12 AWG
12-16 120
MINIMUM GAUGE EXTENSION CORD
Ampere
Rating Volts
Total
Length of
Cord in
Feet Gauge of Extension
Cord
0-6 240
up to
50 18 AWG
0-6 240 50-100 16 AWG
0-6 240 100-200 16 AWG
0-6 240 200-300 14 AWG
6-10 240
up to
50 18 AWG
6-10 240 50-100 16 AWG
6-10 240 100-200 14 AWG
6-10 240 200-300 12 AWG
10-12 240
up to
50 16 AWG
10-12 240 50-100 16 AWG
10-12 240 100-200 14 AWG
10-12 240 200-300 12 AWG
12-16 240
up to 50
14 AWG
12-16 240 50-100 12 AWG
12-16 240
Repair or replace damaged or worn cord immediately.
2. Grounded, cord-connected machines intended
for use on a supply circuit having a nominal rating
less than 150 volts:
If the machine is intended for use on a circuit that has
an outlet that looks like the one illustrated in Fig. A,the
machine will have a grounding plug that looks like the
plug illustrated in Fig. A. A temporary adapter, which
looks like the adapter illustrated in Fig. B may be used to
connect this plug to a matching 2-conductor receptacle
as shown in Fig. B, if a properly grounded outlet is not
available. The temporary adapter should be used only
until a properly grounded outlet can be installed by a
qualified electrician. The green-colored rigid ear, lug, and
the like, extending from the adapter must be connected
to a permanent ground such as a properly grounded
outlet box. Whenever the adapter is used, it must be held
in place with a metal screw.
NOTE: In Canada, the use of a temporary adapter is not
permitted by the Canadian Electric Code.
SHOCK HAZARD. In all cases, make
certain that the receptacle in question is properly
grounded. If you are not sure, have a qualified
electrician check the receptacle.
3. 240 volt single phase operation:
The motor supplied with your machine is a dual voltage,
120/240 volt motor. It is shipped ready-to-run for 120
volt operation. However, it can be converted for 240 volt
operation.
A qualified electrician should do the conversion, or the
machine can be taken to an Authorized DELTA Service
Center. When completed, the machine must conform
to the National Electric Code and all local codes and
ordinances.
The machine is converted by re-wiring the motor for 240
volts and installing a 240 volt plug on the power supply
cord.
Be sure the 240 volt plug is only used in an outlet having
the same configuration as the plug illustrated in Fig. C.
No adapter should be used with the 240 volt plug.
SHOCK HAZARD. In all cases, make
certain that the receptacle in question is properly
grounded. If you are not sure, have a qualified
electrician check the receptacle.
EXTENSION CORDS
Use proper extension cords. Make sure
your extension cord is in good condition and is a 3-wire
extension cord which has a 3-prong grounding type
plug and matching receptacle which will accept the
machine’s plug. When using an extension cord, be sure
to use one heavy enough to carry the current of the
machine. An undersized cord will cause a drop in line
voltage, resulting in loss of power and overheating. Fig.
D-1 or D-2, shows the correct gauge to use depending
on the cord length. If in doubt, use the next heavier
gauge. The smaller the gauge number, the heavier the
cord.

FUNCTIONAL DESCRIPTION
FOREWORD
The DELTA
NOTICE: The manual cover illustrates the current production model. All other illustrations contained in the manual are
representative only and may not depict the actual labeling or accessories included. These are intended to illustrate
technique only.
CARTON CONTENTS
1a
215
14
1b
1d
1c
4
5
7
8
9
10
3
11
12
13
1. a. Fixed wheels
bolts (2)
c. 3/8" Lock nuts (2)
d. 3/8" Flat washers (4)
2. Wheel casters (2)
3. 3/8" Lock washers (2)
4. Retaining nuts (2)
5. Handle retaining clips (2)
(20)
9. #8 x 3/4" (19 mm) Self-tap
sheet metal screws (4)
10. Switch Toggle
11. Bracket for bag hanging
rod
head bolt
14. Hose clamp (2)
15. Dust intake cap and ring (2)
assembly
17. Base
18. Hose
19. Handle
20. Intake adapter
21. Side and front panels (3)
22. Cross panel (2)
23. Lower bag (2)
24. Cloth-covered bag
retainer ring
25. Upper bag
21
19
22 24
20
17
18
25
23

7
UNPACKINGANDCLEANING
Carefully unpack the machine and all loose items from the shipping container(s). Remove the rust-preventative oil from
unpainted surfaces using a soft cloth moistened with mineral spirits, paint thinner or denatured alcohol.
NOTICE
AVIS
AVISO
fr
sp
Do not use highly volatile solvents such as gasoline, naphtha, acetone or lacquer thinner for cleaning your
machine.
After cleaning, cover the unpainted surfaces with a good quality household floor paste wax.
ASSEMBLY
To reduce the risk of injury, turn unit off and disconnect it from power source before installing and
removing accessories, before adjusting or when making repairs. An accidental start-up can cause injury
ASSEMBLY TOOLS REQUIRED
Cross head screw driver (not supplied)
12 mm and other open-end or socket wrenches
(not supplied)
ASSEMBLING WHEELS TO BASE
CASTERS (FIG. 1, 2)
2. Insert caster stud into threaded hole in the base
—one shown at (D) — and tighten.
3. Tighten base of caster with wrench or needle-nose
pliers, as shown in Figure 2.
4. Repeat for other caster.
FIXED WHEELS (FIG. 3, 4)
mount bracket, through center hole (H) of wheel and
through other hole (I) in wheel mount bracket.
hex head bolt (F) and tighten.
NOTE: Do not overtighten lock nut (J) onto the bolt
(F). Be sure wheel is still free to rotate.
4. Repeat for other fixed wheel.
FIG. 1
FIG. 2
A
C
D
FIG. 3
FIG. 4
H
I
J
B
F
F
B
G
ASSEMBLY TIME ESTIMATE
Assembly for this machine takes approximately 1 hour.

8
ATTACH SIDE PANELS TO BASE (FIG. 5–8)
hex head bolt (L).
2. Line up holes (M) in side panel (N) with holes (O) in
base plate.
NOTE: Be sure side panel is oriented as shown in
hole (M) in the side panel and and hole (O) in base.
4. From underneath the base secure side panel to
5. Repeat for other hole in side panel and base.
two panels are shown correctly assembled in
Figure8.
NOTE:
order.
ATTACH CROSS PANELS TO
SIDE PANELS (FIG. 9, 10)
(19 mm) hex head bolt (L).
2. Line up four holes of cross panel (R) with four lower
holes in side panels (N).
3. Insert hex head bolt and washer assembly - (L) and
(K) (inset) - through holes in side panels (N) and then
through holes in cross panel (R).
5. Assembled cross panel is shown in Figure 11.
holes (SS).
NOTE:
order.
FIG. 5
FIG. 5
L
K
M
O
O
M
Q
FIG. 7
N
FIG. 6
FIG. 8
FIG. 9 L
K
R
N
N
Q
FIG. 10 FIG. 11
SS
SS

9
ATTACH FRONT PANEL TO
BASE (FIG. 12–15)
hex head bolt (L).
2. Line up holes in front panel (N) with holes in base
plate (S), as shown in Figure 12.
NOTE: Be sure front panel is oriented as shown in
Figure13.
holes in front panel (N) and base plate (S).
4. From underneath the base secure front panel to
5. Repeat for other hole in front panel and base.
assembled in Figure 15.
NOTE:
order.
ATTACH MOTOR/BLOWER
TO STAND (FIG. 16, 17)
holes (T) in the housing with holes (U) in the stand.
hex head bolt (L).
3. Insert this washer/bolt assembly up through holes
(U) in stand and insert bolt into the threaded holes
(T) of the motor/blower housing. Hand tighten only.
4. Repeat for five remaining holes.
NOTE:
order.
FIG. 12
L
K
S
N
FIG. 13
FIG. 16
FIG. 17
T
U
L
K
FIG. 15
FIG. 14
Q

10
TIGHTEN ALL HARDWARE IN
SEQUENCE (FIG. 18, 19)
Using a 12 mm wrench (not included), tighten hardware in
this order:
1. Tighten six bolts on motor/blower housing.
2. Tighten all six bolts that attach the side and front
panels to the base.
3. Tighten four bolts that attach the cross panel to the
side panels.
FIG. 18
FIG. 19
INSTALLINTAKEADAPTER(FIG.20,21)
with the four holes — one shown at (W) — underneath
the motor/blower housing. Attach the intake adapter with
four #8 self-tapping screws at four holes.
FIG. 20
FIG. 21
V
W

11
FIG. 22
ATTACHING HANDLE (FIG. 22–26)
from the top of the front panel.
2. Orient the clip (X) as shown in inset, with the
opening facing away from the dust collector.
3. Repeat for the other retaining clip on the other side
of the front panel.
4. Orient the handle as shown in Figure 23.
both sides of the front panel, as shown in Figure 23.
onto the ends of the handle that stick inside of the
front panel.
NOTE: These nuts (AA) are non-removeable. Make
sure the handle is properly oriented before installing
them.
X
X
Y
Z
FIG. 23
FIG. 24
AA AA
FIG. 25 FIG. 26

12
ATTACHING THE TOP FILTER
BAG (FIG. 27, 28)
(25.4 mm) hex head bolt (CC).
3. Insert bolt through the hole in the bracket, then
thread it into the hole in the dust collector. Tighten
securely with a 12 mm wrench.
4. Insert the rod into the pocket (EE) on the filter bag.
7. Work the open end of the filter bag into the top
groove of the dust collector drum until it is secure
and sealed. Bend and fold, as necessary, the
internal bag retainer ring to fit it into place.
ATTACHING THE DUST
COLLECTION BAG (FIG. 29, 30)
1. Bring the clear plastic dust collection bag up
through the middle of the cloth-covered bag
bag back down around the retainer ring.
into the bottom groove (II). Bend and fold the ring to
fit it into place.
3. Tug slightly on the bag to eliminate any slack and to
make sure that the bag is secure and will not detach
during collection.
BB
FIG. 27
CC
DD
FIG. 28
EE
FF
FIG. 29
FIG. 30
GG
GG
II
HH
FF

13
FIG. 31
FIG. 32
ATTACHING THE HOSE TO THE
INTAKEPORT(FIG.31,32)
If one intake port is unused, seal this open port using the
enclosed dust intake cap.
To install dust intake cap:
and on the end of one dust intake port before attaching
the hose to the other. Cover the open intake port with flat
intake cap (KK).
To attach the hose:
Loosely attach the hose clamp (LL) around one end
of the flexible hose (MM). Attach the hose to the dust
intake port (NN) and tighten the hose clamp (LL).
Use the other hose clamp to attach the other end of the
flexible hose to the woodworking machine.
NOTE: Do not operate the dust collector with any dust
intake port (NN) uncovered.
JJ
KK
LL
MM
NN
FIG. 33
OO
QQ
FIG. 34
OO
PP
RR
OPERATION
OPERATIONAL CONTROLS AND ADJUSTMENTS
For operator safety, make certain the
dust intake port is covered with the hose before
operating the machine. The rotating fan inside the
blower housing is accessible through the dust intake
port and is hazardous. Always wear proper apparel.
Do not wear jewelry and keep fingers and all foreign
objects out of the dust intake port. Always follow the
safety rules of this manual.
NOTE: The dust collector is shipped with the safety
switch toggle (OO) Fig. 33 removed. The toggle must
be inserted into the dust collector switch and the switch
placed in the "OFF" position before operation.
STARTING AND STOPPING DUST
COLLECTOR (FIG. 33)
Make sure that the switch is in the
“OFF” position before plugging cord into outlet. Do
not touch the plug’s metal prongs when unplugging
or plugging in the cord.
motor. To turn the machine "ON", move the switch up to
the "ON" position. To turn the machine "OFF", move the
switch down to the "OFF" position.

14
LOCKINGSWITCHIN
"OFF" POSITION (FIG. 35, 36)
IMPORTANT: When the machine is not in use, the
switch should be locked in the "OFF" position to prevent
unauthorized use. To lock the machine, move the switch
toggle (OO) to the "OFF" position and pull it out of the
(OO) removed, the switch will not operate. However,
should the switch toggle be removed while the motor is
running, the machine can be turned "OFF," but cannot be
restarted without re-inserting the switch toggle (OO).
In the event of a power outage (such as
a breaker or fuse trip), always move the switch to the
“OFF” position until the main power is restored.
FIRE HAZARD. When using this dust
collector, do not pick up anything that is burning,
smoldering, or smoking (matches, cigarettes, or hot
ashes).
EXPLOSION HAZARD. Do not use this
unit to vacuum combustible explosive materials
(coal, grain, or other finely-divided combustible
material).
HEALTH HAZARD. Do not use this
unit to vacuum hazardous, toxic, or carcinogenic
materials (asbestos, pesticide, or lead-based paint
debris).
FIG. 35
OO
OO
QQ
FIG. 36
CIRCUITBREAKER
overload condition, turn the dust collector switch "OFF," let the motor cool three to five minutes, and push the reset
button (RR) Fig. 35, on the circuit breaker to reset the breaker. The motor can then be turned on again in the usual
manner. If the overload continues to trip, visit our website at www.deltamachinery.com for a list of service centers or
TROUBLESHOOTING
For assistance with your machine, visit our website at www.deltaportercable.com for a list of service centers or call the
MAINTENANCE
To reduce the risk of injury, turn unit off and disconnect it from power source before installing and
removing accessories, before adjusting or when making repairs. An accidental start-up can cause injury.
KEEPMACHINECLEAN
Wear certified safety equipment for eye, hearing and respiratory protection while using compressed air
FAILURE TO START
Should your machine fail to start, check to make sure the prongs on the cord plug are making good contact in the outlet.
Also, check for blown fuses or open circuit breakers in the line.
RR

15
SERVICE
REPLACEMENT PARTS
Use only identical replacement parts. For a parts list or to order parts, visit our website at www.
Service Center or by calling End User Servicesat (800) 223-7278 to receive personalized support from one of our highly-
trained representatives.
FREE WARNING LABEL REPLACEMENT
If your warning labels become illegible or are missing, call (800) 223-7278 for a free replacement.
COLLECT WOOD MATERIALS ONLY. NEVER USE
THE COLLECTOR TO PICK UP METAL SHAVINGS,
DUST, OR PARTS.
RECOJA MATERIALES DE MADERA SOLAMENTE. NUNCA
UTILICE EL RECOLECTOR PARA RECOGER RECORTES, POLVO O
PIEZAS DE METAL.
ASPIRER UNIQUEMENT DES MATIÈRES EN BOIS. NE JAMAIS UTILISER
LE DÉPOUSSIÉREUR POUR L’ASPIRATION DE COPEAUX, POUSSIÈRES
OU MORCEAUX DE MÉTAUX.
PARA REDUCIR EL RIESGO DE LESIONES, EL USUARIO DEBE LEER
EL MANUAL DE INSTRUCCIONES ANTES DE OPERAR EL
RECOLECTOR DE POLVO. SIEMPRE UTILICE PROTECCIÓN
ADECUADA PARA LOS OJOS Y VÍAS RESPIRATORIAS. RIESGO DE
DESCARGA ELÉCTRICA. NO EXPONGA A LA LLUVIA NI UTILICE EN
LUGARES HÚMEDOS. GUARDE BAJO TECHO. SÓLO UTILÍCELO
PARA RECOGER RESIDUOS SECOS. NO RECOJA NI UTILICE CERCA
DE LÍQUIDOS INFLAMABLES O COMBUSTIBLES. NO OPERE SI LA
MANGUERA NO ESTÁ CONECTADA AL ORIFICIO DE ENTRADA O LAS
BOLSAS Y LOS DEPÓSITOS NO SE ENCUENTRAN EN SU LUGAR.
L’UTILISATEUR DOIT LIRE LE MODE D’EMPLOI AVANT D’UTILISER LE
DÉPOUSSIÉREUR AFIN DE RÉDUIRE LE RISQUE DE BLESSURE. TOUJOURS
UTILISER UNE PROTECTION OCULAIRE ET RESPIRATOIRE ADÉQUATE.
RISQUE D’ÉLECTROCUTION. NE PAS EXPOSER L’APPAREIL À LA PLUIE NI
L’UTILISER DANS UN ENDROIT HUMIDE. LE RANGER À L’INTÉRIEUR.
CONÇU UNIQUEMENT POUR LE RAMASSAGE DE MATIÈRES SÈCHES. NE
PAS ASPIRER DE LIQUIDES INFLAMMABLES OU COMBUSTIBLES OU
UTILISER LE DÉPOUSSIÉREUR PRÈS DE CEUX-CI. NE PAS FAIRE
FONCTIONNER SI LE TUYAU N’EST PAS CONNECTÉ À L’ORIFICE
D’ADMISSION ET SI LES SACS OU L’ABSORBEUR NE SONT PAS EN PLACE.
PELIGRO DE LACERACIÓN GRAVE. DESENCHUFE EL PRODUCTO Y
ESPERE 2-1/2 MINUTOS PARA DAR TIEMPO A QUE LOS
COMPONENTES GIRATORIOS INTERNOS SE DETENGAN ANTES DE
RETIRAR TAPAS ANTIPOLVO Y MANGUERAS.
RISQUE DE LACÉRATION GRAVE. DÉBRANCHER LE PRODUIT ET ATTENDRE
2-1/2 MINUTES POUR PERMETTRE AUX COMPOSANTS INTERNES EN
ROTATION DE S’ARRÊTER AVANT DE RETIRER LES CAPUCHONS
CACHE-POUSSIÈRE ET LES FLEXIBLES.
TO REDUCE THE RISK OF INJURY USER MUST READ
THE INSTRUCTION MANUAL BEFORE OPERATING
DUST COLLECTOR. ALWAYS USE PROPER EYE AND
RESPIRATORY PROTECTION. SHOCK HAZARD. DO
NOT EXPOSE TO RAIN OR USE IN DAMP LOCATIONS.
STORE INDOORS. USE ONLY FOR DRY PICK-UP.
FIRE/EXPLOSION HAZARD. DO NOT PICK UP OR USE
NEAR FLAMMABLE / COMBUSTIBLE LIQUIDS. DO
NOT OPERATE WITHOUT HOSE CONNECTED TO
INLET PORT AND BAGS OR CANISTER IN PLACE.
SEVERE LACERATION HAZARD. UNPLUG PRODUCT
AND WAIT 2-1/2 MINUTES TO ALLOW TIME FOR
INTERNAL ROTATING COMPONENTS TO STOP
PRIOR TO REMOVING DUST CAPS AND HOSES.
FALLS CAN CAUSE
SERIOUS INJURIES.
DO NOT STEP OR
STAND ON THIS AREA.
LAS CAÍDAS PUEDEN CAUSAR
LESIONES GRAVES. NO PISAR
NI PARARSE EN ESTA ÁREA.
LES CHUTES PEUVENT CAUSER
DE GRAVES BLESSURES. NE
MARCHEZ PAS ET NE VOUS TENEZ
PAS SUR CET EMPLACEMENT.
POUR RÉDUIRE LE RISQUE DE BLESSURES EN LIEN AVEC DES PIÈCES
MOBILES: ÉLOIGNER LES MAINS DES ORIFICES D’ADMISSION DE L’AIR.
UTILISER UNIQUEMENT AVEC LES ORIFICES D’ADMISSION RECOUVERTS DE
CAPUCHONS OU RACCORDÉS À UN TUYAU FLEXIBLE. L’HÉLICE POURSUIT
SON MOUVEMENT MÊME APRÈS L’ARRÊT DU DÉPOUSSIÉREUR. S’ASSURER
QUE LE DÉPOUSSIÉREUR EST HORS TENSION, DÉBRANCHÉ ET QUE L’HÉLICE
EST IMMOBILE AVANT DE DÉBUTER UNE RÉPARATION OU DE RETIRER LA
POUSSIÈRE ET LES COPEAUX DE L’APPAREIL. NE PAS FAIRE FONCTIONNER SI
LE TUYAU N’EST PAS CONNECTÉ À L’ORIFICE D’ADMISSION ET SI LES SACS
OU L’ABSORBEUR NE SONT PAS EN PLACE.
REDUCE EL RIESGO DE SUFRIR LESIONES CAUSADAS POR LAS PIEZAS
MÓVILES: MANTIENE LAS MANOS ALEJADAS DE LOS ORIFICIOS DE ENTRADA DE
AIRE. OPERE ÚNICAMENTE CON LOS ORIFICIOS DE ENTRADA CUBIERTOS CON
TAPAS O CONECTADOS A UNA MANGUERA FLEXIBLE. EL IMPULSOR CONTINÚA
ROTANDO DESPUÉS DE QUE EL RECOLECTOR DE POLVO ESTÁ APAGADO.
ASEGÚRESE DE QUE EL COLECTOR ESTÉ APAGADO, DESCONECTADO DE LA
FUENTE DE ALIMENTACIÓN Y DE QUE EL IMPULSOR HAYA PARADO ANTES DE
REALIZAR UN MANTENIMIENTO O LIMPIAR EL POLVO Y LAS ASTILLAS. NO OPERE
SI LA MANGUERA NO ESTÁ CONECTADA AL ORIFICIO DE ENTRADA O LAS
BOLSAS Y LOS DEPÓSITOS NO SE ENCUENTRAN EN SU LUGAR.
TO REDUCE RISK OF INJURY FROM MOVING PARTS: KEEP
HANDS AWAY FROM AIR INLET PORTS. ONLY OPERATE
WITH INLET PORTS COVERED WITH CAPS OR CONNECTED
TO FLEXIBLE HOSE. IMPELLER CONTINUES TO ROTATE
AFTER DUST COLLECTOR IS TURNED OFF. MAKE SURE
DUST COLLECTOR IS TURNED OFF, DISCONNECTED FROM
POWER SOURCE AND THAT IMPELLER HAS STOPPED
ROTATING BEFORE SERVICING OR CLEARING DUST AND
CHIPS. DO NOT OPERATE WITHOUT HOSE CONNECTED TO
INLET PORT AND BAGS OR CANISTER IN PLACE.
PELIGRO DE LACERACIÓN
GRAVE. DESENCHUFE EL
PRODUCTO Y ESPERE
2-1/2 MINUTOS PARA DAR
TIEMPO A QUE LOS
COMPONENTES GIRATORIOS
INTERNOS SE DETENGAN
ANTES DE RETIRAR TAPAS
ANTIPOLVO Y MANGUERAS.
SEVERE LACERATION
HAZARD. UNPLUG
PRODUCT AND WAIT
2-1/2 MINUTES TO
ALLOW TIME FOR
INTERNAL ROTATING
COMPONENTS TO STOP
PRIOR TO REMOVING
DUST CAPS AND HOSES.
RISQUE DE LACÉRATION GRAVE.
DÉBRANCHER LE PRODUIT ET
ATTENDRE 2-1/2 MINUTES
POUR PERMETTRE AUX
COMPOSANTS INTERNES EN
ROTATION DE S’ARRÊTER AVANT
DE RETIRER LES CAPUCHONS
CACHE-POUSSIÈRE ET LES
FLEXIBLES.
PELIGRO DE LACERACIÓN
GRAVE. NO OPERE LA
UNIDAD SIN EL ADAPTADOR
DE ENTRADA EN SU LUGAR.
SEVERE LACERATION
HAZARD. DO NOT
OPERATE WITHOUT INTAKE
ADAPTER IN PLACE.
RISQUE DE LACÉRATION GRAVE. NE
PAS FAIRE FONCTIONNER L’APPAREIL
SI L’ADAPTATEUR D’ADMISSION
N’EST PAS EN PLACE.
SEE OWNER’S
MANUAL. CONSULTE EL MANUAL
DEL USUARIO.
CONSULTER LE MODE
D’EMPLOI.
SERVICE AND REPAIRS
All quality tools will eventually require servicing and/or replacement of parts. For information about DELTA Machinery, its
factory-owned branches, or to locate an Authorized Warranty Service Center, visit our website at www.deltaportercable.
com or call our End User Services at (800) 223-7278. All repairs made by our service centers are fully guaranteed against
defective material and workmanship. We cannot guarantee repairs made or attempted by others. By calling this number
you can also find answers to most frequently asked questions 24 hours/day.
4825 Highway 45 North, Jackson, Tennessee 38305 -
Attention: End User Services. Be sure to include all of the information shown on the nameplate of your tool (model
number, type, serial number, date code, etc.)

ACCESSORIES
Since accessories other than those offered by DELTA have not been tested with this product, use of
such accessories could be hazardous. To reduce the risk of injury, only DELTA recommended accessories should be
used with this product.
A complete line of accessories is available from your DELTA Supplier, DELTA Factory Service Centers, and DELTA
nearest supplier.
WARRANTY
To register your tool for warranty service visit our website at www.deltaportercable.com.
Five Year Limited New Product Warranty
DELTA will repair or replace, at its expense and at its option, any new DELTA machine, machine part, or machine accessory which in normal
use has proven to be defective in workmanship or material, provided that the customer returns the product prepaid to a DELTA factory service
center or authorized service station with proof of purchase of the product within five years and provides DELTA with reasonable opportunity
to verify the alleged defect by inspection. For all refurbished DELTA product, the warranty period is 180 days. DELTA will not be responsible
for any asserted defect which has resulted from normal wear, misuse, abuse or repair or alteration made or specifically authorized by anyone
other than an authorized DELTA service facility or representative. Under no circumstances will DELTA be liable for incidental or consequential
damages resulting from defective products. Some states do not allow the exclusion or limitation of incidental or consequential damages, so
the above limitation or exclusion may not apply to you. This warranty is DELTA’s sole warranty and sets forth the customer’s exclusive remedy,
with respect to defective products; all other warranties, express or implied, whether of merchantability, fitness for purpose, or otherwise, are
expressly disclaimed by DELTA. For further detail of warranty coverage and warranty repair information, visit www.deltaportercable.com or call
(800) 223-7278. This warranty gives you specific legal rights and you may have other rights which vary in certain states or provinces.
LATIN AMERICA: This warranty does not apply to products sold in Latin America. For products sold in Latin America,
see country specific warranty information contained in the packaging, call the local company or see website for warranty
information.

17
LES INSTRUCTIONS IMPORTANTES DE SURETE
lire toutes instructions d'avertissements et opération avant d'utiliser n'importe
quel outil ou n'importe quel équipement. En utilisant les outils ou l'équipement, les précautions de
sûreté fondamentales toujours devraient être suivies pour réduire le risque de blessure personnelle.
L'opération déplacée, l'entretien ou la modification d'outils ou d'équipement ont pour résultat la
blessure sérieux et les dommages de propriété. Il y a de certaines applications pour lequel outils et
l'équipement sont conçus. Ce produit NE devrait être modifié en aucune façon et/ou utilisé pour aucune application
autre que celle pour laquelle il a été conçu.
Dans Canada, 125 Mural St. Suite 300, Richmond Hill, ON, L4B 1M4.
www.powertoolinstitute.com
www.ansi.org - ANSI 01.1
Safety Requirements for Woodworking Machines
U.S. Department of Labor regulations www.osha.gov
CONSERVER CES DIRECTIVES.
MESURES DE SÉCURITÉ - DÉFINITIONS
nous avons utilisé les symboles ci-dessous.
indique une situation dangereuse imminente qui, si elle n’est pas évitée, causera la mort ou des
blessures graves.
indique une situation potentiellement dangereuse qui, si elle n’est pas évitée, pourrait se solder
par un décès ou des blessures graves.
indique une situation potentiellement dangereuse qui, si elle n’est pas évitée pourrait se solder
par des blessures mineures ou modérées.
NOTICE
AVIS
AVISO
fr
sp
indique une pratique ne posant aucun risque de dommages corporels mais qui par contre, si
rien n’est fait pour l’éviter, pourrait poser des risques de dommages matériels.
CONSIGNES DE SÉCURITÉ IMPORTANTES
Pendant l’utilisation du dépoussiéreur, prendre
systématiquement des précautions élémentaires, y
compris les suivantes:
LIRE TOUTES LES CONSIGNES AVANT TOUTE
UTILISATION DU DÉPOUSSIÉREUR
pour réduire tout risque d’incendie,
de chocs électriques ou de blessures:
DANGERS D’EXPLOSION ET
D’INCENDIE. ne pas utiliser cet appareil pour filtrer
la poussière de métal. La combinaison de poussières
de bois et de métal peut créer un risque d’explosion ou
d’incendie. Cet appareil est conçu pour filtrer dans des
milieux non déflagrants.
DANGERS D’EXPLOSION ET
D’INCENDIE. ne pas utiliser cet appareil pour dissiper
des vapeurs ou de la fumée. Cela peut se solder par
des explosions ou un incendie. Le présent dépoussiéreur
est conçu pour une utilisation seulement en présence de
poussières sèches en suspension. Limiter l’utilisation à
des milieux non déflagrants exempts de métaux.
DANGERS D’EXPLOSION ET
D’INCENDIE. ne pas utiliser le dépoussiéreur pour
ramasser des liquides inflammables comme l’essence.
Ne pas utiliser le dépoussiéreur près de liquides
inflammables ou combustibles. Cela peut se solder par
une explosion et/ou un incendie.
RISQUES D’INCENDIE. Lors
de l’utilisation du dépoussiéreur, ne pas aspirer des
de la fumée comme des allumettes, cigarettes ou cendres
chaudes.
DANGERS D’EXPLOSION. Ne
pas utiliser l’appareil pour aspirer des matériaux
combustibles déflagrants comme du charbon, du grain ou
autre matériel fin combustible.
RISQUES POUR LA SANTÉ. Ne
pas aspirer des matières dangereuses, toxiques ou
cancérigènes comme l’amiante, un pesticide ou des
résidus de peinture au plomb.

18
• Ne laissez jamais seul un dépoussiéreur branché.
Débranchez-le après utilisation et avant entretien.
•
pour réduire tout risque de chocs
électriques, ne pas utiliser à l’extérieur ou sur une
surface humide.
• Ne permettez pas que le dépoussiéreur soit utilisé
comme un jouet. Si utilisé par un enfant ou près d’un
enfant, maintenez une étroite surveillance.
• Ne l’utilisez que comme indiqué dans ce manuel.
N’utilisez que des accessoires recommandés par le
fabricant de votre modèle.
• Ne l’utilisez pas avec un cordon ou une prise
endommagé. Si le dépoussiéreur ne fonctionne pas
correctement, a été fait tombé, endommagé, ou laissé
dehors, fait tombé dans l’eau, retournez-le chez un centre
de service agréé.
• Ne le tirez ou portez pas par son cordon, n’utilisez
pas le cordon comme une poignée, ne coincez pas le
cordon dans une porte, ou ne tirez pas sur le cordon
sur des surfaces ou coin coupants. Maintenez le
• Ne débranchez pas l’appareil en tirant sur son cordon.
cordon.
• Ne touchez pas la prise ou le dépoussiéreur avec des
mains humides.
• Ne bouchez pas les entrées. Ne l’utilisez pas si une
entrée est bloquée ; éliminez des entrées les poussières,
peluches, cheveux ou tout autre matériau pouvant réduire
le flux d’air.
• Maintenezcheveux,vêtementstroplarges,doigts,ou
toute autre partie du corps éloignés des ouvertures et
des pièces mobiles.
• Éteignez toutes ses fonctions avant de le débrancher.
•
Ne pas utiliser l’appareil avant qu’il ne soit entièrement
assemblé et installé conformément aux directives. Un
appareil mal assemblé peut provoquer des blessures.
•
Demander conseil à un superviseur, instructeur, ou
toute autre personne qualifiée si l’on ne maîtrise pas
parfaitement l’utilisation de l’appareil. La connaissance est
synonyme de sécurité.
•
Suivre tous les codes de câblage et les connexions
électriques recommandées afin d’éviter tout choc
électrique ou électrocution.
•
Ne pas tirer sur l’appareil par le cordon d’alimentation.
Éloigner le cordon d’alimentation d’accessoires ou bords
tranchants, de surfaces chaudes, d’huile ou de graisse.
Ne pas déposer d’objets lourds sur le cordon d’alimentation.
Un cordon d’alimentation endommagé risque de provoquer
un choc électrique ou une électrocution.
• Maintenir l’appareil en condition optimale.
performances optimales, maintenir la zone du ventilateur
propre. Tout filtre bouché peut poser des risques
d’incendie ou d’explosion. Suivre toutes les consignes
que les bouches d’admission et d’échappement sont
dégagées avant de mettre l’appareil en marche. Toute
bouche d’admission ou d’échappement obturée pose des
risques d’explosion et/ou d’incendie.
•
Éloigner les bras, mains, et doigts du ventilateur. Éviter
tout contact avec des pièces mobiles pour empêcher des
blessures.
•
Ne pas utiliser l’appareil sans le sac collecteur
de poussière en place et bien fixé. La sciure et autres
débris peuvent créer un risque potentiel d’incendie et/ou
d’explosion ainsi que des problèmes respiratoires.
• Deschocsstatiquessontpossiblesdanslesendroits
sec ou lorsque l’humidité relative de l’air est basse.
C’est une situation temporaire et cela n’affecte pas
ou installez un humidificateur.
• Pour éviter les combustions spontanées, videz la cuve
après chaque usage.
•
Inspecter le sac à poussière pour toute trace de
coupures ou déchirures. Remplacer les sacs ou tuyaux
d’aspirateur endommagés. La sciure et autres débris peuvent
créer un risque potentiel d’incendie et/ou d’explosion ainsi
que des problèmes respiratoires.
•
Ne pas essayer de retirer ou de remplacer le ou les
sacs collecteurs de poussière alors que l’appareil est
branché à la prise. Des pales de ventilateur exposées
peuvent provoquer de graves blessures.
•
Entreposer l’appareil dans un endroit qui élimine
le risque de dommages potentiels au cordon
d’alimentation. Un cordon d’alimentation endommagé
risque de provoquer un choc ou une électrocution. Ranger le
cordon d’alimentation de façon sécuritaire pour empêcher le
risque de trébuchement.
• G R A V E D A N G E R D E
LACÉRATION.
Arrêter l’appareil, et le débrancher du
secteur puis attendre 2-1/2 minutes l’arrêt complet des
organes rotatifs internes avant tout retrait ou installation
d’accessoires, réglage, changement de configuration ou
élimination de tout bourrage, et avant toute réparation. Tout
démarrage accidentel comporte des risques de dommages
corporels graves.
•
Éteindre l’appareil, le débrancher, et nettoyer la table/
l’espace de travail avant de quitter la zone.
• N’approchez pas vos yeux de la bouche de le
dépoussiéreur pendant l’opération.
• Garder la zone de travail propre et bien éclairée. Les
établis encombrés et les endroits sombres sont propices
aux accidents.
• Évitez de toucher des surfaces mises à la terre
telles celles de tuyaux, radiateurs, cuisinières et
réfrigérateurs. Les risques de chocs électriques
• Certainsboiscontiennentdesconservateurspouvant
être toxiques. Lorsqu’on travaille avec ces matériaux,
protéger la peau de tout contact et les poumons de
toute inhalation. Se renseigner auprès du fournisseur du

matériau pour obtenir toutes les directives de sécurité
disponibles, et les suivre.
porter systématiquement une protection
oculaire. Tout utilisateur ou individu présent doit porter une
protection oculaire homologuée ANSI Z87.1.
pendant l’utilisation, porter
systématiquement une protection auditive individuelle
adéquate homologuée ANSI S12.6 (S3.19). Sous certaines
conditions et suivant la longueur d’utilisation, le bruit
émanant de ce produit pourrait contribuer à une perte de
l’acuité auditive.
porter SYSTÉMATIQUEMENT des
lunettes de protection. Les lunettes courantes NE sont
PAS des lunettes de protection. Utiliser aussi un masque
antipoussières si la découpe doit en produire beaucoup.
PORTER SYSTÉMATIQUEMENT UN ÉQUIPEMENT DE
SÉCURITÉ HOMOLOGUÉ:
• ProtectionoculaireANSIZ87.1(CAN/CSAZ94.3);
• ProtectionauditiveANSIS12.6(S3.19);
• ProtectiondesvoiesrespiratoiresNIOSH/OSHA/MSHA.

19
Cet outil contient des produits
chimiques, y compris du plomb, reconnus par l’état
californien pour causer cancers, malformations congénitales
ou être nocifs au système reproducteur. Bien se laver les
mains après toute utilisation.
Certaines poussières contiennent des
produits chimiques reconnus par l’état californien pour
causer cancers, malformations congénitales ou être nocifs
au système reproducteur. Parmi ces produits chimiques, on
retrouve:
• Lesengraisetleurscomposés;
• les insecticides, herbicides et pesticides et leurs
composés;
• l’arsenic et le chrome dans le bois ayant subi un
traitement chimique.
matériel de sécurité approprié, tel un masque anti-poussières
spécialement conçu pour filtrer les particules microscopiques.
CONSERVER CES DIRECTIVES.
Les consulter souvent et les utiliser pour donner des
directives aux autres.
RACCORDEMENTS ÉLECTRIQUES
Un circuit électrique séparé doit être utilisé pour les machines. Un circuit adéquat est composé d’un câblagede calibre
REMARQUE : les fusibles temporisés devraient avoir l’inscription « D » au Canada et « T » aux É.-U. Si
l’interrupteur (les interrupteurs) se trouve(nt) en position « OFF » (ARRÊT) et que le courantélectrique présente les mêmes
caractéristiques que celles qui sont inscrites sur la machine. Toutes les connexions électriquesdoivent établir un bon
contact. Le fonctionnement sur une basse tension endommagera la machine.
RISQUES DE CHOCS ÉLECTRIQUES. Ne pas exposer la machine à la pluie, et ne pas
l’utiliser dans des endroits humides.
TENSION ET PROTECTION DU CIRCUIT
Caractéristiques techniques
Tension.................................................................120/240 Hertz..........................................................................
.............................................................monophasé Exigences minimales du circuit de dérivation.......15A
Type de fusible...........................................
Risques de surchauffe. Certains moteurs électriques peuvent fonctionner sur un circuit de
15ampères si les conditions suivantes sont respectées:
• Latensiond’alimentationaucircuitdoitêtreconformeauCodenationaldel’électricité;
• Lecircuitn’estpasutilisépouralimenterd’autresdispositifsélectriques;
• Lesrallongessontconformesauxcaractéristiquestechniques.
• Le circuit est équipé d’un disjoncteur de 15 ampères ou d’un fusible à retardement de 15 ampères.
REMARQUE: si le moteur est connecté à un circuit protégé par des fusibles, utiliser exclusivement des
fusibles à retardement. Les fusibles à retardement devraient porter la mention «D» au Canada et «T» aux
États-Unis.
Si l’une des conditions ci-dessus ne peut être respectée, ou si l’utilisation du moteur électrique entraîne des
coupures répétées de courant, il pourra s’avérer nécessaire de le brancher sur un circuit de 20 ampères. Il
ne sera pas nécessaire de changer le cordon amovible.
SPÉCIFICATIONS DU MOTEUR
INSTRUCTIONS DE MISE À LA TERRE
RISQUES DE CHOCS ÉLECTRIQUES. Cette machine doit être mise à la terre pendant son
emploi, afin de protégerl’utilisateur des décharges électriques.
1. Toutes les machines avec cordon mis à la terre:
permettant de réduire le risque de décharge électrique. Cette machine est dotée d’un cordon électrique possédant
règlements locaux.

20
OREILLE DE MISEÀ LA
TERRE
ADAPTATEUR
BOÎTE À PRISES MISE À LA TERRE
BROCHES
CONDUCTRICESDE
COURANT
LA BROCHE DE MISE
ÀLA TERRE EST LA PLUS
LONGUEDES TROIS
Fig. C
BOÎTE DE SORTIE MISE À LA TERRE
LAMES
CONDUCTRICES
LA LAME DE MISE À LA TERRE
TROIS LAMES
Ne pas modifier la fiche fournie - si elle ne s’adapte pas
courant convenable par un électricien compétent.
la terrede l’équipement peut entraîner un risque de
décharge électrique. Le conducteur possédant un isolant
avec surface extérieure de couleur verte, avec ou sans
l’équipement. Si uneréparation ou un remplacement du
cordon électrique s’avère nécessaire, ne pas brancher
borne sous tension.
Consulter un électricien compétent ou le personnel de
service après-vente si on ne comprend pas entièrement
comme l’illustre lafigure A.
Réparer ou remplacer sans délai tout cordon
endommagé ouusé.
2. Machines avec cordon mis à la terre prévues
pour uneutilisation sur une alimentation
nominale inférieure à 150 volts:
Si cette machine est prévue pour être utilisée sur un
disponible. L’adaptateur temporaire ne doit êtreutilisé
la terre est installée par un électricien compétent.
L’oreillerigide ou autre dispositif semblable de couleur
verte, sur ledessus de l’adaptateur, doit être connecté
un adaptateur est utilisé,celui-ci doit être retenu en place
par une vis en métal.
REMARQUE: Au Canada, le Code canadien de
l’électriciténe permet pas l’emploi d’un adaptateur
temporaire.
RISQUES DE CHOCS
ÉLECTRIQUES. Dans tous les cas, s'assurer quela
prise en question est bien mise à la terre. Dans le
doute, demander à un électricien compétentde vérifier
la prise.
3. Fonctionnement monophasé à 240 volts
Le moteur fourni avec la machine est un moteur
sous tension de 120 volts. Toutefois, il peut être converti
au fonctionnement sous 240 volts.
Un électricien professionnel devrait effectuer
la conversion ou utiliser les services d’un centre de
machine doit être conforme au Code électrique national
l’échelle locale.
La conversion exige un recâblage du moteur pour
240 volts grâce et l’installation d’une fiche de 240 volts
sur le cordon d’alimentation.
S’assurer que la fiche de 240 volts s’insère seulement
dans une prise ayant la même configuration que la fiche
fiche de 240 volts.
RISQUES DE CHOCS
ÉLECTRIQUES. Dans tous les cas, s’assurer que la
fiche en question est mise à la terre adéquatement. En
cas de doutes, demander à un électricien professionnel
de vérifier la prise.
Table of contents
Languages:
Other Delta Dust Collector manuals

Delta
Delta 50-851 User manual

Delta
Delta 50-762 User manual

Delta
Delta 3 H.P. SINGLE-STAGE DUST COLLECTOR 50-852 User manual

Delta
Delta 50-767 User manual

Delta
Delta 50-720 User manual

Delta
Delta 50-766 User manual

Delta
Delta 50-850 User manual

Delta
Delta 50-820 User manual

Delta
Delta 50-850 User manual

Delta
Delta 1345315 User manual
Popular Dust Collector manuals by other brands

Oneida Air Systems
Oneida Air Systems Supercell XSK000030 owner's manual

Blastrac
Blastrac BDC-22 operating manual

CLARCOR
CLARCOR UAS V Series owner's manual

Powermatic
Powermatic PM2200 Operating instructions and parts manual

HOLZMANN MASCHINEN
HOLZMANN MASCHINEN ABS 2480 user manual

laguna
laguna XFLUX5 manual