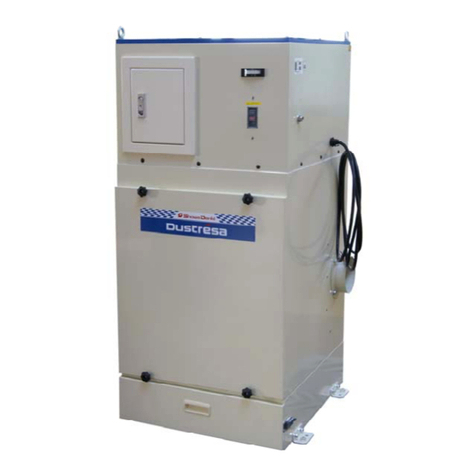
Showa Denki Dustresa CFA-110 User manual

YFAA21A-Y001E
Operation Manual for
Dustrésa
the Compact Dust Collector
CFA-110
CFA-215SC
CFA-215ST
CFA-220S
CFA-240S
SHOWA DENKI CO., LTD.

Introduction
Thank you for choosing our Dustrésa dust collector in the CFA series from among so many similar products
on the market.
Showa Denki, as a dedicated manufacturer of blowers and dust collectors, has supplied innovative products
developed by making the best use of its flow and rotary machine expertise. Compact, yet featuring high
performance and low energy consumption, your Dustrésa will serve you for long safe and sound as long as
you follow the instructions in this manual.
It is recommended that you keep the manual on hand for quick reference.
This manual contains all necessary information from installation to operation about the following varieties of
Dustrésa:
CFA-110 100 V, 50 & 60 Hz commonly used
CFA-215SC 100 V, 50 or 60 Hz exclusively used
CFA-215ST 200 V, 50 or 60 Hz exclusively used
CFA-220S 200 V, 50 or 60 Hz exclusively used
CFA-240S 200 V, 50 or 60 Hz exclusively used
Symbols used herein
The symbols and headwords found in this manual respectively have the following meaning:
Warning If failed to observe the relevant instructions, it could cause death
or serious injury.
Caution If failed to observe the relevant instructions, it could cause injury
or property damage.
indicates what must not be done.
indicates what requires the use of good care.
indicates what must be done.

Contents Page
Chapter 1 Cautions for safety - 1 -
Chapter 2 Outline of the dust collector - 2 -
Configuration - 2 -
Components - 2 -
Chapter 3 Installation - 3 -
Installation - 4 -
Electrical wiring - 4 -
Hood and connection of the duct - 4 -
Trial operation - 5 -
Chapter 4 Operation - 5 -
Routine operation - 5 -
How shake off the dust - 5 -
Caution - 6 -
Chapter 5 Maintenance - 6 -
What and when to inspect - 6 -
Replacing the filter cloth - 7 -
Adjusting tension of the shaking rope - 8 -
Replacement filter cloth sizes - 9 -
Troubleshooting - 10 -
Specifications - 10 -

- 1 -
Chapter 1 Cautions for safety
WARNING
Any Dustrésa must not suck the following things:
a lit cigarette or match, hot dust
sparks from a sander, a grinder, etc.
Combustible filter cloth of the dust collector can ignite and cause a fire.
flammable gases from petrol, thinner, etc.
Sparks from the incorporated electric components, static and contact of metals can cause an
explosion.
dust of aluminium, carbon and starch
It can cause a dust explosion.
Do not operate the Dustrésa with its maintenance door opened because it could be closed by
negative pressure inside catching your fingers and/or the motor overloaded.
Caution
The Dustrésa should not suck the following things which can cause it a failure:
Hot gas
The gas heated to 40C or more would deteriorate the insulation of electric components inside
the dust collector.
Water, oil, adhesives and adhesive dust
They would deposit on the filter cloth causing it blinding.
Work, tools and other solid objects than dust
They could damage the ducts and filter cloth.
Particulates (5 µ or smaller) of carbon and other materials
Use a high-performance filter cloth as the standard type can allow leaks.
Lightweight dust including feather, cotton dust, paper dust, polystyrene foam dust
They would adhere to the inside of the dust collector.
Do not ride on the Dustrésa because it could be deformed or you could fall.
Do not apply high pressure on the Dustrésa with a pressurizer.
Never increase the operation speed more than design speed using an inverter because it could
damage the incorporated blower.

- 2 -
スイッチ
取手
吸込口
吸込フタ
ろ布
ろ布押さえ
ダストパン
シェーキングハンドル
オプション
キャスター
排気口
スイッチ
シェーキング
ハンドル
吸込口
正面扉
吸込フタ
キャスター
ダストパン
ろ布止め金具
吊りボルト 排気口
シェーキング
ハンドル
吸込口
キャスター
正面扉
ろ布
吸込フタ
ダストパン
クランク
Chapter 2 Outline of the dust collector
Configuration
The dust-containing air sucked from the inlet port is dispersed and led to the filter cloth that purifies the air.
The purified air goes through the blower and released from the outlet in the machine roof into the atmosphere.
The dust caught on the filter cloth is shaken off with a shaker operated by a handle. The dust is collected in
the dust pan that is easily taken out from the front door.
Components
CFA-110
CFA-215S, 220S
CFA-240S
Switch
Handhold
A
ir inlet port
Inlet cover
Shaker handle
Caster
(option)
Filter cloth
Filter-cloth
retainin
g
dis
c
Dust pan
A
ir outle
t
Power switch
Shaker handle
A
ir inlet port
Inlet cover
Caster
Dust pan
Filter-cloth
metal fixe
r
Front door
Ring bolt
Front door
A
ir outle
t
Shaker handle
A
ir inlet port
Inlet cover
Caster
Crank
Filter
cloth
Dust pan

- 3 -
ガソリン シンナー
300
700
400
400
Chapter 3 Installation
Upon receiving the product, please examine its nameplate to see if the type, voltage and frequency indicated
on it conform with those of the ordered product. Also, check up the accessories for conformity.
In case of any damage to the product caused during transportation or a shortage of parts, please immediately
contact the relevant retailer or a nearby branch or sales office of Showa Denki.
Install the dust collector in a place fulfilling the following conditions:
Indoor places not get wet by rainwater
Dust collectors in the CFA series are designed
for indoor use.
For installation, avoid places liable to get wet
that may induce an electric shock and a
product failure.
No dew condensation at room temperature
Ambient temperature: 5C to 40C
Humidity: not higher than 80%
High temperatures and dew condensation
could cause an electric component failure
and/or an electric shock.
Horizontal places free from vibrations
Unusual vibrations could cause the product
topple over.
No hazardous chemicals stored around
Places close to stored petrol, thinner, and other
flammable chemicals have the possibility of an
explosion and/or a fire.
Places near the chemicals, like hydrochloric
acid and sulphuric acid, that produce a
corrosive gas could cause the product to
corrode.
Places easy for maintenance
Spaces as illustrated on the left must be
secured for dust discharge, filter cloth
replacement and purified-air release.
Unit: mm
Petrol Thinner

- 4 -
Installation
Although the dust collector, equipped with casters, can be readily moved, apply stoppers so it
may not move during operation. Avoid using the collector on a slope. When necessary, move
it slowly on a flat floor.
When lifting up the CFA-215S or 220S dust collector, hold its bottom, and not the plastic
portion, by two or more persons.
Ensure an enough space (twice or more as its air outlet diameter) around the dust collector so
it may display adequate suction power with its air outlet not blocked. Place nothing on the
machine.
Electrical wiring
Only qualified persons should work on the electrical wiring of the dust collector pursuant to
the Electrical Equipment Technical Standards and the Internal Wiring Regulations.
Make sure of the machine’s power supply as per its nameplate and use what is specified
therein. Operating the machine on a different power supply could be very dangerous causing
an operation failure.
Use an appropriate fuse (breaker) for the power supply that conforms with the start-up
current.
Be sure to earth the power supply connection.
Hood and connection of the duct
Dust collection method and suction air speed (controlled air speed) may vary depending on
the kind of dust and the condition of scattered dust. Generally, the suction air speed in the
hood opening vicinity should be designed to be 0.5 m/sec. or faster. Also, it is desirable that
the airflow in the duct is 15 m/sec. or higher.
The duct joints should be tightly sealed so no air may be sucked or leaked through them.
In case a flexible duct is used, it should not be bent too sharp or unnecessarily sagged so it
may keep a high suction power.
The air inlet port is on the right flank of the collector, viewed from its front door, in the
ex-factory configuration. It can be changed to the left flank and the port and the inlet cover
may thus be interchangeable.
Standard inlet diameter
CFA-110
CFA-215S CFA-220S CFA-240S
75 mm 97 mm 148 mm

- 5 -
Trial operation
Before a trial run of the dust collector, make sure:
• that the power supply cable, earth cable, insulation and voltage have been arranged as
specified;
• that there is no air leak at duct joints or no remaining material, bolt, nut or tool left behind in
the duct, and
• that the maintenance door and the dust pan are securely closed.
With the above points confirmed, turn on the power switch and turn it off quick and observe
the motor cooling fan through the air outlet on the ceiling. If it turns clockwise, it is alright. If it
turns counter-clockwise, then turn off the power supply and change the connections of 2
cables of the 3 power supply cables.
Chapter 4 Operation
Routine operation
Operation procedures: [1] Make sure that the front door is closed.
[2] Turn on the power switch to start operation.
End operation procedures: [1] Turn off the power switch.
[2] Wait about 2 minutes and then shake off the deposited dust on to the
dust pan and discharge.
Since continuous operation of the dust collector would blind the filter cloth and cause the
suction power to drop, stop operating the machine and go through the shaking-off and
discharge steps.
During operation, the shaking-off and discharge procedures are disabled.
Discharge of dust should be performed at the end of the day’s operation. During this
procedure, be sure to wear protective goggles and gloves and a dustproof mask.
How shake off the dust
CFA-110
Detach and clean the filter cloth.
If equipped with an optional shake-off device, turn
its handle to shake off the dust.
CFA-215–240
While holding the collector body by hand, pull the
shaker handle about 3 times. After use, return the
handle to its original position so it may not sag.

- 6 -
Caution
Although, in case of fine dust, a small amount can leak from the dust collector at its start, this
phenomenon will disappear when dust deposits on the filter cloth overall. If, however, the
leakage continues, replace the cloth with the optional high-performance type.
The dust pan, fixed in position with spring, can somewhat hitches on its casing when drawn in
or out. When returning the pan into position, push it in until it clicks fixed (except CFA-110).
Clean the pan before it accommodates too much dust.
The filter cloth’s life is one to two years on the average, which, however, depends on the
machine’s operation time and dust attributes and concentration. Replace the cloth with a new
one if the shake-off procedure fails to recover the suction power.
Although the filter cloth may not be damaged by usual operation, stop the machine operation
and replace the cloth with a new one if it is damaged. Using a damaged filter cloth could not
only allow dust to be released into the atmosphere but damage the built-in blower as well.
Chapter 5 Maintenance
Be sure to maintain the dust collector at regular intervals. This is important to prevent the
machine’s failure or accident and keep it serving you for many years to come. During the
maintenance work, always turn off the power supply to the machine and when replacing the filter
cloth use protective goggles and gloves and a dustproof mask.
What and when to inspect
What When Description
Front door Before operation Must be securely closed.
Motor load current Once a day Read the control panel ammeter, etc.
Exhaust air Dust must not leak.
Blower vibrations Once a week No vibrations or noise
Shaker No noise or operation error
Filter cloth application Once a month Cloth must not come off, loosen or damage.
Piping No bolt coming off or loosened or no worn-off packing
Ducting No dust deposits or clogs
Electrical wirings No poor insulation or loosened terminal
Inside of the machine One a year Clean the components of adhered dust.
The machine and its casing No corrosion or gap

- 7 -
ノブ
ろ布押さえ
ろ布
ガイド
パッチン 蝶ボルト
ダストパン
ロープ
押えねじ クランク
ロープ
フィルタケース
Replacing the filter cloth
CFA-110
(1) Remove the 3 knobs from the filter-cloth
retaining disc.
(2) Detach the retaining disc and remove the old
cloth.
(3) Insert a new cloth and fix the filter into the guide
pins.
(4) Secure the retaining disc with the 3 knobs.
CFA-215S, 220S CFA-240S
(1) Raise the filter-cloth metal fixers (1) Remove the crank by loosening the rope
retaining screw and the wing bolt. Draw out the
dust pan.
(2) Draw out the filter cloth to this side and take it
out.
(2) Unlock the snap locks located on both upper
sides of the filter case and pull out the case to
this side.
Knob
Filter cloth
retainin
g
disc
Filter cloth
Guide pin
Snap lock
Rope
retaining
screw
Rope
Wing bolt
Crank
Dust pan
Filter case

- 8 -
向きに注意 ナット、ワッシャ
(M6)
上の表示
ロープ
ロープ押さえ ロープ押さえ
ロープ
(3) Insert a new filter cloth in the direction as shown
in the figure below, make sure that the cloth is
inserted in the back groove and push it into
position completely.
(3) Loosen off the M6 nuts that fix the filter cloth and
remove the cloth.
(4) Pull up this side of the filter cloth and secure it in
position with metal fixers as it was.
(4) Attach a new cloth, with the ‘Topside’ marking
facing up, and assemble the whole thing
reversely to the procedures mentioned above.
Adjust the rope’s tension (See next page).
Adjusting tension of the shaking rope
Regulate the tension of the shaking rope if the shaker handle is loosened too much or when the filter cloth
is renewed.
(1) Loosen the 2 rope-retaining wing bolts and make the shaker handle closely contact the machine body.
CFA-215S/220S (Remove the filter cloth.) CFA-240S
(2) While pulling the rope end, turn the rope retainer by 2 to 3 cm in the arrow-marked direction.
(3) While pulling the rope, fasten the rope-retaining wing bolt.
Insert in the correct
direction. Nut and washer
‘Topside’
marking
Rope retainer Rope Rope retainer
Rope

- 9 -
Rope retainer in detail
Note: There can be a little air leak from the rope-pierced portions when the rope tension is regulated, which,
however, may not affect the machine’s performance.
In case the rope is broken or severely worn out, replace it with a new one.
Rope for replacement Starter rope (nylon solid braided) 4 mm ×50–60 cm
The rope is commercially available.
Replacement filter cloth sizes
Type Cloth size Number of cloths applied
CFA-110 150 mm 250 mm 1
CFA-215S 420 mm 420 mm 75 mm 1
CFA-220S 420 mm 420 mm 95 mm 1
CFA-240S 420 mm 540 mm 75 mm 2
Use our genuine filter cloths for replacement.
During replacement work, be sure to wear protective goggles and gloves and a dustproof mask.

- 10 -
Troubleshooting
Symptom Possible causes Remedies
Blower motor fails to
start.
• Power absent
• Thermostat activated
• Motor failure
• Turn on the power supply.
• Determine the cause(s), remove it (them) and
restart.
• Inspect and repair the motor (Consult the
manufacturer).
Blower noise,
unusual vibrations
• Motor bearings broken
• Foreign matter mixed
• Impeller out of balance
• Replace the bearings.
• Remove the foreign matter.
• Clean the impeller.
• Correct the imbalance (Consult the manufacturer).
Blown dust leakage • Filter cloth broken or out of
position
• Dust particles too fine
• Packing worn off
• Renew the cloth.
• Replace the filter cloth with a higher-performance
version.
• Replace the packing with a new one.
Poor suction power • Inlet piping clogged
• Filter cloth blinding
• Clear deposit from the piping.
• See the following item.
Filter cloth blinding • Filter cloth’s life
• Adverse dust attributes
• Replace the cloth with a new one.
• Effective measures should be taken separately.
Specifications
Type Motor
kW
Airflow rate
m3/min
Static pressure
kPa
Filtration area
m2
Dust container
capacity
L
Noise level
dB(A)
Mass
kg
CFA-110 0.2 4
0.8
(50 Hz)
1.18
(60 Hz)
0.8 3.1 64 25
CFA-215SC
CFA-215ST 0.4
4
5
6
1.96
1.57
0.98
1.5 6.9 64
44 (60 Hz)
47 (50 Hz)
CFA-220S 0.75
6
8
10
2.25
1.96
1.57
2 6.9 65 55
CFA-240S 1.5
12
16
20
2.55
2.35
1.96
4 16.9 68 135
Note: The noise levels were measured at 1.5 m from the machine’s front, which may vary depending on the
environment and condition in which to use the machine.

- 11 -
Notes :We are not responsible for any accident or breakdown caused by different/wrong use from this
manual, and improper repair or remodeling.
Business Promotion Dpt.
1-25 Shinden Kita-machi, Daito-city, Osaka, Japan 574-0052
Tel: +81-72-870-5708 Fax: +81-72-870-7243
http://www.showadenki.co.jp
This manual suits for next models
4
Table of contents
Other Showa Denki Dust Collector manuals
Popular Dust Collector manuals by other brands
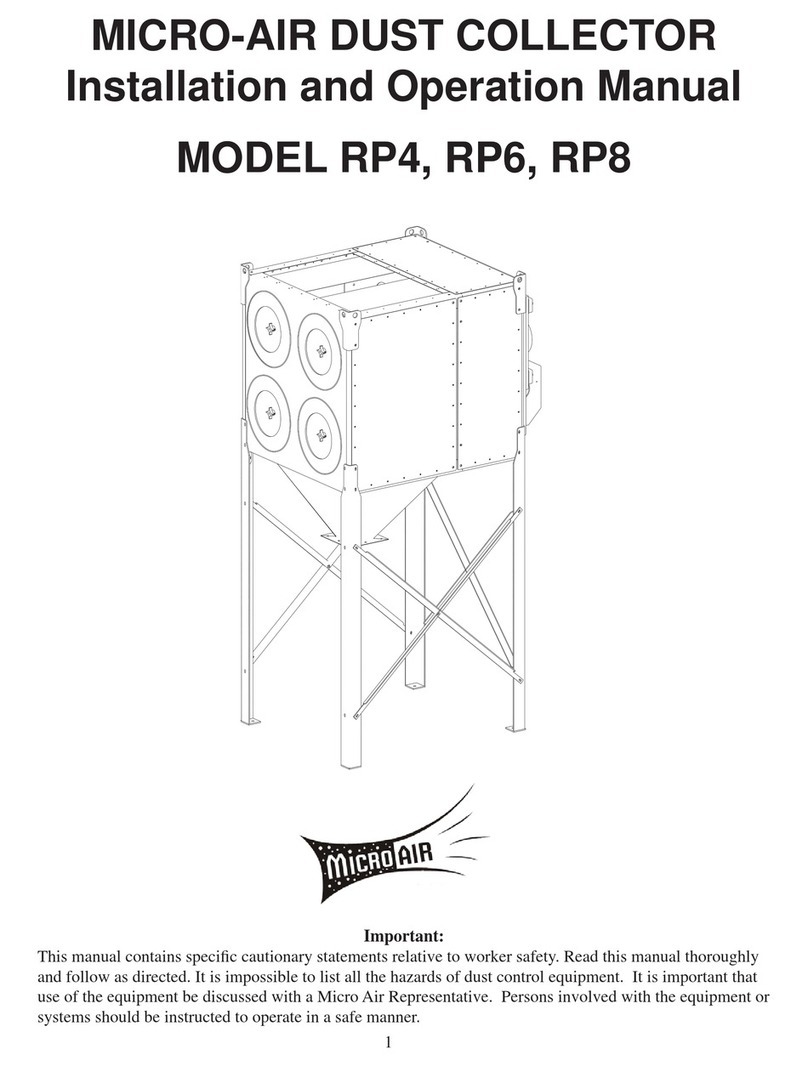
MICRO-AIR
MICRO-AIR RP4 Installation and operation manual
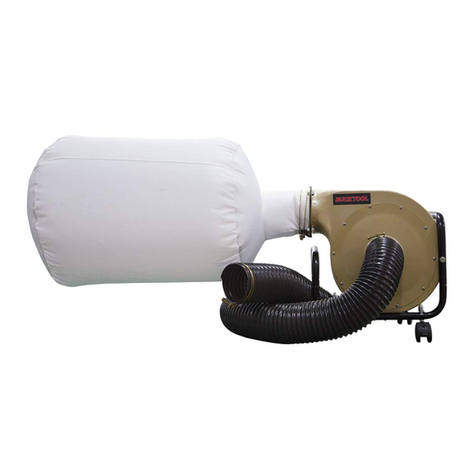
Bucktool
Bucktool DC30A instruction manual

Oneida Air Systems
Oneida Air Systems Supercell XSK000035 owner's manual

Storch
Storch Cookie Monster manual

National Flooring Equipment
National Flooring Equipment 3472 instruction manual
Donaldson Torit
Donaldson Torit E-100 Installation and operation manual


