Delta M81E Series User manual

Copyright Notices
The information contained in the user’s manual and all accompanyied docu-
mentation are copyrighted and all rights are reserved. This publication may
not in whole or in parts, be reproduced, transcribed, stored in a retrieval
system translated into any languages or transmitted in any form without the
prior written consent from the manufacturer, except for copies retained by
the purchasers for their personal archival purposes.
Trademarks
lAward Modular BIOS is a registered trademark of Award Software Inc.
lMicrosoft and Windows 95/98/NT are registered trademarks of Microsoft
Corporation.
lIntel Pentium, Pentium II, Pentium III, Celeron and Slot1 are registered
trademarks of Intel Corporation.
All other product names mentioned herein are used for identification pur-
poses only and may be the trademarks of their respective companies.
Technical Support
If you need technical assistance, our technical support engineers will be
glad to assist you with all technical difficulties, you can reach them by dial-
ing our toll-free service and technical support number : 1-877-DELTA-2K/1-
877-335-8225 (USA / CANADA Only ). Not only you will get to speak with
our experience technical support team, we also provide web-site address
(http://pc.delta.com.tw), product ,sales and RMA/warranty information. Our
skillful technical engineers will be available between 8:00AM to 5:00PM,
PST (Pacific Standard Time).
PRINTED IN TAIWAN

CONTENTS
1. Checklist.............................................................2
2. Introduction........................................................3
3. Specification.......................................................4
4. Layout Guide......................................................6
5. Hardware Installation........................................8
6. BIOS Configuration ......................................... 28
7. Software Installation ....................................... 56
P/N : 5011503900 DEC/1999 REV1.0

M81E / M81DC2 / M812-FX Series User’s Manual
2
Thank you for choosing the M81E/M81DC2/M812-FX series motherboard.
The package box contains the following contents. After unpacking, make sure
that you have everything and that individual components are not damaged. If
you find any component missing or damaged, contact your retailer immediately.
Package Box
M81E/M81DC2/M812-FX Series Motherboard
Anti-Static Bag
EPE Sheet
IDE Ribbon Cable Assembly
vThe 80-Pin ribbon cable is designed with a 40-Pin connector for Ultra
DMA33/66 IDE device.
vThe 40-Pin ribbon cable is designed with a 40-Pin connector for Ultra
DMA33 IDE devices.
User’s Manual
Driver and Utility CD
Note : Mini PCI modem card is optional at the time of purchase that you
can ignore it on checklist.
1. Checklist
1
2
3
4
5
6
7
2
3
4
7
6
5
1

M81E / M81DC2 / M812-FX Series User’s Manual 3
2. Introduction
2. Introduction
The M81E/M81DC2/M812-FX series motherboard offers the high integration, high
performance, high compatibility and power efficient solution on the powerful Intel PPGA370
processors. The motherboard uses the Intel i810E chipset which includes the FW82810/
DC100/E (GMCHO/GMCH/GMCHE) / FW82801AA (ICH) and N82802AB (Firmware Hub)
chip in the Flex ATX form factor.
The principal feature of this motherboard is it can support PPGA370 Celeron and Coppermine
series processors. It operate at 66/100/133MHz FSB and CPU speed running from 300MHz
up to 733MHz.
The i810E chipset provides full AGP capability with the internal 2D/3D graphics engine for
maximum software compatibility, also supports full MPEG-2 motion compensation for
software-assisted DVD video playback and a digital video output that may support (via
Chrontel CH7008A external video Encoder) NTSC and PAL broadcast standards.
The motherboard provides a Mini PCI interface that was developed specifically for integrated
communications peripherals such as modems and network interface card. For customers
who need the flexibility of LAN and modem solutions that can be changed and upgraded by
the end user, PC card may offer a better fitting solution. Also integrated AC97 Audio and 10/
100 Mbps Fast Ethernet LAN solution, which can be configured for either 100Mbps (100Base-
TX) or 10Mbps (10Base-T) Ethernet operation. It provides a RJ-45 port for user to attach
the motherboard, and a phone jack to attach the chassis for modem.
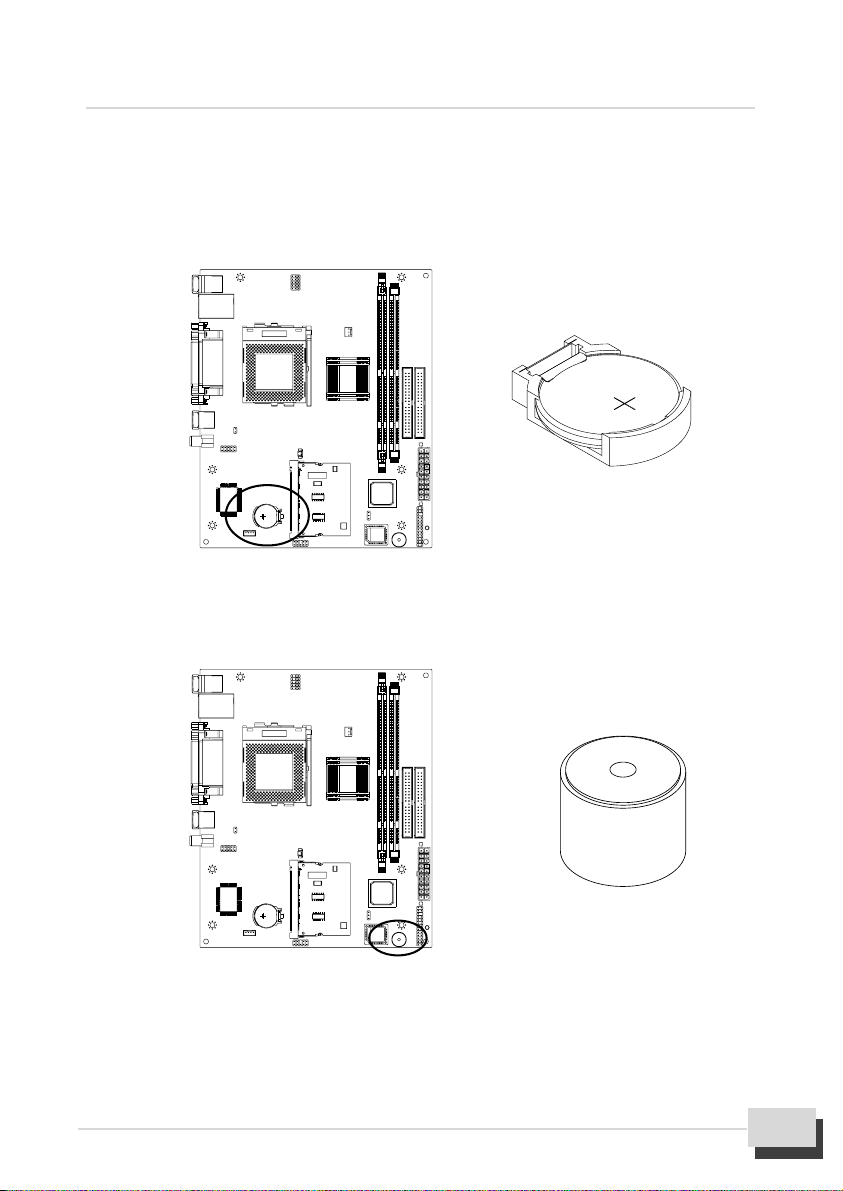
The system management chip (Winbond W83627HF-AW) with software, allows user to
monitor system environment such as system and CPU fan speed (requires fan with
tachometer output), CPU temperature , system temperature and operating voltages.
The motherboard has a comprehensive set of integrated I/O ports. The I/O port array
features PS/2 Keyboard and Mouse ports, a Parallel port, five USB ports, a RJ-45 port, a
VGA display port, a Audio port, a Serial ports, an Infrared port (for IrDA or ASKIR) and two PCI
IDE, also has two 168-Pin DIMM sockets for the installation 3.3V unbuffered SDRAM module, it
supports a memory bus of 100MHz, so we recommend you can choose PC-100 compliant for
performance and upgrade required.
The fully programmable firmware enhances the system feature like Plug and Play, APM (v1.2)/
ACPI (v1.0), Modem Ring-On, Wake On LAN, control of DPMS and BIOS upgrade ability.

M81E / M81DC2 / M812-FX Series User’s Manual
4
3. Specification
Chipset
lM81E/M81DC2/M812-FX consists of the Intel’s FW82810/DC100/E +
FW82801AA + N82802AB
lWinbond’s W83627HF-AW LPC I/O
lAC97 Codec
lSIS’s 900 Fast Ethernet PCI 10/100 Mbps LAN
lChrontel’s CH7008A Encoder
CPU Support
lIntel’s PPGA370 Celeron and FC-PGA Coppermine series Processors
System Speed Support
l66/100/133MHz FSB for CPU Interface
l33MHz PCI Bus for PCI Interface
l66MHz AGP Bus for AGP Interface
l100MHz SDRAM Bus for SDRAM Memory Interface
Memory
lTwo 168-Pin DIMM sockets for 3.3V unbuffered SDRAM module and PC-
100 compliant
lMemory capacity from 8MB up to 256MB
l100MHz or 133MHz super AGP performance using 4MB display cache
memory onboard graphics
Expansion Slots
lMini PCI Socket
Onboard I/O Support
lTwo PCI IDE ports support up to four IDE devices (supports Ultra DMA33/
66 hard drivers, ATAPI CD-ROM, LS-120 and ZIP)
lOne NS16C550A-compatible DB-9 serial port
lOne SPP/ECP/EPP DB-25 parallel port
lFive USB (v1.1) ports
lOne mini DIN-6 PS/2 mouse port

M81E / M81DC2 / M812-FX Series User’s Manual 5
lOne mini DIN-6 PS/2 keyboard port
lOne DB-15 VGA port
lOne S terminal signal port for TV-OUT function
lOne AV terminal signal port for TV-OUT function
lOne infrared port for IrDA or ASKIR interface (Optional)
lOne AC97 audio port
lOne 10/100 Mbps Ethernet RJ-45 port
Green Support
lSuspend to RAM Function
lAPM (v1.2) and ACPI (v1.0) Compliant Power Management
lIDE and Display Power Down Function
Extend Feature Support
lHardware monitor to Fan Speed, Voltage and Thermal
lSystem power on by PS/2 Keyboard and Mouse
lModem Ring-On and Wake On LAN Function
Power
lHarris HIP6021 PWM Power Controller
lFlex ATX Power Supply Configuration
BIOS Support
lAward Medallion Flash BIOS
lPlug and Play, DMI and DPMS Function
lSmart BIOS ROM Protect Function
Compliancies
lDOC Compliant
lCE Certification
Form Factor
lFlex ATX (228 x 190 x 1.6mm)
l4 Layer PCB Design
Environment
lOperating Temperature : 0 ~ 500C
lOperating Humidity : 10 ~ 80%
lVibration : 0 ~ 500Hz
3. Specification

M81E / M81DC2 / M812-FX Series User’s Manual
6
4. Layout Guide
Use the following illustration and key to identify the components on your
motherboard.
K/B & MS PS/2 Mouse Port
K/B & MS PS/2 Keyboard Port
USB1 & LAN RJ-45 LAN Port
USB1 & LAN Two USB Ports
LPT1 Parallel Port
COM1 Serial Port
VGA1 VGA Display Port
J21 S_Terminal TV S Signal Out Port
J20 AV_Terminal TV AV Signal Out Port
JP4 TV System Format Header
3
4
5
6
7
1
2
8
9
10
22
23
18
27
1
2
4
3
5
6
7
8
9
11
10
12
17
13
15
14
16
20
19
21
24
25
26

M81E / M81DC2 / M812-FX Series User’s Manual 7
J11 IrDA Infrared Header (Optional)
J6 CD_IN Header
BAT1 Lithium CR2032 Battery
U2 Mini PCI Socket
J14 Phone Connector
J13 Audio Header
JP1 CMOS Memory Clear Header
BZ1 Buzzer
FSP1 Front Panel I/O Header
PWR LED Power LED
ATX1 Flex ATX Power Connector
IDE1,2 IDE Device Port
DIMM1,2 DIMM Socket
CPU FAN CPU Fan Connector
USB3 Auxiliary USB Header (Single Port)
USB2 Auxiliary USB Header (Dual Port)
PGA370 PPGA370 CPU Socket
4. Layout Guide
18
19
20
21
24
25
26
27
22
23
11
12
13
14
15
16
17

M81E / M81DC2 / M812-FX Series User’s Manual
8
5. Hardware Installation
5.1 Before You Begin
The M81E/M81DC2/M812-FX series motherboard is designed to fit into a special Flex
ATX form factor chassis. The pattern of the mounting holes and the position of back
panel I/O ports is designed with a special Flex ATX specification. The chassis may
come with various mounting fasteners which are made of metal or plastic. It is highly
recommended to use as many metal fasteners as possible to mount the motherboard
in the chassis for better grounding.
5.2 Caution Static Electricity
Before removing the motherboard from its anti-static bag, you need to eliminate any
static electricity that may be accumulated on your body by touching a grounded or anti-
static surface. If noting is available, touch the housing of power supply which is plugged
into the AC outlet.
After removing the motherboard from its anti-static bag, place it only on a grounded or
anti-static surface, component side up. Inspect the motherboard and contact you retailer
immediately if it is damaged.
5.3 Pre Installation Procedure
Before you install your motherboard into a chassis, its convenient to install the CPU, memory
modules and set all the jumpers to correct settings. The examples and explain below
shown the function and identify of the jumper setting to help you understand the circuits
and enable or disable certain features or properties of the motherboard.
Step1: Jumper Settings Explain
ll
ll
lBattery “BAT1”
lIt is a coin-cell style Lithium CR2032 battery is used to provide power to the
RTC and CMOS RAM for keep the data inviolate and effective. The RTC is
a real time clock device, which provides the date and time to system. The
CMOS RAM is used for keeping the information of system configuration,
so the system can automatically boot O/S every time.
lThe battery has a 3~5 years life if the system is not power up. When the
system power up, the power for the RTC and CMOS RAM is supplied from
the 3.3V power supply to extend the life of battery. The user can change a

5. Hardware Installation
M81E / M81DC2 / M812-FX Series User’s Manual 9
new battery to replace old one after it cannot work or BIOS does not keep its
settings.
lReplace only with the same or equivalent type recommended by the
manufacturer.
ll
ll
lBuzzer “BZ1”
lIt is a 5 volts onboard buzzer. When system has any abnormally state that
you will hear warnings through buzzer.
ll
ll
lPower Connector “ATX1”
It has a single lead connector with a clip on one side of the plastic housing.
There is only one way to plug the lead into the power connector “ATX1”. Press
the lead connector down until the clip snaps into place and secures the lead
on to the connector.

M81E / M81DC2 / M812-FX Series User’s Manual
10
lCMOS Memory Clear Header “JP1”
It is a 3-Pin header that if your system can not boot-up because you forgot
your password or the CMOS setting need to be reset to default values after
the system BIOS has been updated. The following instructions can be
performed to clear the CMOS and password.
lTurn off your system power, then place a jumper cap to short Pin 2-3 of
JP1 for 3~5 seconds.
lPut the jumper cap back to Pin 1-2 of JP1.
lTurn on your system power then access BIOS setup, please refer to BIOS
Configuration explain.
20
1
11
10
Assignment Pin Pin Assignment
+3.3V 11 1 +3.3V
-12V 12 2 +3.3V
GND 13 3 GND
PW ON/OFF 14 4 +5V
GND 15 5 GND
GND 16 6 +5V
GND 17 7 GND
-5V 18 8 PW-GOOD
+5V 19 9 +5VSB
+5V 20 10 +12V
Jumper Cap Function
Short Pin 1-2 Normal Operation
Short Pin 2-3 Clear CMOS
1
3

5. Hardware Installation
M81E / M81DC2 / M812-FX Series User’s Manual 11
ll
ll
lCPU FAN Connector “J2”
lThis is a 3-Pin connector that support cooling fan of 12 VDC/0.5A or less, when
the system goes into sleep state, fan should be shut down to eliminate audible
noise and reduce power consumption. You can monitor the fan speed by way of
W83627HF LPC I/O chip and the fan must come with a tachometer output.
lThe CPU and motherboard will overheat if there is no air flow across the CPU
and onboard heat sink. Damage may occur to the motherboard and the CPU fan
if these pins are incorrectly used.
ll
ll
lCD-IN Header “J6”
lJ6 is a 4-Pin 2.0mm audio connector. Connect the cable from a slim type
CD-ROM or DVD drive to J6.
Pin Assignment
1 GND
2 CD-L
3 GND
4 CD-R
14
1
3
Pin Assignment
1 GND
2 +12V
3Speed/RPM

M81E / M81DC2 / M812-FX Series User’s Manual
12
ll
ll
lIrDA Infrared Header “J11” ( Optional )
lIt is a 10-Pin Standard IR(SIR) and Consumer IR(CIR) headers. That support
an optional wireless transmitting and receiving infrared module. This module
mounts to a small opening on system case that support this feature.
lThis is an optional item and it must be connected to the CIR and SIR header
simultaneously for both wireless transmitting and remote control functions
through one external infrared module.
ll
ll
lTV System Format Header “JP4”
lThis motherboard has a 2-Pin header for TV system format setting. It
supports NTSC and PAL TV format.
lUse this jumper to setting the TV format that is integrated on this motherboard.
lPlace a jumper cap to short Pin 1-2 of JP4 that supported for PAL format.
lRemove the jumper cap from Pin1-2 and put the jumper cap back to Pin-
1 of JP4 that supported for NTSC format.
SIR CIR
Assignment Pin Pin Assignment
+5V 1 2 NC
NC 3 4 CIRRx
IRRx 5 6 +5Vsb
GND 7 8 GND
IRTx 9 10 NC
1
210
9
2
1
Jumper Cap Function
Short Pin 1-2 Support PAL format
Open Pin 1-2 Support NTSC format

5. Hardware Installation
M81E / M81DC2 / M812-FX Series User’s Manual 13
ll
ll
lTV S and AV Signal Out Port “S_Terminal, AV_Terminal”
lThe motherboard can display on a regular TV set using either an S terminal or an
AV terminal port for TV signal output by chrontel CH7008A video encoder, the
chip provides dedicated to converting digital PC output to a TV format.
lLocate an available S terminal signal cable or AV terminal signal cable, select
either cable to connect the TV-OUT signal from TV set to the rear panel of your
system.
Note : Make sure that connect S or AV terminal signal cable from system to
TV set, while you carrying out the TV-OUT function installation.
ll
ll
lAudio Header “J13”
lThis motherboard has a built-in audio header on the board. Some system
chassis have built-in audio port on the chassis that must be connected to a
audio header J13 on the motherboard. If you have this kind of system
chassis, connect the cable from the chassis-mounted audio port to the J13
header.
Pin Assignment
1, 2 GND
3 Luma Output / Red Output
4 Chroma Output / Green Output
Use this port send the video output of the
system to a AV terminal port on TV set.
Use this port send the video output of the
system to a S terminal port on TV set.

M81E / M81DC2 / M812-FX Series User’s Manual
14
lFollow the steps mentioned below to install the audio cable :
lOn the motherboard, locate the audio header J13.
lThen connect the cable from chassis-mounted audio port to the J13 header.
(The connector has a key pin to prevent you connecting them wrong.)
ll
ll
lAuxiliary USB Header “USB2 J24, USB 3 J22”
lThis motherboard has two built-in USB header on the board. Some system
chassis have built-in USB port on the chassis that must be connected to a
USB header J24 on the motherboard. If you have this kind of system chassis,
connect the cable from the chassis-mounted USB port to the J24 header.
Assignment Pin Pin Assignment
Mic-In 1 2 GND
Mic-In 3 4 NC
GND 5 6 NC (Key Pin)
Audio (L) 7 8 NC
NC 9 10 Audio (R)
1 9
2 10

5. Hardware Installation
M81E / M81DC2 / M812-FX Series User’s Manual 15
lFollow the step mentioned below to install the USB cable :
lOn the motherboard, locate the USB 2 header J24.
lThen connect the cable from chassis-mounted USB port to the J24 header.
ll
ll
lPhone Connector “J14”
lThis motherboard has a built-in phone connector on the board. Some
system chassis have built-in Phone port on the chassis that must be
connected to a phone connector J14 on the motherboard. If you have this
kind of system chassis, connect the cable from the chassis-mounted phone
port to the J14 connector.
Assignment Pin Pin Assignment
GND 1 2 +5V
GND 3 4 USB3N
USB2P 5 6 USB3P
USB2N 7 8 GND
+5V 9 10 GND
10 9
2 1

M81E / M81DC2 / M812-FX Series User’s Manual
16
lFollow the step mentioned below to install the phone cable :
lOn the motherboard, locate the J14 connector.
lThen connect the cable from chassis-mounted phone port to the J14
connector.
Note : If you has a Mini PCI modem card installed in the motherboard, you
must be plug the cable from the chassis-mounted phone port into J14
connector on the motherboard.
ll
ll
lRJ-45 Port “USB1 & LAN”
lIt is a 8-Pin RJ-45 port for you to connect to either Ethernet 10Base-T or
100Base-TX network. The motherboard provides an RJ-45 port to connect
Twisted Pair Ethernet(TPE) cable to Hub, orient the connector so the key is
aligned with the port, then push the connector into port until you hear a click
voice.
lThe RJ-45 port has two LED indicators which indicate the presence of station
Link and Activity status for installation verification and diagnostic purpose.

5. Hardware Installation
M81E / M81DC2 / M812-FX Series User’s Manual 17
lLink LED(Yellow): The Link LED is located on the left part of the port. It is
associated with the RJ-45 phone jack to indicate whether the twisted pair link
connected. When there is no coming network data packet on the jack, the jack will
start to detect periodical link-integrity pulses which should be sent by the device
connected at the other end of the link, on the received pair of the twisted-pair
cable. If link-integrity pulse is not detected, there is a link failure and the Link LED
will be turned off and the transmit and receive functions of the jack will also be
disabled. Table shows all the status of the Link LED, it is useful as a trouble-
shooting aid. Match the activity of LED on the port with one of the status indicated
in the table.
Off
State
On
Description
lNormal data packet are received or link-integrity pulse is detected.
lWhen no twisted-pair connected.
lWhen link test is disabled.
lNo power source into Hub.
lTwisted-pair is faulty.
lNon 10Base-T or non 100Base-TX device connected at the other
end of the twisted-pair.
lA twisted-pair wire exceeds the recommended length(Maximum
length is 100 meters).
Activity LED
(Green)
Link LED
(Yellow)

M81E / M81DC2 / M812-FX Series User’s Manual
18
lActivity LED(Green): The activity LED is located on the left part of the port. It
indicates the activity(transmit data) status of the system. The LED should be
blinking when the data packet being transmitted from the cable. Table shows
status of the activity LED.
ll
ll
lMini PCI Socket “U2”
lThe Mini PCI is a standard for integrated peripherals, with emphasis on
communications. Mini PCI defines a small card that is functionally equivalent
to a standard PCI expansion card. It was developed specifically for integrated
communications peripherals such as modems and network interface card
(NICs). The Mini PCI card maintains the essential electronics, functionality.
PC signals and software drivers of standard PCI expansion cards.
The motherboard build a Mini PCI of Type III is designed to provide the smallest
formfactor.
lIt allows for smaller size and placement flexibility, particularly in terms of
height or thickness of the integrated peripheral. You can use the Mini PCI
socket to install modem interface card that add new feature to your system.
lFollow the steps mentioned below to install the Mini PCI modem card:
lLocate Mini PCI socket U2 on the motherboard.
lAlign the Mini PCI modem interface card correctly. The edge connector
Off
State
Blink
Description
lData packet being transmitted
lPower off
lNo data package transmitted

5. Hardware Installation
M81E / M81DC2 / M812-FX Series User’s Manual 19
of the interface card has notches that match obstructions in the Mini PCI
socket. You must match the notches with the obstructions in order to install the
interface card.
lInsert the interface card at a 25 degree angle then snap the interface card into
place as shown in the illustration.
Step2: Install the PPGA370 Processor
lThe M81E/M81DC2/M812-FX series motherboard supports a wide range of
Intel PPGA370 processor include the Celeron and the Coppermine (FC-PGA).
It operate over 66/100/133MHz FSB.
lThis motherboard provides a PGA370 socket (370-Pin Zero Insertion Force ZIF
socket ) which a FC-PGA (Flip Chip Pin Grid Array)) or PPGA (Plastic Pin Grid
Array) package plugs into.
lFC-PGA : The package technology used on Coppermine -256K processors
for the PGA370 socket.
lPPGA : The package technology used for Intel Celeron-128K processors
which utilize the PGA370 socket.
lFollow the steps mentioned below to install the PPGA370 processor :
lOn the motherboard, locate Pin-1 on the processor and PGA370 socket, then
open the locking lever for processor.
Alignment Edge
This manual suits for next models
5
Table of contents
Other Delta Motherboard manuals