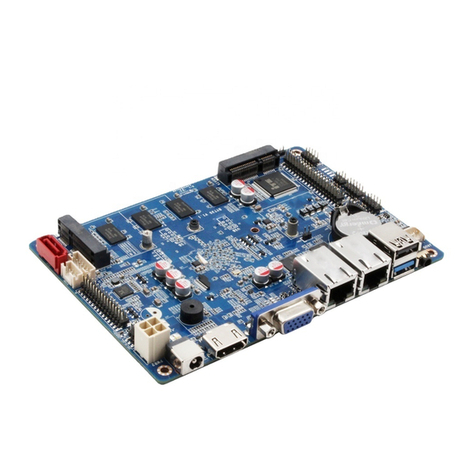
Maxtang ALN50 User manual

ALN50 Motherboard

Copyright
© 2023 Shenzhen Maxtang Computer Co., Ltd. All rights reserved. No part of this publication may be reproduced,
copied, stored in a retrieval system, translated into any language, or transmitted in any form or by any means,
electronic, mechanical, photocopying, or otherwise, without the prior written consent of Shenzhen Maxtang
Computer Co., Ltd (hereinafter referred to as “Maxtang”).
Disclaimer
Maxtang reserves the right to make changes and improvements to the products described in this document without
prior notice. Every effort has been made to ensure the information in the document is correct; however, Maxtang
does not guarantee this document is error-free.
Maxtang assumes no liability for incidental or consequential damages arising from misapplication or inability to use
the product or the information contained herein, nor for any infringements of rights of third parties, which may result
from its use.
All specifications are subject to change without notice. Please check with your regional sales. Products may not be
available in all markets.
Trademarks
All the trademarks, registrations, and brands mentioned herein are used for identification purposes only and may be
trademarks and/or registered trademarks of their respective owners.
*The terms HDMI, HDMI High-Definition Multimedia Interface, HDMI Trade dress, and HDMI Logos are trademarks
or registered trademarks of HDMI Licensing Administrator, Inc.

Shenzhen Maxtang Computer Co., Ltd
1
ALN50 Motherboard
User Manual
(Version 0.5)
Version:
NO.
Description
Issue Date:
V0.5
Initial Version
2023/06/01

Shenzhen Maxtang Computer Co., Ltd
2
Contents
ALN50 Motherboard........................................................................... 1
User Manual ....................................................................................... 1
(Version 0.5) ....................................................................................... 1
Chapter 1 Product Introduction ......................................................................................................3
1.1 Brief Introduction............................................................................................................3
1.2 Parameters ......................................................................................................................3
1.3 Connector Diagram.........................................................................................................4
1.4 Mini PCs I/O Interface .....................................................................................................5
Chapter 2 Hardware ........................................................................................................................7
2.1 Installations .....................................................................................................................7
2.2 Jumper Setting ................................................................................................................7
2.3 Memory Slots ..................................................................................................................7
2.4 Display Interfaces ............................................................................................................7
2.5 Storage Interfaces (Screen Printing: SATA, M.2_N).........................................................8
2.6 Expansion Slots (Screen Printing: M.2_E) .......................................................................8
2.7 USB Interfaces .................................................................................................................8
2.8 Type-C Interface ..............................................................................................................8
2.9 LAN ..................................................................................................................................8
2.10 Audio Interface..............................................................................................................9
2.11 Board Power Supply (Screen printing: PWR1) ..............................................................9
2.12 Power Button (Screen printing: PWON, FP_PWON) .....................................................9
2.13 CPU Fan (Screen printing: CPUFAN) ..............................................................................9
2.14 CMOS Clearance/Retention (Screen printing: CLR_CMOS) ..........................................9
Chapter 3 BIOS Setup ....................................................................................................................10
3.1 Entering the BIOS ..........................................................................................................10
3.2 Main Setup (BIOS info, Date, Time)............................................................................10
3.3 Advanced Settings.........................................................................................................11
3.4 Chipset ..........................................................................................................................19
3.5 Security..........................................................................................................................21
3.6 Boot...............................................................................................................................22
3.7 Save & Exit.....................................................................................................................23
Shenzhen Maxtang Computer Co., Ltd
3
Chapter 1 Product Introduction
1.1 Brief Introduction
The ALN50 motherboard is a 4x4 small form factor motherboard based on the Intel Alder Lake N Series
processor, designed to be used for Ultra-compact mini pcs and various IoT solutions.
1.2 Parameters
Intel Alder Lake-N Series:
⚫Intel® Processor N100, 4Cores 4Threads, Max Turbo Frequency: 3.40GHz, 6 MB Intel® Smart Cache,
TDP: 6W.
⚫Intel® Core™ i3-N305 Processor, 8Cores 8Threads, Max Turbo Frequency: 3.80GHz, 6 MB Intel® Smart
Cache, TDP: 15W
Memory: 1x SO-DIMM DDR4-3200, supports a single channel up to 32GB for maximum memory capacity.
GPU: Integrated Graphics based on CPU, display via 2x HDMI2.0b (Support HDCP2.2)
Storage: 1 x M.2 Key B slot, supports 2242/2280 SATA SSD, 1x FPC SATA3.0 interface
USB: 3x USB3.2 Gen 2, 1x USB2.0
Type C: 1xUSB-C Full-functioned (supports USB3.2 Gen 2 upstream/Display Port 1.4 Alt Mode).
Ethernet: Two RTL8125BG-CG Network Controllers on-board, Data Rate Per Port: 2.5Gbps
Audio: High-Definition Realtek Audio Codec,1xCTIA Audio Jack, supports Line-out+Mic-in.
Expansion: 1x M.2_Key E type 2230 for Wi-Fi Modules (supports PCIe/USB2/CNVi)
Other I/O: 1x FP_PWON Power button optional for remote wired control switch, 1x FPC RS232 COM header
optional (Serial Port).
Board Dimension: 120mm x 120 mm
Chassis Dimension:
Fan/Active: 129mm x 127mm x 52.5mm
Fanless/Passive: 127mm x 127mm x 45.6mm
Power: 12V DC-in
Working Temperature: -20℃~60℃

Shenzhen Maxtang Computer Co., Ltd
4
1.3 Connector Diagram
DC_IN
2*HDMI2.0
USB3.2
USB3.2
LAN1
LAN2
1*USB2.0
1*USB3.2
USB_C
1*SO-DIMM
M.2_2280/2242_SSD or 4G Module
M.2_WIFI_2230
SATA
AUDIO
PWON
JAT
COM1
CLR_CMOS
CPU

Shenzhen Maxtang Computer Co., Ltd
5
1.4 Mini PCs I/O Interface
NX-N100 Fanless Mini PC

Shenzhen Maxtang Computer Co., Ltd
6
MTN-ALN50 Smart Fan Mini PC

Shenzhen Maxtang Computer Co., Ltd
7
Chapter 2 Hardware
2.1 Installations
Please refer to the following steps for installations:
1. Read the user manual carefully to make sure all the adjustments on the ALN50 are correct.
2. Installing the Memory:
⚫Press the ejector tab of the memory slot outwards with your fingertips.
⚫Hold the memory module and align the key to the module with that on the memory slot.
⚫Gently push the module into the slot until the ejector levers return completely to the closed
position, holding the module in place when the module touches the bottom of the slot. To
remove the module, press the ejector levers outwards to unseat the module.
3. Installing the expansion cards:
⚫Locate the expansion slots and remove the screw, insert the cards into the slot at a 45-degree
angle then attach the screw to the expansion cards, gently press down on it then install the screw
back.
4. Connect all signal wires, cables, panel control wiring, and power supplies.
5. Start the computer and complete the setup of the BIOS program.
The board's components are integrated circuits and can easily be damaged by Electrostatic Discharge or
ESD; therefore, please follow the instructions:
⚫Hold the board's edge when handing, and do not touch onboard pins, components, or plug
sockets.
⚫When touching integrated circuit components (such as CPU, RAM, etc.), please wear an anti-
static wrist strap/glove to avoid electrostatic discharge damage to the board or other sensitive
components.
⚫Before installing the integrated circuits/sensitive components, place the sensitive components
in anti-static bags to keep them safe from ESD.
⚫Please make sure the power switch is OFF before plugging the power plug.
2.2 Jumper Setting
Please configure the jumpers according to your requirements before installing the hardware.
How to identify the first header of jumpers and pins: Observe the mark beside the jumper or pins and find
the header marked by “1” or bold line or triangular symbol. Or observe the rear panel and the header with a
square solder pad is the first header.
2.3 Memory Slots
The board provides one SO-DIMM DDR4-3200 slot and supports single channel, up to 32GB for memory.
Notes: Make sure to hold the memory module and align the key to the module with that on the memory
slot. While choosing a memory module, please make sure the module matches the board’s specifications.
2.4 Display Interfaces
The board features two HDMI2.0b interfaces (supports HDCP2.2).

Shenzhen Maxtang Computer Co., Ltd
8
2.5 Storage Interfaces (Screen Printing: SATA, M.2_N)
The board provides 1x M.2 Key_B slot, supports 2280/2242 SATA SSD or 4G module, 1x FPC SATA3.0
interface.
SATA Definition (Screen Printing: SATA)
Pin
Signal
1
GND
2
TX_N
3
TX_P
4
GND
5
RX_P
6
RX_N
7
GND
8
+5V
9
+5V
10
+5V
11
GND
12
GND
2.6 Expansion Slots (Screen Printing: M.2_E)
Screen Printing M.2_E: 1x M.2_Key E slot, type 2230 for Wi-Fi Modules (supports PCIe/USB2/CNVi)
2.7 USB Interfaces
The board supports 3x USB3.2 Gen2 and 1x USB2.0 interfaces.
2.8 Type-C Interface
The board supports 1xType-C(USB-C) Full-functioned (supports USB3.2 Gen 2 upstream/Display Port 1.4
Alt Mode).
2.9 LAN
The board features 2xRJ45 LAN interfaces with high-speed RTL8125BG-CG network controllers, data rate
per ports: 2.5Gbps.
Both of the Ethernet interfaces supports network wake-up (Magic packet wake-up), and the LAN1 supports
UEFI PXE network boot. To utilize UEFI PXE network boot, it is necessary to set (IPv4 PXE Support) to "Enabled"
in the BIOS.
The board also provides a LAN_LED pin header, enabling the extension of the (orange) status indicator
light to the chassis panel.
LED Status Indicators:
LI_LED Status (Green)
Function
ACT_LED Status (Orange)
Function
Always on
Network Connected
Flashing
Data transmission

Shenzhen Maxtang Computer Co., Ltd
9
2.10 Audio Interface
The board features a Realtek ALC897 High-Definition Audio Codec, 1xCTIA Audio Jack, supports Line-out
+ Mic-in.
2.11 Board Power Supply (Screen printing: PWR1)
The board supports 12V DC-IN for power supply with a DC specification of (5.5mm x 2.5mm).
2.12 Power Button (Screen printing: PWON, FP_PWON)
The board features a power button with a light indicator above (Blue LED); an optional FP_PWON remote
control switch (Screen printing: FP_PWON).
Optional Function FP_PWON Remote (Wired) Control Switch (Screen Printing: FP_PWON)
Pin
Signal
1
Power Switch Signal, Low Level for Power On/Off
2
GND
3
Negative Terminal for the Power Indicator Light
4
Positive Terminal for the Power Indicator Light
2.13 CPU Fan (Screen printing: CPUFAN)
The board features one auxiliary cooling fan socket (CPU fan socket powered at 5V by default).
CPUFAN (Screen Printing: CPUFAN)
Pin
Signal
1
GND
2
VCC
3
TAC
4
CTL
2.14 CMOS Clearance/Retention (Screen printing: CLR_CMOS)
CMOS is powered by onboard button batteries. Clearing CMOS will permanently remove the previous
system settings and restore the board system to original settings (factory settings).
Step 1: Turn off the PC and disconnect the power.
Step 2: Press CLR_CMOS for 15 seconds then disconnect.
Step 3: Restart the device, press the <DEL> button to enter the BIOS, load the optimal default value, save,
and exit the settings.
CMOS (Screen Printing: CLR_CMOS)
Setting
Function
Close
Clear CMOS
Please do not clear COMS when the PC is connected to power in case board damages.

Shenzhen Maxtang Computer Co., Ltd
10
Chapter 3 BIOS Setup
3.1 Entering the BIOS
1. Turn on the computer and press <Delete> entering the BIOS
2. After the computer is turned on, keep pressing F11, select enter Setup
3. BIOS Hotkeys:
F9: Restore to Factory setting.
F10: Save and Exit.
ESC: Exit
3.2 Main Setup (BIOS info, Date, Time)
When you enter the BIOS Setup utility the first things you will encounter is the Main Setup screen. Shown
below is the Main BIOS Setup screen. You can always return to the Main setup by selecting the Main tab.
System Date: Sets the date. MM/DD/YY format.
System Time: Set the time. HH:MM: SS format.

Shenzhen Maxtang Computer Co., Ltd
11
3.3 Advanced Settings
Select any of the items in the left frame of the screen. The advanced sections allow you to configure, improve
and set up system features according to the preference of the CPU Configuration. All Advanced BIOS Setup
options are described as follows.

Shenzhen Maxtang Computer Co., Ltd
12
3.3.1 Power & Performance
CPU-Power Management Control
GT-Power Management Control

Shenzhen Maxtang Computer Co., Ltd
13
3.3.2 CPU-Power Management Control
Intel® Speedstep®(TM):
Enhanced Intel SpeedStep® Technology enables the operating system to control multiple frequencies and
voltage points for optimal performance and power efficiency.
Intel® Speed Shift Technology:
An energy-efficient frequency control method by the hardware rather than relying on OS control.
Processor decision is based on the different system constraints for example Workload demand, and thermal
limits while taking into consideration the minimum and maximum levels and activity window of performance
requested by the operating system. Default enabled.
Turbo Mode
The Turbo mode refers to Nehalem’s “Integrated Power Gate” power management technology, which
allows running off some cores and adding power to the others so that they run at a higher frequency. The
capacity of the entire CPU remains unchanged, and the efficiency of the CPU is optimized. Default enabled.
C states
Idle States (C-states) are used to save power when the processor is idle. C0 is the operational state,
meaning that the CPU is doing useful work 100% load. C1 is the first idle state, C2 the second, and so on, where
more power-saving actions are taken for numerically higher C-states. C1 to C3 cuts off the clock inside the CPU,
and C4 to C6 reduces the CPU voltage. Default enabled.
Enhanced C states
C1 to C3 cuts the clock inside the CPU. C4 and C6 mode reduces CPU voltage. Features two way “Enhanced”
mode, enable by default.

Shenzhen Maxtang Computer Co., Ltd
14
3.3.3 GT-Power Management Control
Maximum GT frequency:
Maximum GT Frequency, Default max frequency.
Disable Turbo GT frequency:
Disable Turbo GT Frequency mode, Default disabled.
3.3.4 Thermal Configuration
Enable All Thermal Functions
CPU Thermal Configuration:
Unlocks the temperature setting, the “Tcc Activation Offset” is the temperature adjustment option, the

Shenzhen Maxtang Computer Co., Ltd
15
highest temperature is 105°C. Change the temperature by minus the number of degrees you wish to change.
For example, minus 0(105-0) to set the temperature at 105°C, minus 20(105-20) to set the temperature at 85°C.
(Please note the maximum supported temperature for the processor can be found on ark.intel.com.)
Platform Thermal Configuration
DPTF Configuration
3.3.5 Hardware Monitor
PC Health Status
The PC health status displays CPU temperature, system temperature, fan speed, and other relevant voltage
values. The above parameters have a certain range, and the system cannot run beyond these ranges.
⚫CPU Temperature
⚫System Temperature
⚫CPU Fan Speed
⚫VCore: Core Voltage
⚫VDDQ: RAM Voltage
⚫+3.3V: 3.3V
⚫+5V: 5V
⚫Smart Fan Function:
Automatic Mode
Full on Mode
Manual Mode

Shenzhen Maxtang Computer Co., Ltd
16
3.3.6 Watch Dog Configuration
Watch Dog Configuration
WDT Timeout Mode select: Minute or Second
3.3.7 S5 RTC Wake Settings
Wake system From S5: timing boot settings, disabled by default.
Fixed Time: Select Fixed Time and the system will wake on the Hr: Min: Sec specified.
Dynamic Time: Select Dynamic Time and the system will wake on a dynamic time.

Shenzhen Maxtang Computer Co., Ltd
17
3.3.8 USB Configuration
Legacy USB Support
Enable Legacy USB support. Disables legacy support if no USB devices are connected. Select enable will
keep USB devices available under UEFI’s support.
XHCI Hand-off
A workaround for OS without XHCI hand-off support. The XHCI ownership change should be claimed by
the USB XCHI driver.
USB Mass Storage Driver Support
Enable(default) or disable USB Mass Storage Driver Support.
USB transfer time-out
Time-out value for control, bulk, and interrupt transfers, default time:20 second.
Device reset time-out
USB mass storage device start unit command time-out, default time:20 second.
Device Power-up Delay
Maximum time the device will take before it properly reports itself to the host controller.

Shenzhen Maxtang Computer Co., Ltd
18
3.3.9 Network Stack Configuration
Network Stack
PXE Network boot setting, disabled by default.
3.3.10 NVME Configuration
The capacity and model of the SSD will be displayed under the option after the NVMe protocol SSD has been
installed.
Table of contents
Other Maxtang Motherboard manuals

Maxtang
Maxtang BYT-35 User manual

Maxtang
Maxtang AL-10 User manual

Maxtang
Maxtang FP50 User manual

Maxtang
Maxtang KL35 User manual

Maxtang
Maxtang TL10 User manual

Maxtang
Maxtang EHL-10 User manual

Maxtang
Maxtang DTJ6412-A User manual

Maxtang
Maxtang BYT60 User manual

Maxtang
Maxtang WL10 User manual

Maxtang
Maxtang EHL-35 User manual

Maxtang
Maxtang FP20 User manual

Maxtang
Maxtang DTJ6412-I User manual

Maxtang
Maxtang JSL-15 User manual

Maxtang
Maxtang WL35 User manual

Maxtang
Maxtang BYT-35 SBC User manual

Maxtang
Maxtang MITX-KL10 User manual

Maxtang
Maxtang APL-35 User manual

Maxtang
Maxtang BW-35 User manual

Maxtang
Maxtang FP-10 User manual

Maxtang
Maxtang SKD70 User manual