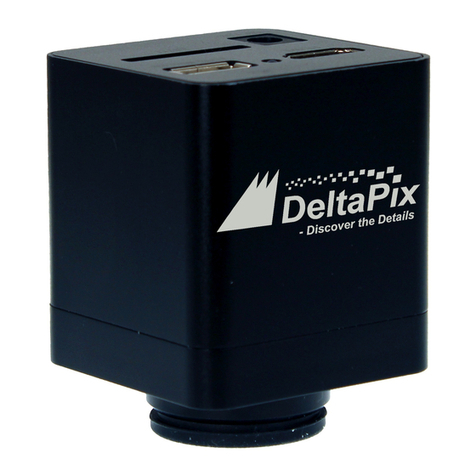
DeltaPix DpxView LE User manual

DeltaPix Camera & Software
Installation Manual
DpxView LE & DpxView Pro
DeltaPix Scientific Cameras

www.deltapix.com
1Preface
Thanks on behalf of the DeltaPix team for using DeltaPix scientific digital cameras.
DeltaPix wants to carry out its service and, with this preface, provide an introduction to the user manual, so
that every one can gain the fullest possible advantage of it.
The manual consist of three parts;
Part one begins with a description of DeltaPix software installation manual that will guide you through the
installation process.
Part two is the DpxView LE user and operational manual that invites you to learn how to manage and control
DeltaPix cameras to the greatest advantage. The manual will help you learning the flexibility and user
friendliness of DeltaPix software.
Part three begins with hints to install DpxView Pro package and the dongle. The second part of part three is
the DpxView Pro user and operational manual.
II

www.deltapix.com
2Installation Manual
DeltaPix Scientific Cameras provide a quick and easy means of displaying high quality video and capturing
high quality images on any USB 2.0 equipped desktop, laptop or embedded computer.
Because they are USB based, there is no need for a frame grabber. Instead, a single cable provides power,
full command and control and data transfer at speeds of up to 480 Mbit/s.
DeltaPix CMOS cameras can be directly powered through the USB connection. The Infinity X might need
more power than specified in the USB 2.0 documents, but can normally be powered directly. If your
computer doesn’t supply enough power, you can connect an external power supply, with the following
specifications; 6V regulated DC, plug with + in the center, outer plug diameter 5.6mm, inner plug diameter
2.1 mm.
DeltaPix CCD cameras may require an external power supply with 5V regulated DC. Using a wrong power
supply will result in burning the camera. Contact DeltaPix local distributor if you are in doubt of any
aspect.
2.1 Software Installation
The DeltaPix scientific USB 2.0 High-Speed camera you have just purchased is designed to operate out of
the box with minimal set-up.
Prior to plugging the camera into the computer, you must first install the software.
The software can be found on the CD-ROM that was shipped with your camera.
2.1.1 Minimum System Requirements
•Windows 2000 (Service Pack 3), or
•Windows XP (Service Pack 1)
•1.3 GHz Pentium III or higher (compatible)
•256 MB RAM
•15 GB free harddisk space
•USB 2.0 Port
Note: An USB 2.0 Port is required. The camera will not work on a standard USB1.1 port.
2.1.2 Installation Procedure
1. If you are using a 3 rd party USB 2.0 PCI add-in card, please ensure the add-in card is properly
installed on your computer before proceeding. We recommend that you use the built-in operating
systems USB 2.0 EHCI drivers provided by Microsoft rather than the device drivers supplied
with your 3 rd party card.
2. You must be logged into the computer with administrator privileges prior to continuing the
installation.
3. Close all application software that is running and then insert the DeltaPix Installation CD into your
CD-ROM drive. If you are using a software update downloaded from our website, please save the
setup file in a directory of your choice. Even that it is normally not necessary, you are advised at this
point to uninstall previous versions of the software and hardware.
III

www.deltapix.com
4. Double-click on “setup.exe” (the name on the setup program may vary), or wait a few moments for
the auto-play function to run the setup program automatically, if you are installing from a CD-ROM.
You should get the following windows dialog box:
5. Follow the onscreen prompts to install the software drivers and user application.
6. After the software has been installed, plug the USB 2.0 Camera into a free USB 2.0 High-Speed
port. If this is not your first installation and you have not uninstalled your soft- and hardware, you
should now be able to run the application called “DeltaPix camera”.
7. If this is your first installation, or you have uninstalled previous versions of hard- and software, the
Window’s New Hardware Wizard will pop-up detecting a new “Unconfigured Device”. Select Install
the software automatically from the options that are presented to you and click Next. A warning
may appear notifying you that the drivers have not been digitally signed by Microsoft. Click Continue
Anyway to continue with the driver installation. Then click Finish to complete the installation of the
drivers.
8. After a few seconds the Window’s New Hardware Wizard will pop-up again (if it doesn’t, disconnect
and reconnect the camera to the computer), detecting an “Infinity X USB 2.0 Camera” device. Select
Install the software automatically from the options that are presented to you and click Next. A
warning may appear notifying you that the drivers have not been digitally signed by Microsoft. Click
Continue Anyway to continue with the driver installation. Then click Finish to complete the
installation of the drivers.
9. You should now be able to run the application software called”DeltaPix camera” from your Start
menu and enjoy!
Note: Windows will require you to re-run steps 8 & 9 each time you plug the camera into a new USB 2.0
port. You must have administrator privileges the first time the camera is used on any given USB 2.0 port.
You may wish to repeat the installation steps at this time for all USB 2.0 ports on your computer.
IV

www.deltapix.com
3Technical Support
If you have problems installing or using the software or with general camera operation, you can e-mail our
technical support group at sup[email protected] or you can contact you local dealer or distributor to get
further direct support.
Please also visit our homepage at www.deltapix.com for software updates or other improvements for your
DeltaPix camera.
3.1 Sequence to install the DeltaPix software
1. Detach any DeltaPix camera (and dongle – for DpxView Pro) from your PC.
2. Important: Uninstall any already installed DeltaPix software; use the 'Control Panel', 'Add or
Remove Programs'.
3. Install the new package from your CD or from the DeltaPix web www.deltapix.com
4. Attach dongle, if any. If it is the first time the dongle is attached you should see a 'Found new
Hardware' sequence. Wait for the sequence to complete. Later dongle attachments will issue the
Windows 'ding-dong' sound.
5. Attach camera. If it is the first time the camera is attached you should see a 'Found new Hardware'
sequence. Wait for the sequence to complete. Later camera attachments will issue the Windows
'ding-dong' sound.
6. Start DeltaPix software.
If you don’t get an image, possible solutions could be;
•Reset all. Use menu “Camera | Reset | All”.
•Touch the color gains (due to an ‘old’ software bug), adjust the gains slightly.
3.1.1 Dongle Check
You can check that the dongle is properly installed, see
the device manager where the USB Dongle should
appear.
V

www.deltapix.com
3.1.2 Camera Check
You can check that the camera is properly installed, see the
device manager where the DeltaPix camera should appear,
in this example Infinity X camera.
3.1.3 External Power Supply
*Warranty void
•Use only external power supplies from DeltaPix.
•The CMOS cameras require a 6v regulated power and CCD cameras a 5v
regulated power.
Some combinations of PCs – especially laptops – and DeltaPix cameras may require an external power supply.
•We always recommend use of external power supply for all CCD cameras.
•If your Infinity X produces poor images, this may also indicate that external power is needed.
The following messages are also indicators of need for external power.
VI

www.deltapix.com
4Using the viewer software
After double clicking on the DeltaPix viewer icon, the viewer application starts, and if a camera is attached
you should immediately be able to see live video from the camera on your screen. An on line help manual is
available through the help menu.
VII

The contents of this document may not be copied nor duplicated in any form, in whole or in part,
without prior written consent from DeltaPix. DeltaPix makes no warranties as to the accuracy of the
information contained in this document or its suitability for any purpose. The information in this
document is subject to change without notice.
Copyright © 2003 - 2007 DeltaPix. All rights reserved
DeltaPix Camera Software
User and Operational Manual
DpxView LE
DeltaPix Scientific Cameras

DeltaPix Camera Manual DpxView LE
© DeltaPix 2007 – VII Page 2
Table of Contents
1THE DELTAPIX VIEWER............................................................................................................................. 5
2INITIAL VIEW................................................................................................................................................. 6
3MAIN MENU .................................................................................................................................................. 7
3.1 File Menu................................................................................................................................................... 7
3.1.1 Save Snapshot...................................................................................................................................7
3.1.2 Print Snapshot....................................................................................................................................7
3.1.3 Work Space........................................................................................................................................8
3.1.4 Exit......................................................................................................................................................8
3.2 View menu................................................................................................................................................. 9
3.3 Image menu.............................................................................................................................................. 9
3.4 Camera Menu..........................................................................................................................................10
3.4.1 Sensor Size......................................................................................................................................10
3.4.2 Exposure...........................................................................................................................................11
3.4.3 White Balance..................................................................................................................................11
3.4.4 Snapshot Settings for “CCD cameras” ...........................................................................................11
3.4.5 Black Frame Compensation............................................................................................................13
3.4.6 Shading Correction ..........................................................................................................................14
3.4.7 Frame Average ................................................................................................................................15
3.4.8 Binning..............................................................................................................................................15
3.4.9 Zoom.................................................................................................................................................16
3.4.10 Frame Rate Mode............................................................................................................................16
3.4.11 Frame Rate.......................................................................................................................................16
3.4.12 Fast Focus Mode .............................................................................................................................17
3.4.13 Visualized Mode...............................................................................................................................17
3.4.14 Preview Demosaicing......................................................................................................................17
3.4.15 Color Correction (Infinity X & DP Camera Series)..........................................................................17
3.4.16 Color Correction (Invenio Camera Series)......................................................................................17
3.4.17 Flip Image.........................................................................................................................................17
3.4.18 Reset camera...................................................................................................................................18
3.5 Settings Menu.........................................................................................................................................18
3.5.1 Options..............................................................................................................................................18
3.5.2 Advanced..........................................................................................................................................20
3.5.3 Magnification ....................................................................................................................................22
3.5.4 Light Source Frequency...................................................................................................................22
3.5.5 Windows...........................................................................................................................................23
3.6 Help menu...............................................................................................................................................23
4BUTTON TOOLBAR...................................................................................................................................24
4.1 Configuring the button toolbar............................................................................................................24
4.2 Exposure bar..........................................................................................................................................25
4.3 Calibration bar and magnification control.........................................................................................26

DeltaPix Camera Manual DpxView LE
© DeltaPix 2007 – VII Page 3
4.3.1 Configuring Magnifications ..............................................................................................................26
4.3.2 Calibrate Objective...........................................................................................................................28
4.4 Focus Tool..............................................................................................................................................30
4.5 Camera Control Buttons.......................................................................................................................31
4.6 Useful Buttons........................................................................................................................................32
5RIGHT CLICK MENU..................................................................................................................................34
5.1 Grab Image..............................................................................................................................................34
5.2 Resolution...............................................................................................................................................34
5.3 Sensor Region........................................................................................................................................34
5.4 Exposure Submenu...............................................................................................................................35
5.5 White Balance Submenu......................................................................................................................35
5.6 Black Frame Compensation Submenu..............................................................................................36
5.7 Shading Correction ...............................................................................................................................36
5.8 Camera Settings Toolbar Visible.........................................................................................................37
5.9 Video Capture Toolbar Visible “Recording AVI”..............................................................................37
5.10 Main Menu...............................................................................................................................................39
5.11 Button Toolbar .......................................................................................................................................39
5.12 Auto-hide Button Toolbar.....................................................................................................................39
5.13 Window Header......................................................................................................................................39
5.14 Status Bar................................................................................................................................................39
5.15 Live Image...............................................................................................................................................39
5.16 Tools ........................................................................................................................................................39
5.17 Full screen video preview.....................................................................................................................39
5.18 Zoom........................................................................................................................................................40
5.19 Exit Program...........................................................................................................................................40
6CAMERA TOOLBAR..................................................................................................................................41
6.1 Capture Button.......................................................................................................................................42
6.2 Output Window ......................................................................................................................................42

DeltaPix Camera Manual DpxView LE
© DeltaPix 2007 – VII Page 4
6.3 Camera Settings Bar .............................................................................................................................42
7STATUS BAR..............................................................................................................................................43
8HIGH RESOLUTION IMAGE VIEWER .....................................................................................................44
8.1 File Menu.................................................................................................................................................44
8.2 View Menu...............................................................................................................................................44
8.3 Zoom Menu.............................................................................................................................................45
8.4 Effects Menu...........................................................................................................................................45
8.5 Batch Process Menu.............................................................................................................................46
8.6 Undo Menu..............................................................................................................................................46
8.7 Camera Window.....................................................................................................................................46
8.8 Right Click Menu....................................................................................................................................46
8.9 Text Annotation......................................................................................................................................46
8.10 Black Level Clamp.................................................................................................................................47
9SHORTCUTS...............................................................................................................................................48
9.1 Camera Window.....................................................................................................................................48
9.2 Output Window ......................................................................................................................................48
9.3 General ....................................................................................................................................................48

DeltaPix Camera Manual DpxView LE
© DeltaPix 2007 – VII Page 5
1The DeltaPix Viewer
The DeltaPix Viewer is a user-friendly tool allowing you take full advantage of your DeltaPix camera.
The software contains the basic functionality to control the camera, acquire high quality images and save the
images.
In many cases this software is all you need to enter the world of digital microscopy.
The DeltaPix Viewer allows the user to capture, view, manipulate, save and load images in various formats
like windows bitmap, jpeg, jpeg2000, DICOM and TIFF. It allows complete camera control - settings as gain,
exposure time, white balance, color correction and many more. Furthermore, AVI recording, simple text
annotations, focus tool, zoom and pan and individual user profiles. The user interface can be configured to
the user’s individual need, allowing simple and intuitive operation.
Advanced functions such as "Dark Frame Compensation", "Spot White Balance", "Auto White Balance",
"Converging Auto Exposure", "Pixel Binning", "Frame Averaging", “Microscope Optics Calibration" and
“Shading Correction” are also available.
TWAIN driver for interface to 3rd party programs, and DirectX support is also available.
The software and updates for the software can be downloaded directly from our homepage. Go to
http://www.deltapix.dk/new_downloads.htm for more information.

DeltaPix Camera Manual DpxView LE
© DeltaPix 2007 – VII Page 6
2Initial View
When the DeltaPix viewer is started the first time after the program has been installed, your screen looks like
this:
At the top of the window, you will see the Main Menu bar. Below the Main Menu, a configurable button bar,
and in the bottom a status bar.
Windows Header.
Can be enabled or disabled
from e.g. the View menu.
Main menu.
Can be enabled or disabled
from e.g. the View menu.
Configurable Toolbar.
Buttons and tools can be
individually enabled or disabled.
This allows the user define a
personal view.
Status bar.
Miscellaneous status information is shown in this bar.
Can be enabled or disabled from e.g. the View
menu.
Image Field.
Displays live image from the attached
DeltaPix Camera.
Resolution and zoom/pan can be
selected via the menus.

DeltaPix Camera Manual DpxView LE
© DeltaPix 2007 – VII Page 7
3Main Menu
The Main Menu, figure to the right, has the
following functions:
File, View, Image, Camera, Settings and Help.
3.1 File Menu
Several functions are available in the File Menu:
Save Snapshot, Print Snapshot, Workspace and Exit
functions.
3.1.1 Save Snapshot
The Save Snapshot function will grab a snapshot of the
live video image shown on the screen and open the Save
As window, figure to the right.
Select the folder and type the file name you wish to
assign to the snapshot. The program will automatically
suggest the most recent filename used, if this feature is
enabled in the Settings menu.
Finally, in the Save as type drop-down menu, select the
appropriate file format.
Note: The JPEG 2000-format will result in a superior image quality, compared to standard JPEG. However,
when saving snapshots in JPEG 2000-format, a certain delay must be expected due to an increase in CPU-
load, especially when using a computer with limited performance.
3.1.2 Print Snapshot
Print Snapshot will open the Camera Print Image window,
allowing you to adjust various settings, prior to print the
snapshot.

DeltaPix Camera Manual DpxView LE
© DeltaPix 2007 – VII Page 8
3.1.3 Work Space
The Work Space function is a system
setup for your personal applications.
It enables you to save your preferred
camera settings into a profile file for
later retrieval and use with a similar
application.
Several profiles matching different
applications can be saved under
individual file names and folders.
To reload the settings at a later stage, activate the
Open function and select the appropriate Profile
file.
When the appropriate Profile has been selected
and the Open button, circled in red, has been
pressed, the following message is displayed.
Pressing Yes will upload and restore the settings
previously saved in the specified Profile file.
Select No to cancel and continue with the current
settings.
All settings are stored with the profile.
Because the visible buttons in the button toolbar are also saved, the look-and-feel is also stored with the
profile.
3.1.4 Exit
The Exit function will close the DeltaPix Viewer.

DeltaPix Camera Manual DpxView LE
© DeltaPix 2007 – VII Page 9
3.2 View menu
The following options are available in the View
menu:
•Set if the Camera Settings Toolbar
should be displayed or hidden.
•Set if the Video Capture Toolbar should
be displayed or hidden.
•Set if the Main Menu Toolbar should be
displayed or hidden.
•Set if the Button Toolbar should be
displayed or hidden.
•Set if the Auto-Hide Button Bar should be active.
•Set if the Window Header should be displayed or hidden.
•Set if the Status Bar should be displayed or hidden.
•Set if the Live Image function should be active or disabled.
•Click on the "histogram" function. The histogram of the current image is displayed. The graphic
zone appears with the resulting histogram.
•The Tools entry comprises an overall DICOM Viewer with limited functionality. The viewer uses the
de-facto standard for viewing medical images. Contrast and brightness can be adjusted by
dragging the mouse over the image.
•Set if you would like to view a Full Screen.
3.3 Image menu
The Image menu includes the same features as
located in the top of the Camera Toolbar:
•Starting the DeltaVu capture function.
•Starting the captured image viewer.
•Increasing / decreasing the resolution
of the DeltaVu capture.

DeltaPix Camera Manual DpxView LE
© DeltaPix 2007 – VII Page 10
3.4 Camera Menu
The Camera Menu shown to the right.
3.4.1 Sensor Size
You can select the active sensor region.
The selected region is always centred on
the mid point of the sensor, leaving the
outer parts unused. Reducing the sensor
area will allow for higher frames rates
and smaller file sizes.
3.4.1.1 Sub Sampling
Selection the “1280 x 1024 x2 sub sampled” uses every second pixel, thus allowing display from the entire
sensor, but at a lower resolution. Frame rates and images file sizes corresponds to the “640 x 480” selection.
The advantage of the sub sampling is the large field of view with high frame rate – the resolution is however
somewhat reduced.
Examples:
•With sensor region size 1280 x 1024 frame rate can be 15fps, only limited by the USB bandwidth
(assuming exposure time less the 1/15s); the captured image file size is 3.75 MB (3750 KB).
•With sensor region size 1280 x 1024 (2x sub sampled) the frame rate can be 51 fps, again limited
by the USB bandwidth (and now assuming exposure time less the 1/51s), the resulting image file
size is four times smaller than the original size. In numbers 960 KB.

DeltaPix Camera Manual DpxView LE
© DeltaPix 2007 – VII Page 11
3.4.2 Exposure
The Auto entry will toggle the
exposure function from
Automatic to Manual exposure
or vice versa.
The Converge entry will
initially set the exposure
function to Auto, until the
picture has settled, leaving the
exposure function in Manual
mode.
Several choices are available in the Max Auto Exposure Time, where you can select between 50ms, 100ms,
500ms, 1000ms or No Limit.
The Selective Auto Exposure Range is recommended to be closed to 50ms, because if there is any change
in light source, the exposure time will not take a long time to be adjusted from 50ms to xx ms. However, if
the exposure range was selected to “No Limit”, it will take some time to come down from 6s to xx ms.
3.4.3 White Balance
The Auto entry will toggle the
White Balance control from
Automatic to Manual mode or
vice versa.
The auto white balance uses the entire image as target. The best result is achieved by removing the
specimen form the light path, and enable auto exposure. When the colors have settled, disable the auto
exposure, and insert the specimen in the light path.
One Shot Spot function gives you the possibility of using a single spot as reference for the white balance
function, by placing a square over a reference area in the image. This reference can be any color, chosen in
the Color Target sub-menu. Normally only white or grey should be used, unless you are very sure of the
color you want to set as a reference.
The best result, when using the spot white balance is achieved by selecting a non-saturated gray area,
Selecting an area where one or more of the color channels are saturated may result in a weird color
balance.
Automatic or Manual Exposure Control and White Balance; the more pro-active users will tend to use the
manual mode, whereas the less pro-active will tend to use the automatic mode and let the software make
the decisions for them.
Either way, there is something for everyone.
3.4.4 Snapshot Settings for “CCD cameras”
DeltaPix CCD cameras offer snapshot capability. This means that exposure and gain snapshot settings
different from the preview settings can be used.
This is very useful e.g. for acquiring fluorescence images with long exposure. It is possible to have a relative
quick - but lower quality - preview frame rate by setting the gain high and enabling binning.

DeltaPix Camera Manual DpxView LE
© DeltaPix 2007 – VII Page 12
Activate the snapshot window from the menu “Camera | Snapshot Settings” or Ctrl+Alt+C.
The snapshot window makes it easy to set the snapshot parameters to acquire an image like in the preview,
but in maximum quality, low gain (for low noise) and no binning (for high resolution).
The arrow button also considers use of preview binning, and adjusts exposure or gain accordingly.
It is recommended to use the “Quality” option while transferring parameters to the snapshot window.
Different parameters can be favoured:
a. As preview, Transfers the preview parameters directly.
b. Quality, Adjusts exposure, keeps gain low manually.
c. Speed, Adjusts gain, adjust exposure manually
Please note that binning cannot be used when acquiring snapshots.
The recommended way to use DeltaPix CCD cameras for fluorescence applications where it is possible to
have both a high frame rate, and a high exposure time for still image capture at the same time:
1. Increase the gain to almost max from the Camera Settings Toolbar.
2. If the image is not bright enough yet, select binning x2 from Camera / Sensor Region menu.
Decrease gain or exposure if the image gets too bright. Remember to do a spot white balance.
3. Select snapshot settings from Camera / Snap Shot Settings menu.
4. In the snapshot settings menu, set the gain to 2.5.
5. In the snapshot settings menu, click on the calculate button.
Now it is possible to have both a live image with high frame rate, and at the same time to capture snapshots
with long exposure times (several seconds) and low noise.
Notice that the live image will have a high noise level, but the snapshot will have low noise because of
the long exposure time. Every time the exposure time or gain is changed in the live image, the
calculate button in the snapshot settings menu must be changed, in order to capture still images with
the same brightness level as the live image.
The arrow button transfers Exposure,
Gain and binning preview information to
the snapshot window. Appropriate
values for snapshot exposure and gain
are suggested.
Acquire snapshot
Setting the sensor clock affects the noise level slightly.
“Normal Sensor Clock” is recommended.

DeltaPix Camera Manual DpxView LE
© DeltaPix 2007 – VII Page 13
3.4.5 Black Frame Compensation
There are two purposes for the Black Frame
Compensation function.
When extended exposure times (and high gain
settings) are used, some of the pixels will show static
“noise” spots, resulting in blue, green or red pixels
being permanently turned on; so-called “Hot Spots”.
Hot spots are usually a result of leakage current
in the physical sensor pixels.
The problem with pixel leakage is that it is highly
dependant on temperature, and so is difficult to
eliminate reliably.
Image captured with exposure time 1.8s. It shows
annoying red, green and blue hotspots
Capturing a dark reference image (with nothing but
the “Hot Spots” displayed) may help eliminating hot
spots.
Use the ‘Capture’ menu option in the main menu, the
‘Capture’ menu in the right click menu, the shortcut
or use the button in the button bar.
Prepare the black frame by shutting off all light or
block the light path in the microscope. When this has
been done, press the button OK.
Exposure time is 1.8s
A new window informing that the Black Frame Compensation
Frame has been captured will open.
When the black frame image has been captured,
illumination may be turned on again and finally when
selecting the Enable entry the static noise is
eliminated from the image.
Due to the high temperature dependency of the hot
spots, you may have to repeat the procedure after a
while.
Image captured with exposure time 1.8s. Enabling
black frame compensation has eliminated hotspots.
This manual suits for next models
1
Table of contents
Other DeltaPix Digital Camera manuals
Popular Digital Camera manuals by other brands
Olympus
Olympus X-560WP - Digital Camera - Compact Bedienungsanleitung
Burg Wächter
Burg Wächter Santec SFC-241KDIM Quick installation guide
Silent Witness
Silent Witness SW111 manual

XINDAO
XINDAO XD P330.501 manual
Kodak
Kodak Smile user guide
Rugged Interactive
Rugged Interactive SelfieCam Order and Installation Manual
