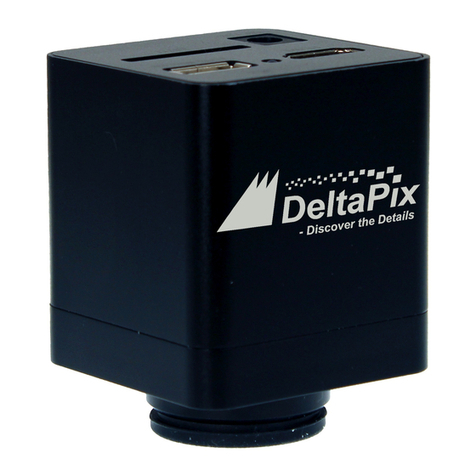
DeltaPix HDMI16MDPX User manual

1
HDMI16MDPX User Guide
Thank you for purchasing a DeltaPix HDMI camera. To insure safety and
obtain optimum performance,please familiarize yourself fully with the use of
this camera. We recommend that you read the manual thoroughly before
operating the camera.
Chapter 1 Introduction...................................................................................................................2
Chapter 2 System Standard Items...............................................................................................2
Chapter 3 HDMI Operation...........................................................................................................3
Chapter 4 Connect HDMI camera to PC..................................................................................11
Cleanliness....................................................................................................................................12
Maintenance..................................................................................................................................12

2
Chapter 1 Introduction
Chapter 2 System Standard Items
One HDMI camera,
One 12V/2A power adapter,
One HDMI cable (2-meters length),
One SD card (16Gb capacity, class 10),
One mouse (with 1.5-meters cable),
One USB2.0 cable (gold plated connector).
1. USB interface:
A: Connect a mouse to the USB port. Use the
mouse to control the camera directly.
B: Connect the USB port to the PC to make
the camera work as a Driver-Free camera.
Use InSight Basic software with dongle to
control it (similar as to using the other USB
cameras).
Note: No driver installation is needed when connecting a/the HDMI camera to
a/the PC via USB port.
HDMI interface:
Use the HDMI cable to connect a/the HDMI camera to the monitor. Image data
is transferred and displayed on the monitor according to the HDMI protocol.
3. Power interface:
Please use the provided 12V/2A power supply. When power is plugged in, the
red light is on. When the camera is turned on, the blue light is on.
4.ON/OFF key:
Press and hold the ON/OFF key until the blue light is on or off to turn the HDMI

3
camera on or off.
5.SD card:
To get faster and more stable data transfer, it is recommended to use the
included Class10 SD card.
6.C mount:
Standard C-mount optical port.
7. Anti-dust seal:
Please remove the seal when
using the camera for the first
time.
The seal was placed on the
camera optical port when it left
the factory. It is used to avoid
the dust accumulation during
transportation.
Chapter 3 HDMI Operation
Step 1. Connect the camera.
1. Plug in the 12V/2A power supply. Use the HDMI cable to connect the
camera to the monitor. Press and hold the ON/OFF key until the blue light is
on.
2. Connect the mouse to the USB port. Move the cursor to make the settings
appear on the screen.
3. Insert the SD card and capture images or videos directly on the SD card.
Step 2. Move the cursor to the left side of the screen.

4
When moving the cursor to the left side of the screen, ‘Capture’ and ‘Setting’ icons will
appear (See image 1). Click ‘Setting’ to get parameter setting menu (See image 2).
Image 1. Image 2.
Selectable languages, choose between English, Chinese, German, Italian, French,
Japanese and Korean.

5
Step 3. Move the cursor to the right side of the screen.
When moving the cursor to the left side of the screen, calibration and viewing settings
menu will appear (See image 3) Image 3.

6
How to do calibration and measurement in HDMI mode:
Basic steps:
1. Click on the calibration icon to get the calibration table.
2. Move the cursor away from the calibration table to start the calibration.
a) The live image should show a calibration slide or a specimen of known dimensions.
b) Draw a line to get a reference length, and enter the length value in the calibration table
There are five unit options available: MIL, CM, MM, UM and INCH.
3. Select the objective magnification in , and it can also fill in user
defined Mag. value if needed.
a) This data only needs to be entered if the user wishes to use the same camera to
capture images at different objective settings and to perform measurement.
In this case, there is no need to create calibration files for images at all the objective
settings, just change “Mag.” to get the corresponding calibration file.
b) If the user need to use one objective in application, select “N/A”
c) If there is no suitable objective magnification from the list, the keyboard can be used
to add an extra group mag. value directly.
4. By entering a name for the newly created calibration file it is possible to create 10

7
groups of calibration files.
5. Click to complete the calibration settings.
6. Click to go to the image measurement page.
7.Right-click anywhere on the live image to get the measurement menu.

8
1 Scale Bar Turn the scale bar on/off on the image.

9
2
Coordinate
Get the coordinates of the selected points.
3
Line
Arbitrary, horizontal and vertical line measurement.
4
Freehand Line
Get a freehand line length.
5 Rectangle
Measure rectangle perimeter and area.
Possible to obtain the data of height, width, perimeter or
area.
6 Circle
Center Point: Use center point and point on the circle to
draw a circle.
Two Point: Draw a circle according to a diameter.
Three Point:Use 3 points on the circle to draw a circle.
Optional to get the data of radius, perimeter or area.
7 Polygon
Measure polygon perimeter and area.
Optional to get the data of perimeter or area.
8 Perpendicular Measure the perpendicular length.
9
Concentric circles
Get the diameters of two concentric circles.
10
Bicircle
Get the distance between the center points of two circles.
11
Angle
Measure angles.
12 Setting
1)Set the measurement line width, color and font color.
2)Magnifier On/off: Switch the magnifier on/off.
When the magnifier is switched on, the area where the
cursor is located will be zoomed in on and placed at the
corner to help accurately locate the measurement point.
13 Save Results
Select to export the measurement results to an excel or
text file.
The exported results will be saved in the
SD card\MEASURE folder.
14 Set Scale It allows the creation of 10 groups of calibration files in the
calibration table, and the user can select 10 groups files to
perform measurements.
15
Exit
Exit measurements.
Note:
All the measurements on the live image will be removed when exiting the measurement.
The measurement results can be saved on the captured images when clicking on the
capture button.

10
Step 5. Check the photo album and videos
1. Check the album and delete the pictures you do not wish to keep.
2. Check the video and delete the video you do not wish to keep. To delete
videos successfully, make sure it is not in use.

11
Step 6. Compare preview with the captured images.
Chapter 4 Connect HDMI camera to PC
1. Install DeltaPix Insight
2. Connect the dongle to a USB port
3. Use USB cable to connect the HDMI camera to the PC.
4. Plug in the 12V/2A power supply. Press and hold the ON/OFF key until
the blue light is on to turn on the camera.
5. No driver installation is needed when the camera is connected to the
PC.

12
Cleanliness
When the camera is NOT in use, please screw on the dust-proof cap to avoid
dust from entering the sensor and the IR filter.
If dust is detected on the filter or the camera sensor, please DO NOT open the
camera or attempt to clean it. Please contact our support team to get further
advice.
Maintenance
please contact DeltaPix customer support team for any maintenance if
needed.
CAUTION: DeltaPix is not liable for any damages arising from abuse or
improper use of the equipment, failure to follow adequate safety precautions,
or unauthorized tampering with the equipment.
Table of contents
Other DeltaPix Digital Camera manuals
