13
1
2
3
4
5
6
7
8
9
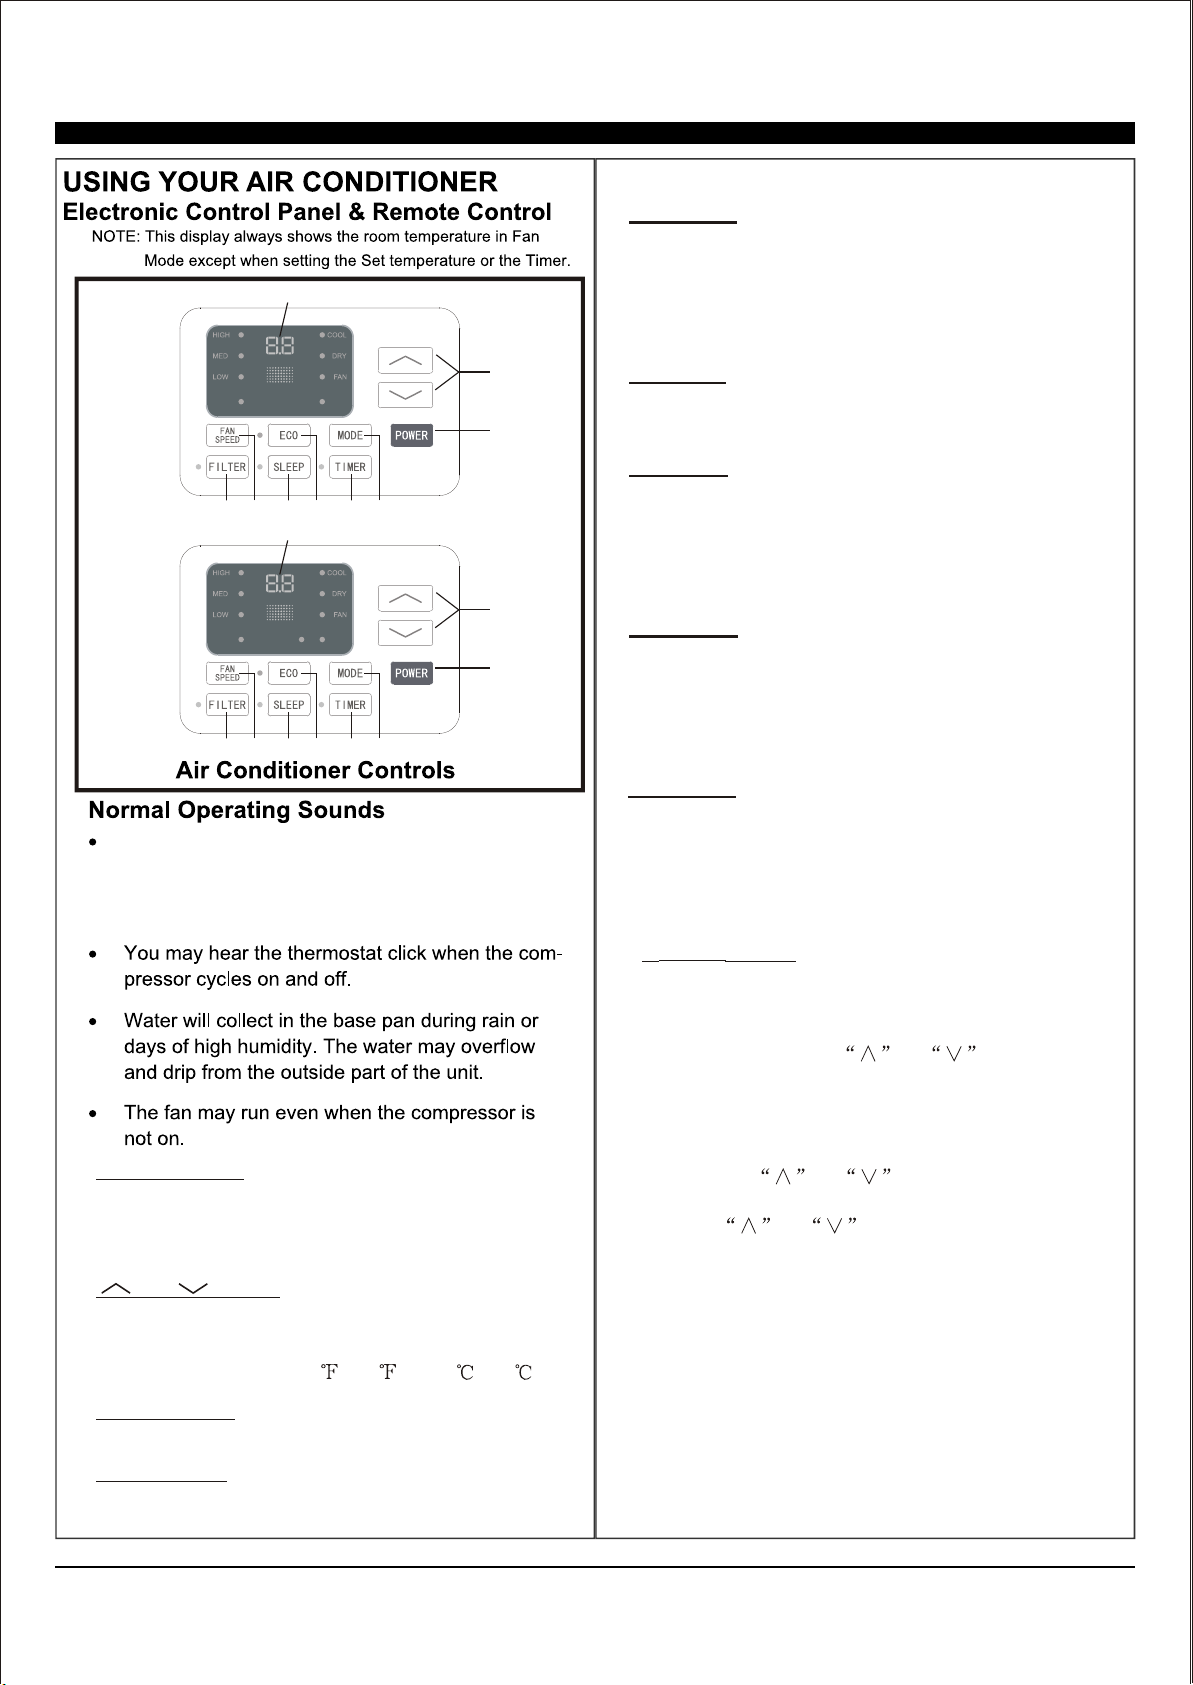
1. Digital Display: Without timer setting, the
operation mode is Cooling, Dry, Fan, Heat and
Auto, and the set temperature will be displayed.
Time will be displayed under timer setting.
2. and Button: Use these buttons on the
control panel and remote to increase or decrease
the Set Temperature or Timer.
Temperature range: 61 ~88 or 16 ~31 .
3. Turn the air conditioner on andPowerButton:
off.
4. Mode Button: Press the mode button to cycle
through the various modes: Cool, Dry, Fan and
Auto, or Heat.
AUTO
SPEED
AUTO
MODE
1
2
3
4
5
6
7
8
9
HEAT
AUTO
SPEED
AUTO
MODE
For Cooling model
For Heating model
Cool Mode: The cooling function allows the air
conditioner to cool the room and at the same time
reduces humidity. Press the MODE button to activate
the cooling function. To optimize this function, adjust
the temperature by pressing the up and down arrows
and the speed by pressing the Fan Speed button.
Dry Mode: This function reduces the humidity of the
air to make the room more comfortable. Press MODE
button to set the DRY mode.
Fan Mode: This mode will only circulate the air.
Press MODE button to select FAN MODE. Pressing
the FAN SPEED button allows you to change the fan
speed setting from HI, MED and LO. If using the
remote control, it will store the fan speed setting from
the most previous use.
Auto Mode: In AUTO mode the unit automatically
chooses the fan speed and the mode of operation
(COOL, DRY or FAN). In this mode the fan speed and
temperature are set automatically according to the
room temperature (Room temperature is determined
by the temperature sensor located in the unit.)
Heat Mode: (if applicable) The heating function
allows the air conditioner to heat the room. Press the
MODE buttons to activate this function. Adjust
temperature and speed with the up and down arrow
keys.
You may hear a pinging noise caused by water
hitting the condenser on rainy days, or when
the humidity is high. The design features help
remove moisture and improve efficiency.
5.
Timer
Button: Use these buttons on the control
panel and remote to set the Timer.
Timer Off: The timed stop is programmed by
pressing the TIMER button. Set the time by
pressing the button or
, set the temperature with pressing
Timer On:
button first
the button or
with pressing the
button or .
stop
until your
desired stop time is displayed, then press TIMER
button again.
When the unit is off, press TIMER
. Press TIMER button
a second time, set the stop time
Press TIMER button a
third time, confirm your settings and stop time.
The display will show the time your machine will
automatically turn on.
Note: It can be set to automatically turn off or on
in 0.5-24 hours. Each press of the
buttons will increase or decrease the timer. The
Timer can be set in 0.5 hours increment below 10
hours and 1 hour increment for 10 hours or
above. The SET light will turn on while setting.
To cancel the set function, press the TIMER
button again.


