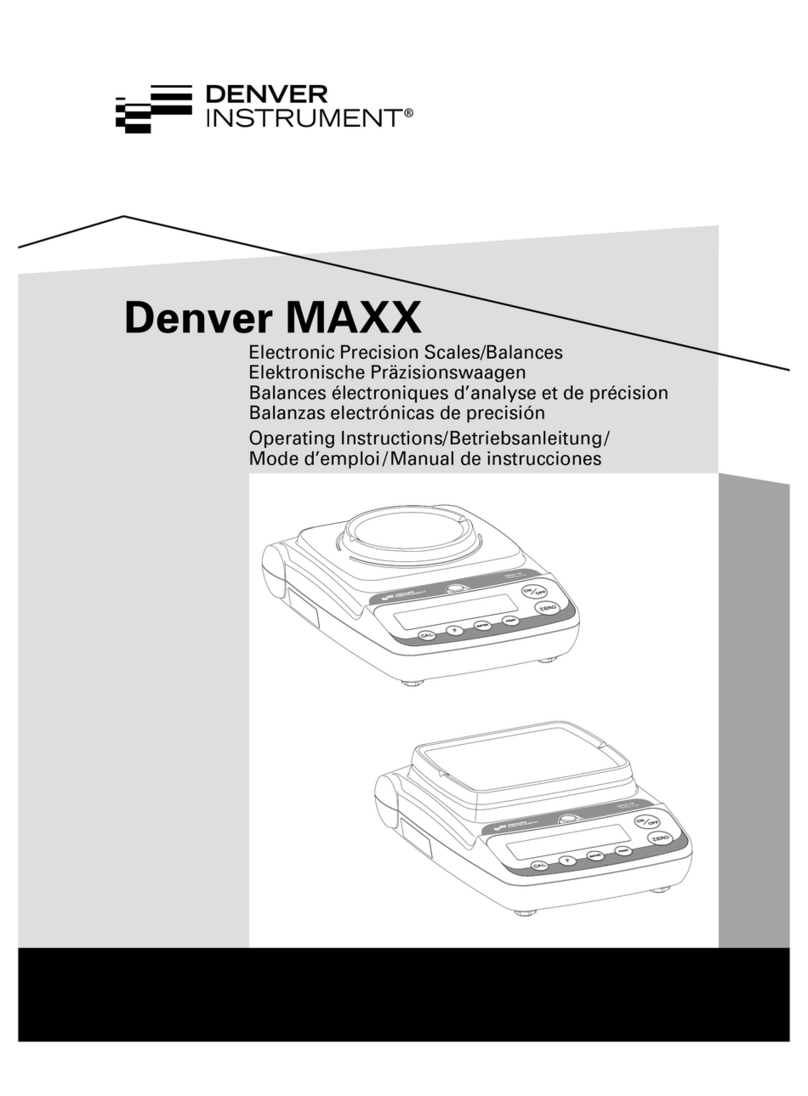
Denver Instrument Tl-series User manual

Denver Instrument Company
TL-Series
Toploading Balances
Operation Manual
602174.1
Rev. G

Declaration Of Conformity
Denver Instrument Company declares that the following products:
TL-Series Balances
conform to the European Union Council Directives and other stan-
dards listed below:
73/23/EEC, “Low Voltage Directive”
EN 61010-1, “Safety requirements for electrical equipment
for measurement, control, and laboratory use.
Part 1. General requirements”
89/336/EEC, “Electromagnetic Compatibility Directive”
EN 55011, Group 1, Class A, “Limits and methods of mea-
surement of radio disturbance characteristics
of industrial, scientific, and medical (ISM) radio-
frequency equipment”
EN 50082-1, “Electromagnetic compatibility - Generic
immunity standard; Part 1: Residential, com-
mercial, and light industry”
Further information may be obtained from the manufacturer, or from
the manufacturer’s representative:
manufacturer:
Denver Instrument Company
6542 Fig Street
Arvada, CO 80004 USA
manufacturer’s representative:
Denver Instrument Company, Ltd.
Denver House
Sovereign Way
Trafalgar Business park
Downham market
Norfolk, UK PE38 9SW

Table Of Contents
Declaration of Conformity . . . . . . . . . . . . . . . . . . . . . . . . . . . . .ii
Introduction . . . . . . . . . . . . . . . . . . . . . . . . . . . . . . . . . . . . . . . .1
Unpacking Your Balance . . . . . . . . . . . . . . . . . . . . . . . . . . . . . .1
Model Specifications . . . . . . . . . . . . . . . . . . . . . . . . . . . . . . . . .2
Installation . . . . . . . . . . . . . . . . . . . . . . . . . . . . . . . . . . . . . . . . . .3
Setup . . . . . . . . . . . . . . . . . . . . . . . . . . . . . . . . . . . . . . . . . . . . . .4
Display and Keypad . . . . . . . . . . . . . . . . . . . . . . . . . . . . . . . . . .6
Software Layout . . . . . . . . . . . . . . . . . . . . . . . . . . . . . . . . . . . . .8
Calibration . . . . . . . . . . . . . . . . . . . . . . . . . . . . . . . . . . . . . . . . .9
Basic Weighing . . . . . . . . . . . . . . . . . . . . . . . . . . . . . . . . . . . .11
Units . . . . . . . . . . . . . . . . . . . . . . . . . . . . . . . . . . . . . . . . . . . . . .12
Statistics . . . . . . . . . . . . . . . . . . . . . . . . . . . . . . . . . . . . . . . . . . .15
Environmental . . . . . . . . . . . . . . . . . . . . . . . . . . . . . . . . . . . . . .19
Animal Weighing . . . . . . . . . . . . . . . . . . . . . . . . . . . . . . . . . . .22
Count Mode . . . . . . . . . . . . . . . . . . . . . . . . . . . . . . . . . . . . . . .24
Check Weighing . . . . . . . . . . . . . . . . . . . . . . . . . . . . . . . . . . . .26
Good Laboratory Practice . . . . . . . . . . . . . . . . . . . . . . . . . . .29
Serial . . . . . . . . . . . . . . . . . . . . . . . . . . . . . . . . . . . . . . . . . . . . .33
Stored Tare Weights . . . . . . . . . . . . . . . . . . . . . . . . . . . . . . . . .39
Batch Weighing . . . . . . . . . . . . . . . . . . . . . . . . . . . . . . . . . . . .42
System . . . . . . . . . . . . . . . . . . . . . . . . . . . . . . . . . . . . . . . . . . . .44
Password . . . . . . . . . . . . . . . . . . . . . . . . . . . . . . . . . . . . . . . . . .47
Specific Gravity . . . . . . . . . . . . . . . . . . . . . . . . . . . . . . . . . . . .48
Factory Settings . . . . . . . . . . . . . . . . . . . . . . . . . . . . . . . . . . . .50
Troubleshooting . . . . . . . . . . . . . . . . . . . . . . . . . . . . . . . . . . . .52
Setting the Scale . . . . . . . . . . . . . . . . . . . . . . . . . . . . . . . . . . .53
Interface details and Serial Commands . . . . . . . . . . . . . . . . .55
Linearity Procedure . . . . . . . . . . . . . . . . . . . . . . . . . . . . . . . . .58
Linearity Weight Settings . . . . . . . . . . . . . . . . . . . . . . . . . . . . .61
Glossary of Terms . . . . . . . . . . . . . . . . . . . . . . . . . . . . . . . . . . .62
Gram Conversion Chart . . . . . . . . . . . . . . . . . . . . . . . . . . . . . .63
Menu Tree . . . . . . . . . . . . . . . . . . . . . . . . . . . . . . . . . . . . . . . . .64
External Transformers . . . . . . . . . . . . . . . . . . . . . . . . . . . . . . . .67
Accessories . . . . . . . . . . . . . . . . . . . . . . . . . . . . . . . . . . . . . . . .67
Cleaning Instructions . . . . . . . . . . . . . . . . . . . . . . . . . . . . . . . .68
Maintenance . . . . . . . . . . . . . . . . . . . . . . . . . . . . . . . . . . . . . .68
Warranty Instructions . . . . . . . . . . . . . . . . . . .Inside Back Cover
i

You have purchased a quality precision weighing instru-
ment that requires handling with care.
Read entire contents of this Operation Manual prior to
operating your new Denver Instrument balance.
Disclaimer Notice
“Calibrate your balance using reference weights of the
appropriate tolerance (class). An instrument can be no
more accurate than the standard to which it has been
compared. For assistance in the selection of reference
weights, please contact the factory”.
Class A Digital Devices:
Notice: This equipment has been tested and found to comply
with the limits for a Class A digital device, pursuant to Part 15 of
the FCC rules. These limits are designed to provide reasonable
protection against harmful interference when the equipment is
operated in a commercial environment. The equipment gener-
ates, uses, and can radiate radio frequency energy and, if not
installed and used in accordance with the instruction manual,
may cause harmful interference to radio communications.
Operation of this device in a residential area is likely to cause
harmful interference in which the user will be required to correct
the interference at his own expense.
Caution: Changes or modifications not expressly approved by
the manufacturer could void the user’s authority to operate this
equipment.
Manufactured in the U.S.A. by:
Denver Instrument Company
6542 Fig Street • Arvada, Colorado 80004
(303) 431-7255 • (800) 321-1135 • Fax(303) 423-4831
ii

Introduction
Thank you for selecting a precision Denver Instrument
Company balance. Your balance is designed and engi-
neered to provide years of reliable performance.
WARNING
Use of this product in a manner not specified by
the manufacturer may impair any safety protection
provided by the equipment!
UNPACKING YOUR BALANCE
Carefully remove your balance from the packing material.
The weigh pan assembly and power transformer are removed
from the balance for shipping but are in the same box.
Be sure that you have received each of the following items
with your balance:
• Balance
• Operation Manual
• Warranty Registration Card
• Weigh Pan Assembly:
Round pan and ring (for 3.5” or 4.5” pans)
or square pan)
• Power Transformer
Carefully read this operation manual in order to take full
advantage of the many features of your balance. Be sure to
read the section on the proper care and maintenance of
your balance so that it will provide you with years of reliable
service.
Please complete and return your warranty registration card,
so that in the event your balance is lost or stolen, Denver
Instrument Company will have a record of your balance’s seri-
al number. Also take a moment right now to record the
model and serial number of your balance on the inside back
cover of this manual for future reference.
!
1

Model Specifications
2
Analytical Models
Model 64 104 204
Weighing Range 61g 110g 210g
Readability 0.1mg 0.1mg 0.1mg
Linearity 0.2mg 0.2mg 0.2mg
Repeatability, (s) 0.1mg 0.1mg 0.1mg
Stabilization Time 4 sec 4 sec 4 sec
Pan Dimensions 3.5” 3.5” 3.5”
(9cm) (9cm) (9cm)
Toploading Models
Model 203 403 402 602
Weighing Range 210g 410g 410g 610g
Readability 0.001g 0.001g 0.01g 0.01g
Linearity 0.002g 0.003g 0.01g 0.01g
Repeatability, (s) 0.001g 0.001g 0.01g 0.01g
Stabilization Time 3 sec 3 sec 2 sec 2 sec
Pan Dimensions 4.5” 4.5” 6.0” 6.0”
(11cm) (11cm) (15cm) (15cm)
Model 2102 4102 2101 4101 6101
Weighing Range 2100g 4100g 2100g 4100g 6100g
Readability 0.01g 0.01g 0.1g 0.1g 0.1g
Linearity 0.01g 0.02g 0.1g 0.1g 0.1g
Repeatability, (s) 0.01g 0.01g 0.1g 0.1g 0.1g
Stabilization Time 2 sec 2 sec 2 sec 2 sec 2 sec
Pan Dimensions 8.375x8.375” 6.0” 8.375x8.375” 8.375x8.375” 8.375x8.375”
(21x21cm) (15cm) (21x21cm) (21x21cm) (21x21cm)
Model 8101 12001 603D 4102D 8102D
Weighing Range 8100g 12000g 610/110g 4100/410g 8100/810g
Readability 0.1g 0.1g 0.01/0.001g 0.1/0.01g 0.1/0.01g
Linearity 0.2g 0.2g 0.01/0.002g 0.1/0.01g 0.2/0.01g
Repeatability, (s) 0.1g 0.1g 0.01/0.001g 0.1/0.01g 0.1/0.01g
Stabilization Time 2 sec 2 sec 2 sec 2 sec 2 sec
Pan Dimensions 8.375x8.375” 8.375x8.375” 4.5” 8.375x8.375” 8.375x8.375”
(21x21cm) (21x21cm) (11cm) (21x21cm) (21x21cm)
Common Specifications
Electrical Requirements: 15VDC @ 800 mA with AC Adapter, center pin (+)
Controls: Silicone rubber keypad, Zero, Display ON/OFF, and 3 softkeys
Display: 4.5 x 1.75 inch (12.3 x 4 cm) custom LCD with backlight
Interface: RS-232 Bidirectional
16 weighing units and 2 custom
Calibration with external weight (minimum of 4 permissible)
Custom calibration with external weight and weigh value entry
Count mode (Average Piece Weight or Piece Counting)
Environmental settings
Animal weighing mode
Specific gravity mode
Check weighing mode (Low and High Limits or Percent to Target)
Statistics function (number, min., max., range, average, standard deviation and total)
250 last weight storage with edit capability
Stored tare weights (10)
User custom setup (10)
Password security
Date, time and weigh value of last calibration
Batch weigh with printout of Tare weight, Net weight and Gross weight
Custom printout with selection of date/time, sample type, sequence number, balance ID, signature line,
and operator.
Height above pan (analyticals): 9.5” (24cm)
Net Weight: 8.7 lbs. (3.9 kg) Round Pan
10 lbs. (4.5kg) Square Pan
14.6 lbs. (6.6 kg) Analytical
Shipping Weight: 12.0 lbs. (5.4 kg) Round Pan
13.0 lbs. (5.9 kg) Square Pan
17.8 lbs. (8.0 kg) Analytical

Installation
Preparation
This product is intended for indoor use.
Select a level, rigid work area that is free from drafts and
vibrations (i.e. away from doors, windows, air conditioning
and heating vents).
The line voltage to the balance should be reasonably con-
stant (+/-10%) and free from fluctuations.
Position balance to allow the removal of the power adapter
plug from the wall outlet. It is not advisable to use an outlet
that is shared with fluorescent fixtures or other electrical
equipment that draws current in an inconsistent manner.
Do not locate the balance near magnetic materials, or near
instruments that incorporate magnets in their design. Avoid
areas that experience extreme highs, lows or fluctuations in
room temperature. Excessive temperatures that may affect
balance operation and accuracy are 1) above 105°F (40°C)
and 2) below 60°F (15°C).
3
24.788
WEIGH
SelectModePrint
ZE R O
g
Display
On/Off
Leveling
Foot
Bubble
Level
Indicator
Weigh
Pan
Display
On/Off
Leveling
Foot

Setup
Carefully remove the balance and all accessories from the
carton. There are no tie-downs; however there may be pack-
ing materials under the pan support (square-pan models only).
LEVELING THE BALANCE
1. The leveling feet are located on the bottom of the balance.
Do not turn the balance over. Viewing the balance from
above, turn all leveling feet counterclockwise until the feet
are fully retracted into the balance base.
2. Note the position of the bubble on the leveling vial.
For maximum weighing accuracy, the bubble should be
located inside the black ring. Some adjustment will likely be
necessary.
3. Begin with the foot that is opposite of the location of the
bubble and turn clockwise until the bubble is moved into
the black ring. If necessary, repeat this step with the other
leveling feet until the bubble is positioned in the center of
the black ring.
4. Avoid extending the level feet too far. If it seems necessary
to do so, it is likely that the tabletop is not level. Check the
surface on which you have placed the balance; it may be
necessary to choose another location.
The bubble moves TOWARD a foot when that foot is
turned CLOCKWISE. The bubble moves AWAY from a
foot when that foot is turned COUNTERCLOCKWISE.
POWERING THE BALANCE
WARNING
Verify that you have received the proper voltage
power supply for your country of use!
Insert the power cord into the receptacle located at the back
of the balance and plug the power adapter into a wall outlet.
The display will perform a quick test in which all segments are
briefly illuminated and display “stabilizing” for 30 seconds.
INITIAL WARM-UP PERIOD
After the initial power-up, it is necessary to allow a minimum of
60 minutes for the balance components to become warm
and for the internal temperature to stabilize.
4
!
Memo:
Note

It is not necessary to unplug your balance from the power
source when it is not in use. It is advised to leave the unit
plugged in so that all components are warm and the balance
is ready to weigh at any time. If you wish, the display can be
turned off to save the segment life, by simply pressing the
Display On/Off button.
WEIGH PAN INSTALLATION
WARNING
Mishandling the balance weigh pans can
cause serious mechanical damage!
The balance weigh pan engages critical and delicate
mechanical components inside the balance. Please observe
the following precautions when handling the weigh pans:
1. Do not apply manual pressure to the weigh pan at any time.
2. Do not bump the pan.
3. Do not drop objects onto the pan.
4. Do not attempt to clean or vigorously wipe the pan while it is
installed on the balance.
ROUND-PAN MODELS
Balances with 3.5” or 4.5” round pans feature a weigh pan
assembly that consists of an aluminum pan and an impact pro-
tection ring that helps to shield the weigh pan from lateral
shocks. (For models with 6” pans, simply place pan on pan
stem.)
1. Place the impact ring on the balance first.
2. Center the weigh pan over the impact ring and gently slide
or twist (do not push) the pan onto the pan stem.
3. When removing the pan for cleaning, remove the impact
ring first and then pull the weigh pan straight up and off
(pulling the pan at an angle could result in mechanical
breakage).
SQUARE-PAN MODELS
Simply place the square top-pan on the pan support.
You’re ready to begin weighing!
5
!

Display and Keypad
The balance features an integrated display/keypad. The
high-contrast LCD display simultaneously provides alpha and
numeric information for ease in setup and accuracy in inter-
pretation of results.
DISPLAY
Stability Indicator. This icon is illuminated when the balance
has stabilized, indicating that the displayed weight is your final
result.
Weigh Units. The current selected weigh unit is displayed. The
balance will keep two weigh units resident for ready use at all
times. Press "Select" to toggle between the two resident
weigh units. (Factory default is grams.) See page 12 for a
complete list of weigh units, their display abbreviations and
how to change the current weigh units.
6
00000000
000000000000
Weigh
Power
dwtlb%
ozGNB
drmomgkg
C1 C2 HST
Select Mode Print
Next
Enter
g
o
ZERO
Display
On/Off
Stability
Indicator
Weigh unit
in use
Turns backlight
and display
on/off.
Returns the display
to zero. Exits a setup
function.
Soft keys provide
access to balance
functions and setup
features.
Graphical
display

Functions. The functions align with the soft keys on the key-
pad to provide access to the balance’s many setup features.
Graphical Display. Bar graph indicates remaining capacity of
balance.
KEYPAD
Zero key. Pressing the zero key returns the weight display to a
zero reading. This is especially useful for taring (subtracting)
container weights.
Soft keys. Three soft keys align with the displayed functions to
provide easy access to all balance setup features. See “Soft
Key Operation”
Display On/Off key. Press once to turn backlight off, press
twice to turn the display only off to save segment life. Pressing
it again turns the display and backlight back on.
SOFT KEY OPERATION
Your balance contains a broad range of features that allow
you to customize the unit to your specific weighing applica-
tion(s). Navigating through the options is easy using the “soft
key” (software programmable key) operation.
Each soft key on the keypad aligns with a balance function
on the display. To select a function, press the key that is just
below it.
To exit any selection in the menu, press the ZERO key and the
balance will return to the weigh screen.
DYNAMIC FINE RANGE (603D, 4102D AND 8102D Models)
This feature allows the user access to the fine weighing range
at any point along the entire weighing spectrum. Simply press
the “Zero” key to rezero the balance and the fine weighing
range is accessed.
7

Software Layout
The balance has a wide variety of modes of operation and set
up parameters for different weighing applications. Parameters
can easily be changed by scrolling through the options and
choosing the desired selection. The different weighing modes
include: basic weighing, animal weighing, statistics, counting,
check weighing and specific gravity calculating. The default
mode is basic weighing. When a mode is turned ON, the mode
name will appear in the lower left corner of the display.
Basic weighing = WEIGH Counting = PCS (for pieces)
Animal weighing = ANIMAL Check Weighing = UNDER, OK or OVER
Batch Weighing = Prompts Specific gravity = SPC GRAVITY (and prompts)
Statistics = SAMPLES
Modes must be turned Off to return to basic weighing or
entering a new mode will turn the previous mode Off.
Setup parameters for optimizing the balance for your specific
needs and conditions include: weighing unit, environmental set-
tings, serial interface settings and Good Laboratory Practice
custom printout information.
Other administration functions can also be accessed including
setting password protection, setting users with different parame-
ters or checking system conditions (ie software version).
All selection of modes and changes to parameters are made
by pressing the Mode softkey and then using the Next softkey
to scroll through the available options. When the desired selec-
tion is shown, press the Enter softkey.
On entering a setup function with multiple selections (ie
baud rate), the first selection will be the current setting.
The following shows the order of the available routines by
screen name, however a complete listing of all selections is the
the Menu Tree on page 64 of the manual.
Screen Name Function
CALIBRATE Calibration
UNITS Weighing unit selection
STATS Statistics mode
ENVIRO Environmental settings
ANIMAL Animal weighing mode
COUNT Counting mode
CHECK WEIGH Check weighing mode
GLP GLP printout and reporting information
SERIAL Serial interface settings
TARE WEIGHTS Tare weight recall and setup
BATCH Batch weighing mode
SYSTEM Check system status
PASSWORD Security protection setup
SPC GRAVITY Specific Gravity mode
FACTORY Return to factory default settings
8
Memo:
Note
Memo:
Note

Calibration
Your balance was calibrated at the factory; however, it is nec-
essary to re-calibrate upon setup and on a regular basis
thereafter. The factory recommendation for calibration is
once per week using the maximum permissible weight stan-
dard. Reasons for more frequent calibration include 1) moving
the balance, 2) organizational procedures, 3) special sam-
ples/applications which require documented calibration
time/date stamp.
Your balance may be calibrated in the External mode or the
Manual mode. Both use an external mass standard. In the
external mode the balance will recognize the calibration
weight as one of the permissible weight values, whereas in the
Manual mode an exact certified value of the calibration
weight is entered.
PERMISSIBLE WEIGHTS
EXTERNAL CALIBRATION (using a mass standard)
Be certain that the
balance has stabi-
lized.
1. Select “Mode”.
2. Press “Enter”.
calibrate
mode
Next
Enter
Model Weight
20 30 50 60 100 200 300 400 500 600 800 1000 2000 4000 5000 6000 8000 12000
64 X X X X
104 X X X X X
204 X X X X
203 X X X X
403 XXXX
402 XXXX
602 XXXX XX
2102 X X X X X
4102 X X X X
2101 X X X X X
4101 X X X X
6101 XX X X
8101 XX X XX
12001 X X X X X X
603D X X X X X X X
4102D X X X X X X
8102D X X X X X X X
9

3. Press “Enter” .
4. Place mass
standard on the
weighing pan
(see Permissible
Weights Chart).
The balance rec-
ognizes the mass
and automatically
calibrates.
NOTE! Do not remove weight until screen returns to weigh
screen.
5. Once calibrated, the balance will return to the weigh dis-
play.
MANUAL CALIBRATION (using a mass standard)
IMPORTANT!!
The decimal point is after the 5th digit. BE CAREFUL to enter
numbers in the proper spaces when manually calibrating. For
instance, to calibrate 200 grams, press the “right” arrow twice
and then enter “2”, then press the “Enter” button. To calibrate
2000 grams, press the “right” arrow once, enter “2”, then press
the “Enter” button. If this is done incorrectly, you must go to
“Setting Scale”, and perform that procedure before continu-
ing.
1. Select “Mode”.
10
weigh
0.00
g
Select Mode Print
Weigh
0
external
cal
Next
Enter
calibrate
mode
Next
Enter

2. Press “Enter”.
3. Press “Next”.
4. Press “Enter”.
5. Enter the desired
mass standard
value using the
arrow keys and
press “Enter”.
6. At Add Weight prompt, place the mass standard
on the weighing pan.
7. When stable, Press “Enter”.
8. Once calibrated, the balance will return to the weigh display.
Basic Weighing
You are ready to begin weighing if you have:
• Set up the balance in an acceptable location (see page 3 )
• Calibrate the balance (see page 9 )
For optimum accuracy, please place your samples as near the
center of the weighing pan as possible.
Your balance is designed to provide accurate measurements
regardless of where you place the sample on the pan; howev-
er, repeatability, accuracy and stabilization time are optimized if
the load is placed as close to the center of the pan as possible.
Press the ZERO key to access the weighing mode (the word
WEIGH will appear in both the upper right-hand corner and the
lower left-hand corner.
external
cal
Next
Enter
manual
cal
Next
Enter
00000.0000000
cal manu
g
Enter
11

TARING
To subtract the weight of the sample container:
1. Place the
empty container
on the weighing
pan.
2. Press ZERO.
3. Add sample to the container and wait for the stability icon
to appear (upper left-hand corner).
4. The weight of the sample only will appear on the display.
Units
Your balance offers 16 different weigh units and 2 user-cus-
tomizable units. Weigh units available (display symbol): Grams
(g), Kilograms (kg), Milligrams (mg), Ounces (oz), Troy Ounces
(ozt), Pounds (lb), Grains (gn), Pennyweight (dwt), Carats (c),
Tael HK, Hong Kong (H), Tael Sing, Singapore (S), Tael Taiwan
(T), Momme (mom), Dram (dr), Baht (B), Tola (t), and two cus-
tom, user-defined (C1 and C2).
12
zeroing
0.00
g
Select Mode Print
Weigh
weigh
0.00
g
Select Mode Print
Weigh
Stability
icon O

Selecting Weigh Units
Your balance will keep two weigh units resident for ready use
at all times. To toggle between the two weigh units, press the
soft key “Select” which appears on the main weighing screen.
The factory default weigh unit is grams. To change the select-
ed weigh units:
1. Select “Mode”.
2. Press “Next”.
3. Press “Enter”.
4. To scroll through the weigh units, continue to press “Next”.
5. To choose a weigh unit, simply press “Enter”
6. Weigh Unit 1 will be stored into memory. Repeat steps 4
and 5 above to select Unit 2
7. To return to the weigh mode, press ZERO.
8. Press “Select” to toggle between the two weigh units. An
icon will appear to the right of the weight display indicating
which weigh unit is in use.
Custom Weigh Units
To have the balance automatically perform a multiplication
of the weight value (g) or to set a Custom unit, simply enter
the appropriate factor into one of two Custom units. These
can also be set as Unit 1 and Unit 2 for immediate access.
calibrate
mode
Next
Enter
units
mode
Next
Enter
grams
unit
g
Next
Enter
13

14
To enter a Custom unit:
1. Select “Mode”.
2. Press “Next”.
3. Press “Enter “.
4. Scroll through
the weight units,
with the “Next” key
until CUSTOM is
displayed.
5. Press “Enter”.
6. Enter the desired factor using the arrow keys.
7. To save the factor entry press “Enter”.
8. Select UNIT2 or press ZERO to return to the weigh screen.
calibrate
mode
Next
Enter
units
mode
Next
Enter
grams
unit
g
Next
Enter
custom
unit
1
Next
Enter
00000.0000
custom
1
Enter

Statistics
Your balance has an internal memory of 250 weighing which
can be used to store, list, select, output or to perform statisti-
cal evaluation of selected weighing. To begin storing weights
to memory statistics must first be turned ON.
To turn statistics ON.
1. Press “Mode”.
2. Press “Next”
until MODE, STATS.
3. Press “Enter”.
4. Press “Enter”.
The display will
return to the
weigh screen with
SAMPLES 0 in the
lower left corner.
After weighings
have been stored,
SAMPLES X
will show the num-
ber stored.
To rapidly return to the Stats setup, press Select from the
weigh screen in the Statistics mode.
calibrate
mode
Next
Enter
stats
mode
Next
Enter
calc
stats
Next Print
Enter
samples 00
0.00
g
Select Mode Print
Weigh
15
turn on
stats
Next
Enter
Memo:
Note

16
To store a weight to memory
1. With the weight on the pan, press “Print”. The SAMPLES will
increase by one showing that the weight has been added
to memory.
2. Continue to add more weights to memory.
To list stored weights
1. Press “Mode”.
2. Press “Next” until
MODE, STATS
3. Press “Enter”.
4. Press “Next” until
STATS, LIST.
5. Press “Enter” to
show first stored
weight.
6. Press “Next”
repeatedly to scroll
through all stored weights
7. Press “Enter” to exit to STATS.
calibrate
mode
Next
Enter
stats
mode
Next
Enter
list
stats
Next Print
Enter
27.34
g
Next Print
Enter
This manual suits for next models
34
Table of contents
Other Denver Instrument Scale manuals
Denver Instrument
Denver Instrument XE-100A User manual
Denver Instrument
Denver Instrument TB-124 User manual
Denver Instrument
Denver Instrument Summit User manual
Denver Instrument
Denver Instrument TP Series User manual

Denver Instrument
Denver Instrument PK-Series User manual
Denver Instrument
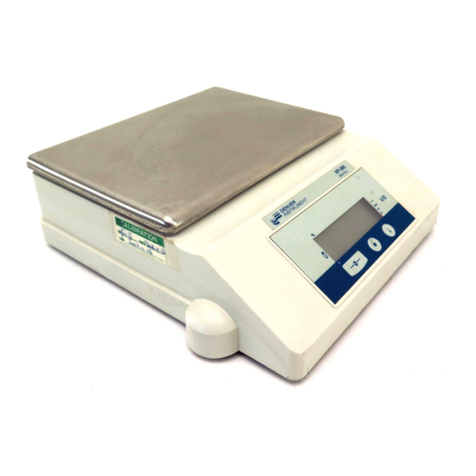
Denver Instrument XP Series User manual
Denver Instrument
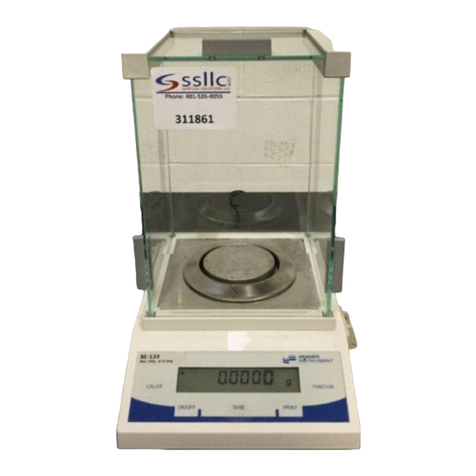
Denver Instrument TB Series User manual
Denver Instrument
Denver Instrument DL series User manual

Denver Instrument
Denver Instrument ACA-100 User manual
Denver Instrument
Denver Instrument P-114 User manual
