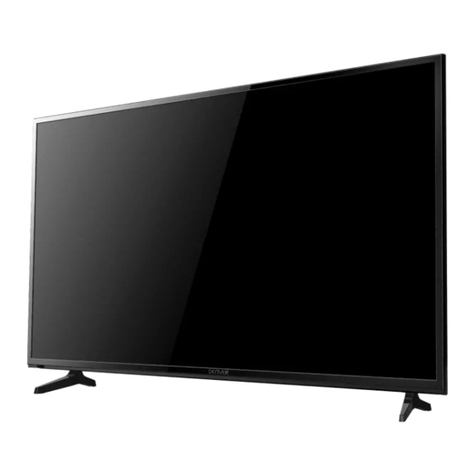
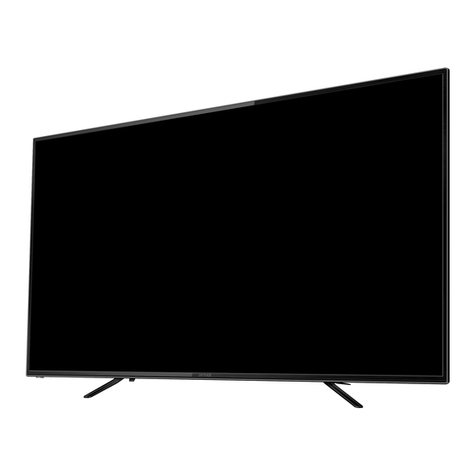
Denver LED-3259TC User manual

Contents
Caution
1
Safety Information
2
Accessories
3
Technical Specification
3
Product Introduction
4
Front View
4
Connections
5
Remote Control
6
-7
FTI
8
-10
OSD Menu
11
-27
1. INPUT
11
2. VIDEO
12-13
3. AUDIO
14
4. TV
15-17
5. SETUP
18
6. Time Setup
19-20
7. Lock
21
8. Hotel Mode
22-23
9. PVR Menu
24-26
10.VGA
27
USB
28
PHOTO
29
MUSIC
30
VIDEO
31
TEXT
32
Simple Troubleshooting
33

Caution
The lightning flash with
arrowhead symbol, within an equilateral
triangle is intended to alert the user to the presence of un-insulated
"dangerous voltage” within the products enclosure that may be of
sufficient magnitude to constitute a risk of electric shock to the
persons.
The exclamation point within an equilateral triangle is intend to alert
the user to the presence of important operating and maintenance
(servicing) instructions in the literature accompanying the appliance.
Correct disposal of this Product
(Waste Electrical & Electronic Equipment (WEEE)
Your product is designed and manufactured with high quality materials and
components which can be recycled and reused.
This symbol means that electrical and electronic equipment, at their end-
of-life should be disposed of separately from your household waste.
Please dispose of this equipment at your local community waste
collection/recycling center.
In the USA there are separate collection systems for used electrical and
electronic products. Please help us to conserve the environment we live in!
This unit complies with European safety and electrical interference
directives.
1

Safety Information
To ensure reliable and safe operation of this equipment, please read carefully all the
instructions in this user guide, especially the safety information below.
Electrical safety
To prevent overload, don't share the same mains supply socket with too many other items
of equipment.
- Do not place any connecting wires where they may be stepped on or tripped over.
- Do not place heavy items on the leads, which may damage them.
- Hold the Mains plug, not the wires, when removing from a socket.
- During a thunderstorm or while leaving the TV for long periods, disconnect the aerial (if
outdoor) and the power supply.
- Do not allow water or moisture to enter the TV . Do NOT use in wet or moist areas such
as Bathrooms, steamy kitchens or near swimming pools.
Pull the plug out immediately, and seek professional help if:
- the mains plug or cable is damaged
- liquid is spilt onto the set, or if it is accidentally exposed to water or moisture -anything
accidentally penetrates the ventilation slots -the set does not work normally.
- Do NOT remove the safety covers. There are no user serviceable parts inside.
You may invalidate the warranty. Qualified personnel only are permitted to service this
apparatus.
- To avoid battery leakage, remove exhausted batteries from the remote control
handset, or when not using for along period.
- Do NOT break open or throw exhausted batteries on a fire.
Physical safety
Do NOT block ventilation slots in the back cover. You may place the TV in a cabinet, but
ensure at least 5cm (2") clearance all around the unit.
Do NOT tap or shake the TV screen, you may damage the internal circuitry. Take good
care of the remote control, do not drop it or allow it to come into contact with liquids.
To clean the TV use a soft dry cloth. Do NOT use solvents or petrol based fluids. For
stubborn stains, you may use a damp soft cloth with diluted detergent.
2
Accessories
User’s Manual
Remote control
Converter
cable for AV
AV Cable
Converter cable
for YPbPr
* Note: The configuration of the components may look different from the following illustration
Technical Specification
- TV System
PAL BG/DK/I SECAM BG/DK L/L’
- Screen Size
32 inch(diagonal)
- Resolution
1920x1080
- Aerial input
75 Q (unbalanced)
- Audio output power
2x10W
- Power Consumption
AC100-240V
Remote Control
Type
infrared
Control distance
5m
Control angle
30° (horizontal)
Batteries
2 x 1.5V, size AAA
3

Product Introduction
Introduction
Front View
Led Indicator
Led Indicator
Switch
Switch
Remote Control window (Keep clear)
1. (IR) Infrared Receiver: Receives IR signals from the remote control. POWER to turn on
and off.
Indicator on(Red)
Standby mode
Indicator off (Null)
Power on mode
The effective receiving range for the signal is 5-8 metres from the front of the remote
control window, and 30° to the left or right side and 20° above or below the remote
control window.
2. The functions of the buttons are described as bellows:
INPUT: Press to display the input source menu.
MENU: Press to display the OSD menu, press again to exit the menu.
CH+/-: Press to scan through channels.
VOL+/-: Press to adjust the volume.
POWER: Tum on/standby the TV set
4

Connections
Headphone: Connect it to your headphone or other audio equipment.
Common Interface: CI slot.
USB: USB jack for update, media and PVR.
Coax: Digital coaxial output.
RF: Connect antenna or cable 75 Ohm coaxial to receive TV signal.
RJ45: For automatic upgrades for MHEG5 (Digital Text interactive services) and
HD services.
MINI AV: Connect it to the audio & video output terminals of DVD with the
Converter cable. (Audio terminals are shared with YPbPr)
MINI YPbPr: Connect it to the YPbPr video output terminal of DVD with the
Converter cable.
HDMI1/2/3: Connect it to the HDMI of DVD or other equipment.
VGA: For PC display. Connect it to the D-Sub 15 pins analog output connector of the PC.
SCART: Connect them to the SCART video output terminal of DVD.(used in component
source)
PC-IN: Connect it to the audio output terminal of PC.
5

Remote Control
The remote control is using Infrared (IR). Point it towards the front of the LED TV. The remote
control may not work correctly if it is operated out of range or out of angle.
6

Remote Control
NUM.
BUTTON&FUNCTION
1
POWER - Press this button to switch on the TV when at standby mode or enter standby mode.
2
MUTE - Press this button to mute or restore sound.
3
CH-/CH+ - Changes the channels up and down.
4
[0-10+]- Directly elect a TV channel
CH-List - Display the channel list (only in DTV).
5
RECALL-Return to previous channel.
6
[], [], [], [] - Direction button.
7
Chapter Previous button
8
Chapter Forward button
9
PLAY button
10
PAUSE button
11
SUBPAGE -Videotext sub-page button.
12
TEXT The button used in teletext mode.
13
REVEAL -To reveal or hide the hidden words.
14
FAV - Favorite program.
15
INFO -Display a variety of information about current channel.
16
SUB button - Subtitle button.
17
RED - Display red screen in TELETEXT mode.
18
GREEN - Display green screen in TELETEXT mode.
19
INPUT Press input to change the singal source.
20
Vol-/Vol+ - Adjust the volume.
21
MENU- Press this button to enter the menu screens for various optional adjustable setting.
22
ASPECT - Aspect Ratio
23
EPG - To show the Electronic Programmes Guide during no-menu state only.
24
REC - Record button
25
OK - Press OK to Confirm your operartion
26
HOLD - Freezes a multi-page passage on screen in Teletext mode.
FAST FORWARD button
27
SIZE- Change the display size in teletext mode.
FAST REVERSE button
28
EXIT -To return to the screen.
29
STOP button
30
CANCEL -Videotext hidden button
31
INDEX-Request the index page in teletext mode.
32
AUDIO button
33
TV/R -TV and Radio Channels.
34
SLEEP- Cycles through the LCD TV sleep time.
35
NICAM - Press repeatedly to cycle through the NICAM mode.
36
BLUE - Display blue screen in TELETEXT.
37
YELLOW - Display yellow screen in TELETEXT.
7

FTI
Welcome
Welcome to use the wizard for initial Setup!! please press [ OK ] start the
wizard.
Language
Please select your language, press [
]/[
] to select, press [ OK ] to
confirm:
8

Country
Please select your country, press [
]/[
] to select, press [OK] to cofirm:
Tuner Type
Please select your tuner type, press [
]/[
] to select, press [OK] to
confirm:
Option
Description
Tuner
Mode
Antenna
Set the signal type to antenna. When set to Air, TV can catch
analog and DVB-T broadcasting signal.
Cable
Set the signal type to cable. When set to Cable, TV can catch
analog and DVB-C broadcasting signal.
9

Scan
Please select your scan, press [▼]/[▲] to select, press [OK] to confirm:
Option
Description
Scan
Automatically search for channels.
Skip Scan
Skip the scan and enter to the complete interface.
Complete
10

Input Source
Press INPUT to display the input source list, and press ▼/▲to select and OK to confirm.
Using the Remote Control to Display and
Navigate the On-Screen Main Menus
1. Press to display the
on-screen menu.
2. Use the ◄ or ► buttons to
highlight the desired menu
icon. Press to select it.
3. Use the ▲ or ▼ buttons to
scroll up and down through
the features.
4. Follow the instructions on the
screen.
5. Press to exit the menu.
To exit the menus
Press (or ).
Press once to display the on-screen menu, and press again to return to normal view. If no
buttons are pressed, the menu closes automatically after about 15seconds.
11

Video
Option
Description
Picture Mode
Use the ▼or ▲ buttons to highlight one of the following options, then
press [OK] to enter the sub-menu and press ◄ or ► to adjust.
Standard
Select for standard picture settings.
Recommended for home entertainment.
Vivid
Select for enhanced picture contrast and
sharpness.
Bright
Select for enhanced picture brightness.
Cinema
Optimal picture and sound for watching movies.
Sport
Optimal picture and sound for watching sports.
User
Allow you to store your preferred settings.
Note: Those settings can be adjusted only when the Picture Mode is set to
User.
Brightness
Adjust to brighten or darken the picture. Press ◄ to darken the picture.
Press ► to brighten the picture.
Contrast
Adjust the white level of the picture. Press ◄ to decrease the contrast.
Press ► to increase the contrast.
Saturation
Adjust the color purity of the picture. Press ◄ to increase the red tones,
Press ► to increase the green tones.
Sharpness
Adjust to sharpen or soften the picture. Press ◄ to soften the picture.
Press ► to sharpen the picture.
12

Option
Description
Color
Temperature
Use the ▼ or ▲ buttons to highlight one of the following options,
then-press [OK] to enter the sub-menu and press ◄ or ► to adjust.
Standard
Select to give the white color a neutral tint.
Warm
Select to give the white color a reddish tint.
Cool
Select to give the white color a bluish tint.
Option
Description
Advanced
Video
Use the ▼ or ▲ buttons to highlight one of the following options,
then-press [OK] to enter the sub-menu and press ◄ or ► to adjust.
DNR
You can clear up analog TV signal by reducing the dot
noise.
This feature is not available at PC or Media source.
MPEG NR
Similar with the Noise Reduction, you can set to reduce
the block noise.
13

Audio
Option
Description
Balance
Adjust the level of sound coming from the left and right speakers. Press ◄
to decrease balance. Press ► to increase the balance.
Bass
Adjust the high frequency sounds.
Press ◄ to decrease bass. Press ► to increase the bass.
Treble
Adjust the low frequency sounds.
Press ◄ to decrease treble. Press ► to increase the treble.
Sound
Surround
Off
Set the system of stereophonic sound off.
On
Set the system of stereophonic sound on.
Equalizer
Off
Set the sound to normal type.
Rock
Optimal sound for listening rock music.
Pop
Optimal sound for listening pop music.
Live
Optimal sound for live video.
Dance
Optimal sound for listening dance music.
Techno
Optimal sound for listening techno music.
Classic
Optimal sound for listening classic music.
Soft
Optimal sound for listening soft music.
Auto Volume
Control
Automatically adjusts volume to be consistent across programs and
channels. Press^ or
► button to select (On/Off).
14

TV
Option
Description
Tuner Mode
Use the ▼ or ▲ buttons to highlight one of the following options, then press [OK] to
enter the sub-menu and press ◄ or ► to adjust.
Cable
Set the signal type to cable. When set to Cable, TV can catch
analog and DVB-C broadcasting signal.
Antenna
Set the signal type to antenna. When set to Air, TV can catch
analog and DVB-T broadcasting signal.
Channels
Use the ▼ or ▲buttons to highlight one of the following options, then press [OK] to
select it and then you will enter the password interface.
The default is “0000”, if you forget what you set, please call the service center.
Channel Scan
Automatically search for channels. It will search analog
channels first, then digital channels. For detail please reference
page 16.
Note: before execute auto channel search, please confirm your signal
type. Wrong setting of Signal Type maybe cause finding no channel.
Found numbers do no include encryption programs.
Analog Manually
search
Manually search analog channels. For detail, For
detail, please reference page 16.
Digital Manually
search
Manually search digital channels. For detail, please
reference page 16.
15

Channel Scan
Analog Manual Scan
Digital Manual Scan
Option Description
Favorite Network Select Add channels to create a favorite list.
Channel Skip
Manually add and skip channels in your
program list. For detail, please reference page
12.
Channel Sort
Manually sort channels in your program list. For
detail, please reference page 12.
Channel Edit
Manually sort channels in your program list. For
detail, please reference page 12.
Analog Channel Fine
Tune
Adjust the frequency of the analog channel
finely.
Clean
Channel List
Clean the channel list what you had set.
Schedule List Display the recorder shedule.
16

Channel Sort
Channel Skip
Channel Edit
Schedule List
17

Setup
Option Description
OSD Language
Set the On-Screen-Display language.
Aspect Ratio
Choose from, 4:3, 16:9, Zoom1, Zoom2, and Panorama.
Blue Screen
Set the screen to blue or not when having no signal.
Interaction
Channel Set the channel to interaction or not when having no signal.
MHEG PIN
Protection Set the MHENG PIN Protection or not when having no signal.
Time Setup
Use the ▼or ▲buttons to highlight one of the following options, then
press [OK] to enter the sub-menu and press ◄ or ► to adjust.
Set Time Zone/Time/Sleep Time/Auto Sleep. For detail please
reverence page 14.
Subtitle
Use the ▼ or ▲buttons to highlight one of the following options, then
press [OK] to enter the sub-menu and press ◄ or ► to adjust.
For detail please reverence page 19.
Digital Subtitle Lang.1st Set the first language for the digital subtitle.
Digital Subtitle
Lang.2
nd
Set the second language for the digital
subtitle.
Subtitle Type
Select the subtitle type (Normal/Hearing
Impaired).
Teletext
Use the ▼ or ▲buttons to highlight one of the following options, then
press [OK] to enter the sub-menu and press ◄ or ►to adjust.
For detail please reverence page 19.
Digital Teletext Language Set the language for the digital teletext.
Decoding Page
Language Set the language for the decoding page.
18
Table of contents
Other Denver LED TV manuals

Denver
Denver LED-5571 User manual

Denver
Denver LED-5573K User manual

Denver
Denver LED-2469S User manual

Denver
Denver LED-3279 User manual

Denver
Denver LDD-1953 User manual

Denver
Denver LED-1953MC User manual

Denver
Denver LED-6570 User manual

Denver
Denver LED-2459TC User manual

Denver
Denver LED-2456DVBTS User manual

Denver
Denver LDD-1953MC User manual

Denver
Denver LED-6568T2CS User manual

Denver
Denver LED-2256DVBTS User manual

Denver
Denver LDD-2249 User manual

Denver
Denver LDD-2468 User manual

Denver
Denver LDD-2453 User manual

Denver
Denver LED-3267T2C User manual

Denver
Denver LED-5571 User manual

Denver
Denver LDD-3273 User manual

Denver
Denver LED-3264DVBTS User manual

Denver
Denver LED-5570T2CS User manual