Desa HRC100 User manual

Save for future reference.
For more information, visit www.desatech.com
WIRELESS HAND-HELD REMOTE CONTROL MODELS HRC100,
HRC101, HRC200 AND HRC201 OPERATING INSTRUCTIONS
For Use With DESA Heating Products Remote Ready Log Sets
and Fireplace Systems
INSTALLING REMOTE RECEIVER
1. Disconnect switch wires from the control valve.
Some units will have an ON/OFF switch with
switch plate that is connected to the control
valve. Other units will have a jumper wire that
will need to be removed from the control valve
(see Figure 1).
2. Remove screws and switch plate as shown in
Figure 1. Discard after removing.
3. Install remote receiver unit onto gas log heater
base using clips (2) and insulating washers
provided.
4. Pushclipsrmlyintoplace(seeFigure2).
5. Connect wires as shown in Figure 3.
Note: Onyellowamemodels,reuseprovided
phillips head screws and reinstall heat shield over
receiving unit.
INSTALLING WIRELESS REMOTE
CONTROL ACCESSORY
Two 9-volt alkaline batteries (not included) are
required to operate this wireless hand held remote
controlset.Onebatterymustbeinstalledinthe
receiver and one in the hand-held remote control
unit. Note:Onlyusealkalinebatteries.
Installing 9-Volt Battery (Not Included) in
Receiver
1. Locatethebatteryclipmountedontheback
of the receiver.
2. Slidea9-voltbatterythroughtheclip.
3. Attachtheterminalwirestothebattery.
Figure 1 - Disconnecting Wires from
Control Valve
Front
Back
Wires to
Control Valve
Screw
Jumper Wire
Control Valve
Figure 2 - Installing Remote Receiver
Front
Back
Insulating
Washers
Remote
Receiver
Mounting
Clips
Figure 3 - Connecting Wires
Valve
Red Wire
From
Receiver
White
Wire From
Receiver
Battery Clip
ON/OFF Switch with
Switch Plate

www.desatech.com 116710-01C2
9-Volt Battery
Battery
Housing
Installing 9-Volt Battery (Not Included) in
Hand-Held Remote Control Unit
1. Remove battery cover on back of remote
control unit.
2. Removeanddiscardsensortaginsidebattery
housing.
3. Attach terminal wires to the battery. Place
batteryintothebatteryhousing.
4. Replace battery cover onto remote control
unit.
Figure 4 - Installing Battery in Hand-Held
Remote Control Unit
Battery
Cover
Terminal
Wires
Remote Control Unit
REMOTE OPERATION
NOTICE: You must light the pi-
lot before using the hand-held
remote control unit. See Light-
ing Instructions in your owner’s
manual.
1. Afterlighting,letpilotameburnforabout
one minute. Turn control knob to ON posi-
tion.Adjustameadjustmentknobanywhere
between HI and LO. Slide the selector switch
to the REMOTE position (see Figure 5).
Note: The burner may light if hand-held
remote was on when selector switch was last
turned off. You can now turn the burner on and
off with the hand-held remote control unit.
IMPORTANT: Do not leave the selector switch
in the REMOTE or ON position when the pilot
isnotlit.Thiswilldrainthebattery.
Figure 5 - Setting the Selector Switch,
Control Knob and Flame Adjustment
Knob (Available on Some Models) for
Hand-Held Remote Operation
O
F
F
P
I
L
O
T
L
O
I
H
REMOTE
OFF
ON
O
N
Flame Adjustment Knob
(Available on Some Models)
Control Knob
Selector Switch in
REMOTE Position
(Optional Hand-Held
Remote Control)
ON/OFF Series
(Models HRC100 and HRC101)
Hold the control button on the hand-held remote
until burner turns on. Hold the control button again
until burner turns off (see Figure 6).
To Lock press both buttons on hand-held remote
control until light stops flashing. Hand-held
remotecontrolisnowlocked.Ifthereisonit
will be turned off automatically. In the locked
state,thelightwillnotlightupwhenanybutton
is pressed.
To Unlock press both buttons together on hand-
heldremotecontroluntilthelightstopsashing.
The hand-held remote is now unlocked.
Figure 6 - ON/OFF Hand-Held Remote
Control Unit
Control
Button
Indicator Light
Sensor
Tag

www.desatech.com
116710-01C 3
THERMOSTAT SERIES
(MODELS HRC200 AND HRC201)
The hand-held remote can be operated using
either the manual mode (MANU) or thermostatic
mode (AUTO) (see Figure 7). To select Fahren-
heit/Centigrademodedisplay,carefullypressthe
˚C/˚Fmodebuttonwiththeendofapaperclipor
similar blunt object.
Manual Mode
1. Press the POWER and LOCK buttons together
to turn on the hand-held remote control.
2. PresstheMANUbuttontoturnonthere-
place.
3. Press the POWER and LOCK buttons together
toturnoffthereplace.
Auto (Thermostatic) Mode
1. Press the POWER and LOCK buttons together
to turn on the hand-held remote control.
2. Press AUTO button to select this mode.
3. Setthedesiredroomtemperaturebypress-
ing the TEMP + or - buttons.
4. Press the POWER and LOCK buttons together
toturnoffthereplace.
Note: Do not leave the hand-held remote in the
AUTOmode close to the replace.The radiant
heatfromthereplacewillturnoffthereplace.
Ideally,placethehand-heldremoteinthecenter
oftheroomfacingtowardsthereplace.
Note: Do not hold the hand-held remote for a long
time.Bodytemperaturewillaffectitsoperationin
the AUTO mode.
Figure 7 - Thermostat Hand-Held Remote Control Unit
LOCK
MANU AUTO
ºC/ºF
TEMP POWER
ROOM
TEMP
SET
TEMP
AUTO
Turns Hand-Held Remote
On or Off and Allows You
to Choose the Manual
Setting
Selects AUTO Mode
°C/°F Mode Button
Locks System to
Prevent Accidental
Ignition
Turns Burners
On or Off
Increases or Decreases
Room Temperature in
AUTO Mode
Digital Display Shows
Temperature and Settings
Safety Features
When away from home for an extended period
of time or as a child safety feature to prevent
accidental ignition of the replace, the receiver
ON/OFF/REMOTE switch should be in the OFF
position.
Auto Shutoff Feature
1. If the average room temperature reaches a
rangeof82°F(28°C)to92°F(33°C),the
hand-heldremotecontrolwillperformasafety
overrideandshutthereplaceoff.Thisfeature
is not available in the MANU mode.
2. The receiver continuously receives signals
from the hand-held remote to control the
room temperature. If the hand-held remote is
misplaced,obstructedorforanyreasoncan-
nottransmittothereceiver,thereceiverwill
shutoffthereplace.Thiswilloccurineight
or more minutes depending upon location of
remote transmitter and strength of batteries.
Key Pad Lock Feature
This feature allows the user to lock/unlock the
keypadonthehand-heldremoteintheMANUor
AUTO mode to prevent inadvertent operation (i.e.
childrenoperatingthehand-heldremotecontrol,
etc.).Thekeypadislockedineitheronoroff.Press
the POWER and LOCK buttons together to turn
the unit on or off.

2701 Industrial Drive
P.O. Box 90004
Bowling Green, KY 42102-9004
www.desatech.com
DOCKING STATION
The wall docking station offers a convenient loca-
tiontostoreyourhand-heldremotecontrolwhen
thereplaceisnotinuse.Thereplacewillnot
operateproperlywhenremotecontrolisstoredin
the wall docking station.
Note: For customer service contact DESAHeating
Products at 1-866-672-6040 or visit our web site
at www.desatech.com.
Figure 8 - Remote Docking Station

Conserve este instructivo para referencia futura.
Para obtener más información, visite www.desatech.com
INSTRUCCIONES DE OPERACIÓN PARA LOS MODELOS
HRC100, HRC101, HRC200 Y HRC201 CON CONTROL REMOTO
INALÁMBRICO
Para uso con sistemas para chimenea y juegos de leños de
encendido remoto de DESA Heating Products.
INSTALACIÓN DEL RECEPTOR
REMOTO
1. Desconecte los cables del interruptor de la
válvula de control. Algunas unidades tienen
un interruptor de alimentaciónconplaca,el
cual está conectado a la válvula de control.
Otras tienen un cable de puente que deberá
extraerdelaválvuladecontrol(consultela
figura 1).
2. Quitelostornillosylaplacadelinterruptor
como se muestra en la figura 1. Deséchelos.
3. Instale la unidad del receptor remoto en la base
del calefactor de leños a gas sujetándolo con
losclips(2)yarandelasaislantesincluidas.
4. Fije con firmeza los clips en su sitio (consulte
la figura 2).
5. Conecte los cables como se muestra en la
figura 3.
Nota: Enlosmodelosconllamacoloramarillo,
vuelva a utilizar los tornillos de cruz (phillips)
provistos para instalar el protector de calor en la
unidad receptora.
INSTALACIÓN DEL ACCESORIO
PARA CONTROL REMOTO
INALÁMBRICO
Este control remoto requiere dos baterías alcalinas
de 9 voltios (no incluidas). Una batería se coloca en
elreceptorylaotraenlaunidaddecontrolremoto.
Nota: Utilice sólo baterías alcalinas.
Colocación de la batería de 9 voltios (no
incluida) en el receptor
1. Encuentre el sujetador de batería montado en
la parte posterior del receptor.
2. Introduzca una batería de 9 voltios en el suje-
tador.
3. Conecte los cables de terminal a la batería.
Figura 1 - Desconexión de los cables de
la válvula de control
Front
Back
Cables hacia
la válvula de
control
Tornillo
Cable de
puente
Válvula de control
Figura 2 - Instalación del receptor
remoto
Front
Back
Arandelas
aislantes
Receptor
remoto
Sujetadors
de montaje
Figura 3 - Conexión de los cables
Válvula
Cable rojo
del receptor
Cable
blanco del
receptor
Sujetador de batería
Interruptor de alimentación
con placa
Frente
Atrás
Frente
Atrás
®

www.desatech.com 116710-01C6
O
F
F
P
I
L
O
T
L
O
I
H
REMOTE
OFF
ON
O
N
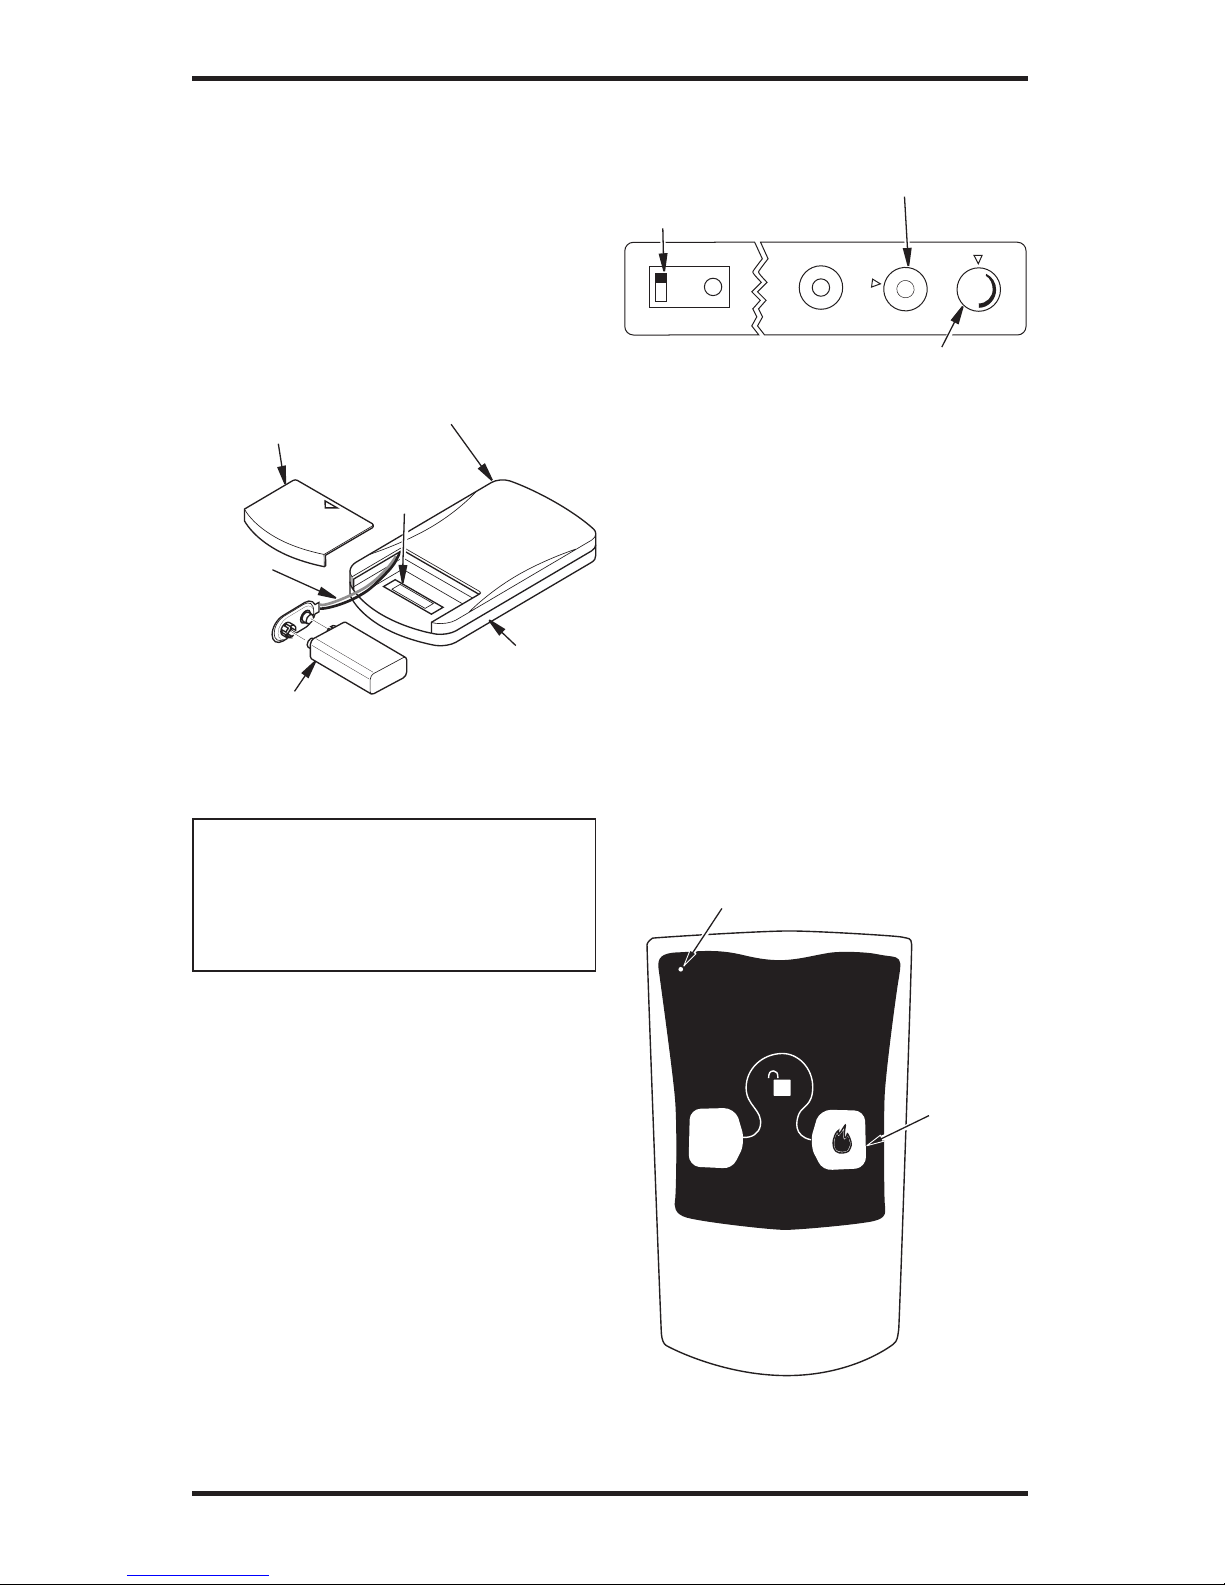
Batería de 9 voltios
Compartimento
de batería
Instalación de la batería de 9 voltios (no
incluida) en el control remoto
1. Retire la tapa de la batería ubicada en la parte
posterior de la unidad de control remoto.
2. Retire y deseche la etiqueta del sensor que
se encuentra dentro del compartimiento de la
batería.
3. Conecte los cables de terminal a la batería.
Introduzca la batería en el compartimento.
4. Coloque la tapa de la batería en el control
remoto.
Figura 4 - Instalación de la batería en la
unidad de control remoto
Cubierta de
la batería
Cables de
terminal
Unidad de
control remoto
OPERACIÓN REMOTA
AVISO:antesdeutilizarlaunidad
decontrolremotodebeencender
elpiloto.ConsultelasInstruccio-
nes de encendido en el manual
del propietario.
1. Una vez que el piloto enciende deje que
la llama permanezca encendida durante
un minuto. Gire la perilla de control hasta
la posición de “ON” (encendido). Gire la
perilla de ajuste de llama hasta cualquier
posición entre “HI” (alto) y “LO” (bajo).
Ponga el interruptor del selector en la posición
“REMOTE” (remoto) (consulte la figura 5).
Nota: Es posible que el quemador encienda si
el control remoto estaba encendido la última
vez que se apagó el interruptor del selector.
Ahorayapuedeencenderyapagarelquema-
dor con la unidad de control remoto.
IMPORTANTE: no deje el interruptor del selec-
tor en la posición “REMOTE” (remoto) o “ON”
(encendido) cuando el piloto no esté encendido.
De lo contrario la batería se descargará.
Figura 5 - Ajuste del interruptor del
selector, de la perilla de control y de la
perilla de ajuste de llama (disponibles
en algunos modelos) para su
funcionamiento con control remoto
Perilla de ajuste de llama
(disponible en algunos modelos)
Perilla de control
Interruptor del selector
en posición REMOTO
(remote) (el control
remoto es opcional)
Serie con interruptor de alimentación
(modelos HRC100 y HRC101)
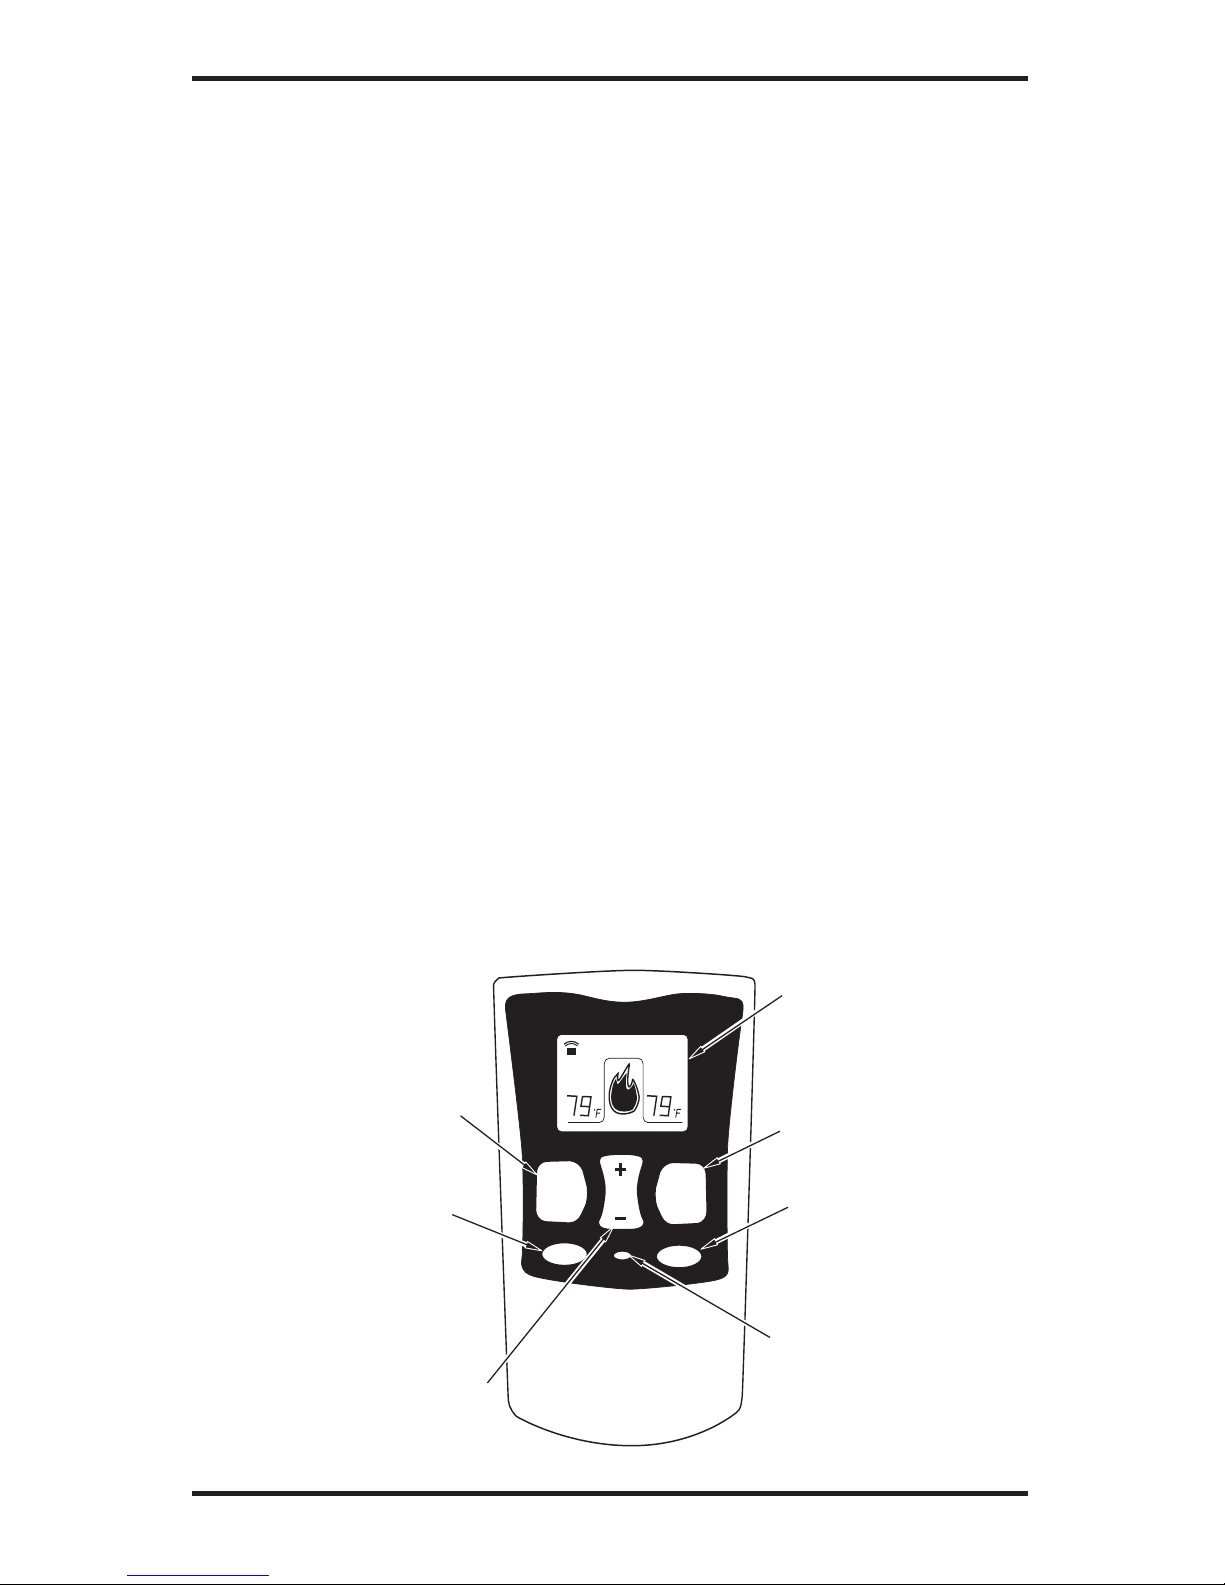
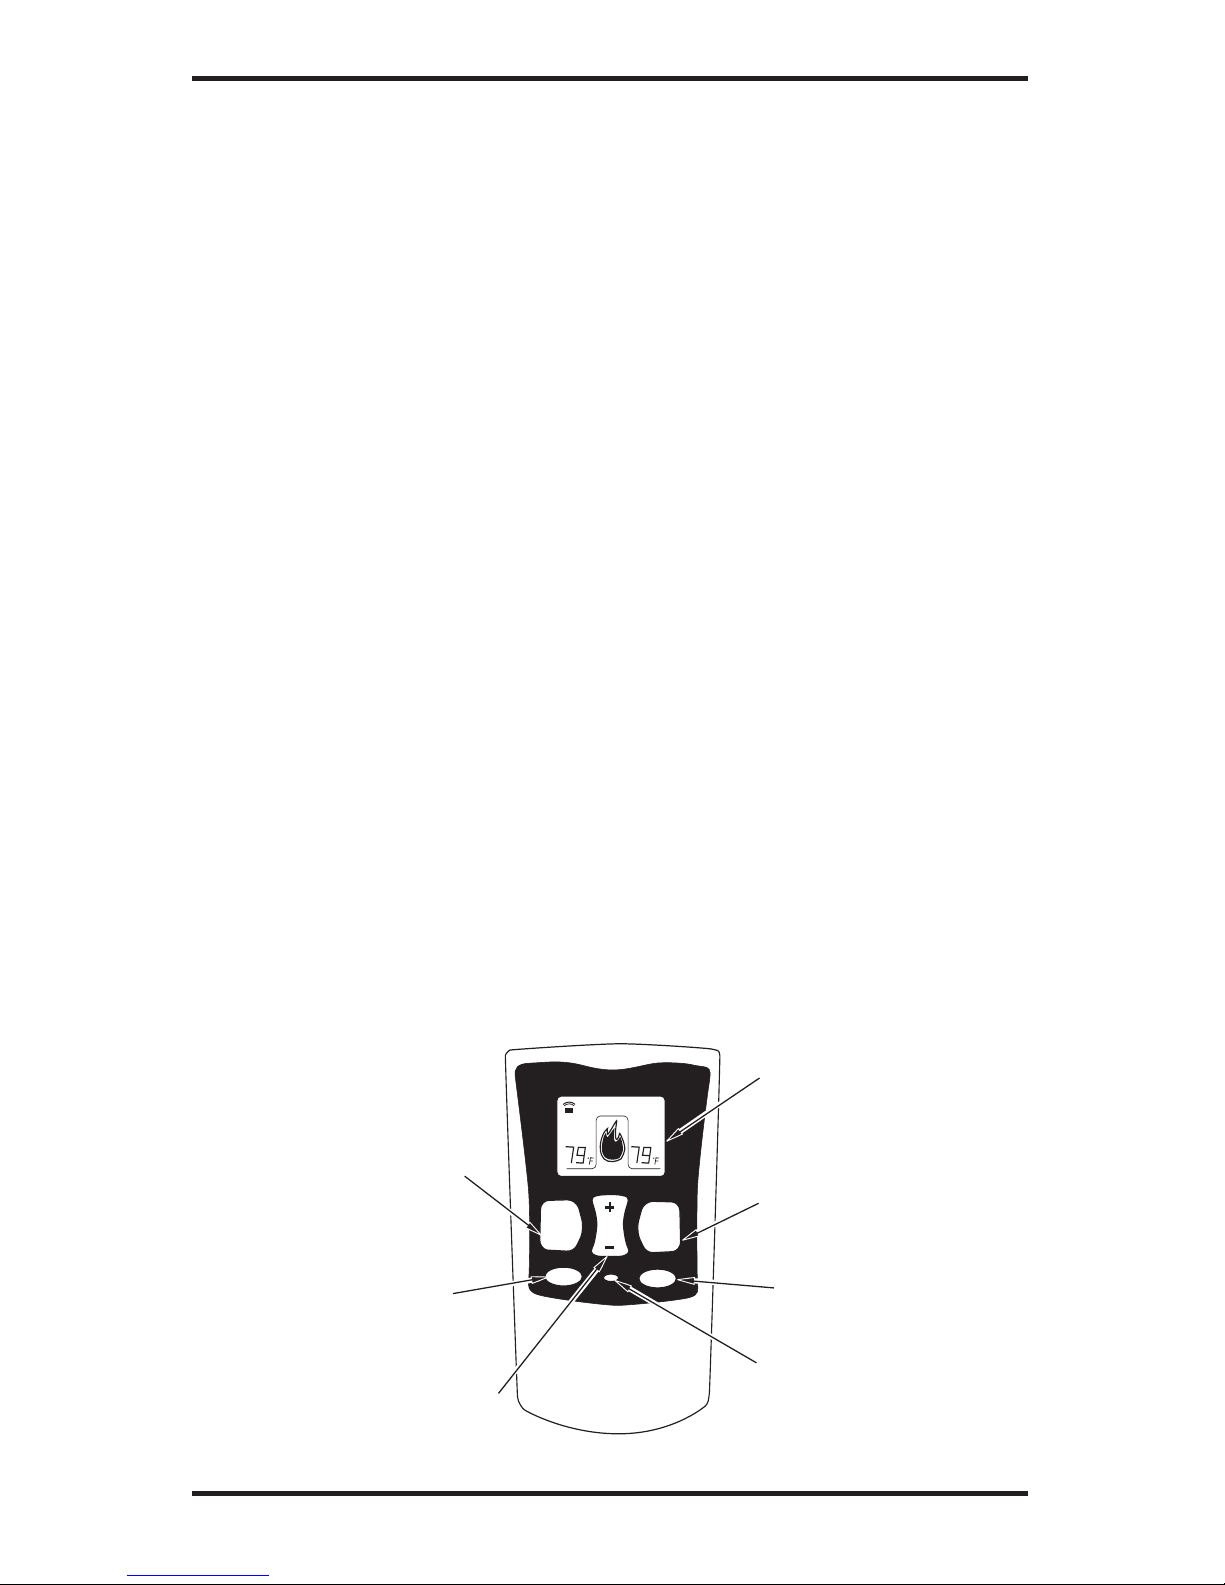
Mantenga presionado el botón de control del
control remoto hasta que el quemador se encienda.
Mantenga nuevamente presionado el botón del
control hasta que el quemador se apague (consulte
la figura 6).
Para bloquearlo presione los dos botones del
control remoto hasta que la luz deje de parpadear.
En ese momento la unidad de control remoto
queda bloqueada. Si la llama está encendida el
calentador se apagará automáticamente. Cuando
estábloqueado,laluznoseencenderáalpresionar
alguno de los botones.
Para desbloquearlo presione los dos botones
del control remoto al mismo tiempo hasta que la
luz deje de parpadear. La unidad de control remoto
queda desbloqueada.
Figura 6 - Unidad de control remoto con
interruptor de alimentación
Botón de
control
Luz indicadora
Etiqueta
del sensor

www.desatech.com
116710-01C 7
SERIE CON TERMOSTATO
(MODELOS HRC200 Y HRC201)
El control remoto puede utilizarse ya sea en
modo manual (MANU) o en modo termoestático
(AUTO)(consultelagura 7).Paraseleccionar
el modo de mostrar la temperatura en fahrenheit
ocentígrados,presionecuidadosamenteelbotón
delmodo˚C/˚Fconlapuntadeunclipodealgún
otro objeto puntiagudo.
Modo manual
1. Presione al mismo tiempo los botones de
POWER(encendido)yLOCK(bloqueo)para
encender la unidad de control remoto.
2. Presione el botón MANU (manual) para
encender la chimenea.
3. Presione al mismo tiempo los botones de
POWER(encendido)yLOCK(bloqueo)para
apagar la chimenea.
Modo automático (termoestático)
1. Presione al mismo tiempo los botones de
POWER (encendido) y BLOCK (bloqueo)
para encender la unidad de control remoto.
2. Presione el botón AUTO (automático) para
elegir este modo.
3. Para ajustar la temperatura deseada de la
habitación presione los botones TEMP + o -.
4. Presione al mismo tiempo los botones de
POWER (encendido) y BLOCK (bloqueo)
para apagar la chimenea.
Nota: Cuando el control remoto esté en modo
AUTO (automático) no lo deje cerca de la chi-
menea. La chimenea se apagará por el calor que
irradia de ella. Lo más recomendable es que ponga
la unidad de control remoto en el centro de la
habitaciónydirigidohacialachimenea.
Figura 7 - Unidad de control remoto con termostato
LOCK
MANU AUTO
ºC/ºF
TEMP POWER
ROOM
TEMP
SET
TEMP
AUTO
Enciende o apaga la
unidad de control remoto
y permite elegir el ajuste
manual
Elige el modo
AUTOMÁTICO
Botón de
modo °C/°F
Bloquea el sistema para
prevenir que se encienda
accidentalmente
Enciende o apaga
los quemadores
Sube o baja la temperatura
de la habitación en modo
AUTOMÁTICO
La pantalla digital
muestra la temperatura y
configuración
Nota: No sujete la unidad de control remoto en su
mano por mucho tiempo. La temperatura corporal
afecta el funcionamiento del control remoto cuan-
do ésta en modo AUTO (automático).
Aspectos de seguridad
Cuandovayaaestarfueradesudomiciliodurante
un largo tiempo o como medida de seguridad
para niños y para prevenir que la chimenea se
enciendaaccidentalmente,pongaelinterruptorde
ON/OFF/REMOTE (encendido/apagado/remoto)
del receptor en la posición OFF (apagado).
Apagado automático
1. Cuando la temperatura promedio de la habita-
ción alcance un rango de 28° C (82° F) a 33° C
(92°F),elcontrolremotoefectuaráunaacción
decontrolmaestrodeseguridadyapagarála
chimenea. Esta función no está disponible en el
modo MANU (manual).
2. El receptor continuamente recibe señales del
control remoto para controlar la temperatura
de la habitación. Cuando el control remoto
esté extraviado o algo obstruya la señal o
bien cuando por algún otro motivo no pueda
transmitir la señal al receptor, éste último
apagará la chimenea. Esto ocurrirá en ocho o
más minutos dependiendo de la ubicación del
controlremotoydelacargadelasbaterías.
Bloqueo del teclado
Está función permite al usuario bloquear o des-
bloquear el teclado del control remoto en el modo
MANU (manual) o AUTO (automático) para
prevenir que éste opere de manera inadvertida (por
ejemplo,queniñospequeñosloesténmanejando,
etc.). El teclado se puede bloquear en encendido
o apagado. Presione al mismo tiempo los botones
dePOWER(encendido)yLOCK(bloqueo)para
encender o apagar la unidad.

2701 Industrial Drive
P.O. Box 90004
Bowling Green, KY 42102-9004, EE.UU.
www.desatech.com
116710-01
Rev. C
08/06
116710 01
BASE PARA EL CONTROL REMOTO
La base de pared es un sitio conveniente para
colocar la unidad de control remoto cuando la
chimenea no esté en uso. La chimenea no funcio-
nará correctamente cuando el control remoto esté
en la base de pared.
Nota: Para servicio al cliente llame a DESA Hea-
ting Products al teléfono 1-866-672-6040 o visite
nuestro sitio web en www.desatech.com.
Figura 8 - Base para el control remoto
NOT A UPC
This manual suits for next models
3
Table of contents
Languages:
Other Desa Remote Control manuals