CONTACT SUPPORT
PHONE: (888) 487-4488
ADDRESS: 8715 Boston place, Rancho Cucamonga, CA. 91730
www.designelementusa.com
•Avoid using any type of rough cleaning material on top of the cabinet
nish.
• Use mild liquid soap and water-dampened soft cloth to remove stains from
the cabinet and to clean the marble countertop.
• For the glass part of the mirror, use ammonia-free cleaning products.
CARE AND CLEANING
•Please go through this entire instruction manual before making any
attempt to assemble, operate or install the product.
• During installation, handle the countertop and sink with optimum care.
They might break if hit hard on a solid surface.
• Don’t start using the vanity right away. Wait for approximately 24 hours
after installation so that the silicon glue can dry.
• When scrubbing the cabinet while cleaning, make sure you do not remove
or scratch the nish.
SAFETY AND PRECAUTIONS
!
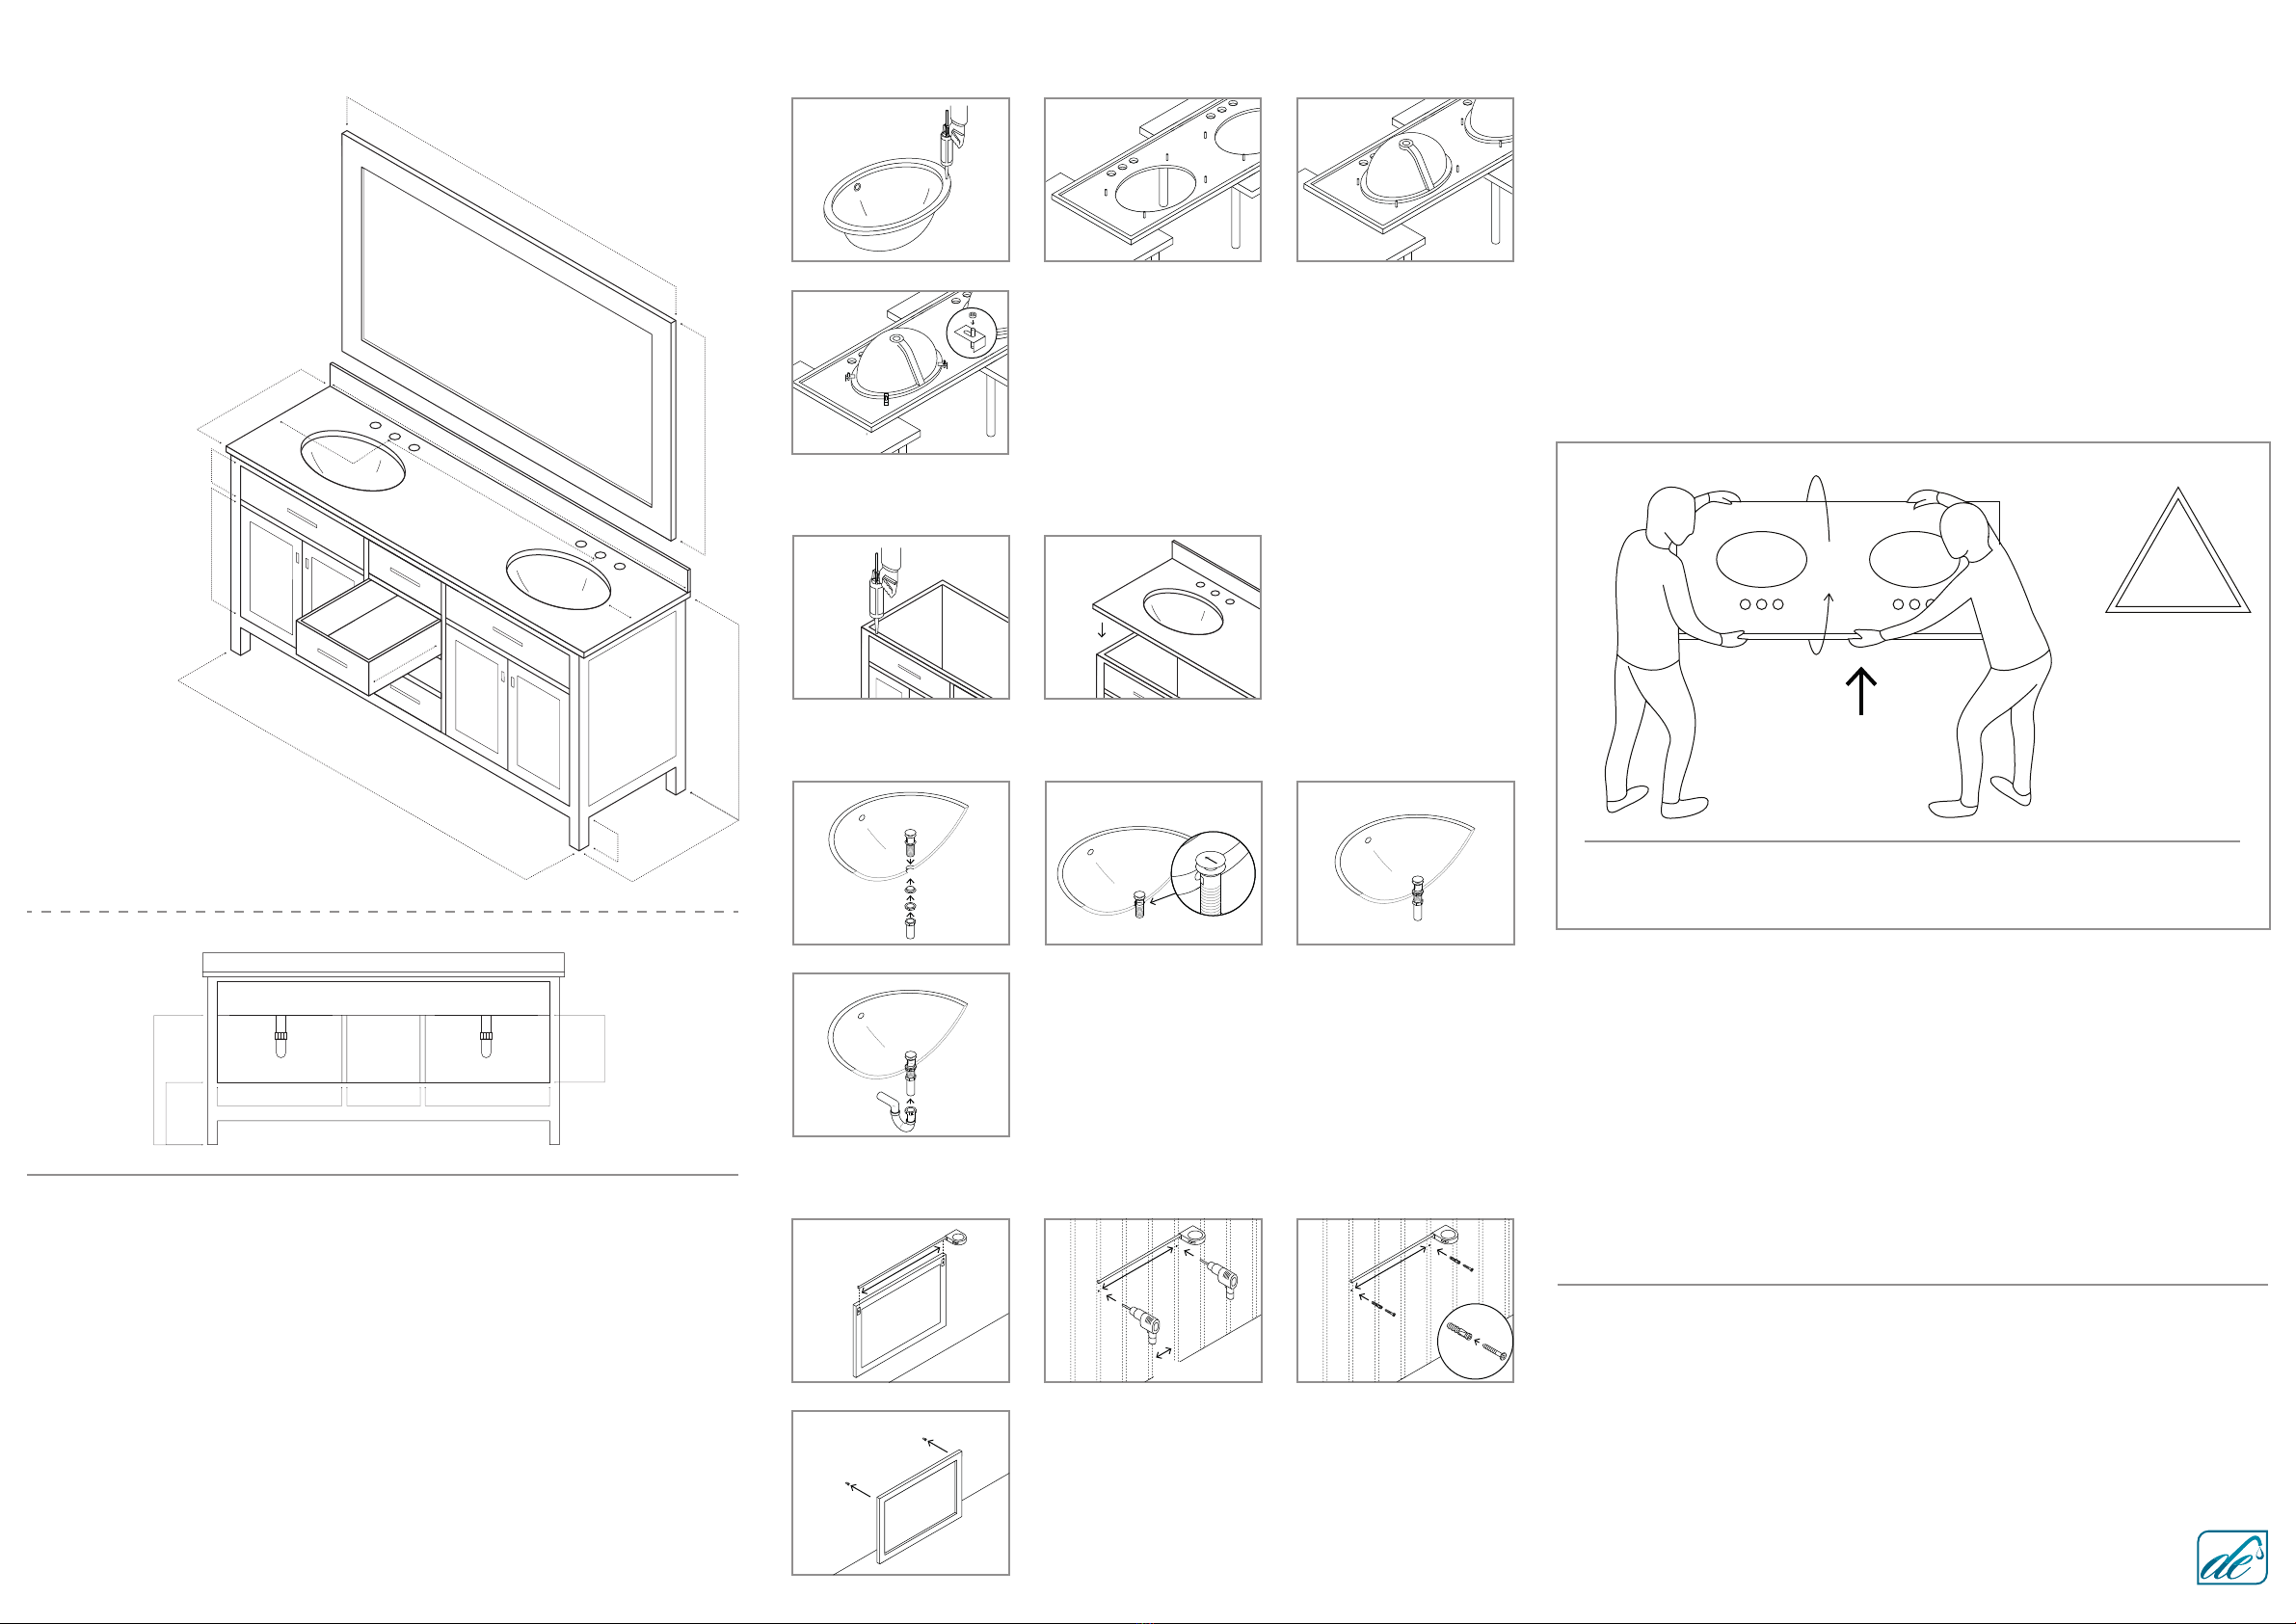
While turning around the double sink counter tops, always add
support from the centre for safety
!
While turning around the double sink counter tops, always add
support from the centre for safety
12"or 16"
1. 2. 3.
4.
1. 2. 3.
4.
1. 2.
1. 2. 3.
4.
Hanging Mirror On The Wall
4. Hang the mirror on to the screws.
3. Insert the plastic plugs into the drilled holes and then insert screws into the
plastic plugs. Tie up the screws till they remain at least 0.5” – 0.75” outside the
wall.
2. Locate the studs on the wall. They are normally placed 12” to 16” apart from
each other. Drill two holes on the studs as per your previous measurement.
1. Measure the distance between the screw holes from the back of the mirror.
Installing The Drain On The Sink
4. Connect the trap onto the drain bottom.
3. Tie up the mounting rubbers and metal rings from the bottom of the drain.
2. For the overow sinks, make sure that the overow hole on the drain is aligned
straight in the direction of the overow hole on the sink.
1. After installing the counter top on the cabinet, put the drain assembly inside
the hole in the sink and x it rmly.
Attaching Counter Top To Cabinet
2. Place the countertop on the glued
cabinet.
3. Don’t start using the vanity right
away. Wait for approximately 24
hours so that the silicon glue can dry.
1. Apply continuous stream of quality
silicon glue to the top of the cabinet
where the countertop needs to be
placed.
4. Tie up screws positioned at the respective places on the counter top.
3. Put the glued sink over the cutout and attach it rmly.
2. Turn the counter top upside down and provide support from beneath.
(Note: While turning around the double sink counter tops, always add support from the
centre for safety)
1. Apply continuous stream of silicon glue on circumference of the sink.
Attaching Sink To The Counter Top
PACKING LIST
•Pre-assembled cabinet
•Countertop
• 2 Sinks
•1 Mirror
• Mirror mounting screws
• Drain
•Instruction Manual
WARRANTY
Design Element warrants cabinets, mirrors, nishes and ttings to be free
from defects in workmanship and materials under normal use and service
for a period of one (1) year.
Please report any damage or missing pieces of your vanity to us immedi-
ately. These things must be reported no later than 30 days from the date of
delivery.
BACK
FRONT
DEC076B
COLLECTION: London
SERIES: Stanmark
DIMENSIONS: W 72” | D 22” | H 36”
SKU CODE:
INSTRUCTION MANUAL
22”
21 5/8”
17 5/8”
4 5/8”
68”
40 5/8”
72”
15 5/8” 7”
71 5/8”
34 1/4”
35 3/4”
19 7/8” 6 5/8”
26 3/4”
13 3/4” 25 5/8” 25 5/8”15 5/8”
12”


