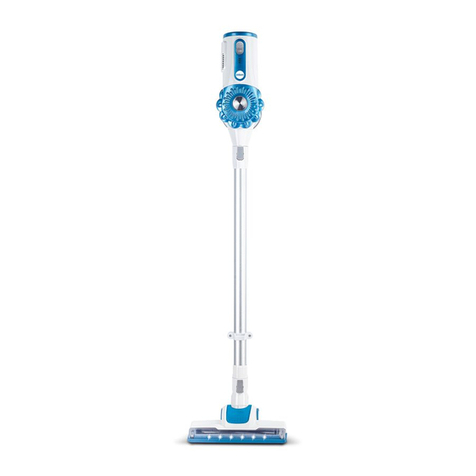
devoac V50 User manual

V50
Cordless Stick
Vacuum Cleaner
V50 / V50S / V50P Pro / V50P / V50T
V51 / V52 / V55 / V56 / V57 / V58 / V59
V500 / V510 / V520 / V550 / V560
V570 / V580 / V590
https://devoac.com/[email protected]

CONTENTS
○ ImpoantSafetyInstructions
○ Product Technical Parameters
○ Product Components
○ Product Assembling
○ Instructions for Use
○ Cleaning & Maintenance
○ Troubleshooting
○ Warranty
------------------------- 01
------------------------- 03
--------------------------------- 04
---------------------------------- 05
---------------------------------- 06
------------------------------ 07
-------------------------------------- 09
-------------------------------------------- 09
ImpoantSafetyInstructions
Read all the instructions carefully before using the vacuum cleaner.
WARNING:Basicsafetyprecautionsshouldalwaysbeobseedwhenusingan
electricalappliance,includingthefollowingtoreducetheriskofre,electrical
shock, orinju.
Storeitindoorsinadplaceoutofthereachofchildren;
Alwaysuseresponsibly.Thisappliancecanbeusedbychildrenagedfrom 10
yearsandaboveandpersonswithreducedphysical,sensoormental
capabilitiesorlackofexperienceandknowledgeiftheyhavebeengiven
supeisionorinstructionconcerninguseoftheapplianceinasafewayand
understandthehazardsinvolved;
Don'tletchildrenplaywiththeappliance;supeisechildrenusingormain-
taining theappliance;
Useonlymanufacturer'srecommendedattachmentsasdescribedinthis
manual;misuseoruseofanyaccessoorattachmentotherthanthose
recommended,maypresentariskofpersonalinju;
Takeextracarewhencleaningstairs;
Keeptheapplianceandaccessoriesawayfromhotsuace;
Donotblocktheappliancesopeningsorhinderairow,keepopeningsfree
ofanyobjectsincludingdust,lint,clothing,ngers(andallpasofthebody);
Paicularlykeephairawayfromopeningsandmovingpas;
1.
2.
3.
4.
5.
6.
7.
8.
PersonalSafety
ElectricalSafety
Onlyusebatteriesandchargersuppliedbythemanufacturer;
Nevermodifythechargerinanyway;
Thechargerhasbeendesignedforaspecicvoltage.Alwayscheckthevoltage
isthesameasthatstatedontheratingplate;
Achargerthatissuitableforonetypeofbattepackmaycreateariskofre
whenusedwithanotherbattepack;
Beforeusing,checkthechargercordforsignsofdamageorageing.Adamaged
orentangledchargercordincreasestheriskofreandelectricshock;
Donotabusethechargercord;
Nevercarthechargerbythecord;
Donotpullthecordtodisconnectitfromasocket,grasptheplugandpullto
disconnectit;
Don'twrapthecordaroundthechargerwhenstoring;
Keepthechargercordawayfromhotsuacesandsharpedges;
1.
2.
3.
4.
5.
6.
7.
8.
9.
10.
01

ElectricalSafety
BatteSafety
Thesupplycordcannotbereplaced.Ifthecordisdamagedthecharger
shouldbediscardedandreplaced;
Donothandlethechargerortheappliancewithwethand;
Donotstoreorchargetheapplianceatoutdoor;
Thechargermustberemovedfromthesocketbeforeremovingthebatte,
cleaningormaintainingtheappliance.
11.
12.
13.
14.
ThisapplianceincludesLi-ionbatteries,donotincineratebatteriesorexpose
tohightemperatures,astheymayexplode;
LiquidejectedfromthebattemaycauseIrritationorburns;
Inanemergencysituationcontactprofessionalhelpimmediately;
Leaksfromthebattecellscanoccurunderextremeconditions.Donottouch
anyliquidthatleaksfromthebatte.Iftheliquidthatgetsonskin,wash
immediatelywithsoapandwater.Iftheliquidgetsintotheeyes,ushthem
immediatelywithcleanwaterforaminimumof10minutesandseekmedical
attention.Wearglovestohandlethebatteandisposeofimmediatelyin
accordancewithlocalregulations;
Shoingthebatteterminalsmaycauseburnsorre;
Whenthebattepackisnotinuse,keepitawayfrompaperdips,coins,keys,
nails,screwsorothersmallmetalobjectsthatcouldmakeaconnectionfrom
oneterminaltoanother;
Whenyoudisposeoftheapplianceremovethebatteanddisposeofthe
battesafelyinaccordancewithlocalregulations.
1.
2.
3.
4.
5.
6.
7.
Seice
IntendedUse
Beforeusingtheapplianceandafteranyimpact,checkforsignsofwearof
damageandrepairasnecessa;
Donotusetheapplianceifanypaisdamagedordefective;
Repairsshouldbecarriedoutbyseicecenter.Repairsbyunqualiedpersons
couldbedangerous;
Nevermodifytheapplianceinanywayasthismayincreasetheriskofpersonal
inju;
Onlyusereplacementpasoraccessoriesprovidedbymanufacturer.
1.
2.
3.
4.
5.
Thisappliancehasbeendesignedfordomesticdvacuumcleaningonly;
Donotpickupliquidsoruseonwetsuaces;
Donotpickupanythingthatisammable,burningorsmoking;
Useonlyasdescribedinthismanual;
Don'tuseonconcrete,tarmacadamorotherroughsuaces.
1.
2.
3.
4.
5.
Warning
Donotusewater,solvents,orpolishestocleantheoutsideoftheappliance;
wipecleanwithadcloth;
Neverimmersetheunitinwateranddonotcleaninadishwasher.
1.
2.
* Regularly replace the HEPA lter to prevent the suction decline from aecting
machine cleaning peormance.
Model Number
Input Voltage
Battery Capacity
V50
100-240v, 50/60Hz
2200mAh
Net Weight
Output Voltage
Adapter Cord Length
2.2kg/4.8lbs
27V, 0.5A
1.8m
Product Technical Parameters
02 03

04 05
Product Components Product Assembling
Long Crevice
Extra HEPA Filter
2-in-1 Oval Brush Adapter Roller Brush
2-in-1 Cleaning tool
Wall Bracket
Main Body
Dust Box
Brush Head
Telescopic Tube
How to use as the stick vacuum cleaner
How to use as the handheld vacuum cleaner
How to place the vacuum cleaner
1) Press the button on the brush head and attach the tube on until a click sound.
2) Press the button on the accessories and attach the tube until a click sound.
Attach the accessories to the main body directly as below.
1) Fix the wall bracket with screw which
near with the socket.
2) Hang the main body on the wall
bracket after using.
Batte Indicator
Low Speed/ High Speed
ON/OFF
For more info about accessories, please contact Devoac to get suppo.
Web: https://devoac.com Email: suppo@devoac.com

Cleaning & Maintenance
* Clean the vacuum cleaner regularly
How to empty the dust box
1) Clean the dust bin promptly after each use.
2) Hair and u must also be removed regularly from the rollers.
3) Stainless lter should be washed once a month and replaced when necessa.
4) HEPA lter can't be washed and should be cleaned with a 2-in-1 cleaner tool
once a month, and replaced when necessa.
5) Check your stick vac regularly for obstructions.
(1) Press the metal tube release button to take o the tube.
Telescopic tube button
(2) Unlock the dust box to empty. (3) Empty the dust box.
(1) Put the main body on the
table to charge.
(2) Hang the vacuum on the wall
bracket to charge.
Charging Methods
ON/OFF and Speed Adjusting
1) Press the on/o button on the handle to sta or close the vacuum cleaner.
2) Press the speed control button on the handle to adjust the vacuum cleaner
to work with high/low speed.
Charging
1) Before charging, make sure the adapter is the right one.
2) When charging, the LED indicator light will keep ashing,
3) When fully charged, the indicator light will stay on.
4) When the batte is going to be power o, the LED light will ash.
And please charge it right now with adapter.
Instructions for Use
Regular cleaning of the vacuum cleaner will prevent loss of suction and clogging,
thus maintaining the life of the vacuum cleaner for a longer period of time.
Batte Indicator
Low Speed/ High Speed
ON/OFF
06 07

Troubleshooting
Warranty
(1) Open the dust box, and rotate
to take out the lter.
(2) Rotate to take out the HEAP lter.
(3) Clean the HEPA with the
cleaning tool, not washable.
(4) Wash the mesh lter and d
before installing.
(5) Assemble the HEPA lter into
the metal lter.
(6) Put the metal lter into the
dust box.
How to clean lters
(1) Open the button and take out
the roller brush.
(2) Clean the roller brush with the
cleaning tool.
How to clean the roller brush
12-monthWarranty & LifetimeCustomerSuppo
OnlyapplytoeligiblepurchasesmadedirectlyfromtheDevoacauthorized
distributors.Warrantycoverageappliestotheoriginalownerandtotheoriginal
productonlyandisnottransferable.
Howtoinitiateawarrantyclaim
Ifyourapplianceoperatesimproperlywhileinuseundernormalhousehold
conditionswithinthewarrantyperiod,pleasecontactourcustomersuppo
suppo@devoac.comVisithttps://devoac.comtolloutthewarrantyformto
initiateawarrantyaims.
Formorewarrantydetails,pleaserefertohttps://devoac.comAllrights are reseed
by Devoac’s ocial website.
Problem Solution
Poor suction or no suction
Batte can’t charge
Stop working
Roller brush stops spinning
or has strange noise
1. Clean the lter.
2. Empty the dust box.
3. Check that the lters is correctly installed.
1. Check the adapter.
2. Check the connection between the main body
and the charger.
1. Charge the batte.
2. Batte can’t charge, and replace it.
3. Brush head is broken, and replace it.
4. Clear debris/hair from roller brush with
2-in-1 cleaning tool.
1. Check if the brush is stuck by hair.
2. Check if the lter cup is installed correctly in the
right position.
3. Detach the tube, and use the accessories the
main body only. If still don’t work, contact with
the seice team for help.
08 09
This manual suits for next models
19
Table of contents
