Diagnostic Instruments SPOT User manual

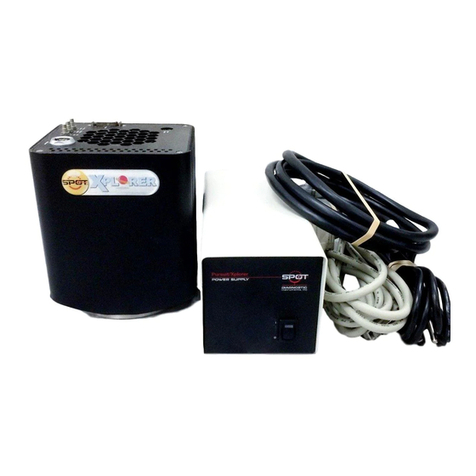
User’s Guide to the SPOT Cooled Color
Digital Camera
Table of Contents:
Copyright Information...........................................................................2
Introduction/Document Conventions....................................................3
Ch. 1 - Electronic Imaging Theory and the SPOT Camera .................4
Ch. 2 - Navigating the SPOT Software................................................9
Ch. 3 - Preparing to Take a Picture....................................................19
Ch. 4 – Taking a Picture.....................................................................48
Ch. 5 - Viewing, Editing and Annotating Images ...............................65
Ch. 6 - Calibration and Measurement..............................................103
Ch. 7 – Using SPOT Databases ......................................................107
Ch. 8 - Printing Options....................................................................124
Appendix A - Specifications .............................................................132
Appendix B - Changing the Dessicant.............................................133
Appendix C - Using SPOT's TWAIN Features.................................136
Appendix D - Using the SPOT Image Pro Plus Driver.....................141

Single User Copyright and License Agreement, Diagnostic Instruments
Carefully read the following terms and conditions before using the software. By using the software
on the enclosed CD, you indicate your complete and unconditional acceptance of these terms and
conditions.
This document is a legal agreement between you, the end user, and Diagnostic Instruments, concerning the
use of the enclosed software. This agreement constitutes the complete agreement between you and
Diagnostic Instruments.
If you do not agree to the terms of this agreement, do not use the CD. Promptly return the CD,
including the written materials, the binder, and all other equipment/containers to the dealer where
you purchased them from. You will receive a full refund.
1. LICENSE: Diagnostic Instruments grants you the LICENSEE, a limited, non-exclusive license to use
the enclosed software. You may physically transfer the Software from one computer owned or leased
by you to another, provided that the Software is used on only one computer at a time. You may not
electronically transfer the Software from one computer to another over a network. You may make a
copy of the Software for backup and archival purposes, provided that the original copyright notice
an/or other legend is reproduced on each copy. Except for backup purposes, you may not make or
distribute copies of the Software. You may not modify, translate, adapt, reverse engineer, decompile,
disassemble, or create derivative words based on the Software. If you wish to use the Software on
more than one computer, you must license another copy of the software for each computer.
2. TITLE: Diagnostic Instruments retains title to the Software, subject to your right to possess and use
the software while the License is in effect. You will agree to use your best efforts to protect the
software from unauthorized use, illegal reproduction, or illicit distribution.
3. COPYRIGHTS and TRADE SECRETS: Diagnostic Instruments owns all rights regarding the
Software. This agreement does not convey ownership of the software to you, but only the right to use
a copy of the software strictly in accordance with this agreement. The unauthorized duplication or
distribution of the software or the documentation is an infringement of Diagnostic Instruments' rights
to the software and may be subject to criminal and/or civil penalties.
4. UPDATE POLICY: In order to receive updates to the Software, you must complete and return the
enclosed registration card to Diagnostic Instruments. All updates provided to you shall become part of
the software governed by the terms of this agreement.
5. GENERAL: This agreement merges all prior written and oral communication regarding the Software
and sets forth the entire agreement of the parties. This agreement shall be governed by the laws of the
state of Michigan, without regard to the conflict of law provisions thereof, as if it was performed
wholly within the state.
Copyright and Trademark Information
Copyright 1997-1998 by Diagnostic Instruments, Inc.
All rights reserved.
Trademarks:
SPOT is a registered trademark of Diagnostic Instruments, Inc.
Windows 95 and Windows NT are registered trademarks of Microsoft, Inc.
Adobe Photoshop is a registered trademark of Adobe Systems Incorporated.
All other product names mentioned in this document are the property of their respective trademark holders.

Introduction/Document Conventions for the User's Guide to the SPOT Cooled Color Digital Camera
User's Guide to the SPOT Cooled Color Digital Camera, 6/9/98 3
Introduction
This on-line manual contains instructions for using the software that comes with both the
standard SPOT Cooled Color Digital Camera and the SPOT 2 slider version of the
camera. The Adobe Acrobat Reader allows you to use the manual in a variety of ways.
You can view all or selected parts of the manual on-line, or you can use the Acrobat
Reader to print exact copies of what you see on the screen.
Document Conventions
The following table details the specific textual conventions that are used throughout the
manual:
Notes !Note: This is an example of a note. Notes appear
within the text to indicate information for further
consideration or reference.
Cautions CAUTION!
This is an example of a cautionary note. Cautionary
notes appear to indicate that you should carefully
consider the implications of an action.
Warnings MWARNINGM
THIS IS AN EXAMPLE OF A WARNING. WARNINGS
INDICATE THAT THE ACTION YOU ARE TAKING COULD
EITHER CAUSE INJURY TO YOURSELF OR COULD
HARM YOUR SYSTEM
Links All chapter headings are linked to their locations within
the chapter. In addition, certain references to other
chapters and sections are linked for convenient
reference.
SPOT2 SPOT2 SPOT2 notes indicate specific instructions for
users with the slider version of the SPOT
camera. Unless otherwise indicated, all
instructions apply to both versions of the
camera.

Ch. 1 - Electronic Imaging Theory and the SPOT Camera Table of Contents
User’s Guide to the SPOT Cooled Color Digital Camera, 6/9/98 4
Ch. 1 - Electronic Imaging Theory and the
SPOT Camera
Introduction .......................................................................................................... 5
Digital Photography .......................................................................................... 5
Color Images .................................................................................................... 6
The SPOT Cooled Color Digital Camera.......................................................... 7
Three Pictures............................................................................................... 7
Pixel Digitization............................................................................................ 7
A Cooled CCD Chip...................................................................................... 7
Gain .............................................................................................................. 7
An Automated Exposure Process ................................................................. 8

Ch. 1 - Electronic Imaging Theory and the SPOT Camera Digital Photography
User’s Guide to the SPOT Cooled Color Digital Camera, 6/9/98 5
Introduction
This chapter is a brief overview of the operational theory behind the SPOT Cooled Color
Digital Camera. The next two sections, Digital Photography and Color Images provide a
short introduction to electronic imaging theory, followed by a description of how this
theory applies to the SPOT camera. The final section highlights some of the unique
features of the SPOT camera.
Digital Photography
Modern electronic imaging is based on the charged coupled device (CCD). All of
today’s digital cameras have a CCD chip or chips. In digital cameras, the CCD chip/
sensor replaces the film of traditional cameras as the means by which the camera records
the image. The surface of the CCD chip is composed of light-sensitive cells arranged in a
checkerboard pattern. Each cell of the checkerboard is known as a picture element, or
more commonly, a pixel. The following is a simplified description of what happens when
you take a picture with a digital camera:
1. The camera’s optical system forms images on the “checkerboard” of pixels.
2. The CCD is exposed to the image for a period of time.
During this period, each photo-sensitive cell receives photons of light, converts the
photons to electrons, and then stores the electrons in the cell. The process by which
each cell accumulates electrons can be compared to a well filling with water. As
more light hits a cell, the electron level in the well rises. The more electrons that are
in the cell, the more voltage it will have when read out by the digital camera.
3. Following the exposure, a digital camera does three things:
a. It measures the voltage of each cell.
b. It converts the voltage to a binary number.
c. It transmits this number down a cable to your computer.
4. The computer reconstructs the image by assigning a brightness value to each pixel in
the final image. Each brightness value is proportional to the voltage of the
corresponding cell on the CCD chip.

Ch. 1 - Electronic Imaging Theory and the SPOT Camera Color Images
User’s Guide to the SPOT Cooled Color Digital Camera, 6/9/98 6
Color Images
Because a CCD chip is inherently monochromatic (i.e., black and white), color filters
must be used to extract the color information from the image. There are three basic
design methodologies:
§Single CCD design using color masked pixels - Digital cameras designed in this
manner have one CCD chip with color filters physically bonded to each pixel on the
chip. Some pixels get red filters, some pixels get green filters and some pixels get
blue filters. Since each pixel is only able to measure the intensity of one color, the
intensity of the missing two colors for this pixel must be estimated, based on nearby
pixels that have precise measurements of the missing colors. For example, a pixel
that has a green filter will have an exact measurement of the green color value, but
the red and blue values must be estimated, based on the nearest red and blue pixels.
This estimation is known as interpolation.
Pros and Cons: A digital camera designed in this way is inexpensive and can freeze
moving images with a single exposure. However, because they interpolate brightness
values, such cameras tend to produce images where the fine details are smeared; they
cannot provide the high resolution that is available from a non-filtered CCD chip.
§Three CCD design using color beamsplitter - This design uses three CCD chips.
The incoming image first goes through a color beam splitter which directs the red
light to one chip, the green light to a second chip and the blue light to a third chip.
The chips are very accurately aligned so as to achieve near perfect registration
between the three chips. The red, green, and blue values for each point on an image
are measured by the corresponding pixel on each of the three chips.
Pros and Cons: This design produces an image that retains the high resolution of the
individual chips. This type of camera can also freeze moving images with a single
exposure. However, because most of the cost in a high resolution CCD camera is in
the CCD chip itself, three chip cameras are far more costly than their single chip
counterparts.
§Single CCD design that takes three pictures (three pass method) – Cameras
designed in this way expose a single CCD chip three times, once to red light, once to
green light, and once to blue light. One variant in this type of camera is how the chip
is exposed to the different colors of light. Some cameras switch individual red, green
and blue glass filters in front of the chip for each exposure. Others use a liquid
crystal filter that changes from red to green to blue as different voltages are applied to
it. By exposing the chip three times, each cell on the CCD is able to measure all three
color values.
Pros and Cons: This technique attains the high resolution of the three CCD design
without the high cost associated with using three chips. However, because these
cameras require three exposures, they cannot freeze moving images.

Ch. 1 - Electronic Imaging Theory and the SPOT Camera The SPOT Cooled Color Digital Camera
User’s Guide to the SPOT Cooled Color Digital Camera, 6/9/98 7
The SPOT Cooled Color Digital Camera
In order to provide you with an understanding of what happens when you take a picture,
the following sections highlight some of the basic operating principles of the SPOT
camera.
Three Pictures
The SPOT camera uses the single CCD, three pass method. To take a picture (also
known as capturing an image), the SPOT camera takes a red picture, a green picture, and
a blue picture. A color filter, controlled by the software that accompanies your camera,
changes from red to green to blue for each exposure. Thus, SPOT can use one CCD chip
to compute precise red, green, and blue values for each pixel in the final image.
Pixel Digitization
Following each exposure, SPOT reads the CCD chip and digitizes each pixel as it comes
off of the CCD chip, and before it is sent through the cable into the computer. This
technique minimizes noise and maintains the lack of distortion that is inherent with CCD
chip geometry.
A Cooled CCD Chip
The CCD chip in the SPOT camera is cooled in order to reduce thermal noise. The effect
of thermal noise on a digital image is similar to the "snow" that you see on your TV when
tuned in to a station with a weak signal. If you could reduce the snow (i.e., the thermal
noise), the weak station (or the dim image) would be much clearer. Cooling the CCD
chip cuts the amount of thermal noise in half for every 5°C drop in temperature. The
SPOT camera uses a Peltier thermoelectric cooler to keep the chip cooled to 37°C below
ambient room temperature. Thus, if the room temperature is 25°C, the CCD chip is
12°C. This makes the SPOT camera an excellent option for dim images.
!Note: In order to keep the CCD chip from frosting over, a desiccant packet is added
to the air space surrounding the chip before the camera is sealed. Over time, the
desiccant can become saturated with moisture and lose its effectiveness. To change
a desiccant packet, refer to Appendix __.
Gain
Normally an auto exposure routine in a digital camera sets the exposure time so that the
brightest pixel on the CCD chip is completely “filled” with electrons, or is “full well”
(see the Digital Photography section). This simple technique works well for bright
images, but, as an image gets dimmer, exposure times can get uncomfortably long.

Ch. 1 - Electronic Imaging Theory and the SPOT Camera The SPOT Cooled Color Digital Camera
User’s Guide to the SPOT Cooled Color Digital Camera, 6/9/98 8
With the Spot camera you can shorten exposure times by filling the brightest pixel on the
CCD to less than full well, and then using this lower level as full scale. The inverse
fraction of full well that the brightest pixel on the CCD is filled to is known as the gain.
For example, filling a pixel to half of full well cuts the exposure time in half. Since the
exposure time is cut in half, we call this a gain of 2.
The following table illustrates the relationship between gain, the fraction of full well that
the brightest pixel is filled to, and the effect of gain on exposure time:
Gain Fraction of Full Well Exposure Time (sample)
1 1 80 seconds
21/2 40 seconds
41/4 20 seconds
81/8 10 seconds
16 1/16 5 seconds
An 80 second exposure at a gain of one turns into a 5 second exposure at gain 16. This is
good in terms of the exposure time. Unfortunately, background noise is directly
proportional to gain. It is 16 times higher at a gain of 16 is than at a gain of one.
An Automated Exposure Process
Normally, for any given image, trial and error would have to be used to determine the
optimal combinations of gain and exposure time. In order to eliminate the need for trial
and error experimentation, the SPOT camera automatically determines this information
by sampling light levels before each exposure. Based on the light levels and the user-
determined Auto-Gain Limit, SPOT determines the optimal gain setting and exposure
time for the image.
!Note: For more information on using the Auto-Gain Limit feature, refer to the
Chapter 3, “Preparing to Take a Picture.”

Ch. 2 - Navigating the SPOT Software Table of Contents
User's Guide to the SPOT Cooled Color Digital Camera, 6/9/98 9
Ch. 2 - Navigating the SPOT Software
Introduction ........................................................................................................ 10
The Viewing and Editing Window................................................................... 10
Menus......................................................................................................... 10
The Toolbar................................................................................................. 11
File Save and Print Options..................................................................... 11
Image Capture and View Options............................................................ 12
Image Annotation Options....................................................................... 12
The View Status Bar ................................................................................... 13
Opening and Saving Files............................................................................... 14
Standard Windows Options......................................................................... 14
Open File................................................................................................. 15
Save........................................................................................................ 15
Save As................................................................................................... 15
Close....................................................................................................... 15
Delete...................................................................................................... 15
Print/Print Setup ...................................................................................... 15
Exit........................................................................................................... 15
SPOT Specific Options ............................................................................... 15
Open Database Image ............................................................................ 15
Show File Thumbnails............................................................................. 16
Save to Database.................................................................................... 17
Save All ................................................................................................... 17
Preliminary Settings........................................................................................ 18
Preferences................................................................................................. 18
Initialize....................................................................................................... 18

Ch. 2 - Navigating the SPOT Software The Viewing and Editing Window
User's Guide to the SPOT Cooled Color Digital Camera, 6/9/98 10
Introduction
This chapter is an introduction to the SPOT program's operating environment. It consists
of three major sections:
§The Viewing and Editing Window - This section describes the primary window for
all image capture and editing functions.
§Opening and Saving Files - This section discusses the standard Windows file save
and open features, as well as those that are unique to the SPOT program.
§Preliminary Settings - This section describes the initial settings that you can make to
customize your software.
The Viewing and Editing Window
When you open or capture an image, it appears in the main viewing and editing window.
All of the image save, view, edit, and annotation functions are accessed from this
window, which consists of three areas:
§Menus
§The Toolbar
§The View Status Bar
Each of these areas is discussed in the three sections that follow.
Menus
The menus that appear at the top of the window vary according to whether an image is
open, and whether you are editing or annotating an image. When you first open the
software, the only functions that are available are the file opening, image setup, and
image capture options.
§File opening - The file open and save options are for the most part identical to the
standard Windows file open and save options. There are also several features that are
unique to the SPOT software. Refer to the Opening and Saving Files section in this
Chapter for more details on opening and saving image files in SPOT.
§Image setup - Defining or selecting an image setup is the crucial first step in the
picture taking process. All of the image setup options can be accessed via the Setup
menu. Refer to Chapter 3, Preparing to Take a Picture, for more details on defining
and utilizing image setups.
§Image capture - Image capture (picture taking) options are accessed via the Camera
menu. For more details on capturing an image, refer to Chapter 4, Taking a Picture.

Ch. 2 - Navigating the SPOT Software The Viewing and Editing Window
User's Guide to the SPOT Cooled Color Digital Camera, 6/9/98 11
The Toolbar
When you first open the SPOT program, the Toolbar appears on the left hand side of the
screen. The Toolbar buttons are shortcuts to frequently used menu items. Like the
menus, the Toolbar varies according to the whether an image is open, and what you are
doing.
Dragging the cursor over the Toolbar displays information about each button.
§The name of the button displays the name of the associated menu option.
§The function that the button performs displays on the left hand side of the view status
bar.
The Toolbar buttons can be classified into three categories:
§File save and print options
§Image capture and view options
§Image annotation options
As a default, the Toolbar displays the file save/print options and the image capture/view
options.
!Note: To use the image annotation options, you must select the Annotate option
from the Edit menu. The annotation buttons then replace the image capture and
view buttons.
Each set of options is discussed below.
File Save and Print Options
The file, save, and print options appear as the bottom part of the toolbar. The following
table illustrates the file save and print Toolbar buttons:
Save
Save As
Save to Database
Reload
Print
Search
!Note: Refer to Chapter 8, Printing Options, for more details on printing from the
SPOT program.

Ch. 2 - Navigating the SPOT Software The Viewing and Editing Window
User's Guide to the SPOT Cooled Color Digital Camera, 6/9/98 12
Image Capture and View Options
The image capture and view options appear as the top half of the toolbar. These options
are accessible after you have captured an image and you want to edit and/or recapture the
image. The following table illustrates the image capture and view buttons:
Get Image (exposure from setup)
Get Image (last used exposure)
Focus
Frame
Compute Exposure
Compute White Balance Values
Zoom
Show Pan Window
!Note: Refer to Chapter 4, Taking a Picture, and Chapter 5, Viewing, Editing, and
Annotating Images for more details on these options.
Image Annotation Options
In addition to editing an image for resolution, clarity, and color, the SPOT software
allows you to annotate images by adding explanatory text and illustrations.
!Note: Image annotation is described in detail in Chapter 5, Viewing, Editing, and
Annotating Images..
When you select the Annotate option from the Edit menu, the annotation buttons replace
the image capture and view buttons at the top of the Toolbar. The following table
illustrates the image annotation toolbar buttons:
Select
Freehand
Straight Line
Arrow
Rectangle
Ellipse
Polygon
Stamp
Text

Ch. 2 - Navigating the SPOT Software The Viewing and Editing Window
User's Guide to the SPOT Cooled Color Digital Camera, 6/9/98 13
The View Status Bar
The view status bar, which appears at the bottom of your screen, displays information
about the image that is on screen. The following is an illustration of the view status bar,
as it appears for an open image:
From left to right, the view status bar displays the following information:
§Image size - The size of the image in square pixels (i.e., 766, 512). The standard size
for an image is represented by the size of the CCD chip, which for the SPOT camera
is 1315 pixels x 1035 pixels. Thus, for unmodified images that are captured with the
SPOT camera, this measurement will read (1315, 1035).
§Pixel bit depth (bits per pixel) - The pixel bit depth at which the image was captured
appears next to the size values. This value reflects the pixel bit depth for the image
setup that you used to capture the image. There are four options:
−8 bpp (monochrome)
−12 bpp (monochrome)
−24 bpp (RGB color)
−36 bpp (RGB color)
!Note: For a detailed discussion of pixel bit depth, refer to Chapter 3, Preparing to
Take a Picture.
§X Y pixel coordinates - As you move your cursor over an image, the view status bar
displays the x y coordinates in pixels. Thus, for an image that uses the entire CCD
chip, the values for the upper left corner of the image would be (0,0), while the lower
right values would read (1315, 1035).
§Brightness values - As you move your cursor over an image, the view status bar
indicates the brightness values for the pixel coordinates. The values depend on the
pixel bit depth for the image. For example, if the image was captured using a 24 bpp
image setup, the view status bar displays separate red, green, and blue brightness
values for each part of the image [i.e., RGB: (162, 134, 127)]. If the same image
were captured with (or changed to) a different pixel bit depth (i.e., 8 bpp), only one
brightness value is displayed [i.e., (176)].
§Size Settings - In the illustration above, the view status bar displays Normal. This
indicates two things:
−The open image is being viewed in a non-zoomed mode.
−The Fit to Window option has not been selected. If you select the Fit to Window
option (see the Preliminary Settings section of this chapter), the words Fit to
Window appear in this section.

Ch. 2 - Navigating the SPOT Software Opening and Saving Files
User's Guide to the SPOT Cooled Color Digital Camera, 6/9/98 14
When you select the zoom mode, either via the View menu or the Toolbar button, the
status changes to Mag:x1, indicating the fact that you are in zoom mode, as well as
the magnification. When you zoom out the status bar displays the magnification in
fractional values (i.e., Mag:x1/4).
§Modified Status - The section to the right of the magnification setting remains blank
until you modify an image. Once an image has been modified from the original
status, the word Modified appears here.
§Image Setup - The far right end of the view status bar displays the currently active
Image Setup (i.e., Factory Defaults). This is the image setup that the program uses to
capture images. From this part of the view status bar, you can:
−Change the currently active image setup.
−Modify an existing image setup.
−Add a new image setup to the list.
!Note: Refer to Chapter 3, Preparing to Take a Picture, for more information on
image setups..
Opening and Saving Files
All of the file open and save options in the SPOT program can be accessed from the File
menu and the Toolbar. The file open and save options in the SPOT software can be
classified into two categories:
§Standard Windows options.
§SPOT specific options.
These options are discussed in the sections below.
Standard Windows Options
The majority of File menu commands in the SPOT program work in the same way as any
standard Windows 95 program would. The following section lists these commands.
!Note: The standard windows functions are not described in detail in this chapter.
For more detail on these functions, refer either to the Windows on - line help or to
the context sensitive help in the window. To use the context sensitive help, left click
on the question mark icon at the top of the window. A question mark now appears
next to the cursor. Position the question mark/cursor over the area of the window
that you have a question on, and left click. A pop-up window explains the item.

Ch. 2 - Navigating the SPOT Software Opening and Saving Files
User's Guide to the SPOT Cooled Color Digital Camera, 6/9/98 15
Open File
Use the Open File command to open image files of a specified format (i.e., JPEG, GIF,
BMP, etc..).
Save
Use the Save option to save a previously unsaved image to new file, or to update the
changes to an existing file.
Save As
Use the Save As option to save an image to a new file and/or file location.
Close
Use the Close option to close an image. The program prompts you to specify a location
to save the file.
Delete
Use the Delete option to delete an open image. The program prompts you to verify the
deletion.
Print/Print Setup
Refer to Chapter 8, Printing Options for information on standard Windows and SPOT
custom printing features.
Exit
Exit the SPOT program.
SPOT Specific Options
The following options are specific to the SPOT program.
Open Database Image
Use the Open Database Image option to open an image from a SPOT database. The
SPOT database from which you want to open the image must be open.

Ch. 2 - Navigating the SPOT Software Opening and Saving Files
User's Guide to the SPOT Cooled Color Digital Camera, 6/9/98 16
To open a database image, follow these steps:
1. From the File menu, select the Open Database Image option. The following window
appears:
2. Enter the Image ID. To find the system assigned Image ID, select the Search option
from the Database menu; the Image ID for each image displays with the search
results. If the search results are displayed in tabular form, the Image ID appears in its
own column. If the search results are displayed as thumbnails, right click on the
thumbnail to display associated information, including the Image ID.
Show File Thumbnails
Use the Show File Thumbnails option to display thumbnail previews of specified files.
You can open the image from the preview screen.
To use the Show File Thumbnails options, follow these steps:
1. From the File menu, select the Show File Thumbnails option. The following window
appears:
2. Specify the file type.
3. Specify a file location. If you specify the file location without selecting individual
files, the program displays thumbnails for all files of the specified type in that
location.

Ch. 2 - Navigating the SPOT Software Opening and Saving Files
User's Guide to the SPOT Cooled Color Digital Camera, 6/9/98 17
4. Click on Open. The Thumbnails preview window appears, as shown here:
Save to Database
Use the Save to Database option to save an image to a SPOT database. To save an image
to a SPOT database, follow these steps:
1. Ensure that the database that you want to save the image to is open.
2. From the File menu, select the Save to Database option, or click on the Save to
Database Toolbar button:
3. The Save Image to Database window appears. Enter the appropriate information for
the database.
!Note: For details on saving images to a SPOT database, refer to Chapter 7, Using
SPOT Databases..
Save All
Use the Save All option to save all open image files. The program prompts you for the
name and file location of each image.

Ch. 2 - Navigating the SPOT Software Preliminary Setting
User's Guide to the SPOT Cooled Color Digital Camera, 6/9/98 18
Preliminary Settings
There are two program settings that should be checked/defined prior to capturing images.
§Preferences
§Initialize
Preferences
The SPOT program allows you to set three basic operating preferences:
§Toolbar position (on-screen)
§JPEG image quality
§Automatic fit to window sizing
To set the operating preferences, follow these steps:
1. From the Setup menu, select the Preferences option. The following window appears:
2. Select the screen position for the Toolbar Placement. The default is Left Side.
3. Enter an integer between 1 and 100 to set the JPEG quality for images. JPEG quality
refers to the level of compression for JPEG images. A value of one is the most
compressed (and lowest image quality), while a value of 100 is the least compressed
(and highest image quality). The default setting is 100.
4. Determine whether images should open in Fit to Window mode. This box is checked
as a default. If this option is selected, the program automatically sizes images to fit
the available screen space when you open or capture an image. Thus, you can im-
mediately see the entire image without having to zoom out. This is especially useful
with smaller monitors.
Initialize
If you turned on the SPOT power supply after you opened the program, you need to
initialize the camera in order to activate all of the capture and editing options. To do so,
select the Initialize option from the Camera menu.

Ch 3 – Preparing to Take a Picture Table of Contents
User’s Guide to the SPOT Cooled Color Digital Camera, 6/9/98 19
Ch. 3 - Preparing to Take a Picture
Introduction: What is an Image Setup? ...............................................................20
Accessing the Image Setup Screen.................................................................21
Image Setup Options.......................................................................................23
Setup Name.................................................................................................23
Pixel Bit Depth..............................................................................................23
Exposure......................................................................................................24
Auto-Exposure vs. User-Defined Exposure..............................................25
Filter Color (8 and 12 bit mono)................................................................26
Use: Red Green Blue (24 and 36 bit RGB)............................................27
Color Order (24 and 36 bit RGB)..............................................................27
Binning......................................................................................................28
Image Type (Auto-Exposure) ...................................................................29
Auto-Gain Limit (Auto-Exposure, 8 bit and 24 bit) ...................................29
Adjustment Factor (Auto-Exposure) .........................................................31
White Balance (Auto-Exposure, 24 and 36 bit RGB)................................31
Exposure Time(s) (User Defined Exposure).............................................33
Gain (User-Defined Exposure, 8 bit and 24 bit)........................................36
Image Area...................................................................................................37
Auto Corrections ..........................................................................................38
Chip Defect Correction.............................................................................39
Noise Filter ...............................................................................................39
Image Size Double...................................................................................39
Gamma Adjust..........................................................................................40
Horizontal Flip...........................................................................................43
Vertical Flip...............................................................................................43
Background Subtract................................................................................43
Flatfield Correct........................................................................................46

Ch 3 – Preparing to Take a Picture Introduction: What is an Image Setup?
User’s Guide to the SPOT Cooled Color Digital Camera, 6/9/98 20
Introduction: What is an Image Setup?
In the SPOT software, an image setup serves two purposes:
§It defines the way a picture will be taken.
§It defines the way a picture will be modified after it is taken.
Individual image setups can be tailored to optimize the picture taking process for
different types of images or microscopy techniques. These image setups can be created,
saved, and recalled as needed.
Each image setup is defined according to settings that are entered in four general
categories:
§Pixel Bit Depth
§Image Depth (resolution)
§Exposure
§Image Area
§Auto Corrections (post-exposure adjustments)
!Note: Each of these items will be discussed in more detail in the sections that
follow.
So, if your work involves samples where the specimen is typically the brightest part of an
image (i.e., fluorescence), you can set the Image Type exposure option to Dark Field.
This allows the camera to properly expose such a picture. For your convenience, the
SPOT software offers four (in addition to the Factory Defaults) pre-defined Image
Setups:
§Brightfield
§Fluorescence
§Glints #1
§Glints #2
Because the options that you select directly impact the quality of the final image, you
should choose the image setup carefully.
Table of contents
Other Diagnostic Instruments Digital Camera manuals
