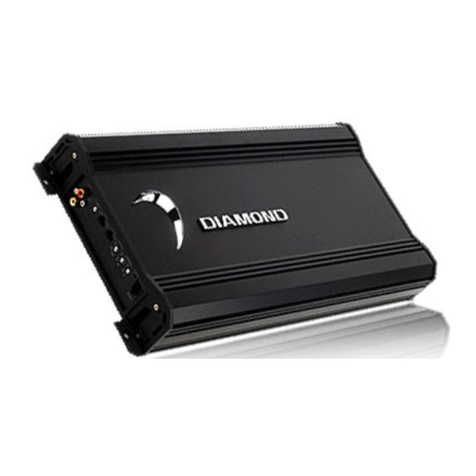
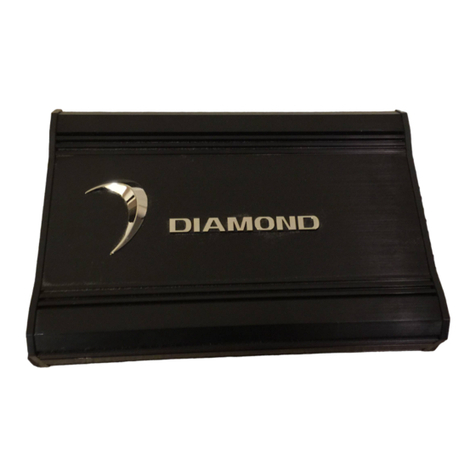
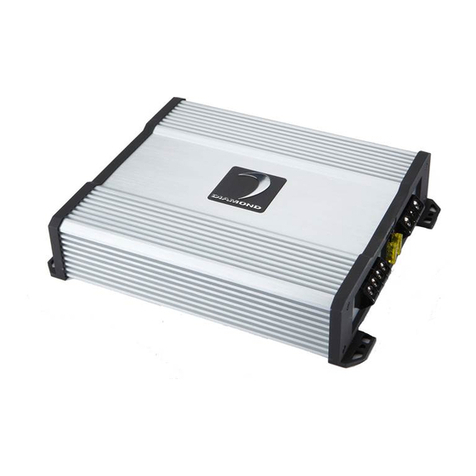
Diamond D3 User manual

Product
Owners
Manual
AMPLIFIERS
Serial
Number
Date
Of
Purchase.

SPECIAL
THANKS
Thank
you
for
choosing
a
Diamond
Audio
D3
amplifier.
The
feam
here
at
Diamond
insists
that
you
listen
to
music
as
the
artist
intended,
and
that's
what
drives
us
to
develop
and
engineer
cutting
edge
audio
solutions
that
are
true
to
any
audiophiles
guidelines.
Each
of
Diamonds
products
are
concepted,
designed,
engineered,
tested
and
sold
by
pure
audio
fanatics.
Each
one
of
us
on
the
Diamond
team
realizes
how
important
audio
performance
is
to
you,
because
it
is
equally
important
to
us.
So
rest
assured
that
you
have
purchased
an
amplifier
with
no
compromise.
Thanks
Again,
The
Diamond
Team
CAUTION
Prolonged
exposure
to
sound
pressure
levels
In
excess
of
100
dB
can
cause
permanent
hearing
loss.
Diamond
Audio
D3
amplifiers
produce
enough
power
to
make
most
speaker
systems
exceed
that
level.
Please
exercise
restraint
and
protection
during
their
operation
in
order
to
preserve
your
ability
to
enjoy
their
fidelity
for
years
to
come.
I
1
©2005
Diamond
Audio
Technology.
All
Rights
Reserved

SPECIFICATIONS
Model
Frequency
Signal-to-
TND
Channel
Input
DC
Fuse
Response
Noise
Ratio
Separation
Range
Range
Rating
75
dR
250
mV-25V
D3
400.2
20-
20l(Hz
100
dB
0.05%
(min.)
(HL
0.5
-
5
V)
10.8-15.6
V
40
A
75
dB
250
mV-2.5
V
D3
400.4
20-
20k
Hz
100
dB
0.05%
(min.)
(HL
0.5
-
5
V)
10.8-15.6
V
40
A
n/a
250
mV-3V
D3
600.1
20
-250
Hz
90
dB
0.1%
11.5-14.4
V
70
A
RMS
POWER
Model
4
Ohm
Stereo
2
Ohm
Stereo
4
Ohm
Mono
2
Ohm
Mono
1
Ohm
Mono
D3
400.2
100x2
200x2
400x1
n/a
n/a
D3
400.4
50x4
100x4
200
x2
n/a
n/a
D3
600.1
n/a
n/a
300x1
450x1
600x1
PHYSICAL
DIMENSIONS
Model
Length
Width
ncr
Height
Weight
D3
400.2
13.5"
8.5"
2.25"
9
lbs
D3
400.4
14.5"
8.5"
2.25"
10
lbs
D3
600.1
1/"
8.5"
2.25"
13
lbs
I
2
I
©2005
Diamond
Audio
Technology.
All
Rights
Reserved

APPEARANCE/FEATURES
■
Low
Profile
and
Compact
Custom
Aluminum
Heatsinks
■
Gold
Plated
Terminals
■
Pulse-width
Modulated
(PWM)
MOSFET
Power
Supply
■
Oversized
Power
Supply
Devices
for
Enhanced
Thermal
Efficiency
■
Selectable
Crossovers
■
Short
Circuit
and
Reverse
Polarity
Protection
■
"Soft
Start"
Muting
on
Remote
Turn-on
to
Eliminate
Turn
on
"Thump"
PROFESSIONAL
INSTALLATION
To
achieve
maximum
performance
and
life
time
warranty
coverage
(see
warranty
statement),
Diamond
Audio
strongly
recommends
that
a
factory
authorized
Diamond
retailer
professionally
installs
your
new
amplifier.
The
D3
amplifier
is
an
awesome
component
with
category
leading
technology,
proper
attention
must
be
taken
during
installation
to
ensure
optimum
performance.
The
authorized
Diamond
retailer
you
purchased
your
amplifier
from
has
the
training,
expertise,
and
tools
for
proper
installation.
If
you
decide
to
install
your
amplifier
yourself,
please
read
this
manual
through
to
become
familiar
with
the
amplifiers
install
and
set
up
procedures.
MOUNTING
D3
amplifiers
do
not
utilize
any
fan
driven
cooling
system.
Care
must
be
taken
to
provide
a
sufficient
flow
of
air
around
the
amplifier
for
the
thermal
management
system
to
operate
at
peak
efficiency.
Air
should
be
able
the
flow
over
the
top
and
sides
of
the
amp
freely.
Adding
a
fan
to
your
system
can
be
beneficial
in
keeping
your
amp
cool.
A
minimum
2
inches
of
space
around
the
amplifier
is
recommended
to
ensure
proper
air
flow.
Never
mount
any
amplifier
where
it
can
get
wet.
Water
damage
is
not
covered
under
warranty.
Mounting
your
amplifier
inside
an
enclosure
is
not
a
good
idea
unless
that
enclosure
Is
equipped
with
ventilation
fans
to
circulate
fresh
air
through
the
enclosure.
I
3
I
©2005
Diamond
Audio
Technology.
All
Rights
Reserved

REM
GND
+12V
40
AMP
MAX
DC
CONNECTIONS
o
D3
amplifiers
need
proper
power
and
ground
connections
to
deliver
maximum
performance
and
efficiency.
Your
new
amplifier
has
a
regulated
power
supply.
It
is
designed
to
make
full
power
even
if
the
voltage
changes.
It
will
draw
more
current
at
lower
voltages
to
make
that
power.
Try
to
ground
your
system
to
a
single
point
in
the
vehicle.
The
gauge
of
the
power
and
ground
cables
must
be
capable
of
handling
the
current
needed
by
the
entire
system.
Power
and
ground
cables
must
be
of
the
same
gauge.
If
the
alternator
is
not
capable
of
supplying
enough
power
for
both
the
vehicle
AND
the
audio
system,
a
high
output
alternator
should
be
installed
for
best
performance.
Power
&
Ground
(12VDC)
D3
amplifiers
are
designed
to
accept
up
to
4
gauge
power
and
ground
spade
terminals,
in
some
systems
this
may
be
overkill,
but
bigger
is
always
better
when
it
comes
to
power
and
ground
connections.
Strip
approximately
1/4
inch
of
insulation
from
the
end
of
the
power/ground
cable
going
to
the
amplifier.
Crimp
the
proper
spade
terminal
onto
the
power/ground
cable,
insert
the
terminal
into
the
power
block
on
the
end
of
the
amplifier
and
tighten
the
screw.
Repeat
for
each
amplifier
installed.
Turn-on
(REM)
Locate
the
terminal
labeled
“REM”
on
the
end
of
the
amplifier.
Your
source
unit
should
have
a
wire
in
its
harness
labeled
“REMOTE”
or
“AMP
TURN-ON.”
Run
this
wire
from
your
source
unit
to
the
amplifiers
REM
connection.
Strip
approximately
1/2
inch
of
insulation
from
the
wire,
crimp
a
12
gauge
spade
terminal
onto
the
wire,
insert
the
terminal
into
the
power
block
on
the
end
of
the
amplifier
and
tighten
the
screw.
I
4
I
©2005
Diamond
Audio
Technology.
All
Rights
Reserved

Diamond
Audio
recommends
using
speaker
wire
of
at
least
16
gauge.
Lay
out
the
wire
in
the
vehicle
from
fhe
individual
speaker
locations
to
the
amplifier(s).
Observe
safe
wiring
precautions.
D3
amplifiers
will
accept
speaker
wire
spade
terminals
up
to
12
gauge.
Locate
the
speaker
terminal
block
on
the
end
of
the
amplifier.
Sfrip
approximately
1/4
inch
of
insulation
from
the
wire,
crimp
a
12
gauge
spade
terminal
onto
the
wire,
insert
the
terminal
into
the
speaker
block
on
the
end
of
the
amplifier
and
tighten
the
screw.
Repeat
for
all
speaker
wires.
Please
observe
recommended
minimum
speaker
impedances
to
prevent
possible
damage.
SETTING
THE
GAIN
This
control
matches
the
output
voltage
of
the
source
unit
or
processor
to
the
amplifier
inputs.
Rotating
this
control
to
the
“MIN"
mark
(counterclockwise)
configures
the
D3
amplifier
to
accept
input
voltages
as
high
as
5V
RMS.
This
control
should
be
set
as
low
as
possible.
The
basic
procedure
for
setfing
inpuf
gains
is
as
follows:
1.
Adjust
all
amplifier
gain
controls
to
just
above
the
minimum
setting
(fully
counterclockwise).
2.
Using
the
highest
quality
source
(usually
CD)
play
some
music
and
slowly
turn
up
the
source
unit
until
you
can
hear
distortion.
Now
turn
down
the
volume
until
the
distortion
stops.
This
is
your
maximum
source
unit
level.
3.
Turn
up
the
amplifier
gain
until
audible
distortion
starts.
Turn
down
the
gain
to
the
point
lUST
BELOW
the
start
of
the
distortion.
4.
Repeat
step
3
for
all
amplifiers
in
your
system.
I
5
I
©2005
Diamond
Audio
Technology.
All
Rights
Reserved

D3
400.2
Bridging
The
channels
on
the
D3
400.2
amp
are
capable
of
being
bridged
to
a
4
Ohm
mono
output.
Creation
of
the
mono
channel
is
accomplished
by
using
the
left
channel
positive
(+)
output
connection
of
the
amplifier
for
the
speaker
positive
and
the
right
channel
negative
(-)
output
connection
of
the
amplifier
for
the
speaker
negative.
Note:
It
is
important
that
a
4
Ohm
minimum
total
speaker
impedance
load
is
observed
when
bridging
the
amp!
If
an
impedance
load
of
less
than
4
Ohms
is
used,
you
will
eventually
damage
your
amplifier
and
void
your
warranty.
RCA
INPUT
The
RCA
cables
from
your
source
unit
should
be
inserted
here.
OUTPUT
These
RCA
outputs
are
used
to
provide
unfiltered
signal
to
an
processor
or
another
amplifier.
Crossovers
The
Diamond
D3
400.2
amplifier
features
a
second-order
12dB/octave
electronic
crossover
that
is
selectable
for
highpass
or
lowpass
modes.
These
filters
are
then
adjustable
between
55
and
550
Hz.
I
6
I
©2005
Diamond
Audio
Technology.
All
Rights
Reserved

Bass
Boost
Acts
like
an
equalizer
with
an
adjustable
gain
fixed
at
45
Hz.
Adjust
from
left
to
right
clockwise
to
give
as
much
as
18
dB
of
boost
at
that
frequency.
If
there
is
a
noticeable
lack
of
low
end
extension
in
the
system,
use
this
to
boost
the
bass.
Caution:
If
any
unusual
noise
like
popping
or
crackling,
or
unwanted
distortion
occurs
when
adjusting
the
bass
boost,
immediately
turn
the
boost
down
to
avoid
damaging
your
speakers.
Crossover
Mode
Switches
electronic
crossover
between
off,
lowpass,
or
highpass
modes.
When
in
HP
or
LP
mode,
the
12
dB/oct
crossover
is
implemented
at
the
frequency
set
on
the
frequency
knob.
Crossover
Frequency
Adjustable
left
to
right
clockwise
from
55
Hz
up
to
550
Hz.
D3
400.4
Bridging
Both
sets
of
channels
on
the
D3
400.4
amp
are
capable
of
being
bridged
to
a
4
Ohm
mono
output.
Creation
of
the
mono
channel
is
accomplished
by
using
the
left
channel
positive
(+)
output
connection
of
a
set
of
channels
(front
or
rear)
on
the
amplifier
for
the
speaker
positive
and
the
right
channel
negative
(-)
output
connection
of
the
same
set
of
channels
on
the
amplifier
for
the
speaker
negative.
I
7
©2005
Diamond
Audio
Technology.
All
Rights
Reserved

Note:
It
is
important
that
a
4
Ohm
minimum
total
speaker
impedance
load
is
observed
when
bridging
the
amp!
If
an
impedance
load
of
less
than
4
Ohms
is
used,
you
will
eventually
damage
your
amplifier
and
void
your
warranty.
RCA
FRONT/REAR
INPUTS
The
RCA
cables
from
your
source
unit
should
be
inserted
here.
Crossovers
The
Diamond
D3
400.4
amplifier
features
second-order
12dB/octave
electronic
crossovers
that
are
selectable
for
highpass
or
lowpass
modes.
These
filters
are
then
adjustable
between
55
and
550
Hz.
Bass
Boost
Acts
like
an
equalizer
with
an
adjustable
gain
fixed
at
45
Hz.
Adjust
from
left
to
right
clockwise
to
give
as
much
as
18
dB
of
boost
at
that
frequency.
If
there
is
a
noticeable
lack
of
low
end
extension
in
the
system,
use
this
to
boost
the
bass.
Caution:
If
any
unusual
noise
like
popping
or
crackling,
or
unwanted
distortion
occurs
when
adjusting
the
bass
boost,
immediately
turn
the
boost
down
to
avoid
damaging
your
speakers.
Crossover
Mode
Switches
electronic
crossover
between
off,
lowpass,
or
highpass
modes.
When
in
HP
or
LP
mode,
the
12
dB/oct
crossover
is
implemented
at
the
frequency
set
on
the
frequency
knob.
Crossover
Frequency
Adjustable
left
to
right
clockwise
from
55
Hz
up
to
550
Hz.
I
8
I
©2005
Diamond
Audio
Technology.
All
Rights
Reserved

Input
Mode
Switches
between
input
modes.
2
CH
BASS
-
Input
from
only
one
set
of
RCA's
in
mono
mode.
Rear
channels
use
front
inputs
for
a
mono
signal.
Only
for
use
when
the
amplifier
is
used
for
subwoofers.
2
CH
-
Input
from
only
one
set
of
RCA's
in
stereo
mode,
no
fade.
Rear
channels
use
front
inputs
for
a
stereo
signal.
4
CH
-
Input
from
two
sets
on
RCA's
for
true
4
channel
stereo
mode.
Rear
channels
use
rear
inputs
for
a
stereo
signal.
D3
600.1
Remote
Gain
The
D3
mono
block
amplifier
comes
with
a
remote
gain
output.
The
remote
gain
module
(included)
plugs
into
this
output
to
allow
for
gain
control
away
from
the
amplifier.
When
you
plug
this
module
in,
it
replaces
the
gain
from
where
it
is
set
on
the
amplifier.
Max
(all
the
way
clockwise)
on
the
module
is
set
to
whatever
the
gain
on
the
amp
is
set
to.
Note:
Diamond
D5
&
D6
remote
gains
do
not
work
with
the
D3
600.1.
INPUT
The
RCA
cables
from
your
source
unit
should
be
inserted
here.
I
9
I
©2005
Diamond
Audio
Technology.
All
Rights
Reserved

Crossover
The
Diamond
D3
600.1
amplifier
features
a
lowpass
electronic
crossover
that
is
selectable
for
12
dB/oct
or
24
dB/oct
slopes.
These
filters
are
then
adjustable
between
40
and
150
Hz.
Phase
Invert
Allows
adjustment
of
the
sub
woofer
phase,
normal
or
180
degrees
out
of
phase.
Slope
Select
Switches
crossover
slope
between
12
dB
and
24
dB.
This
slope
is
implemented
at
the
frequency
selected
on
the
frequency
knob.
Crossover
Frequency
Adjustable
left
to
right
clockwise
from
55
Hz
up
to
550
Hz.
Sub-Bass
EQ
Acts
as
a
bass
EQ
with
an
adjustable
frequency
setting
and
boost.
Adjust
to
desirable
frequency,
28
-
80
Hz,
and
then
add
the
amount
of
boost
wanted
up
to
+18
dB.
Can
be
used
to
boost
missing
low
end
frequencies
in
a
sub
woofer
system.
TROUBLESHOOTING
If
the
LED
is
on,
your
D3
amplifier
should
be
working
correctly,
if
not,
check
all
signal
connections.
If
the
problem
persists,
or
the
amp
will
not
power
up
at
all,
double
check
all
power
connections
including
all
fusing.
If
the
amp
still
will
not
work
correctly,
please
return
to
the
authorized
Diamond
retailer
you
bought
the
amplifier
from
and
have
them
trouble
shoot
your
system
or
call
Diamond
Tech
Support
at
1-866-328-2834.
I
10
I
©2005
Diamond
Audio
Technology.
Aii
Rights
Reserved

LIMITED
AMPLIFIER
WARRANTY
STATEMENT
Diamond
Audio
Technology,
inc.
(DAT)
warrants
this
ampiifierto
be
free
from
defects
in
materiai
and
workmanship
for
the
iifetime
of
the
ampiifier
in
its
originai
instaiiation
provided
the
ampiifier
was
purchased
from
and
instaiied
by
an
authorized
DAT
retaiier.
Ampiifiers
purchased
from
but
not
instaiied
by
an
authorized
DAT
retaiier
carry
a
one
(1)
year
parts
and
iabor
guarantee.
This
warranty
is
not
transferable
and
applies
only
to
the
original
purchaser
of
this
amplifier
in
its
original
installation.
Original
purchaser
must
reside
in
the
United
States
and
register
the
ampiifier
with
DAT
within
30
days
of
instaiiation.
Warranty
registration
information
can
be
found
at
www.diamondaudio.com
or
by
cailing
866-328-2834.
Originai
purchaser
must
be
able
to
provide
proof
of
purchase
and
installation
with
the
sales
receipt
from
the
authorized
DAT
retailer
that
sold
and
installed
the
amp.
Should
a
manufacturing
defect
occur
in
the
first
three
(3)
years
of
the
above
said
warranty
period,
DAT
will
replace
the
defective
product
with
new
product
of
the
same
or
equivalent
value
and
performance.
Should
the
defect
occur
after
the
first
three
(3),
DAT
will
(at
its
discretion),
repair
or
replace
the
defective
product
or
parts
with
new
or
remanufactured
product
for
as
long
as
the
amplifier
is
in
its
original
installation.
Damage
or
failure
caused
by
any
of
the
following
is
not
covered
under
this
warranty
policy:
negligence,
improper
use,
abuse,
product
modification,
unauthorized
repair
attempts,
accident,
acts
of
God,
misrepresentations
by
DAT
retailers,
and
improper/inadequate
packaging
during
return
shipping.
Warranty
is
void
if
serial
numbers
have
been
removed,
altered
or
defaced
or
if
protective
seal
is
broken.
HOW
TO
OBTAIN
WARRANTY
SERVICE
In
the
event
a
DAT
product
should
require
service,
you
should
visit
the
authorized
DAT
retailer
you
purchased
the
product
from
and
they
can
expedite
your
claim.
All
claims
must
fall
into
the
guidelines
listed
above
and
be
accompanied
by
a
copy
of
the
original
sales
and
installation
receipt
from
that
authorized
DAT
retailer.
Product
returned
for
warranty
service
must
be
freight-prepaid,
properly
packaged
and
clearly
marked
with
the
Return
Authorization
(RA)
number
issued
by
DAT.
Any
product
returned
to
DAT
that
is
improperly
packaged,
does
not
have
a
RA
number
clearly
marked
on
the
package,
or
never
received
a
RA
number;
may
be
refused
upon
delivery.
DAT
does
not
assume
responsibility
for
lost
or
misdirected
product.
Repair
or
replacement
under
this
warranty
is
the
exclusive
remedy
of
the
consumer.
DAT
shall
not
be
liable
for
any
incidental
or
consequential
damages
for
breach
of
any
expressed
or
implied
warranty
on
this
product.
Some
states
do
not
allow
the
exclusion
or
limitation
or
incidental
or
consequential
damages,
or
allow
limitations
on
how
long
an
implied
warranty
lasts,
so
the
above
limitations
or
exclusions
may
not
apply
to
you.
This
warranty
gives
you
specific
legal
rights
and
you
may
also
have
other
rights
that
may
vary
from
state
to
state.
Customers
outside
the
United
States
should
contaot
their
looal
sales
office
to
obtain
information
on
pricing,
exchange
unit
availability,
instructions,
service
and
warranty/non-warranty
replacement
or
repair.
CORPORATE
OFFICE;
Diamond
Audio
Technology,
Inc.
410
S.
Benson
Ln.
Chandler,
Arizona
85224
USA
PHONE:
(480)
813-6200
FAX:
(480)
813-6210
WEB;
www.DiamondAudio.com
SERVICE/TECH
SUPPORT:
TOLL
FREE
1-866-328-2834
TECH
SUPPORT
EMAIL
©2005
Diamond
Audio
Technology.
All
Rights
Reserved
Other manuals for D3
2
This manual suits for next models
3
Table of contents
Other Diamond Amplifier manuals

Diamond
Diamond D3 User manual

Diamond
Diamond Decada User manual

Diamond
Diamond D1 250.2 User manual

Diamond
Diamond D3 1000.1 User manual
Diamond
Diamond Micro1 User manual

Diamond
Diamond HX400.2 User manual

Diamond
Diamond D9 & TDX TECHNOLOGY User manual

Diamond
Diamond Elite Series DE300.2 User manual
Diamond
Diamond MICROV2 Series User manual

Diamond
Diamond D3 User manual