DIBSIES MY ANYTIME CHAIR User manual

MY ANYTIME CHAIR
ASSEMBLY MANUAL
Accompanying Assembly Video:
https://www.dibsies.com/matc-assembly
SCAN FOR VIDEO

2
IMPORTANT
Please see our easy-to-follow Assembly Video for additional guidance
with assembly: www.dibsies.com/matc-assembly
If any parts are missing or if you have difculty during assembly,
please email Dibsies Customer Support for assistance:
PARTS LIST
Ensure that the following parts are included.
Part A - Fabric Slip
Cover w/ Zipper
Part D - Bottom
(Thicker) Foam Block x1
Part B - Round Foam
Blocks x2
Part C - Back
(Thinner) Foam Block x1
3
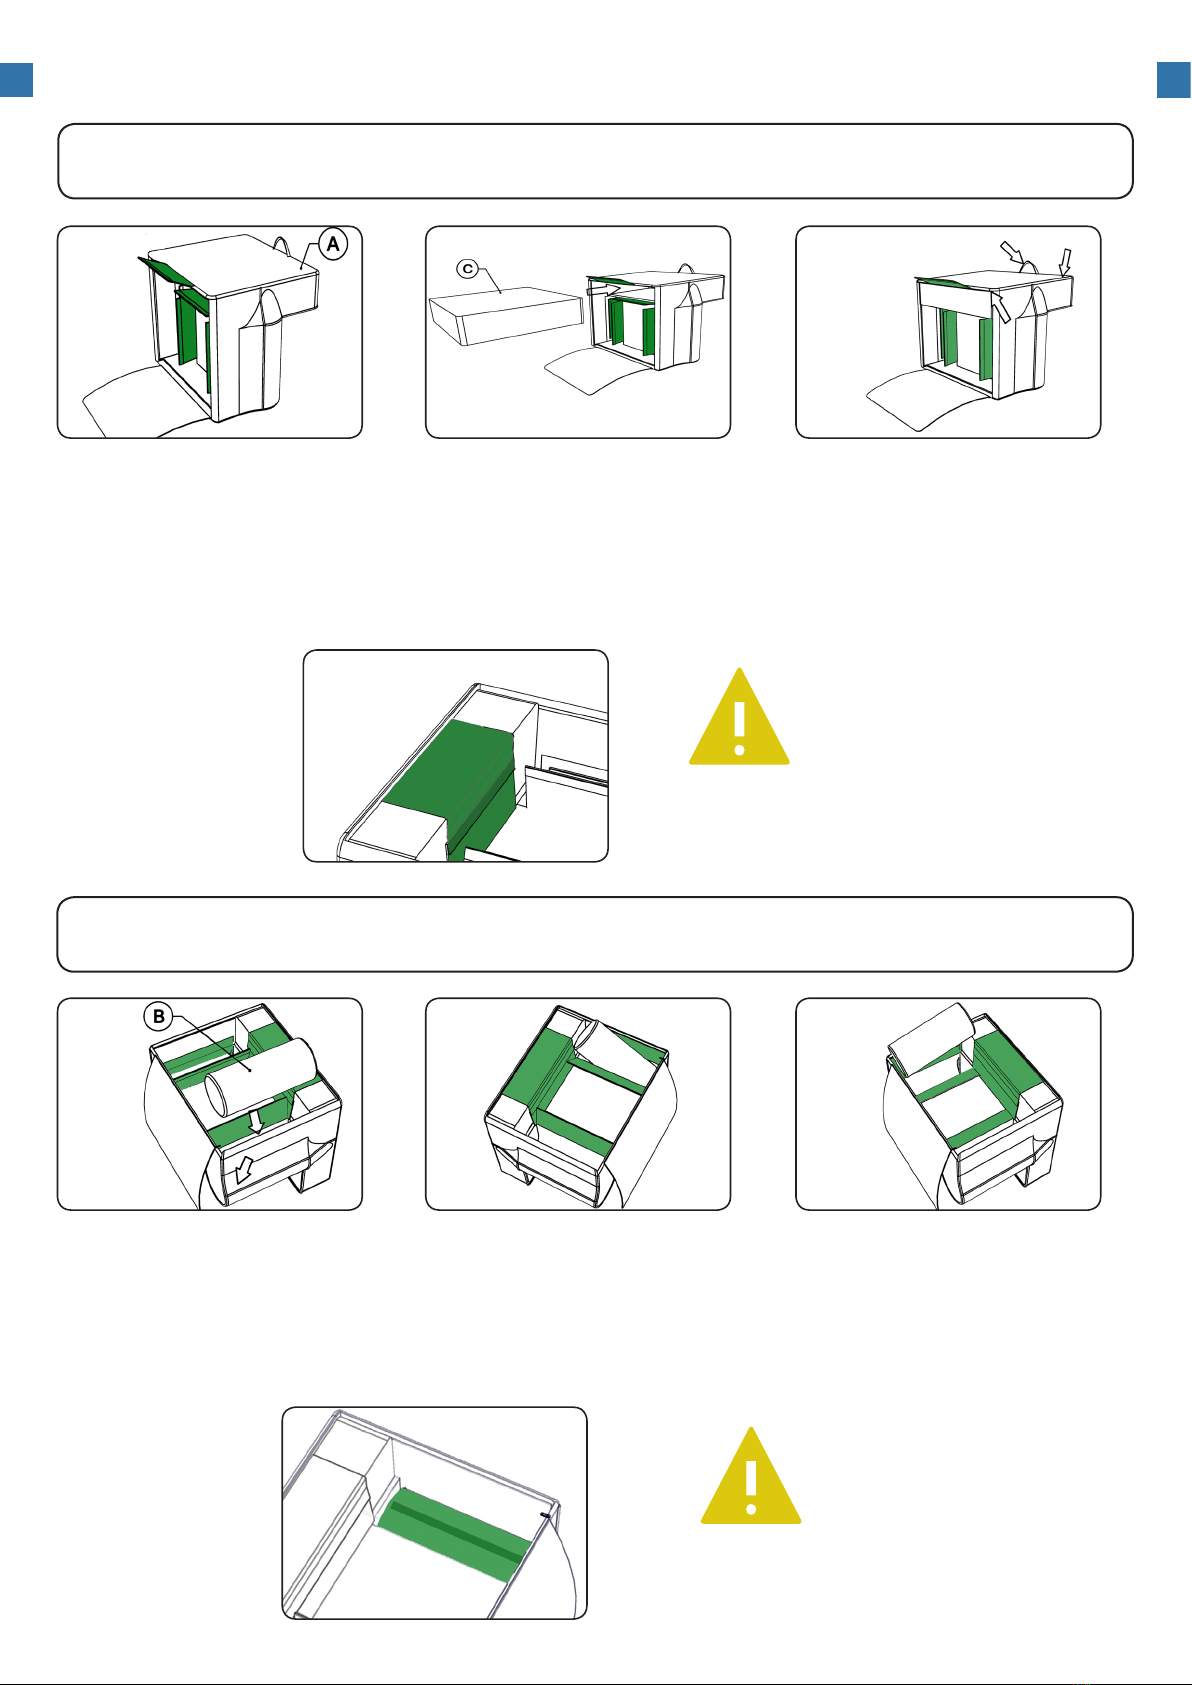
INSTRUCTIONS
Prepare Part A Cover
Prepare Part B Round
Foam Block
Insert Part C Foam Block
to form back of chair
Ensure round foam block
is secure
Place the slip cover (Part A) on a at
surface and make sure it is unzipped.
Locate three pairs of white fabric
aps inside the cover and make sure
they are unfastened from each other.
Turn chair upside down. Locate
one Part B Round Foam Block
and prepare to insert it into slip
cover to form one armrest.
Adjust the slip cover to ensure tight t.
Pull back slightly on the seam closest
to the handle until handle is tilting
towards the back of the chair. Then
fasten together the two white fabric
aps inside cover.
Locate the other Part B Round
Foam Block and repeat the previous
steps to secure the round foam
block into place.
1.
1.
3.
3.
Step 1 - Inserting the Part C (Thinner) Foam Block
Step 2 - Inserting the Part B Round Foam Blocks
Adjust cover to ensure
foam block is snug
Ensure Part C is held
securely in place with the
white fabric aps.
Ensure both Part B blocks
are held securely in place
with the white fabric aps
Repeat these steps for other
armrest.
Locate the Part C Foam Block (this is
the thinner rectangular foam block).
Insert it into the back of the slip cover
as shown.
Insert the round block at an angle
as shown. Secure in place by
fastening together the two white
fabric aps.
2.
2.

INSTRUCTIONS
Zip Up the Slip Cover
Flip over the bottom ap of the slip cover
and then seal it closed by sliding the zipper
all the way around the bottom. Use one
hand to zip and your other hand to help
hold the slip cover together to aid in the
zipping process. Hide zipper by tucking it
into ap as shown.
3.
Step 3 - Inserting the Part D (Thicker) Foam Block
Prepare Part D Bottom
Foam Block
Insert the Part D Foam
Block
Enjoy your new My
Anytime Chair!
Locate Part D Foam Block (this is the
thicker rectangular foam block) and
prepare to insert it into slip cover to form
bottom of chair.
Slowly insert the foam block into the slip
cover at an angle as shown. Once it is
fully inserted, make sure it is positioned
at and even with the Part C Foam Block.
Before using your new chair, verify that all
parts are fully secured. Assembly is now
complete. Enjoy your new My Anytime
Chair!
1. 2.
4.
4
www.dibsies.com
7014 Faireld Business Center Dr.
Cincinnati, OH 45014
Other DIBSIES Indoor Furnishing manuals


Popular Indoor Furnishing manuals by other brands

Regency
Regency LWMS3015 Assembly instructions

Furniture of America
Furniture of America CM7751C Assembly instructions

Safavieh Furniture
Safavieh Furniture Estella CNS5731 manual

PLACES OF STYLE
PLACES OF STYLE Ovalfuss Assembly instruction

Trasman
Trasman 1138 Bo1 Assembly manual

Costway
Costway JV10856 manual


