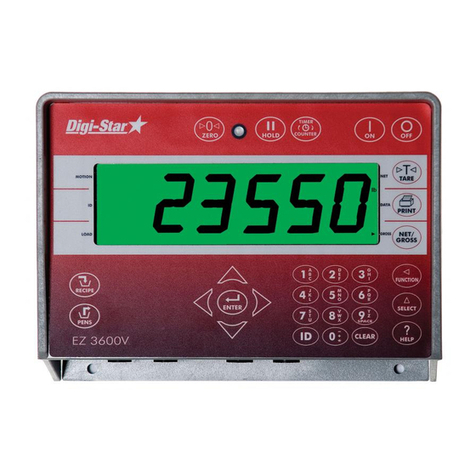
Digistar EZ3600 User manual

EZ3600
User manual
Ft. Atkinson, Wisconsin USA
Panningen, the Netherlands
www.digi-star.com
D371 -GB Rev D May 10
HELLO

Table of contents
D3715-GB Rev D EZ3600 User' s manual
T BLE OF CONTENTS
FEED MANAGEMENT SOFTWARE ................................................................................................ 1
CAB CONTROL (WIRELESS) .......................................................................................................... 2
SAFETY DURING USE .................................................................................................................... 3
Check system before use .............................................................................................................. 3
Cleaning ........................................................................................................................................ 3
Charging battery and welding ........................................................................................................ 3
OVERVIEW WEIGHING INDICATOR .............................................................................................. 4
OPERATION ..................................................................................................................................... 6
Switching on the weighing indicator .............................................................................................. 6
USING EZ3600(V) AS A DATA TRANSFER UNIT ........................................................................... 7
DATA TRANSFER ............................................................................................................................ 8
DataKey mode ............................................................................................................................... 8
DataLink modes ............................................................................................................................ 8
Weighing indicator data formats .................................................................................................... 8
LOADING AND FEEDING IN COMPLETE LOAD MODE ................................................................ 9
Loading recipes ............................................................................................................................. 9
Resizing recipe weight .................................................................................................................. 9
Feeding groups ........................................................................................................................... 10
LOADING AND FEEDING IN RECIPE AND GROUP LIST MODE ................................................ 11
Loading the recipe ....................................................................................................................... 11
Resizing recipe weight ................................................................................................................ 11
Feeding groups ........................................................................................................................... 12
ADVANCED FUNCTIONS .............................................................................................................. 13
Partially feeding groups ............................................................................................................... 13
Return to the skipped ingredient ................................................................................................. 13
Changing the feeding cycle number ............................................................................................ 13
Clearing the indicator memory .................................................................................................... 14
Re-using recipe / group data ....................................................................................................... 14
Adding a group to group list ........................................................................................................ 14
EZ3600(V) FRONT PANEL PROGRAMMING ............................................................................... 16
PROGRAMMING RECIPES ........................................................................................................... 17
Changing the programming method ............................................................................................ 17
Changing ingredient names ........................................................................................................ 17
Printing an ingredient name ........................................................................................................ 18
Programming a new recipe ......................................................................................................... 18
Changing ingredient amounts in the recipe ................................................................................. 19
Deleting recipe ............................................................................................................................ 20
Calling up a recipe ....................................................................................................................... 20
PRINTING RECIPES ...................................................................................................................... 21
Printing a single recipe ................................................................................................................ 21
Printing all the recipes ................................................................................................................. 21
LOADING AND DOSING OUT RECIPES ....................................................................................... 22
Loading recipe according to amount per animal ......................................................................... 22
Dosing out recipe ........................................................................................................................ 23
ADDITIONAL FUNCTIONS ............................................................................................................ 24
Holding the displayed amount ..................................................................................................... 24
Printing ........................................................................................................................................ 24
Backlight intensity ........................................................................................................................ 24
Deleting accumulative ingredient amounts .................................................................................. 2
COMMONLY USED DIRECT ACCESS NUMBERS ....................................................................... 26
Pre-alarm ..................................................................................................................................... 26
Automatically advancing ingredients ........................................................................................... 26
Tolerance .................................................................................................................................... 26
Group tolerance ........................................................................................................................... 27

Table of contents
D3715-GB Rev D EZ3600 User' s manual
Delay time ................................................................................................................................... 27
Automatically advancing to next ingredient / Manually advancing to next group ........................ 28
Drive ratio .................................................................................................................................... 28
Weighing indicator ID / feed mixer ID .......................................................................................... 28
Radio number .............................................................................................................................. 29
Changing the recipe amount on the weighing indicator .............................................................. 29
Setting the time ........................................................................................................................... 29
Setting the date ........................................................................................................................... 30
TMR Tracker or Front Panel programming ................................................................................. 30
LIST WITH DIRECT ACCESS NUMBERS ..................................................................................... 31
TROUBLE SHOOTING ................................................................................................................... 34
INSTALLATION .............................................................................................................................. 36
Mounting the indicator ................................................................................................................. 36
Load cell direction ....................................................................................................................... 36
Connecting the cables ................................................................................................................. 37
Connecting load cells to J-Box .................................................................................................... 38
Changing setup and calibration numbers .................................................................................... 38
OPTIONAL EQUIPMENT ............................................................................................................... 39
Rotation counter sensor .............................................................................................................. 39
Transmitter/receiver .................................................................................................................... 39
Remote displays .......................................................................................................................... 39
APPENDIX A1: EC DECLARATION OF CONFORMITY
All rights reserved. Reproduction of any part of this manual in any form whatsoever without Digi-Star’s express written permission is forbidden. The
contents of this manual are subject to change without notice. All efforts have been made to assure the accuracy of the contents of this manual. However,
should any errors be detected, Digi-Star would greatly appreciate being informed of them. The above notwithstanding, Digi-Star can assume no
responsibility for any errors in this manual or their consequence.
© Copyright! 2008 Digi-Star, Fort Atkinson (U.S.A.).

Feed management software
D3715-GB Rev D EZ3600 User's manual
1
FEED M N GEMENT SOFTW RE
A full featured Windows
®
based system that offers powerful and easy to
use features.
>>For additional information, see www.digi-star.com

Cab control (wireless)
D3715-GB Rev D EZ3600 User's manual
2
C B CONTROL (WIRELESS)
Features
• Wireless remote operation in front loader with full key control of the weighing indicator
mounted on the feed mixer.
• Thanks to Cab Control the weight can be easily readout in your front loader.
• Ingredients can be loaded more accurately.
Functions
• Communicates with several feed mixers
• Easily call-up recipes without leaving the front loader.
• Manual advance when loading ingredients.
Specifications
• Built-in wireless 2.4 GHz radios
• Range up to 1000ft (300m)
• 24 channels
• 12 or 24 Vdc systems
>>For additional information, see www.digi-star.com

Safety during use
D3715-GB Rev D EZ3600 User's manual
3
S FETY DURING USE
Caution
Check system before use
Before you are going to use the Digi-Star weighing system you need to check the proper working
of the system by charging all weighing points with a known weight.
Digi-Star cannot be held responsible for deviations and problems arising from incorrect use of the
weighing indicator, incorrect calibration or settings. Furthermore Digi-Star cannot be held
responsible for deviations and problems arising from technical problems to the system.
Cleaning
Do not use running water (high pressure cleaners, hoses) to clean the indicator.
Charging battery and welding
During welding you need to remove the weighing bars to avoid damaging. If this is not possible,
you need to place the “ground” clip as close to the welding point as possible, in order to avoid that
current can flow through the weighing bars.
Digi-Star cannot be held responsible for problems arising from welding or charging of the battery.
Disconnect all cables
Remote display
(optional)
J-Box
Weighing indicator

Overview weighing indicator
D3715-GB Rev D EZ3600 User's manual
4
OVERVIEW WEIGHING INDIC TOR
1. – press and hold for 3 seconds to zero balance the weighing indicator.
2. Warning light pre-alarm – light flashes and alarm sounds when weight is within preset limit.
3. – to hold displayed weight when moving the machine.
4. – to set mixing time
. – to switch on weighing indicator . Press this key while the weighing indicator is on to run
the self test.
6. – to switch off weighing indicator.
7. Display – to display actual values and settings.
8. – to temporarily zero the weighing indicator [Net mode].
9. – to register or print the displayed weight.
10. – to toggle between net and gross weights.
11. – to select recipes.
12. – to enter user and feed cycle numbers. Any user number can be entered as long as this
number has not been assigned by the management software.
1
2
3
4
5
6
7
8
9
10
11
12
13
14
15
16
17
18
19
20
21
>>See pages 36, 37 and 38 for installation instructions.

Overview weighing indicator
D3715-GB Rev D EZ3600 User's manual
5
13. – to clear <Backspace>
14. – to start dosing out recipe for groups [List mode]. See page 12.
1 . – to confirm modification or select the next item.
16. Arrow keys – to scroll through a list of information.
17. Keyboard – to enter numbers and letters.
18. – to display extra information.
19. – to display extra tasks.
20. – to perform the selected task.
21. DataKey – to transfer data from computer to weighing indicator and vice versa.
22. Serial port/printer port – communication with inputs and outputs of the computer and other
digital devices (optional).
23. Port for remote display – to connect the remote display (optional).
24. Load cell port – to connect the J-Box cable.
2 . Power supply port – to connect the power supply cable.
26. Port for DataKey – to insert the DataKey. Turn the DataKey to upload/download data.
27. Serial number
>>See pages 36, 37 and 38 for installation instructions.
22
23
24
25
26
27
27

Operation
D3715-GB Rev D EZ3600 User's manual
6
OPER TION
Switching on the weighing indicator
1. Press .
2. Enter the user number, if required.
3. Press .
4. Press and hold for 3 seconds to zero
balance the weighing indicator.
HE
LLO
user
0
1
2
3
4

Using EZ3600(V) as a data transfer unit
D3715-GB Rev D EZ3600 User's manual
7
USING EZ3600(V) S D T TR NSFER UNIT
Recipes can be programmed using the TMR Tracker software and sent to the EZ3600(V) unit via
DataKey or DataLink. When running in “PC” mode it is not possible to program a recipe using the
front panel.
To set unit to PC programmable see page 30 TMR Tracker or Front Panel programming.

Data transfer
D3715-GB Rev D EZ3600 User's manual
8
D T TR NSFER
DataKey mode
1. Insert the DataKey in the weighing indicator.
2. Press to upload data.
Note: If the weighing indicator displays
uncompleted recipes in the memory, press
to overwrite this data. Remove DataKey after
data have been transferred.
To download data of completed recipes:
Insert the DataKey in the weighing indicator. The
weighing indicator automatically sends data to
the DataKey.
Remove the DataKey.
DataLink modes
Operation Displayed message
DataLink connects with the weighing indicator ←PC→
DataLink sends data to the weighing indicator DL←IN
The weighing indicator gives a message that all data has been
received. new data
Weighing indicator connects with DataLink
←
PC
→
Weighing indicator sends complete data to DataLink DL
→
OUT
To send data to the PC, if not all recipes have been fed. Press
until a message [right column] appears on the display. Press
to select this.
EZ→PC
The weighing indicator marks uncompleted recipes as being completed and sends data of the
completed recipes to DataLink.
Note: After data has been sent, uncompleted recipes will be deleted.
Weighing indicator data formats
Data can be sent to the weighing indicator in two different modes:
Complete load mode
Each load is prepared by the TMR Tracker software. In this mode
groups are assigned to recipes and an accurate load is prepared.
Recipe and group list
mode
The TMR Tracker software sends the recipe and group data in two
separate lists. The operator selects the recipe to be prepared and the
dose outs per group.
1
2

Loading and feeding in complete load mode
D3715-GB Rev D EZ3600 User's manual
9
LO DING ND FEEDING IN COMPLETE LO D MODE
Loading recipes
1. Press
1. The weighing indicator displays recipe, group
number and feeding number in succession.
2. Press and to select the required
recipe.
3. Press to start the recipe selected.
Resizing recipe weight
If the RESIZE function is activated, the recipe
amount for the group(s) can be adjusted.
1. Enter the new recipe amount or keep the
original amount.
2. Press . The weighing indicator
recalculates the recipe.
Note: Press to change the number of animals instead of the recipe amount. After the number
of animals has been changed, the weighing indicator will automatically adjust the recipe
amount.
Press to accept the recipe amounts of the group(s) without adjusting them.
If the weighing indicator indicates that the resized recipe exceeds the capacity of the feed
mixer, press to ignore this message.
rec 1
Feed 1
RESIZE
1
2
1
3
1
2

Loading and feeding in complete load mode
D3715-GB Rev D EZ3600 User's manual
10
1. The first ingredient and the corresponding
amount will flash on the display.
2. As soon as the amount starts to approach
zero the alarm light starts flashing and you
will hear an alarm signal.
3. a) Manually advance next ingredient: When
the ingredient amount to be loaded has been
reached, press to accept this amount.
Press again to advance to the next
ingredient.
b) Automatically advance next ingredient:
When the ingredient amount to be loaded has
been reached, the weighing indicator will
automatically advance to the next ingredient.
Note: See pages 26, 27 and 28 for settings.
Note: To load the ingredients in a different order, press or to select the required
ingredient. Press to start loading this ingredient.
Feeding groups
When the ingredients have been loaded, the
weighing indicator will show the first group to be
fed.
1. a) Manual advance:
Press to select the group to be fed.
When the amount to be fed has been dosed
out, press to accept this. Press
again to advance to the next group,
or
b) Automatic advance:
When the amount to be fed has been dosed
out, the weighing indicator will automatically
advance to the next group.
After the last group has been fed, following
message will appear on the display:
Recipe co plete.
Note: Do not press .
To feed the groups in a different order, press or to select the required group.
Press to start feeding this group.
corn
GROUP 1
1
3
2
1

Loading and feeding in recipe and pen list mode
D3715-GB Rev D EZ3600 User's manual
11
LO DING ND FEEDING IN RECIPE ND GROUP LIST MODE
Loading the recipe
1. Press .
2. On the display appears, for example:
RECIPE DRY COW TOT - 2500
3. Press and to select the required
recipe.
4. Press to start loading the selected
recipe.
Resizing recipe weight
If the RESIZE function has been activated, the
recipe amount can be adjusted.
1. Enter the new recipe amount or keep the
original amount.
2. Press . The recipe is recalculated.
Note: If the weighing indicator indicates that the resized recipe exceeds the capacity of the feed
mixer, press to ignore this message.
1. The first ingredient and the corresponding
amount will flash on the display.
2. As soon as the amount starts to approach
zero the alarm light starts flashing and you
will hear an alarm signal.
3. a) Manually advance next ingredient: When
the ingredient amount to be loaded has been
reached, press to accept this amount.
Press again to advance to the next
ingredient, or …
b) Automatically advance next ingredient: When the ingredient amount to be loaded has been
reached, the weighing indicator will automatically advance to the next ingredient.
See pages 26, 27 and 28 for settings.
Note: To load the ingredients in a different order, press or to select the required
ingredient. Press to start loading this ingredient.
dry
RESIZE
corn
3
2
1
1
2
1
2
3
4

Loading and feeding in recipe and pen list mode
D3715-GB Rev D EZ3600 User's manual
12
Feeding groups
1. After the last ingredient has been loaded,
Recipe co plete will appear on the display.
Press . The weighing indicator shows
the groups to be fed.
2. Press or to select the required
group.
3. Press .
4. The weighing indicator shows the group to be
fed and the corresponding recipe amount.
Feeding can be started.
. a) Manually advance: When the recipe
amount to be fed has been dosed out,
press to accept this. Press again
to advance to the next group.
or
b) Automatically advance: When the recipe
amount to be fed has been dosed out, the
weighing indicator will automatically advance
to the next group to be fed.
6. When the group(s) have been fed, press
to select the recipe for the next group to be
fed.
See pages 26, 27 and 28 for settings.
group 1
1
2
3/
6
4

dvanced functions
D3715-GB Rev D EZ3600 User's manual
13
DV NCED FUNCTIONS
Partially feeding groups
1. Press to advance to next group without
finishing feeding the current group.
Note: If you have set the group tolerance and
feeding is stopped before the preset recipe
amount is reached, an alarm will sound and the
weighing indicator displays:
PEN underfed – Press Print
to re ove this pen fro list -
Press On to keep pen
To set group tolerance, see page 27.
Return to the skipped ingredient
1. Press or to return to the skipped
ingredient.
2. Press
Note: If the ingredient amount has changed by
more than 4 counts, this ingredient can no
longer be selected.
Changing the feeding cycle number
1. Press .
2. Enter user number.
3. Press .
4. Enter feeding number (1-9).
. Press .
1
1
2
1
2/4
3/

dvanced functions
D3715-GB Rev D EZ3600 User's manual
14
Clearing the indicator memory
1. Press .
2. Press and hold .
3. Press , while holding . The
weighing indicator will successively show:
On=erase Clear=Reuse Net=Exit
Release .
4. Press .
Re-using recipe / group data
1. Press .
2. Press and hold .
3. Press , while holding . The
weighing indicator will successively show:
On=erase Clear=Reuse Net=Exit.
Release .
4. Press again to re-use recipe and group
data.
Note: The weighing indicator re-uses the recipe and group information stored in the weighing
indicator. The loaded ingredient amounts and fed recipe amounts will be removed. Download
the complete data in the DataKey, before re-using the recipe and stored group data.
For continuous re-use, set number 466 from the list with direct access number (D.A.N.-list) to
ON. See page 33.
dding a group to group list
1. Enter group name or number.
2. Press .
3. Press to add the group.
1
4
2/3
3
1
2/3
3
CLEAR
Reuse
4
1
calf
2
3

dvanced functions
D3715-GB Rev D EZ3600 User's manual
15
4. Press or to select the required
recipe.
. Press .
6. Enter the recipe amount to be fed to the
group.
7. Press .
8. Enter the number of animals in this group.
9. Press .
10. If you work with zones, the following will
appear on the display:
Enter zone 0-9
11. Enter the required zone.
12. Press .
4
6/8
7/9
Rec 1
3000
10
12
zone 1
11

EZ3600(V) Front panel programming
D3715-GB Rev D EZ3600 User's manual
16
EZ3600(V) FRONT P NEL PROGR MMING
Recipes can be programmed using the EZ3600(V) front panel.
To set front panel programming see page 30 TMR Tracker or Front Panel programming.

Programming recipes
D3715-GB Rev D EZ3600 User's manual
17
PROGR MMING RECIPES
The ingredients in a recipe can be entered in three different ways:
1. Amount per animal (standard setting)
Enter the amount of ingredient per animal per recipe. For example, 9 kg silage and 8 kg corn.
Depending on the number of animals to be fed, the weighing indicator will calculate the total
amount of the ingredients to be prepared: For example, with 100 animals this will be 900 kg silage
and 800 kg corn.
2. Percentage (%) per ingredient
Enter the amount of ingredient per recipe as a percentage (%). For example, % silage and 4 %
corn. The weighing indicator will calculate the total amount to be prepared per ingredient: For
example, with a total weight of 1000Kg this will be 0 kg silage and 4 0 kg corn. Attention; the
total must be 100%.
3. Amount per ingredient
Enter the required total amount of ingredient per recipe. For example, 2 00 kg silage and 2000 kg
corn.
Changing the programming method
[E- thd]
1. Enter 441 and press .
2. Press repeatedly to select the required
programming method for blends.
1 = Amount per animal
2 = Percentage (%) per ingredient
3 = Amount per ingredient
3. Press to confirm the selected
programming method.
Changing ingredient names
The standard ingredient names can be changed as required:
1. Repeatedly press , until iNGRNM is
displayed.
2. Press .
3. Press to select the ingredient to be
changed.
4. Press to change the name. EDIT will
briefly be displayed, followed by a flashing
cursor.
1
2
3
E thd
ingrn
4
2
1/3
Other manuals for EZ3600
3
Table of contents
Other Digistar Controllers manuals
Popular Controllers manuals by other brands

AUGIER Energy
AUGIER Energy OCEM DIAM3200 Series Installation & maintenance
Generac Power Systems
Generac Power Systems PowerManager 004975-2 manual

EUTECH INSTRUMENTS
EUTECH INSTRUMENTS WD-19505-40 instruction manual

Mitsubishi Electric
Mitsubishi Electric MELSEC FX3U-485ADP-MB installation manual
Lennox
Lennox V0STAT54P-2 Installation & operation instructions
Schischek
Schischek ExRun Y Series quick start guide
