Network Attached Storage
®NAS
4
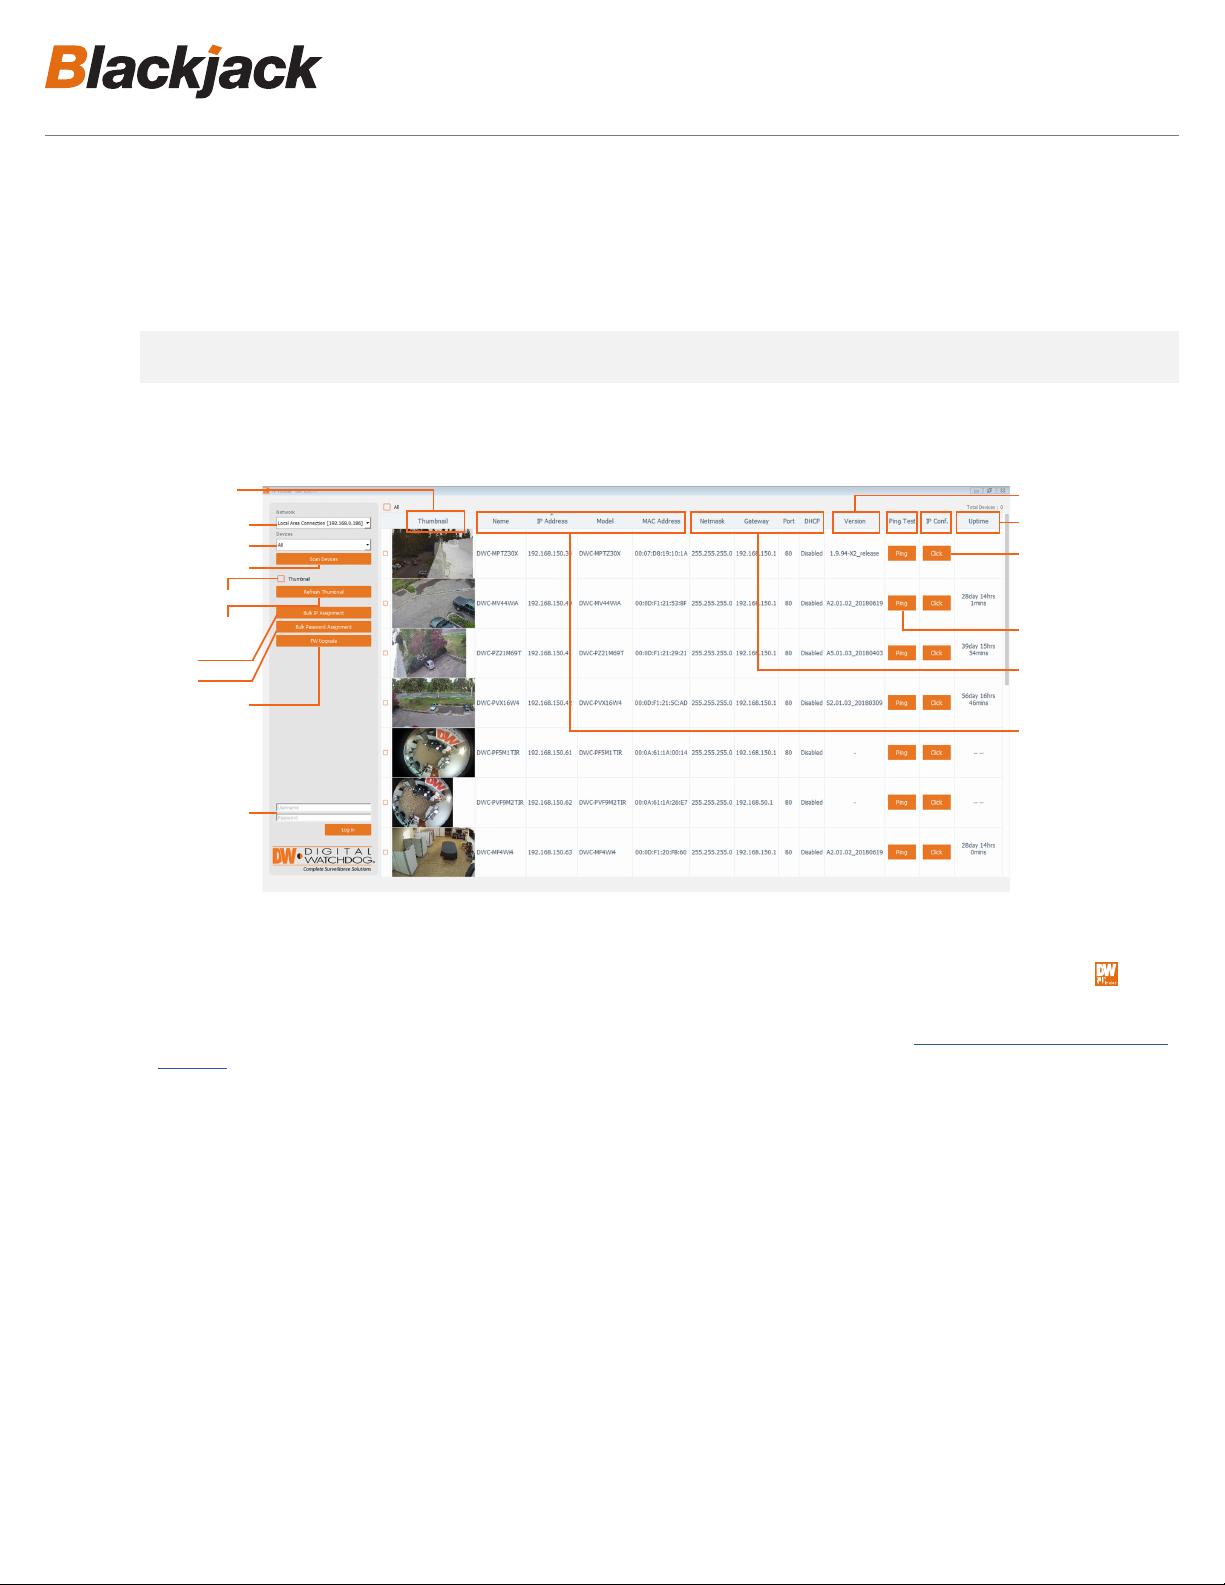
4. If the Blackjack NAS is not listed, change the Network* by clicking the drop down and select another network if exist.
Click to scan the network for the Blackjack NAS.
- If it’s showing incorrect network, select the correct network from the drop-down list.
4. If the BlackJack NAS is not listed, change the Network* by clicking the drop down and select
another network if exist. Then click to scan the network for the Blackjack NAS.
-Ifit’sshowingincorrectnetwork,selectthecorrectnetworkfromthedropdownlist.
5. Find the BlackJack NAS from the list, then either double click on the or click on
the under the IP Conf column.
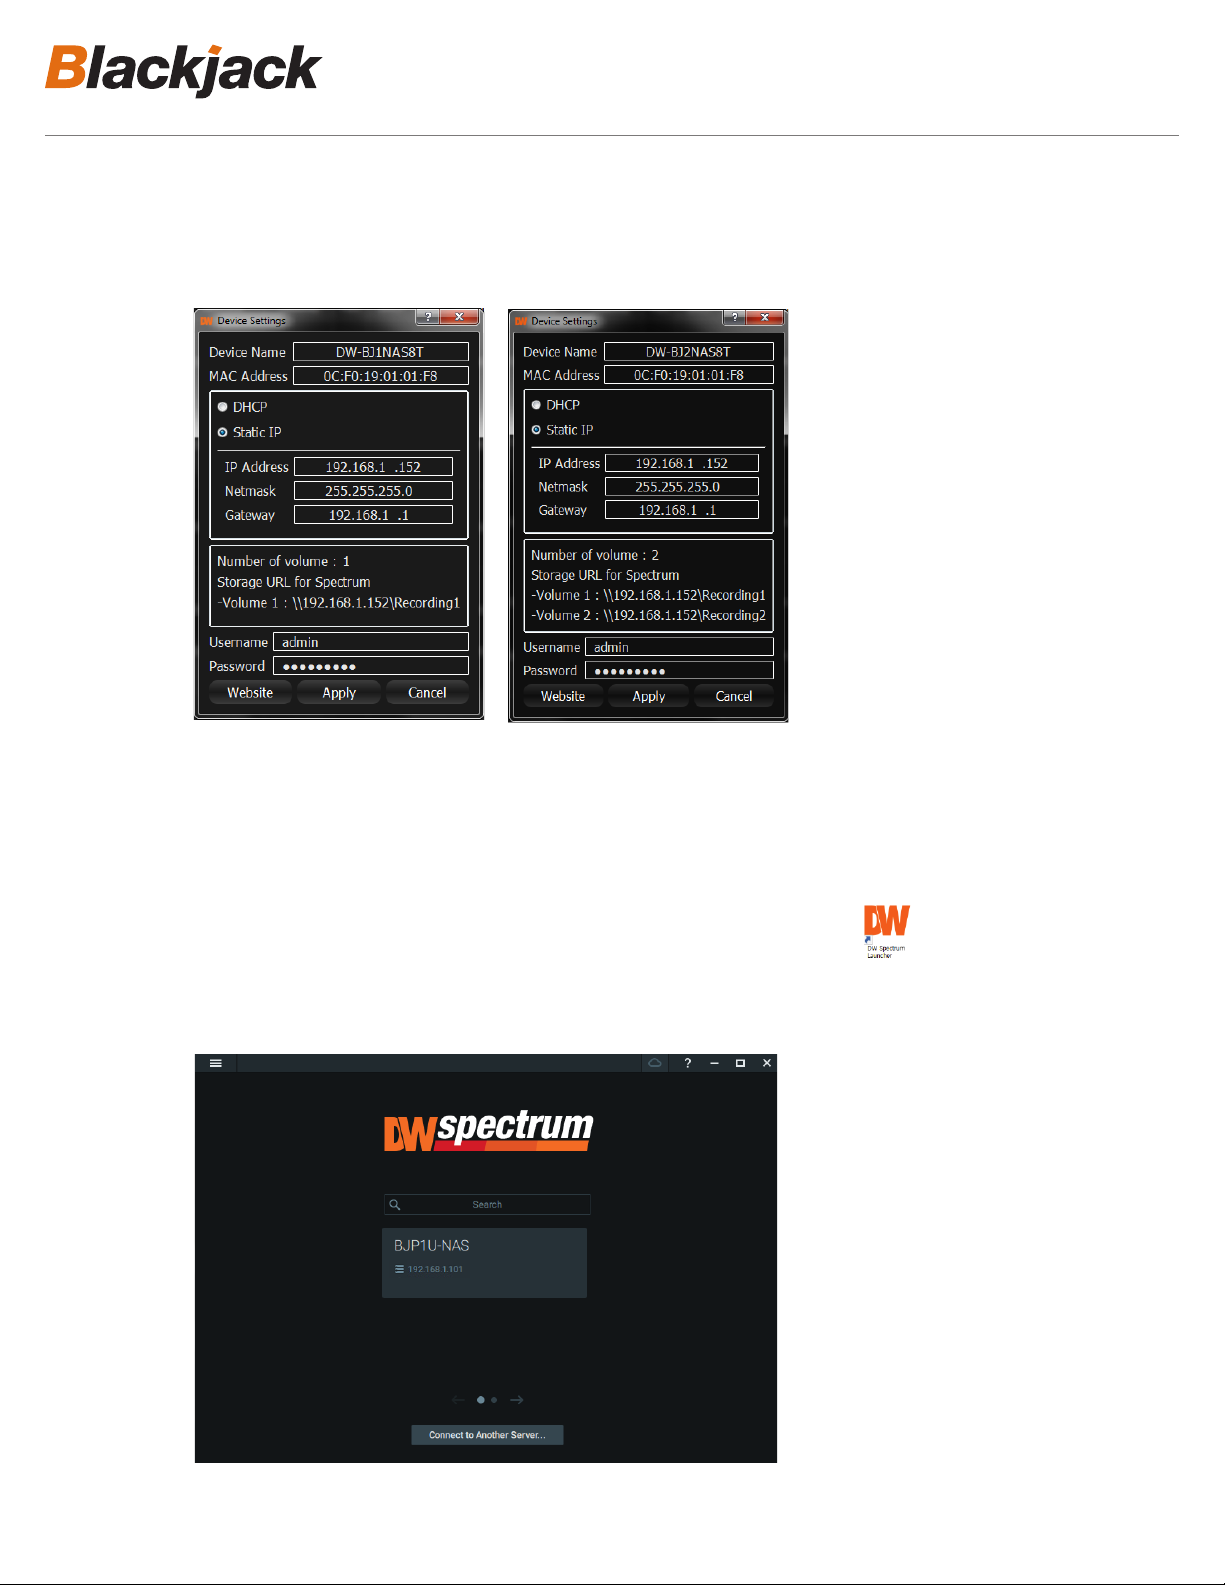
6. From the Device Settings, enter IP Address, Netmask and Gateway then click Apply to save
changes.
* Consult with your IT or network administrator If you do not have IP information,
IP Address: 192.168.1.200,
Subnetmask: 255.255.255.0
Gateway:192.168.1.1
5. Find the Blackjack NAS from the list, then either double click on the
4. If the BlackJack NAS is not listed, change the Network* by clicking the drop down and select
another network if exist. Then click to scan the network for the Blackjack NAS.
-Ifit’sshowingincorrectnetwork,selectthecorrectnetworkfromthedropdownlist.
5. Find the BlackJack NAS from the list, then either double click on the or click on
the under the IP Conf column.
6. From the Device Settings, enter IP Address, Netmask and Gateway then click Apply to save
changes.
* Consult with your IT or network administrator If you do not have IP information,
IP Address: 192.168.1.200,
Subnetmask: 255.255.255.0
Gateway:192.168.1.1
or click on the click button under the
IP Conf column.
6. From the Device Settings, enter IP address, netmask and gateway then click Apply to save changes.
* Consult with your IT or network administrator If you do not have IP information.
NOTE: Default IP Info
IP Address: 192.168.1.200,
Subnetmask: 255.255.255.0
Gateway:192.168.1.1
4. If the BlackJack NAS is not listed, change the Network* by clicking the drop down and select
another network if exist. Then click to scan the network for the Blackjack NAS.
-Ifit’sshowingincorrectnetwork,selectthecorrectnetworkfromthedropdownlist.
5. Find the BlackJack NAS from the list, then either double click on the or click on
the under the IP Conf column.
6. From the Device Settings, enter IP Address, Netmask and Gateway then click Apply to save
changes.
* Consult with your IT or network administrator If you do not have IP information,
IP Address: 192.168.1.200,
Subnetmask: 255.255.255.0
Gateway:192.168.1.1