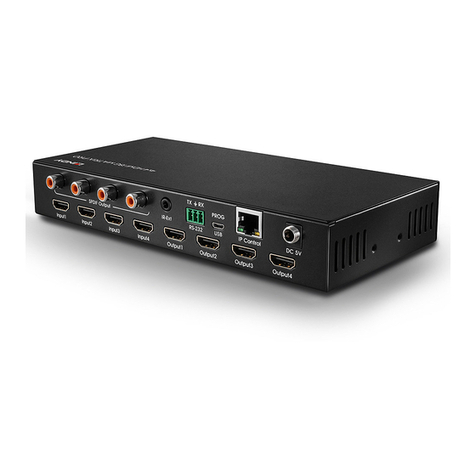
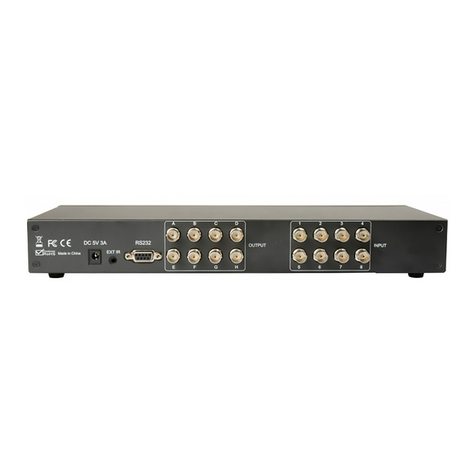
DigitaLinx DL-44E-KIT Operating instructions

11675 Ridgeline Dr
Colorado Springs, CO 80921
Rev 160926 Phone: 719-260-0061
Toll-Free: 800-530-8998
Fax: 719-260-0075
DL-44E-KIT Installaon and
Operaon Guide

DL-44E-KIT Installaon Guide
2

DL-44E-KIT Installaon Guide
3
Important Safety Instrucons
»Please completely read and verify you understand all instrucons in this manual before operang this equipment.
»Keep these instrucons in a safe, accessible place for future reference.
»Heed all warnings.
»Follow all instrucons.
»Do not use this apparatus near water.
»Clean only with a dry cloth.
»Do not install near any heat sources such as radiators, heat registers, stoves, or other apparatus (including ampliers)
that produce heat.
»Use only accessories specied or recommended by Intelix.
»Explanaon of graphical symbols:
◊ Lightning bolt/ash symbol: the lightning bolt/ash and arrowhead within an equilateral triangle
symbol is intended to alert the user to the presence of uninsulated “dangerous voltage” within the
product enclosure which may be of sucient magnitude to constute a risk of shock to a person or
persons.
◊ Exclamaon point symbol: the exclamaon point within an equilateral triangle symbol is intended
to alert the user to the presence of important operang and maintenance (servicing) instrucons
in the literature accompanying the product.
»WARNING: TO REDUCE THE RISK OF FIRE OR ELECTRIC SHOCK, DO NOT EXPOSE THIS APPARATUS TO RAIN OR
MOISTURE AND OBJECTS FILLED WITH LIQUIDS, SUCH AS VASES, SHOULD NOT BE PLACED ON THIS APPARATUS.
»Use the mains plug to disconnect the apparatus from the mains.
»THE MAINS PLUG OF THE POWER CORD MUST REMAIN READILY ACCESSIBLE.
»Do not defeat the safety purpose polarized or grounding-type plug. A polarized plug has two blades with one wider
than the other. A grounding-type plug has two blades and a third grounding prong. The wide blade or the third prong
is provided for your safety. If the provided plug does not t into your outlet, consult an electrician for replacement of
your obsolete outlet. Cauon! To reduce the risk of electrical shock, grounding of the center pin of this plug must be
maintained.
»Protect the power cord from being walked on or pinched parcularly at the plugs, convenience receptacles, and the
point where they exit from the apparatus.
»Do not block the air venlaon openings. Only mount the equipment per Intelix’s instrucons.
»Use only with the cart, stand, table, or rack specied by Intelix or sold with the equipment. When/if a
cart is used, use cauon when moving the cart/equipment combinaon to avoid injury from p-over.
»Unplug this apparatus during lightning storms or when unused for long periods of me.
»Cauon! Shock Hazard. Do not open the unit.
»Refer to qualied service personnel. Servicing is required when the apparatus has been damaged in any way, such as
power supply cord or plug is damaged, liquid has been spilled or objects have fallen into the apparatus, the apparatus
has been exposed to rain or moisture, does not operate normally, or has been dropped.

DL-44E-KIT Installaon Guide
4
Table of Contents
Product Overview��������������������������������������������������������������������������������������������������������������������������������������� 6
Package Contents ��������������������������������������������������������������������������������������������������������������������������������������� 6
Front and Rear Panels DL-44E-KIT��������������������������������������������������������������������������������������������������������������� 7
Front Panel���������������������������������������������������������������������������������������������������������������������������������������������������� 7
Rear Panel ����������������������������������������������������������������������������������������������������������������������������������������������������� 7
Front and Rear Panels DL-HD70LS-RX ��������������������������������������������������������������������������������������������������������� 8
Front Panel���������������������������������������������������������������������������������������������������������������������������������������������������� 8
Rear Panel ����������������������������������������������������������������������������������������������������������������������������������������������������� 8
Installaon Instrucons������������������������������������������������������������������������������������������������������������������������������ 9
Mount the Matrix ����������������������������������������������������������������������������������������������������������������������������������������� 9
Usage Precauons ���������������������������������������������������������������������������������������������������������������������������������������� 9
Connecon Procedure����������������������������������������������������������������������������������������������������������������������������������� 9
Connecon with HDBaseT Receiver �������������������������������������������������������������������������������������������������������������� 9
System Operaons ��������������������������������������������������������������������������������������������������������������������������������������10
IR Remote������������������������������������������������������������������������������������������������������������������������������������������������� 10
Control Far-end Device locally���������������������������������������������������������������������������������������������������������������������11
Control Local Device Remotely ....................................................................................................................11
Mulple to Mulple: (IR Matrix) .................................................................................................................11
TCP/IP Control ������������������������������������������������������������������������������������������������������������������������������������������ 12
Controlled by PC������������������������������������������������������������������������������������������������������������������������������������������ 12
Controlled by PC(s) in LAN���������������������������������������������������������������������������������������������������������������������������12
Web Browser Control�������������������������������������������������������������������������������������������������������������������������������� 13
EDID Management ����������������������������������������������������������������������������������������������������������������������������������� 14
EDID learning ��������������������������������������������������������������������������������������������������������������������������������������������14
EDID Invoking���������������������������������������������������������������������������������������������������������������������������������������������� 14
RS232 Commands������������������������������������������������������������������������������������������������������������������������������������� 15
Troubleshoong ��������������������������������������������������������������������������������������������������������������������������������������� 19
Loss of color or no video signal output �������������������������������������������������������������������������������������������������������19
Cannot control the device via front panel buons��������������������������������������������������������������������������������������19
Cannot control the device via IR remote ����������������������������������������������������������������������������������������������������� 19
Cannot control the matrix by control device (e.g. a PC) through RS232 port����������������������������������������������19
Stac becomes stronger when connecng the video connectors ���������������������������������������������������������������19
DL-44E-KIT Technical Specicaons����������������������������������������������������������������������������������������������������������� 20
DL-HD70LS-RX Technical Specicaons ����������������������������������������������������������������������������������������������������� 21

DL-44E-KIT Installaon Guide
5

DL-44E-KIT Installaon Guide
6
The DL-44E-KIT is a professional 4K HDBaseT Home Distribuon Hub Kit, which consists of a 4K HDBaseT Matrix
Switcher, 3 HDBaseT Receivers and accessories. The DL-44E-KIT is a professional 4x4 HDBaseT Matrix Switcher
that consist of the following inputs and outputs, 4 HDMI IN (4kx2K@60Hz signal at max), 3 IR IN, 1 IR EYE, 4 IR
OUT, 3 HDBaseT OUT, 1 HDMI OUT, 1 SPDIF OUT, 1 L&R RCA OUT, and TCP/IP, RS232 control port via phoenix
connector. The DL-44E-KIT oers manual HDCP management and auto-detecng along with easy installaon
with rack-mounng design.
The DL-HD70LS-RX is an HDBaseT Receiver that consists of the following inputs and outputs, 1 HDBaseT IN,
1 IR IN, 1 IR OUT and HDMI OUT. The receiver is powered directly by the DL-44E-KIT. All HDMI inputs can be
selected by either the front panel buons, IR, RS232 or GUI. The selected source is delivered to HDBaseT zoned
outputs 1-3 & HDMI Output.
The DL-44E-KIT is capable of delivering 4K signals up to 40m, 1080p up to 70m and powering the receivers via
a single CAT5e cable. It is recommended to use good quality CAT6 cable. The Matrix Switcher supports EDID
management and is HDCP 2.2, 1.4 compliant. Audio sources can be selected via RS232 commands and TCP/IP
at the Matrix Switcher or by 3rd Party control.
Product Overview
Package Contents
Please verify the following items are in the shipping box prior to installaon of the DL-44E-KIT.
1 x DL-44E-KIT 4K HDBaseT Matrix Switcher,
3 x DL-HD70LS-RX HDBaseT Receivers
1 x Power Adapter (DC 24V 2.71A)
1 x Power Cord(Oponal)
4 x IR Emiers
3 x IR Receivers
1 x IR Receiver(Inserted into IR EYE port)
1 x IR remote
1 x RS232 cable(Phoenix to 9-pin D-Sub)
2 x Mounng ears & 6 x Screws (For DL-44E-KIT 4K HDBaseT Matrix Switcher )

DL-44E-KIT Installaon Guide
7
DL-44E-KIT Front and Rear Panels
Front Panel
Rear Panel
FIRMWARE
OUTPUT 1
IN PUT TO
1 2 3 4
OUTPUT 2
IN PUT TO
1 2 3 4
OUTPUT 3
IN PUT TO
1 2 3 4
OUTPUT 4
IN PUT TO
1 2 3 4
13
24
1-HDBT
IR OUT
IR E YE
2-HD BT 4-SPDIF4-HDMI
3- HDBT L R
4 DC 24V TCP/I P
RxTx
RS 232
POWER CONTR OL
IR IN
1 2 3
4
1 2 3
HD MI 1 HD MI 2 HD MI 3 H DMI 4
INPUTS OUTPUTS
3
4
25
16
1. FIRMWARE
2. Power Indicator
3. INPUT Selector Indicators
4. Output selector buon
1. HDMI INPUTS
2. IR IN
3. IR OUT
4. OUTPUTS
5. TCP/IP and RS232 Control
6. DC 24V

DL-44E-KIT Installaon Guide
8
DL-HD70LS-RX Front and Rear Panels
Front Panel
Rear Panel
IR IN IR OUTHDMI OUT
123
Link HDCP
12V DC
12
1. HDMI OUT
2. IR IN
3. IR OUT
1. Power Indicator
2. TP IN
The RJ45 socket has two LED status indicators. Plug in the Pre-installed CAT cable in to the HDBT RJ45 socket.
HDCP: HDCP compliant indicator, OFF: No HDMI trac (no picture), GREEN: Signals with HDCP, Blinking GREEN:
Signal without HDCP.
LINK: HDBT Link status indicator. OFF: No Link, YELLOW:Link Successful, Blinking YELLOW: Link Error.

DL-44E-KIT Installaon Guide
9
Installaon Instrucons
Mount the Matrix
At least 2 inches of free air space is required on both sides of the DL-44E-KIT for proper side venlaon. Avoid
mounng the DL-44E-KIT near a power amplier or any other source of signicant heat.
1. The DL-44E-KIT 4K Home Distribuon kit should be installed in a clean and dust free environment.
2. Ensure that all plugs, power cords and sockets are in good condion without signs of damage.
3. All devices should be connected before power on.
Usage Precauons:
Connecon Procedure:
1. Connect HDMI sources (e.g. DVD) to HDMI input ports of the Matrix Switcher via good quality HDMI
cables.
2. Connect the Pre-Installed CAT5e/CAT 6 cable infrastructure to the DL-44E-KIT Matrix Switcher and
HDBaseT receivers DL-HD70LS-RX via good quality patch leads.
3. Connect HDTV to HDMI output port via HDMI cable.
4. Plug in an HDMI cable in to each of the DL-HD70LS-RX and connect to the local display [HDTV].
5. Connect AVR amplier to SPDIF output port or via the Toslink opc bre cable.
6. Connect speaker to L&R (RCA) output port via audio cable.
7. Plug the IR Receivers 3.5mm jack into the IR IN sockets on the DL-HD70LS-RX and plug in the IR Emiers
to the IR OUT sockets (1-4) on the Matrix Switcher to make up as an IR Matrix.
8. Plug the phoenix connector in to the RS232 socket on the matrix, this will enable the Matrix Switcher to
be controlled via a PC.
9. Plug in a Patch lead from the router in to the Ethernet port on Matrix Switcher to control Matrix Switcher
by TCP/IP protocol.
10. Plug in the Power supply adapter 24V DC and ghten to secure. Once all components have been
connected and the installaon is completed, turn on the power.
Connecon with HDBaseT Receiver:
1. The Matrix Switcher has 3 HDBaseT outputs which support PoC technology.
2. Plug in the 4 RJ45 patch leads in to the HDBT outputs and connect to the pre-installed infrastructure.
3. Connect the DL-HD70LS-RX HDBaseT Receivers to the pre-installed cabling via addional patch leads.
4. Plug the power supply in to the power socket on the matrix, the DL-HD70LS-RX will be powered by the
Matrix Switcher.

DL-44E-KIT Installaon Guide
10
System Operaons
The Matrix Switcher can be controlled via the front panel. Please follow the basic programing instrucons
below:
1. To convert one input to an output:
Example: Input 1 to Output 3
-Press INPUTS 1 + OUTPUTS 3 + ENTER
2. To convert an input to several outputs:
Example: Convert Input 2 to Output 3 and 4
-Press INPUTS 2 + OUTPUTS 3 + OUTPUTS 4 + ENTER
3. To convert an input to all outputs:
Example: Input 1 to all Outputs
-Press INPUTS 1 + ALL + ENTER
IR Remote
Connect an IR receiver to the IR EYE port of the Matrix Switcher, users can control it through the included IR
remote. Here is a brief introducon to the IR remote.
Standby buon, press it to enter/ exit standby mode.
INPUTS: Input channel selecon buons, range from 1-4, corresponding IR signal switched
synchronously when switching input channels.
OUTPUTS: Output channel selecon buons.
Menu buons: ALL, EDID, CLEAR and ENTER.
-ALL: Select all outputs.
-EDID management buon: Enable input port to manually capture and learn the EDID data
of output devices.
-CLEAR: Withdraw an operaon like switching output channel, learning EDID data before it
comes into eect. Meanwhile, the matrix will return to the previous status.
-ENTER: Conrm operaon.

DL-44E-KIT Installaon Guide
11
Control Far-end Device locally
Connect an IR receiver with IR carrier to the IR IN port of the Matrix Switcher; users can control far-end output
display via its IR remote from local.
In that case, the IR signal is transferred via twisted pair. Only the corresponding IR OUT port can emit control
signals to the remote display.
Control Local Device Remotely
Connect IR receiver(s) to IR IN on far-end HDBT receiver(s), and IR Emier(s) to IR OUT port of the switcher, and
use the IR Remote of local source to control the device remotely.
Mulple to Mulple: (IR Matrix)
The 4 “IR OUT” ports and the 3 “IR IN” ports on the far-end receivers make up a 4x3 IR matrix. The IR signal is
sent by IR remote, then it is transferred to HDBaseT receiver, then to corresponding zone of the matrix through
the twisted pair, nally it is transferred to IR OUT port and received by controlled device.

DL-44E-KIT Installaon Guide
12
Router Connecon
1. Congure the router to use the same IP range as the matrix, such as 192.168.0.1.
2. Connect the computer to the router.
3. Connect the DL-44E-KIT to the router
Crossover Cable Connecon
TCP/IP Control
Besides IR control, RS232 control, the Matrix Switcher boasts opon TCP/IP port for IP control.
Default sengs: IP: 192.168.0.178; Subnet Mast: 255.255.255.0; Gateway: 192.168.0.1; Serial Port: 4001.
IP& gateway can be changed as you need, Serial Port cannot be changed.
Connect the Ethernet port of control device and TCP/IP port of the Matrix Switcher, and set same network
segment for the 2 devices, users are able to control the device via web-based GUI or designed TCP/IP
communicaon soware.
The Matrix Switcher can be controlled by PC without Ethernet access or PC(s) within a LAN.
Controlled by PC
Connect a computer to the TCP/IP port of the Matrix Switcher, and set its network segment to the same as the
Matrix Switcher’s.
Controlled by PC(s) in LAN
Connect the Matrix Switcher, a router and several PCs to setup a LAN
TIA/EIA-568A
Green/White
Green
Orange/White
Blue
Blue/White
Orange
Brown/White
Brown
Pin 1
Pin 2
Pin 3
Pin 4
Pin 5
Pin 6
Pin 7
Pin 8
1 8 TIA/EIA-568B
Orange/White
Orange
Green/White
Blue
Blue/White
Green
Brown/White
Brown
Pin 1
Pin 2
Pin 3
Pin 4
Pin 5
Pin 6
Pin 7
Pin 8
1 8
Crossover Cable Pinout
Connect a computer to the TCP/IP port of the Matrix Switcher, and set its network segment to the same as
the Matrix Switcher’s. DL-44E-KIT provides a built-in GUI for convenient TCP/IP control. GUI allows users to
interact with the DL-44E-KIT through graphical icons and visual indicators. Type 192.168.0.178 in your browser
to access the web GUI.

DL-44E-KIT Installaon Guide
13
Web Browser Control
Log In Screen: There are 2 selectable usernames – admin (default password: admin) and user (default
password: user). Log in as admin can access more conguraon interfaces than user. Enter username and the
right password.
Main: Interface shown aer logging in, provide intuive I/O connecon switching. The buon matrix displays
every possible connecon between every input and output, users can carry on the connecons by clicking
corresponding buon. Buons 1~9 at the right-boom corner provides quick saving and recall for overall
connecon status.
Users: Display or modify credenal sengs, front panel lock, and GUI version. If there is any modicaon,
press Save to restore the sengs, or press Cancel to withdraw.
Interface: Set tle bar label and buon labels, press Save to save the sengs.
Conguraon: Set HDCP Compliance status for every input, and manage EDID.
Network: Inquire and congure network sengs including MAC address, IP address, subnet mask, and
Gateway

DL-44E-KIT Installaon Guide
14
EDID Management
EDID (Extended Display Idencaon Data) is data generated from each display in the system to communicate
the capabilies of the device. The DL-44E-KIT features EDID management to maintain compability between
all devices. It can be controlled via EDID learning and EDID invoking.
The included IR remote can be used to enable the Matrix Switcher to learn the EDID of all sink devices.
-One input port learns the EDID data of one output port:
Example: Input 2 learns EDID data from output 4
-Press EDID + INPUTS 2 + OUTPUTS 4 + ENTER
-All input ports learn EDID data from one output port:
Example: all input ports learn EDID data from output 4
-Press: EDID + ALL + OUTPUTS 4 + ENTER
No. EDID Data
11080P 2D 2CH
21080P 3D 2CH
31080P 2D Mulchannel
41080P 3D Mulchannel
53840x2160 2D / 30Hz
EDID learning
EDID Invoking
There are ve types of embedded EDID data. The chart below illustrated the detailed informaon of the
embedded EDID data. Sending the command “UpgradeIntEDID[x].” via RS232 Control Soware to upgrade the
embedded EDID data, x=1~5.

DL-44E-KIT Installaon Guide
15
RS232 Commands
Descripon Command Example Response
Inquire the models informaon. /*Type; DL-44E-KIT
Lock the front panel buons on the Matrix. /%Lock; System Locked!
Unlock the front panel buons on the
Matrix.
/%Unlock; System Unlock!
Inquire the version of rmware /^Version; VX.X.X
System Commands
Except the front control panel, the Matrix Switcher can be controlled by far-end control system through the
RS232 communicaon port. This RS232 communicaon port is a 3-pin phoenix connector. User can use the
RS232 cable (Phoenix to 9-pin D-Sub) to connect the RS232 port to PC.
Please remember to end the commands with the ending symbols “.” and “;”. Type the command carefully, it
is case-sensive.
• 9600 baud
• 8 Data Bits
• 1 Stop Bit
• Parity = none

DL-44E-KIT Installaon Guide
16
Descripon Command Example Response
Transfer signals from the input channel [x]
to all output channels
[x]All. X To All. (X=01~04)
Transfer all input signals to the
corresponding output channels
All#. All Through.
Switch o all the output channels. All$. All Closed.
Transfer signals from the input channel [x]
to the output channel [x].
[x]#. X Through. (X=01~04)
Switch o the output channel [x]. [x]$. X Closed. (X=01~04)
Switch on the output channel [x]. [x]@. X Open. (X=01~04)
Switch on all output channels. All@. All Open.
Transfer the AV signal from the input
channel [x1] to one or several output
channels ([x2], separate output channels
with comma).
[x1]V[x2]. AV: X1-> X2
(X1/X2=01~04)
Transfer the AV and IR signal from input [x1]B[x2]. AV: X1-> X2
Transfer the IR signal from output [x1] to
input [x2].
[x1] R[x2]. IR: X1-> X2(X1 >X2=01~04)
Check the I/O connecon status of output
[x]
Status[x]. AV: Y-> X (X=01~04,
Y=01~04)
Inquire the input channel to the output
channels one by one.
Status. AV: 01->01
… …
AV: 04->04
IR: 01->01
… …
IR: 04->04
Save the present operaon to the preset
command [Y], ranges from 0 to 9.
Save[Y]. Save To FY (Y=0-9)
Recall the preset command [Y]. Recall[Y]. Recall From FY (Y=0-9)
Clear the preset command [Y]. Clear[Y]. Clear FY (Y=0-9)
Operaon Commands

DL-44E-KIT Installaon Guide
17
Descripon Command Example Response
Work in normal mode. PWON. PWON
Enter into standby mode and cut o the
power supply to HDBaseT receivers.
PWOFF. PWOFF
Enter into standby mode. (Do not cut o the
power supply to HDBaseT receivers, press
other buons or send other commands to
start.)
STANDBY STANDBY
HDCP management command.
[Y] is for input (value: I) or output (value: O);
[X] is the number of the port, if the value of
X is ALL, it means all ports; [Z] is for HDCP
compliant status, the value may be 1 (HDCP
compliant) or 0 (not HDCP compliant).
/%[Y]/[X]:[Z]. /%[Y]/[X]:[Z].
Enable HDMI audio output of port x.
X=1, 2, 3, 4, enable this port.
X=5, enable all the 4 ports.
DigitAudioON[x]. DigitAudio ON with [x]
Disable HDMI audio output of port x. DigitAudioOFF[x]. DigitAudio OFF with
Input port [y] learns the EDID from output
port [x].
EDIDH[x]B[y]. EDIDH[x]B[y]
Set the audio part of input port [x] to PCM
format in EDID database.
EDIDPCM[x]. EDIDPCM[x]
Get EDID data from output [x] and display
the output port number.
EDIDG[x]. Hexadecimal EDID data
and carriage return
character
Restore the factory default EDID data of
every input.
EDIDMInit. EDIDMInit.
Manually EDID switching. Enable input[Y]
to learn the EDID data of output[X]. If the
EDID data is not available, then set it as
inialized EDID data.
EDIDM[X]B[Y]. EDIDM[X]B[Y]

DL-44E-KIT Installaon Guide
18
Descripon Command Example Response
Reset to factory default. %0911. Factory Default
Check the command sent by port 1 when
PWON.
%9951. Port 1:data when PWON
Check the command sent by port 2 when
PWON.
%9952. Port 2:data when PWON
Check the command sent by port 3 when
PWON.
%9953. Port 3:data when PWON
Check the command sent by port 4 when
PWON.
%9954. Port 4:data when PWON
Check the command sent by port 1 when
PWOFF.
%9955. Port 1:data when PWOFF
Check the command sent by port 2 when
PWOFF.
%9956. Port 2:data when PWOFF
Check the command sent by port 3 when
PWOFF.
%9957. Port 3:data when PWOFF
Check the command sent by port 4 when
PWOFF.
%9958. Port 4:data when PWOFF
Check the system locking status. %9961. System Locked/ Unlock!
Check the power status %9962. STANDBY/PWOFF/ PWON
Check the working mode of infrared carrier. %9963. Carrier native/ Force carrier
Check the IP address. %9964. IP:192.168.0.178 (default)
Check the connecon status of the inputs. %9971. In 01 02 03 04
Connect Y Y Y Y
Check the connecon status of the outputs. %9972. Out 01 02 03 04
Connect Y Y Y Y
Check the HDCP status of the inputs. %9973. In 1 2 3 4
HDCP N N N N
Check the I/O connecon status. %9975. Out 01 02 03 04
In 04 04 04 04
Check the output resoluon. %9976. Out 1 1920x1080
Out 2 1920x1080
Out 3 1920x1080
Out 4 1920x1080
Check the status of digital audio of output
channels.
%9977. Out 1 2 3 4
Audio Y Y Y Y
Check the HDCP compliant status of the
inputs.
%9978. In 01 02 03 04
HDCPEN Y Y Y Y
Lock the channel [x], X=1~4 I-Lock[X]. Channel[x] Lock!
Unlock the channel [x], X=1~4 I-Unlock[X]. Channel[x] Unlock!
Lock all channels A-Lock. All Channel Lock!
Unlock all channels A-UnLock. All Channel Unlock!
Check the lock status of all channels. Lock-Sta. Channel 1->1 Lock!
.....
Channel 2->1 Unlock!
.....

DL-44E-KIT Installaon Guide
19
Troubleshoong
Loss of color or no video signal output
Cannot control the device via IR remote
Cannot control the device via front panel buons
»Check whether the cables are connected correctly and in working condion.
»Swap HDMI cables.
»Test the source device directly to display/ projector.
»Test with another source.
»Test dierent input or output of the matrix switcher.
»Replace remote baery with new one.
»Adjust the distance, angle and point right at the IR receiver.
»Send command /%Unlock; or select unlock in GUI interface to unlock.
Cannot control the matrix by control device (e.g. a PC) through RS232 port
»Type in correct RS232 communicaon parameters: Baud rate:9600; Data bit: 8; Stop bit: 1; Parity bit: none.
»Check to ensure the connecon between the control device and the unit are correct.
Stac becomes stronger when connecng the video connectors
»Check the grounding and make sure it is connected well.

DL-44E-KIT Installaon Guide
20
DL-44E-KIT Technical Specicaons
Video Input
Input 4 HDMI
Input Connector Female HDMI
Input Level T.M.D.S. 2.9V~3.3V
Input Impedance 100Ω(Differential)
HDMI Standard Support HDMI1.4 & HDCP2.2 and is backward compatible with all previous standards.
Video Output
Output 1 HDMI – 3 HDBaseT
Output Connector Female HDMI
Female RJ45(with LED indicators)
Output Level T.M.D.S. 2.9V~3.3V
Output Impedance 100Ω(Differential)
HDMI Standard Support HDMI1.4 & HDCP1.4 and is backward compatible with all previous standards.
Video general
Video Signal HDMI (or DVI-D)
Transmission Distance 1080P@60Hz ≤70m
4Kx2K@60Hz ≤40m
Resolution Range Up to 4Kx2K@60Hz
EDID Management In-built EDID data and manual EDID management
Gain 0 dB
Bandwidth 10.2Gbit/s
Switching Speed 200ns (Max.)
Audio general
Output Signal Stereo audio
Digital audio
Analog Audio Output Support PCM
Digital Audio Output Supports PCM,Dolby,DTS,DTS-HD
Frequency Response 20Hz~20KHz
Output Connector 1 L&R(RCA)
1 SPDIF
Control Parts
Control Ports 4 IR OUT
3 IR IN
1 IR EYE
1 TCP/IP (female RJ45)
1 RS232 (3-pin pluggable terminal block)
Panel Control Front panel buttons
RS232 Control 3-pin pluggable terminal block
IR Extended IR receiver
TCP/IP Control Web-based GUI
General
Power Supply Input: 100-240V~, 50/60Hz
Output: DC 24V 2.71A
Power Consumption 35W (Max)
Temperature 0 ~ +50,
Reference Humidity 10% ~ 90%
Dimension (W*H*D) 360mm x 28mm x 150 mm
Net weight 910g
Distances and picture quality may be aected by cable grade, cable quality, source and desnaon equipment, RF and electrical interference, and cable
patches.
Table of contents
Other DigitaLinx Matrix Switcher manuals
DigitaLinx
DigitaLinx DL-HDM88-FS Operating instructions
DigitaLinx
DigitaLinx DL-HDM88A-H2 User manual
DigitaLinx
DigitaLinx DL-S42-H2 User manual
DigitaLinx
DigitaLinx DL-A51 User manual
DigitaLinx
DigitaLinx DL-HDM88-SS Operating instructions

DigitaLinx
DigitaLinx DL-HDM88A-H2 User manual
DigitaLinx
DigitaLinx DL-HDM44-FS Operating instructions
DigitaLinx
DigitaLinx DL-HDM44 User manual
DigitaLinx
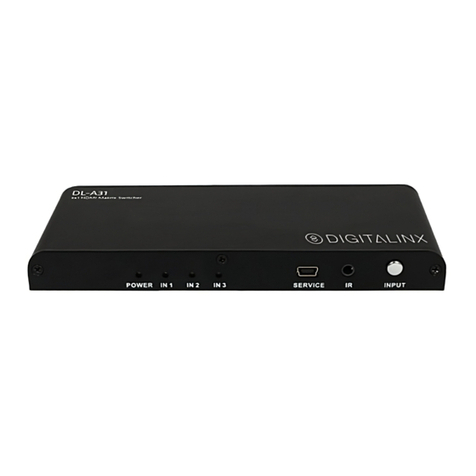
DigitaLinx DL-A31 User manual
