HDanywhere MHUB PRO 2.0 (4x4) 40 User manual

Revision 1: 23/08/19
MHUB PRO 2.0 (4x4) 40 CODE: MHUBPRO24440
MHUB PRO 2.0 (8x8) 100 CODE: MHUBPRO288100
Product Guide (English UK)

2Box. Features. Specs.

Box. Features. Specs.
1.

Glossary of termsContents
MHUB Video or Audio distribution systems manufactured
by HDANYWHERE.
Consumer Electronics
Control (CEC)
An optional feature-set within the HDMI
specication allowing a single remote control to
control multiple devices connected via HDMI.
Tipping Point
Compression (TPC)
Video content such as Ultra HD 4K 60 4:4:4 uses
up to 18Gbps of data at any one time which is not
possible over current HDBaseT technology. HDA
makes transmission of 18Gbps content possible
using TPC. Visually lossless, TPC only becomes
active if HDBaseT’s threshold is breached, hence the
term tipping point.
Audio Return Channel ARC enables audio from a display to be extracted
and returned to MHUB.
V&A Term used to describe one Video enabled MHUB and
one or more MHUB AUDIO systems.
HDBaseT Technology used to convert HDMI in to a format
which can be carried over network cable.
IR RX & IR TX Infrared (IR) Receiver (RX) and Transmitter (TX). The
RX ‘receives’ a signal from another remote control
and the TX ‘transmits’ it.
uControl A remote control app for MHUB systems made by
HDANYWHERE and available from iOS & Android app
stores.
Control System A 3rd party method of control for MHUB systems.
For example, Crestron, Control4, RTI, Savant, Fibaro
etc.
MHUB-OS MHUB’s on-board operating system from which most
settings can be congured.
Glossary of terms, In the box 4-5
Features, Specications 6-7
Panel description & MHUB PRO 2.0 (4x4) 40 panel diagram 10-11
MHUB PRO 2.0 (8x8) 100 panel diagram 12
MHUB PRO 2.0 Display Receiver panel diagram & description 13
IR (Infrared) control 14
Using the Master & Room Remote, Testing that IR works 15
Cabling 16
Hiring a HDA Pro 17
MHUB control methods 18
Stacking: creating V&A systems 19
Example wiring diagram & explanation 22-24
Power up 25
Setup on uControl 28-29
Accessing MHUB-OS & MHUB-OS settings 32-33
uControl interface 36-37
Legals: Compliance, conformity & Product Guarantee 40-41

5
In the box
x1 MHUB PRO 2.0 (4x4) 40 Chassis/Hub
x4 Display receiver
x9 Infrared Transmitter cable (1.5m) (IR TX)
x5 Infrared (20-60Khz) Receiver cable (1.5m) (IR RX)
x8 Three Pin Phoenix Connector
x5 Chassis and display receiver mounting bracket pairs
x1 Master remote control
x1 In-room remote control
x1 RS232 serial cable (1.5m)
x1 100-240V AC 50/60Hz cable (IEC lead)
x1 User Guide
x1 MHUB PRO 2.0 (8x8) 100 Chassis/Hub
x8 Display receiver
x17 Infrared Transmitter cable (1.5m) (IR TX)
x9 Infrared (20-60Khz) Receiver cable (1.5m) (IR RX)
x16 Three Pin Phoenix Connector
x9 Chassis and display receiver mounting bracket pairs
x1 Master remote control
x1 In-room remote control
x1 RS232 serial cable (1.5m)
x1 100-240V AC 50/60Hz cable (IEC lead)
x1 User Guide
Name: MHUB PRO 2.0 (4x4) 40
Product code: MHUBPRO24440 Name: MHUB PRO 2.0 (8x8) 100
Product code: MHUBPRO288100

FeaturesIMPORTANT:
Supports video picture formats up to 4K@60Hz (4:4:4)
Multi-channel digital audio support up to and inlcuding Dolby/Atmos and DTS:X
Capable of video + audio matrixing with additional audio inputs
Simultaneous multi-channel and downmixed audio output
Auto down scaling on all outputs
Route ARC & HDMI source audio to audio matrix
Bi-directional IR & RS232
10/100 Ethernet available on Display Receiver (MHUBPRO288100 only)
CEC, HDR and advanced EDID management
uControl & Amazon Alexa compatible
Remotely manageable
Includes HDA API 2
Premium touchpanel/aluminium design
For optimum performance and safety, please read these instructions carefully
before connecting, operating or conguring this product. Please keep this manual
for future reference.
Surge protection is recommended
This MHUB system contains sensitive electrical components that may be damaged
by electrical spikes, surges, electric shock, lightening strikes, etc. The usage of
surge protection systems is recommended in order to protect and extend the life
of your system.

7
Specication
HDMI version HDMI 2.0
HDCP compliance HDCP 2.2 & HDCP 1.4
Video bandwidth 18Gbps
Video resolution Up to 4K@60Hz (4:4:4) with HDR
Colour space RGB, YCbCr 4:4:4, YUV 4:4:4, YCbCr 4:2:2/4:2:0
Colour depth 8-bit, 10-bit, 12-bit (1080p@60Hz)
8-bit (4K@60Hz)
HDR formats HDR10, HDR10+, Dolby Vision, HLG
Video & audio IO
MHUBPRO24440
Inputs: x4 HDMI, x2 3.5mm Stereo Jack, x1S/PDIF,
x1 RCA Outputs: x4 HDBaseT, x4 HDMI (Mirror), x4
3.5mm Stereo Jack, x4 Digtal Coax
MHUBPRO288100
Inputs: x8 HDMI, x2 3.5mm Stereo Jack, x1S/PDIF,
x1 Coax Outputs: x8 HDBaseT, x8 HDMI (Mirror), x8
3.5mm Stereo Jack, x8 Digital Coax
Transmission distance
MHUBPRO24440
1080p 70m / 4K 40m
MHUBPRO288100
1080p 100m / 4K 100m
HDMI audio formats PCM 2.0 / 5.1 / 7.1, Dolby Digital / Plus / EX, Dolby
True HD, DTS, DTS-EX, DTS-96 / 24, DTS High Res,
DTS-HD Master Audio, DSD
Coax audio formats PCM 2.0, Dolby Digital, DTS
Stereo audio formats PCM 2.0 44.1 / 48 / 88.2 / 96 / 176.4 / 192KHz, 16
/ 20 / 24bit
Infrared 20Khz - 60Khz
ESD protection ±8kV (Air-gap discharge)
±4kV (Contact discharge)
Power consumption MHUBPRO24440 68W (Maximum)
MHUBPRO288100 130W (Maximum)
Power supply
Chassis:
100-240V AC 50/60Hz
Display Receiver:
24V PoH (Power over HDBaseT)
Operating temperature 0°C - 40°C / 32°F - 104°F
Storage temperature -20°C - 60°C / -4°F - 140°F
Relative humidity 20 - 90% (Non-condensing)
Housing Aluminium Enclosure
Colour Grey (Carbonite)
Dimensions (W/D/H) mm
MHUBPRO24440
Chassis: 440 x 284 x 45
Display Receiver: 162.8 x 90 x 18
MHUBPRO288100
Chassis: 440 x 372.5 x 88
Display Receiver: 162.8 x 90 x 18
Weight
MHUBPRO24440
Chassis: 2400g
Display Receiver: 187g
MHUBPRO288100
Chassis: 4200g
Display Receiver: 187g

8IO. Control. IR. Cabling.

IO. Control. IR. Cabling.
2.

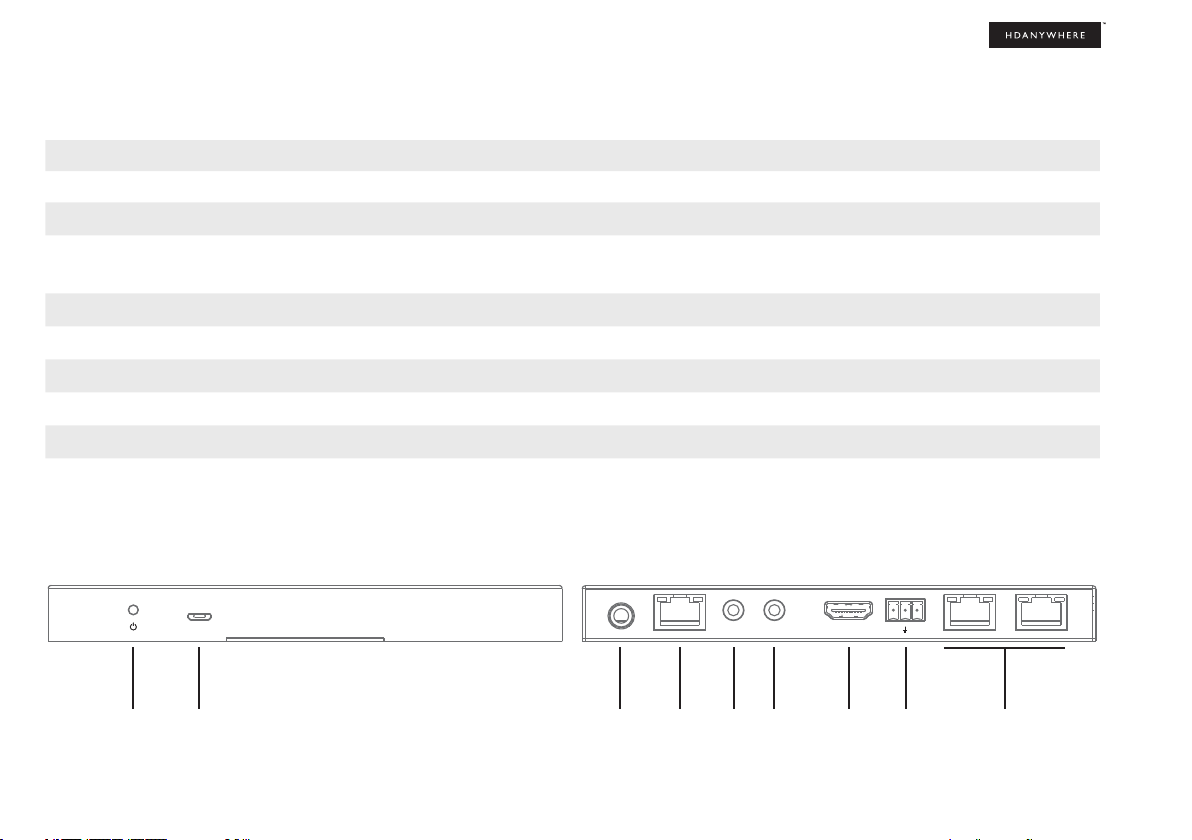
1. Source (IN): HDMI video input ports indicated by numbers.
2. Video (OUT): HDBaseT (RJ45) & HDMI video output ports. The HDMI output
mirrors the HDBaseT port and is not switchable independently. 18Gbps video
will pass through HDMI (uncompressed) whilst the HDBaseT port will use TPC
(compression) simultaneously. The HDBaseT port has two indicator lights.
Left light: solid means connection between MHUB and display receiver is
good. Flashing means that the connection is poor. Off means that there is no
connection detected. Right light: solid means HDCP is detected. Flashing means
there is no HDCP. Off means no HDMI signal is detected.
3. LAN (IN): Connect to a router to extend 10/100 LAN at display locations
(MHUBPRO288100 only).
4. Audio (IN): x2 3.5mm Stereo Jack, x1 S/PDIF, x1 Coax
5. RS232 (IN): Send serial commands to and from this input to the
corresponding display receiver RS232 output. Wired (A/GND/B).
6. Audio (OUT): Coax & 3.5mm Stereo Jack audio output mirrored ports. Coax
outputs multi-channel audio and the 3.5mm Stereo Jack will down-mix to
2-channel stereo simultaneously.
7. HUB IR (IN): Connect an IR RX to enable remote (IR) control of MHUB.
8. Display IR (IN): Connect an IR RX to send a remote (IR) control command
through MHUB to the corresponding display receivers “IR (OUT)” port.
9. All IR (IN): Connect an IR RX to this port to send a remote (IR) control
command to all display receiver “IR (OUT)” ports.
10. Source IR (OUT): Connect an IR TX to control corresponding HDMI inputs.
11. AVR IR (OUT): Connect an IR TX to enable remote (IR) control of an AVR.
12. CONTROL: Enables TCP/IP control of MHUB.
13. RS232: Enables a PC or control system to control MHUB over serial.
14. GND: Earthing point to connect MHUB casing to ground.
15. Power: Connect the supplied IEC power lead to provide power to MHUB.
A. HDANYWHERE logo: Indicator light. If this light is on and solid then MHUB
has power and is on.
B. MHUB PRO 2.0 logo: Indicator light. If this light is on and solid then MHUB
has power and is on. Pressing and holding this button for 2 seconds will toggle
MHUB to go in and out of standby mode.
C. Source Selector: Selects a HDMI video input.
D. Notication screen: OLED screen displaying basic system data and
information.
E. Output Selector: Routes source selection to the desired output on MHUB. To
perform video routing using the front panel you must rst select the output that
you want to route video to and then select the source using the Source Selector.
F. TPC indicator: Indicator light. Lit if Tipping Point Compression is active on any
output.
G. Menu: Basic management options for MHUB. Tapping the “Menu” button will
cycle through the following options:
- Set EDID
Cycle through a list of EDID options using the up /down arrows. Select the
desired prole and press “OK” button. You will now be prompted to select a
HDMI input port to commit the change to.
- Set Baud
Advanced option to set a baud rate for RS232/serial communication.
- DHCP status & IP address
Cycle between DHCP and IP address options.
Pressing the menu button at any point will return you back one level in
navigation.
H. Up / Down arrows: Navigates through options on the notication screen.
I. OK: Commit a change or proceed through menus in MHUB.
MHUB PRO 2.0 panel description

PRO 2.0
MHUB
1234 A B C D
MENU OK
A B C D
A B C D
Digital/Stereo (OUT)
A B
1 2 3 4
1 2 3 4
CONTROL
Hub IR (IN) Display IR (IN)All IR (IN)Source IR (OUT) AVR IR (OUT)
A1 A2 A3 A4
RS232 (IN)
Source (IN)
100-240V AC 50/60HZ
RS232
Audio (IN)
Video / Audio (OUT)
A B C D E F G H I
1
2
7 8 10 49 11 14
12 13 15
5 6
Digital/Stereo (OUT)
RS232 (IN)
A B
11
MHUB PRO 2.0 (4x4) 40: front & rear panel

A B C
1
D
5 6
E
2
F
4
78910 11 12 13 14 15
G H I
3
Hub IR (IN)
Digital/Stereo (OUT)
RS232 (IN) & Audio (OUT)
A B C
D E F G
H
A B CD E F G H
Video (OUT)
A B C D E F G H
A1 A2 A3 A4
Display IR (IN) All IR (IN)
87654321
Source IR (OUT) AVR IR (OUT)RS232
100-240V AC 50/60HZ
LAN (IN)
87654321
Source (IN)
A B
Audio (IN)
PC: MHUBPRO288100
SKU: 1.05.904.022.1
CONTROL
MHUB PRO 2.0 (8x8) 100: front & rear panel
OUTIN B A
13
MHUB PRO 2.0 Display Receiver: front & rear panel
1. Power LED: Indicator light. If this light is on and solid then the display receiver has power.
2. Firmware Update: Micro USB port for rmware updates via PC software.
3. Power: DC24V / 1A. The display receiver is powered via Power over HDBaseT (PoH) from MHUB. The port is there in case of PoH failure.
4. Video: HDBaseT link between MHUB and display receiver. This port has two indicator lights. Left light: solid means connection between MHUB and display receiver is
good. Flashing means that the connection is poor. Off means that there is no connection detected. Right light: solid means HDCP is detected. Flashing means there is no
HDCP. Off means there is no HDMI signal at all.
5. IR IN: Connect an IR RX to send a remote (IR) control command from the display receiver to MHUB’s active “Source IR (OUT)” port.
6. IR OUT: Connect an IR TX to this port to control displays using remote (IR) control commands.
7. HDMI (OUT): Connect a HDMI cable from the display receiver to your display to provide a picture.
8. RS232 (OUT): Will output a serial command from MHUB’s RS232 (IN) port to a display. Communication is bi-directional. Wired (B/GND/A).
9. LAN: Connect to any networked device to provide 10/100 LAN access. (MHUBPRO288100 only).
987654321
IR (Infrared) control
MHUB can manage IR signals and route them to sources, AVRs or displays. Using
this feature will allow you to use a remote control and pass that IR command from
your display location to MHUB or vice-versa.
Sending IR commands from a display ‘back’ to MHUB
This will enable backwards IR control (the most common form of IR control) where
IR signals from a remote in any one of your zones is sent back to MHUB and your
source device.
Sending IR commands to a display
1. Connect an IR TX to port labelled “Source IR (OUT)” on MHUB. Ensure that
the port number matches the port number of the corresponding video source
input, labelled “Source (IN)”. For example, if you have AppleTV plugged in to port
3, then the IR TX cable should also be connected to Source IR (OUT) port 3.
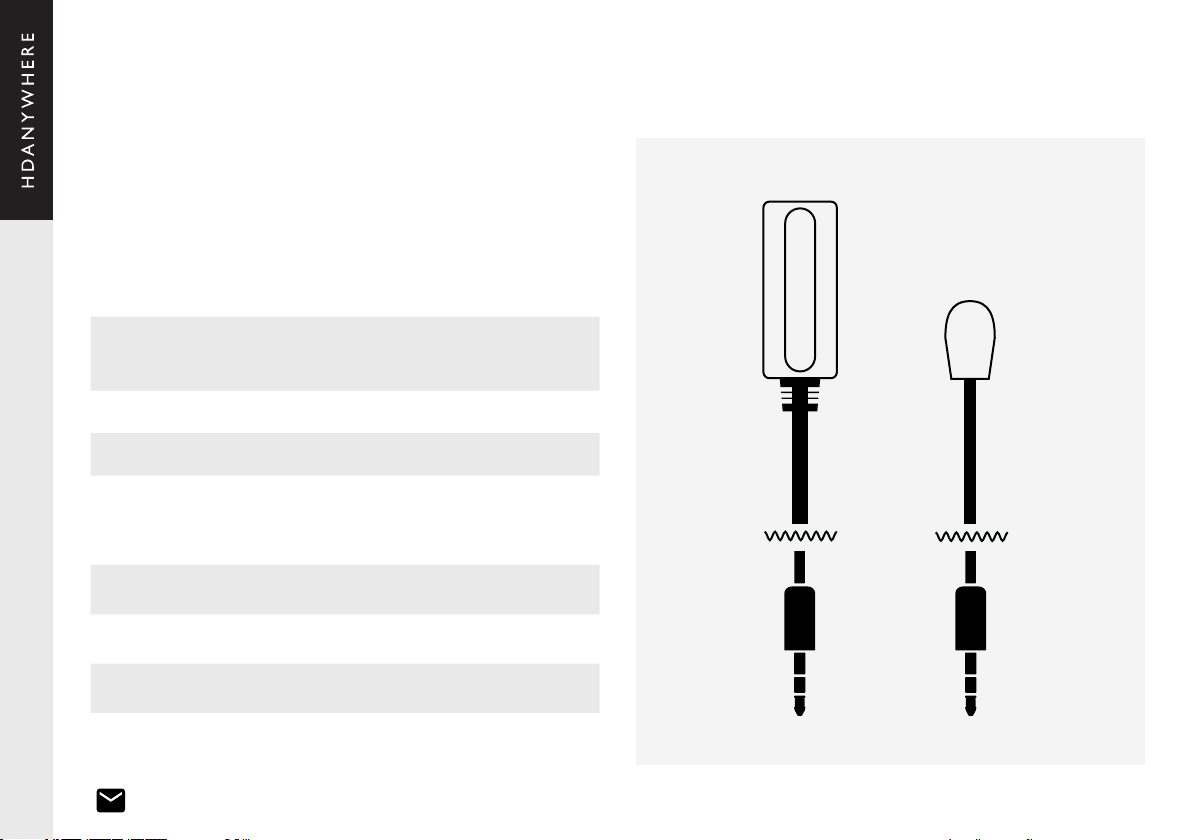
2. Place the IR TX bud (small tear drop part) in front of the IR window of the
source. Repeat for each source device you wish to control.
3. Connect an IR RX to port labelled “IR IN” on the display receiver.
4. Place IR RX head in line-of-sight of the remote control.
IR Receiver (IR RX)
IR Transmitter (IR TX)
1.5m
1. Connect an IR TX to port labelled “IR OUT” on the display receiver.
2. Place the IR TX bud (small tear drop part) in front of the IR window of the
display. Repeat for each display you wish to control.
3. Connect an IR RX to port labelled “Display IR (IN)” on MHUB. Ensure that the
port letter matches the port letter routed to the display receiver.
4. Place IR RX head in line-of-sight of the remote control.
21
43
65
87
1
B
SOURCE
DISPLAY
15
Testing that IR control worksUsing the Master & Room remote
This section aims to verify that your MHUB’s IR control system is setup correctly
and assumes that your MHUB has been wired as per the instructions laid out in this
manual. Please refer to the MHUB wiring diagrams in this document to ensure that
your setup matches that before proceeding with the verication below.
Testing basic operation from a display ‘back’ to MHUB
To verify that IR control is working correctly proceed to any display receiver location
with an IR RX connected to it. Use the MHUB Room Remote to select a source
with an IR TX connected to it at the MHUB end. You should notice that the MHUB
switches to that source on your display. Now pick up your source remote control for
the source you just switched to and attempt to control the source using the native
remote control. If both work then you have setup IR control correctly. Repeat this
step for all display receiver locations.
Testing commands from MHUB to a display
To verify that control commands from MHUB to your display are working you will
need to use uControl, or test using the following method. 1) select a display that
you wish to test 2) connect an IR RX to the corresponding Display IR (IN) input 3)
ensure that the display receiver has an IR TX connected and that it is pointed to
the display IR receiving window 4) take the display remote control to the MHUB
location and point the remote at the IR RX, test the on/off command. The display
should turn on or off. This will conrm that IR can pass from MHUB to your display
successfully.
Working with identical source devices (discrete IR)
MHUB can work with multiple source devices that are identical due to its discrete
IR function. Discrete IR avoids IR clashes that result in unwanted operation of all
identical devices. MHUB manages this by targeting IR commands specically to
the source device being watched on the display. When using two or more identical
source devices, take measures to avoid IR transmission leaks that could cause the
identical source devices to respond in error. This includes simple measures like
placing identical sources on different shelves or attempting to ‘hood’ the IR TX so
that IR signals can not leak.
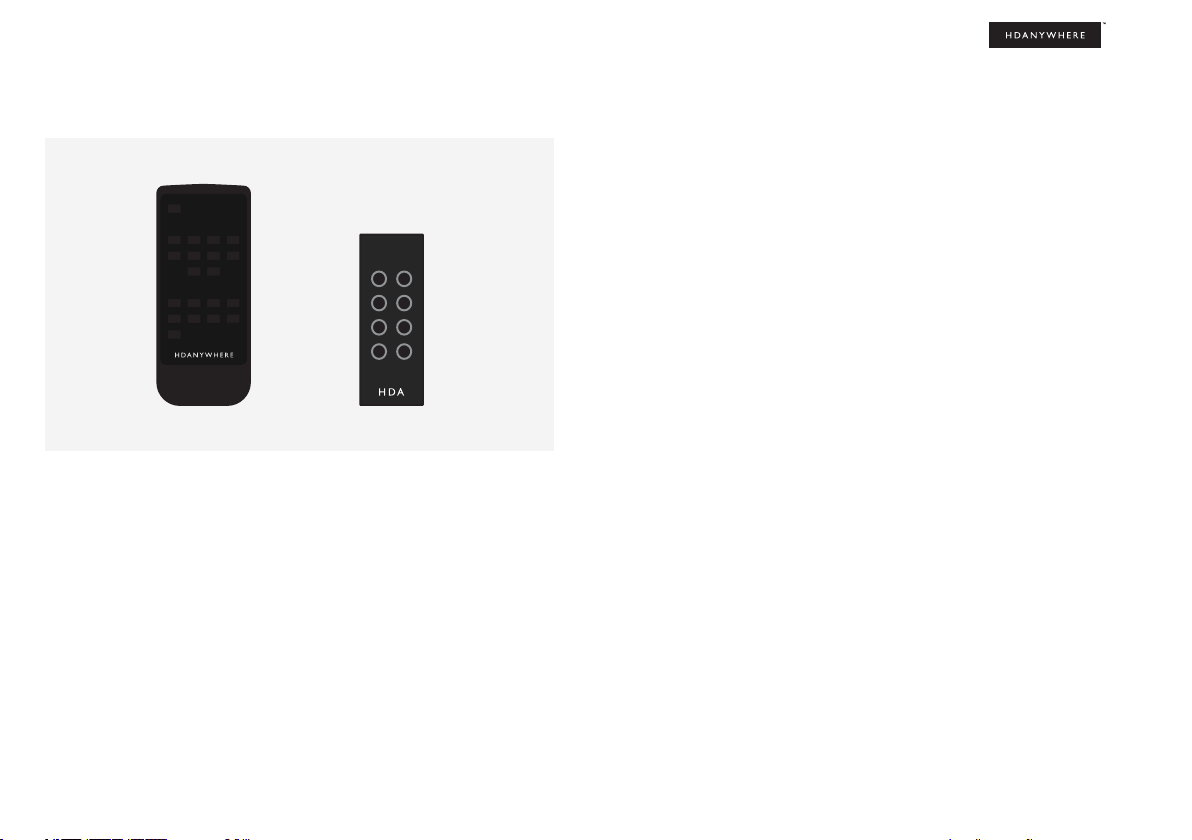
MHUB comes with two types of native remote control.
1. A Master Remote control
2. A Room Remote control
Both remote controls are limited to video switching operations only. HDANYWHERE
does not recommend that these remote controls are used as a primary controlling
device for MHUB (see section: “MHUB control methods”).
The Master Remote control provides video switching control regardless of the
room or zone that the command comes from.This is useful if MHUB is installed in
an environment like a bar where you might want to switch all TVs from one source
to another.
The Room Remote control uses ‘contextual’ IR which means that it will only switch
video sources for the zone or room that you’re in.
MHUB PRO 2.0 (8x8) 100 Master and Room remote controls
2
1
Currently you can use Cat6, Cat6e, Cat6a, Cat7 or Cat7a with MHUB PRO 2.0. Cat5e
may work, but is not recommended, due to bandwidth requirements required by
the system.
Optimum performance
Whichever network cable type you choose, ensure that the main wiring architecture
is ‘solid core’ and not stranded ‘patch’ cabling. Patch cabling can be used for the
last few metres of a run (e.g wallplate) but should be avoided over longer runs as
signal transfer over stranded cores is signicantly impacted. The use of pre-made
leads is not recommended unless you can be absolutely sure of their construction
credentials (i.e. solid core 568B). For optimum performance, use a single piece of
Cat cable terminated directly at the transmitter and the receiver ends. Make sure to
use the correct connector types (i.e. RJ45 solid core) crimp connectors.
Shielded cables
Shielded FTP cable is not a stipulation. However, if you are using this type of
cable ensure compatible shielded accessories are used. Failure to terminate cable
screen at all points can induce interference rather than eliminate it.
Patch panels and wall plates
If patch panels are terminated correctly then there is a minimal loss of distance.
The use of wallplates and patch panels has the potential to cause increased
resistance on the cable introducing pinch points for signal transmission and could
reduce transmission lengths. TIP: Instead of using RJ45 wallplates search for
“brush plates” this will yield many results.
Cabling
HDMI cabling
HDANYWHERE recommends using suitably robust and good quality HDMI cables.
It is not advised to use passive HDMI cables over 5 metres in length either on
the inputs or the outputs of MHUB or its display receivers. Where HDMI cables
longer than 5 metres are required, HDA recommends utilising it own brand of long
distance HDMI cables or suitable alternative.
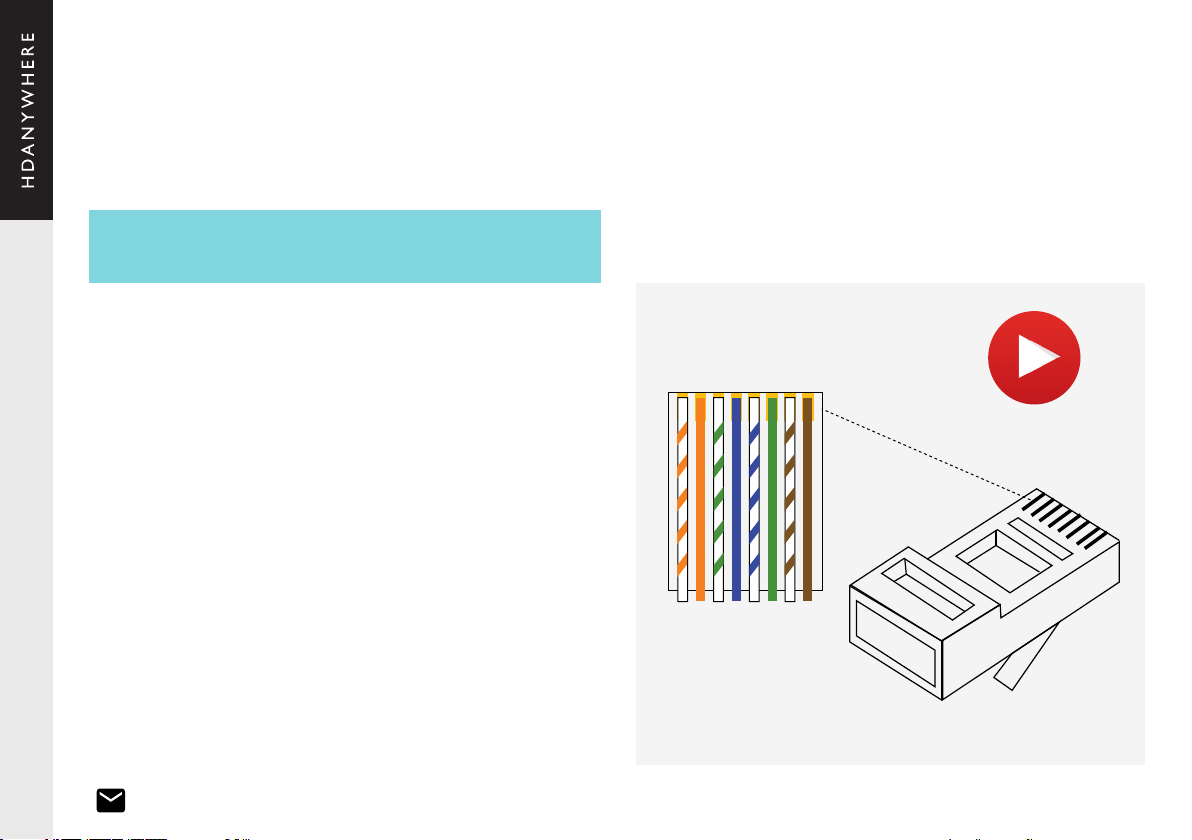
Terminate using RJ45 connectors to 568B wiring standard.
D
o
n
t
h
a
v
e
t
i
m
e
?
W
a
t
c
h
o
n
l
i
n
e
!
https://youtu.be/EbWAEndiCuU
12345678
1234567
8
Note:
DO NOT USE ANY COPPER CLAD ALUMINIUM (CCA) Cat 6/7 CABLE.
17
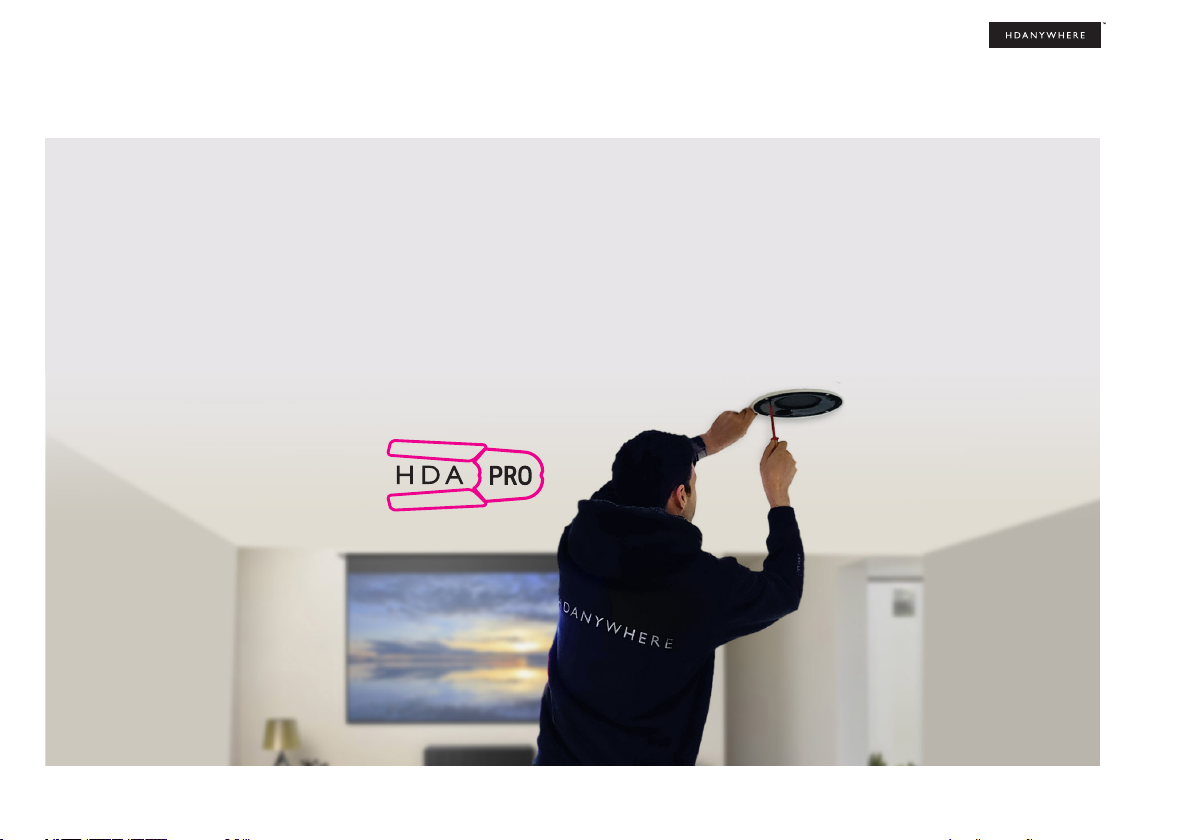
Hire a HDA Pro
If cabling infrastructure, control and best practises appear a little too much to absorb and learn then why not hire a HDA Pro to do the work instead for you?
Having your MHUB system professionally installed should help to guarantee the system’s long-term performance and ensure that it blends neatly with your decor.
All HDA Pros have the added ability to manage your system remotely for you - meaning that routine maintenance and even advanced troubleshooting can be done
without the need to visit your home. Ask our HDA Pros for home control, cinema, heating/AC, lighting and security services. Download a guide to picking a HDA Pro
here: https://content2.hdanywhere.com/en/downloads/documents/hdanywhere_doc-picking-an-installer.pdf
Find a HDA Pro anywhere in the world today
Visit: https://hdanywhere.com/dealers-and-installers/

MHUB control methods
MHUB PRO 2.0 has been designed to be operated and controlled in numerous ways depending on your requirements. There are limited control options from the front panel
and from the Master and Room remote, so attention needs to be paid to the method by which MHUB will be controlled. The methods to control and considerations for each
are listed below.
uControl
Available for free on iOS and Android, uControl is MHUB’s native method of control. All of MHUB’s built-in features are available; offering comprehensive control over
switching, source/display control, ARC access, executing Sequences and mute states in all zones. uControl communicates over the same Local Area Network (LAN) as your
MHUB which allows for global control over the entire system regardless of what zone you are in. In the absence of a third-party control system, HDANYWHERE recommends
uControl as the method to control your MHUB on a daily basis.
Voice
All MHUB systems support voice control as standard via an Amazon Echo (Alexa) device. Voice control is not designed to act as a primary control method but to assist
the other methods listed on this page. Using voice it is possible to change channels, execute sequences, turn MHUB on/off, increase or decrease display volume and basic
transport commands such as play/pause/forwards/backwards from any zone.
Third-party control system
Control via a third-party control system is supported using our latest and most advanced API to date. For an up-to-date list of systems that MHUB PRO 2.0 supports please
visit the “Control Drivers” section of our support site: http://support.hdanywhere.com. Control varies depending on the control system being used but typically, switching is
supported with other drivers able to offer more. Please consult a HDA Pro (page 17) to nd out more.
MHUB-OS
Any device with a web browser can control MHUB directly from MHUB-OS’ dashboard. From here it is possible to control switching and ARC. MHUB-OS is also where all
conguration for MHUB is done.
Master and Room remote controls (IR)
MHUB supports the passing of IR commands from any display receiver location back to MHUB and vice versa, this is described on pages 14-15. Switching to audio sources
is not supported nor is access to display ARC. In scenarios such as this, HDANYWHERE recommends using MHUB-OS’ dashboard or uControl.

19
MHUB PRO 2.0 is a ‘stackable’ system meaning that it can be added to MHUB AUDIO (6x4) or any MHUB audio enabled device. When you create a system comprised of a
video MHUB and an audio MHUB then we refer to this as a V&A system. System stacking is covered in more detail in audio enabled MHUB user guides. This section serves
to provide a brief explanation of terminology and basic composition of a stacked system.
Master & slave devices
Stacking works by taking one or more MHUB systems and combining them together so that it presents itself to the user as one larger system. A stacked system requires
that a ‘Master’ MHUB is nominated as well as ‘Slave’ devices which the Master will control. All communication and the large majority of system conguration will be done on
the Master system only. Once the MHUB systems are setup in stack mode then management of any of the slave devices becomes locked to the user.
You can only create a stack with uControl
To create a stacked system you will need uControl. uControl will scan your network and will identify any MHUB that is present on it. If more than one MHUB is found then
you will be presented with additional options: 1) to setup and connect to any MHUB system in standalone mode or 2) to combine one or more MHUB systems in to a stack.
If you select option #2, then you will be asked to nominate your Master device rst.
• If you are setting up a stack with a video MHUB and an audio MHUB (V&A) then the video MHUB will automatically be selected as the Master device.
• If you are setting up a stack with multiple MHUB AUDIO’s then you will be given the option to choose which device is the Master.
• You can not create a stack with more than one video MHUB included.
• You are limited to a maximum of 3 Slave devices.
• You can reorder the Slaves in your stack to match how your systems are physically setup in your rack.
TIP: Have a plan in place before you start
It is advisable to have a drawing or a plan in place before you start to connect your MHUB systems up. Outputs from MHUB can act as inputs for Slave MHUBs and both
can be switched to any input/output combination. This can get very confusing! Detail everything and label your cables and interconnects to make troubleshooting easier.
Modifying or deleting a stack after stack setup is complete
It is possible to modify any aspect of the stack setup from MHUB-OS and uControl. However, if you wish to add or remove a Slave device or would like to upgrade the Master
MHUB then you will have to reset all systems in the stack back to factory settings and restart the setup Stack process.
Stacking: creating a Video & Audio (V&A) system

20 Wiring. Power Up. First Boot.
This manual suits for next models
3
Other HDanywhere Matrix Switcher manuals

HDanywhere
HDanywhere MHUB User manual

HDanywhere
HDanywhere MHUB862U User manual

HDanywhere
HDanywhere MHUB4KPRO44 User manual

HDanywhere
HDanywhere HKM42-UK User manual

HDanywhere
HDanywhere MHUB2K88 User manual

HDanywhere
HDanywhere HKM42BTP User manual

HDanywhere
HDanywhere MHUBU43140 User manual

HDanywhere
HDanywhere MHUB User manual


