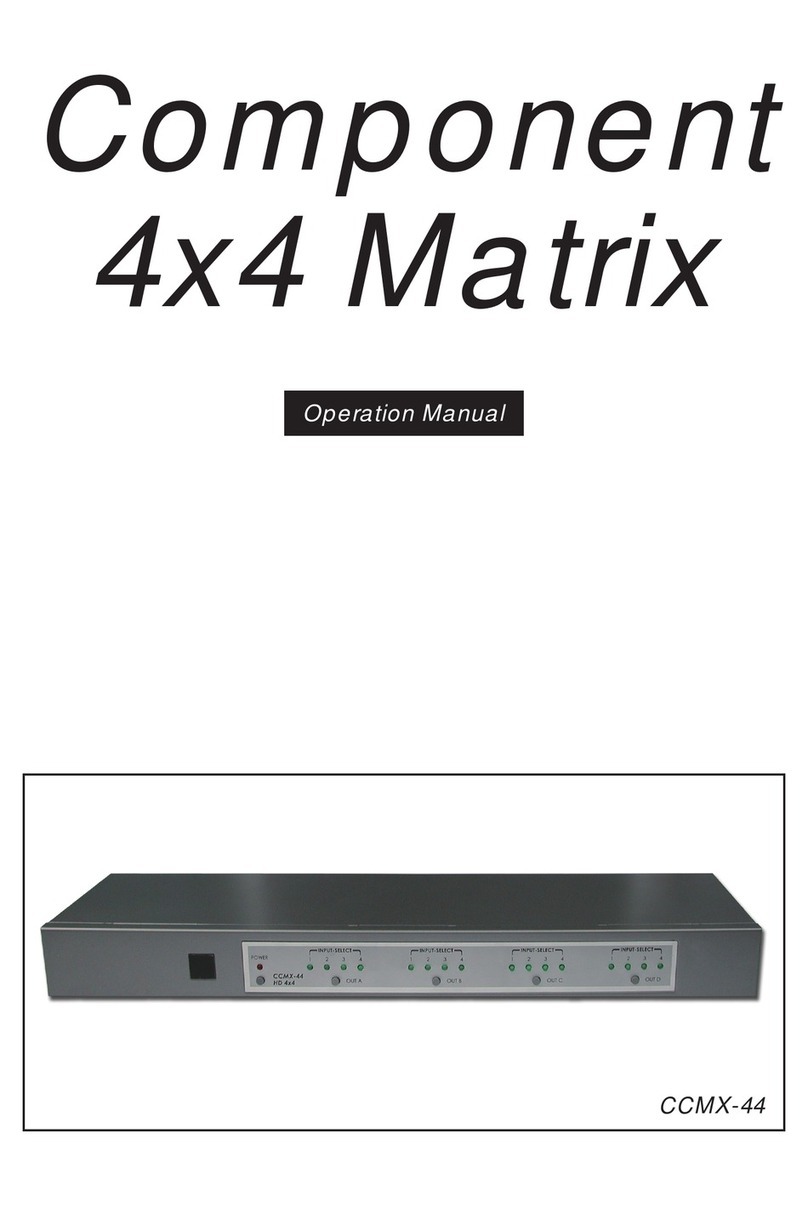
Cypress CCMX-44DA User manual

CCMX-44DA
HD 4x4
Operation Manual
CCMX-44DA


Revision History
Version No Date Summary of Change
V1 20081021 Preliminary Release
Precaution
Failure to follow the precautions described below may cause damage to
CCMX-44DA and void the warranty.
DO NOT open the case. Doing so will void the warranty. If you nd
problem with it, please return back to your retailer or seller who will
assist you or provide you with solution.
DO NOT use third-party AC adapter or power cord. Doing so may
damage the unit.
DO NOT bump, jar or drop contents of the products as it may
damage it and result in warranty void.
DO NOT set any liquids or beverages on the case as they may
damage the unit.

Table of Contents
1
1
1
1
2
2
3
4
4
4
5
5
5
5
6
1. Introduction......................................................................................
2. Application……………………………………………………….......….
3. Features............................................................................................
4. Package Contents...........................................................................
5. Operation Controls and Functions.................................................
5.1 Rear Panel Installation.................................................................
5.2 Front Panel...................................................................................
5.3 Remote Control..........................................................................
5.4 RS-232 Protocol............................................................................
5.4.1 Pin Denition.............................................................................
5.4.2 Commands..............................................................................
6. Specications.........................................................................................
6.1. General Specication................................................................
6.2. Support Resolution.....................................................................
7. Connection and Installation.................................................................

1. Introduction
The Cypress CCMX-44DA is a high performing Digital/Analog AV matrix.
When distributing multiple HD audio/video sources this device offers you the
advantage of being able to direct them to any of the four outputs, or all
four displays can show one output source at the same time. It also provides
you with a variety of choices of where to play your image, all of which is
controlled through the remote.
Please follow this manual to begin enjoying the benets of this unit. We
suggest keeping this manual in a safe place for future reference.
2. Application
High performance Digital/Analog AV matrix with remote.
Link up-to four of your favorite sources and enjoy playing them on
HDTV’s for a truly magnicent experience.
Each input can be directed to any/all of the outputs.
Accepts both digital and analog audio.
3. Feature
1. Provides 4x4 matrix input/output of Component (YPbPr/YCbCr) video
and L/R & Coaxial digital audio signal.
2. Buffered video and audio output.
3. Input source LED indicators on each output selection.
4. Ideal for integrating your home theater, conference rooms and retail
stores.
5. Supports high resolution input/output:
HDTV: 480i, 576i, 480p, 576p, 1080i, and 1080p
6. Supports analog stereo L/R audio input/output.
7. Supports Coaxial audio input/output.
8. IR remote control.
9. RS-232 control.
4. Package Contents
1. Cypress CCMX-44DA Component Matrix
2. 12VDC Power Supply Adaptor
3. Remote Control
4. Operation Manual
1

5. Operation Controls and Functions
5.1. Rear Panel installation
① RS-232 Communication Port:
Connect to the COM port of your PC for remote control over RS-232
protocol.
② Component with Digital (Coaxial) & L/R Audio output Ports A, B, C and D:
Connect each set of Component (3 RCA) and Audio (2 RCA/Coaxial)
cables to the input of your HD displays.
③ Component with Digital (Coaxial) & L/R Audio INPUT Ports 1, 2, 3 and 4:
Connect each set of Component (3 RCA) and Audio (2 RCA/Coaxial)
cables to the output of your source equipment such as DVD/Blu Ray
players or set-top-boxes.
④ Power:
Plug the 12VDC power supply into the unit and connect the adaptor to an
AC outlet.
1
RS-232
RL
RL
Pr/Cr Pb/Cb Y
C
D
Pr/Cr Pb/Cb Y
RL
RL
Pr/Cr Pb/Cb Y
A
B
Pr/Cr Pb/Cb Y
RL
RL
Pr/Cr Pb/Cb Y
3
4
Pr/Cr Pb/Cb
INPUTOUTPUT
Y
RCoaxial
Coaxial
Coaxial
Coaxial
Coaxial
Coaxial
Coaxial
Coaxial
L
RL
Pr/Cr Pb/Cb
DC 12V
Y
1
2
Pr/Cr Pb/Cb Y
3 2 4
2

POWER
OUT A OUT B OUT C OUT D
12 43
INPUT-SELECT
12 43
INPUT-SELECT
12 43
INPUT-SELECT
12 43
INPUT-SELECT
CCMX-44DA
HD 4x4
① Remote control sensor.
② Power Switch & LED Indicator:
The LED will switch on when the power is turned on.
③ Input Select/Indicators for Output A:
Press the "OUT A" button repeatedly to switch to your desired source. One
of the four LEDs will turn on to indicate which input source has been
selected and routed to the display.
④ Input Select/Indicators for Output B:
Press the "OUT B" button repeatedly to switch to your desired source.
One of the four LEDs will turn on to indicate which input source has been
selected and routed to the display.
⑤ Input Select/Indicators for Output C:
Press the "OUT C" button repeatedly to switch to your desired source. One
of the four LED’s will turn on to indicate which input source has been
selected and routed to the display.
⑥ Input Select/Indicators for Output D:
Press the "OUT D" button repeatedly to switch to your desired source. One
of the four LED’s will turn on to indicate which input source has been
selected and routed to the display.
5.2. Front Panel
1 2 3 4 5 6
3

5.3. Remote Control
1. Power:
Press the button to turn the unit on or off.
2. Select input for Component/Audio OUT A:
Press 1, 2, 3 or 4 to select the desired input source
for Component/Audio OUT A.
3. Select input for Component/Audio OUT B:
Press 1, 2, 3 or 4 to select the desired input source
for Component/Audio OUT B.
4. Select input for Component/Audio OUT C:
Press 1, 2, 3 or 4 to select the desired input source
for Component/Audio OUT C.
5. Select input for Component/Audio OUT D:
Press 1, 2, 3 or 4 to select the desired input source
for Component/Audio OUT D.
OUTPUT
A
OUTPUT
D
OUTPUT
C
OUTPUT
B
POWER
CR-33
1
2
3
4
5
5.4. RS-232 Protocol
5.4.1. Pin Denition
CCMX-44DA
Remote
Control
Console
PIN Denition PIN Denition
1 NC 1 NC
2 Tx 2 Rx
3 Rx 3 Tx
4 NC 4 NC
5 GND 5 GND
6 NC 6 NC
7 NC 7 NC
8 NC 8 NC
9 NC 9 NC
*RS-232 transmission format:
Baud Rate: 9600 bps
Data bit: 8 Bits
Parity: None
Stop Bit: 1 bit
4

5.4.2. Commands
COMMAND ACTION
P0 Power Off (standby)
P1 Power On *
ST System Status *
VR Firmware Version
A1 Output A select Input1
A2 Output A select Input2
A3 Output A select Input3
A4 Output A select Input4
B1 Output B select Input1
B2 Output B select Input2
B3 Output B select Input3
B4 Output B select Input4
C1 Output C select Input1
C2 Output C select Input2
C3 Output C select Input3
C4 Output C select Input4
D1 Output D select Input1
D2 Output D select Input2
D3 Output D select Input3
D4 Output D select Input4
*: command "P1" and "ST" response: P? A? B? C? D?
6. Specications
6.1. General Specication
* Input Ports:
Component (YPbPr/YCbCr) + Coaxial & L/R Audio x 4 sets
* Output Ports:
Component (YPbPr/YCbCr) + Coaxial & L/R Audio x 4 sets
* 12V DC power supply
* Dimensions: 436 (W) x 120 (D) x 44(H)mm
* Weight: 1.6 Kgs
* Power consumption: 6w (max)
6.2. Support Resolution
INPUT 480i / 480p/576i / 576p/720p/1080i / 1080p@50Hz/60Hz
OUTPUT 480i / 480p/576i / 576p/720p/1080i / 1080p@50Hz/60Hz
5

5
Blu-raySTB
HD TV HD TV
HD TV HD TV
DVD PS3
4. Operation Controls and Functions
4.1. Front Panel
1. Remote control sensor.
2. Power Switch & LED Indicator:
The LED will illuminate when the power is turned on.
3. Input Select/Indicators for Output A:
Press the "OUT A" button repeatedly to switch to your desired source. One of
the four LEDs will illuminate to indicate which input source is being selected,
and routed to the display.
4. Input Select/Indicators for Output B:
Press the "OUT B" button repeatedly to switch to your desired source. One of
the four LEDs will illuminate to indicate which input source is being selected,
and routed to the display.
5. Input Select/Indicators for Output C:
Press the "OUT C" button repeatedly to switch to your desired source. One of
the four LEDs will illuminate to indicate which input source is being selected,
and routed to the display.
6. Input Select/Indicators for Output D:
Press the "OUT D" button repeatedly to switch to your desired source. One of
the four LEDs will illuminate to indicate which input source is being selected,
and routed to the display.
4.2. Rear Panel
1. RS-232 Communication Port:
Connect to the COM port of your PC for the distant control over RS-232
channel.
2. Component and L/R Audio OUTPUT Ports A, B, C and D:
Connect each set of Component (3 RCA) and Audio (2 RCA) to the input of
your HDTV displays.
3. Component and L/R Audio INPUT Ports 1, 2, 3 and 4:
Connect each set of Component (3 RCA) and Audio (2 RCA) to the output of
your source equipments such as DVD player or set-top-box.
4. Power:
Plug the 12VDC power supply into the unit and connect the adaptor to AC wall
outlet.
4.3. Remote Control
1. Power:
Press the button to turn on/off the unit.
2. Input Select for Component/Audio OUT A:
Press 1, 2, 3 or 4 to select the desired input source for
Component/Audio OUT A.
3. Input Select for Component/Audio OUT B:
Press 1, 2, 3 or 4 to select the desired input source for
Component/Audio OUT B.
4. Input Select for Component/Audio OUT C:
Press 1, 2, 3 or 4 to select the desired input source for
Component/Audio OUT C.
5. Input Select for Component/Audio OUT D:
Press 1, 2, 3 or 4 to select the desired input source for
Component/Audio OUT D.
4.4. RS-232 Protocol
4.4.1. Pin Definition
*RS-232 transmission format:
Baud Rate: 9600 bps
Data bit: 8 Bits
Parity: None
Stop Bit: 1 bit
2 3
1 2 3 4 5 6
POWER
OUT A OUT B OUT C OUT D
1 2 43
INPUT-SELECT
1 2 43
INPUT-SELECT
1 2 43
INPUT-SELECT
1 2 43
INPUT-SELECT
CCMX-44
HD 4x4
RS-232
R L
R L
Pr/Cr Pb/Cb Y
C
D
Pr/Cr Pb/Cb Y
R L
R L
Pr/Cr Pb/Cb Y
A
B
Pr/Cr Pb/Cb Y
R L
R L
Pr/Cr Pb/Cb Y
3
4
Pr/Cr Pb/Cb
INPUTOUTPUT
Y
R L
R L
Pr/Cr Pb/Cb
DC 12V
Y
1
2
Pr/Cr Pb/Cb Y
4321
OUTPUT
A
OUTPUT
D
OUTPUT
C
OUTPUT
B
POWER
CR-33
1
2
3
4
5
PIN
1
2
3
4
5
6
7
8
9
Definition
NC
Tx
Rx
NC
GND
NC
NC
NC
NC
PIN
1
2
3
4
5
6
7
8
9
Definition
NC
Rx
Tx
NC
GND
NC
NC
NC
NC
CCMX-44 Remote Control Console
7. Connection and Installation
6

5
Blu-raySTB
HD TV HD TV
HD TV HD TV
DVD PS3
4. Operation Controls and Functions
4.1. Front Panel
1. Remote control sensor.
2. Power Switch & LED Indicator:
The LED will illuminate when the power is turned on.
3. Input Select/Indicators for Output A:
Press the "OUT A" button repeatedly to switch to your desired source. One of
the four LEDs will illuminate to indicate which input source is being selected,
and routed to the display.
4. Input Select/Indicators for Output B:
Press the "OUT B" button repeatedly to switch to your desired source. One of
the four LEDs will illuminate to indicate which input source is being selected,
and routed to the display.
5. Input Select/Indicators for Output C:
Press the "OUT C" button repeatedly to switch to your desired source. One of
the four LEDs will illuminate to indicate which input source is being selected,
and routed to the display.
6. Input Select/Indicators for Output D:
Press the "OUT D" button repeatedly to switch to your desired source. One of
the four LEDs will illuminate to indicate which input source is being selected,
and routed to the display.
4.2. Rear Panel
1. RS-232 Communication Port:
Connect to the COM port of your PC for the distant control over RS-232
channel.
2. Component and L/R Audio OUTPUT Ports A, B, C and D:
Connect each set of Component (3 RCA) and Audio (2 RCA) to the input of
your HDTV displays.
3. Component and L/R Audio INPUT Ports 1, 2, 3 and 4:
Connect each set of Component (3 RCA) and Audio (2 RCA) to the output of
your source equipments such as DVD player or set-top-box.
4. Power:
Plug the 12VDC power supply into the unit and connect the adaptor to AC wall
outlet.
4.3. Remote Control
1. Power:
Press the button to turn on/off the unit.
2. Input Select for Component/Audio OUT A:
Press 1, 2, 3 or 4 to select the desired input source for
Component/Audio OUT A.
3. Input Select for Component/Audio OUT B:
Press 1, 2, 3 or 4 to select the desired input source for
Component/Audio OUT B.
4. Input Select for Component/Audio OUT C:
Press 1, 2, 3 or 4 to select the desired input source for
Component/Audio OUT C.
5. Input Select for Component/Audio OUT D:
Press 1, 2, 3 or 4 to select the desired input source for
Component/Audio OUT D.
4.4. RS-232 Protocol
4.4.1. Pin Definition
*RS-232 transmission format:
Baud Rate: 9600 bps
Data bit: 8 Bits
Parity: None
Stop Bit: 1 bit
2 3
1 2 3 4 5 6
POWER
OUT A OUT B OUT C OUT D
1 2 43
INPUT-SELECT
1 2 43
INPUT-SELECT
1 2 43
INPUT-SELECT
1 2 43
INPUT-SELECT
CCMX-44
HD 4x4
RS-232
R L
R L
Pr/Cr Pb/Cb Y
C
D
Pr/Cr Pb/Cb Y
R L
R L
Pr/Cr Pb/Cb Y
A
B
Pr/Cr Pb/Cb Y
R L
R L
Pr/Cr Pb/Cb Y
3
4
Pr/Cr Pb/Cb
INPUTOUTPUT
Y
R L
R L
Pr/Cr Pb/Cb
DC 12V
Y
1
2
Pr/Cr Pb/Cb Y
4321
OUTPUT
A
OUTPUT
D
OUTPUT
C
OUTPUT
B
POWER
CR-33
1
2
3
4
5
PIN
1
2
3
4
5
6
7
8
9
Definition
NC
Tx
Rx
NC
GND
NC
NC
NC
NC
PIN
1
2
3
4
5
6
7
8
9
Definition
NC
Rx
Tx
NC
GND
NC
NC
NC
NC
CCMX-44 Remote Control Console

20081021 MPM-CCMX44DA
Home page: http://www.cypress.com.tw
CYPRESS TECHNOLOGY CO., LTD.
Other manuals for CCMX-44DA
1
Table of contents
Other Cypress Matrix Switcher manuals

Cypress
Cypress CMLUX-24S User manual

Cypress
Cypress CCMX-44 User manual

Cypress
Cypress CMLUX-22S User manual

Cypress
Cypress CPCD-41AR User manual

Cypress
Cypress CHMX-44 User manual

Cypress
Cypress CMSI-8H8HS User manual

Cypress
Cypress CMLUX-4H4CAT User manual

Cypress
Cypress CMPRO-U4H4CVE Installation manual

Cypress
Cypress CMLUX-42S User manual

Cypress
Cypress CMLUX-4H4CAT User manual