DINUY RE EL1 LE3 User manual

A
MANUAL DE INSTRUCCIONES
INSTRUCTIONS MANUAL
RE EL1 LE3
Dimensiones 1 módulo de anchura
Tª Funcionamiento 0ºC ~ +40ºC
Grado de protección IP20 según UNE20324
De acuerdo a la Norma UNE EN 60669-2-1
ES
REGULADOR UNIVERSAL CON MANDO ROTATIVO
ESPECIFICACIONES TÉCNICAS
CARACTERÍSTICAS
Regulador modular válido para el control de:
· Lámparas LED 230V regulables a principio de fase (leading-edge): LED1.
· Lámparas LED 230V regulables a final de fase (trailing-edge): LED2.
· Lámparas LED 12V regulables con transformador electrónico: LED2.
· Incandescencia y Halógenas 230V: LED2.
· Halógenas 12V con transformador electrónico: LED2.
Por el contrario, no es válido para el control de:
· Lámparas LED no regulables.
· Lámparas LED 12V o Halógenas 12V con transformador ferromagnético.
Formato modular, montaje en carril DIN.
Control con pulsador o a través del potenciómetro del frontal (B).
Admite hasta 3 pulsadores luminosos y un número ilimitado de no luminosos.
El potenciómetro frontal (B) permite realizar una regulación desde el propio aparato, sin
necesidad de un pulsador exterior.
El selector (A) permite seleccionar el nivel mínimo de regulación. De esta forma, se puede
evitar que, a niveles bajos de regulación, las lámparas parpadeen o parezcan estar apagadas.
Posibilidad de configuración Maestro/Esclavo, lo que permite:
· Ampliar la potencia regulada, conectando varios reguladores en paralelo.
· Controlar el regulador mediante mando a distancia y un interface: RC KNX 001 + CO KNX 001.
Protegido frente a cortocircuitos y sobrecargas. Incorpora una protección térmica que
apagará las lámparas en caso de sobrecalentamiento del regulador.
DESCRIPCIÓN
Selector A: modo de regulación y nivel mínimo de regulación
Este regulador, realiza una regulación a principio de fase (LED1) o a final de fase (LED2),
en función de la posición del selector (A), el cual debe ser colocado correctamente teniendo
en cuenta el tipo de carga conectado.
Es muy importante posicionar correctamente el Selector A para evitar la rotura del regulador
o de las propias lámparas.
Para asegurarse qué tipo de regulación admite su lámpara LED, y posicionar correctamente
el selector, revise las características de la lámpara o consulte con el fabricante de la misma.
Además, este selector aporta una segunda función, permitiendo ajustar el nivel mínimo de
regulación en ambos modos:
· “-”: nivel mínimo de regulación bajo.
· “+”: nivel mínimo de regulación alto.
De esta forma, se puede evitar que, al nivel de regulación mínimo, las lámparas parpadeen
o den la impresión de estar apagadas.
Potenciómetro B: mando de regulación
Permite realizar una regulación de las lámparas desde el propio aparato, sin necesidad de
instalar un pulsador exterior.
También posibilita el poder fijar un nivel permanente y anular el resto de ordenes de control.
Tecla C: modo de funcionamiento
Se dispone de 3 modos de funcionamiento, los cuales cambian según se pulsa la Tecla C:
· Memoria (indicador D en rojo permanente): una pulsación corta enciende las lámparas
al nivel de regulación ajustado antes de haber apagado la última vez.
· No Memoria (indicador D apagado): una pulsación corta enciende las lámparas al máximo.
· Auto (indicador D haciendo 2 destellos): una pulsación corta encenderá las lámparas al
nivel de regulación ajustado antes de haber apagado la última vez. Además, si hay un
corte de alimentación, al restablecerse el mismo, las lámparas volverán al mismo estado
que tenían antes de haberse quedado sin los 230V.
Carga
Lámparas LED 230V a principio de fase
Lámparas LED 230V a final de fase
Lámparas LED 12V con transformador electrónico
Incandescencia y Halógenas 230V
Halógenas 12V con transformador electrónico
Válido para... Lámparas LED regulables,
Incandescencia y Halógenas
Consumo 3VA
Tensión Alimentación 230V~ 50Hz
Pulsadores luminosos Máx. 3
Nivel de regulación mínimo Ajustable
Control Pulsador o Potenciómetro frontal
4 ~ 80W
4 ~ 300VA
300W de transformador:
6 trafos de 50W y 1lamp/trafo
3 trafos de 100W y 1lamp/trafo
15 ~ 300W
20 ~ 300W
LED1 LED2
Mem
C
B
D
ATENCIÓN: ¡Tensión peligrosa!.
¡Los trabajos con equipos eléctricos en la red de 230V, deben de
ser realizados exclusivamente por técnicos cualificados!.
¡Desconecte la tensión de red antes de proceder al montaje,
desmontaje o manipulación del equipo eléctrico!.
(*) Se recomienda dejar libre, al menos, un módulo de separación entre el regulador y otros elementos del cuadro.
Dimensions 1 module, 17,5mm wide
Working temperature 0ºC ~ +40ºC
Protection degree IP20 according to EN60529
According to the Standard EN 60669-2-1
GB
UNIVERSAL DIMMER WITH ROTARY KNOB
TECHNICAL DATA
CHARACTERISTICS
Modular dimmer valid for the control of:
· 230V LED lamps dimmable by leading-edge: LED1.
· 230V LED lamps dimmable by trailing-edge: LED2.
· 12V dimmable LED lamps with electronic transformer: LED2.
· Incandescence and Halogens 230V: LED2.
· 12V Halogen lamps with electronic transformer: LED2.
Otherwise, it is not valid for the control of:
· Non-dimmable LED lamps.
· 12V LED lamps or 12V Halogen lamps with inductive transformer.
Modular housing, 35mm DIN-rail mounting.
Control by pushbutton or by its built-in rotary knob (B).
Can be connected up to 3 lighted pushbuttons and an unlimited number of non-lighted.
The rotary knob (B) allows a dimming from the device, without the need of an external
pushbutton.
The selector (A) allows to select the minimum dimming level. In this way, lamps can be
prevented from blinking or to be switched-off at low dimming level.
Master/Slave configuration, which allows:
· Extend load capacity by connecting several dimmers in parallel.
· Control the dimmer wirelessly through an interface: RC KNX 001 + CO KNX 001.
Protected against short-circuit and overload. It incorporates a heating protection that will turn
the lamps off in case of overheating of the dimmer.
DESCRIPTION
Selector switch A: dimming mode and minimum dimming level
This dimmer can control the lamps by leading-edge (LED1) or trailing-edge (LED2),
depending on the position of the selector switch (A), which must be placed taking into
account the connected type of load.
It is very important to place correctly the selector switch A avoiding damaging the dimmer or
the lamps.
In order to know which type of dimming technology accepts your LED lamp, please check
the characteristics of the lamp or consult its manufacturer.
Besides, this selector switch has a second function, allowing to set the minimum dimming
level in both working modes:
· “-”: minimum dimming level low.
· “+”: minimum dimming level high.
In this way, it can be avoided that at the minimum dimming level the lamps blink or appear to
be off.
Rotary knob B: dimming potentiometer
It allows to control the lamps from the dimmer, without the need to install an external
pushbutton.
It also can set a fixed dimming level and cancel other control orders.
Key C: working mode
Three working modes are available, which change as the Key C is pressed:
· Memory (LED D switched on in red): a short press will switch the lamps on to the same
level they have before the last switching-off.
· No Memory (LED D switched off): a short press will switch the lamps on at maximum.
· Auto (LED D blinks twice): a short press will switch the lamps on to the same level they
have before the last switching-off. Besides, if the mains supply is cut-out, when it is
restored the lamps will return to the same state they had before they were switched-off.
Load
230V LED lamps dimmable by leading-edge
230V LED lamps dimmable by trailing-edge
12V LED lamps with electronic transformer
Incandescence & 230V Halogens
12V Halogens with electronic transformer
Valid for... Dimmable LED lamps,
Incandescence & Halogens
Consumption 3VA
Power supply 230V~ 50Hz
Lighted pushbuttons Up to 3
Minimim dimming level Adjustable
Control Pushbutton or built-in rotary knob
4 ~ 80W
4 ~ 300VA
300W of transformer capacity:
6 transfo x 50W & 1lamp/transfo
3 transfo x 100W & 1lamp/transfo
15 ~ 300W
20 ~ 300W
(*) Keep a distance of at least one module gap between the dimmer and other devices of the cabinet.
WARNING: Hazardous voltage!.
Work with electrical equipment on the 230V mains must be carried
out only by qualified technicians!.
Switch off the mains before installing, removing or handling of
electrical equipment!.

DINUY S.A.
C/Auzolan 2, 20303 Irun (Spain)
Tel.: +34 943 62 79 88
E-mail: info@dinuy.com
www.dinuy.com
ES
Indicador D: modo de funcionamiento
Según el modo de funcionamiento, este LED se comportará de una forma u otra:
· LED apagado: regulador maestro en modo “No Memoria”.
· LED encendido permanentemente: regulador maestro en modo “Memoria”.
· LED dos destellos: regulador maestro en modo “Auto”.
· LED parpadeando: regulador en modo Esclavo.
FUNCIONAMIENTO
Funcionamiento con Pulsador Cableado (en modo Maestro): Fig. 1
Una pulsación corta encenderá las lámparas al nivel máximo (No Memoria) o al nivel de
regulación ajustado antes de haber sido apagado por última vez (Memoria o Auto).
Una pulsación larga realizará la regulación de las lámparas. Para cambiar el sentido de
regulación (creciente o decreciente), es sufiente con soltar el pulsador y volver a
mantenerlo presionado.
Estando las lámparas encendidas, una pulsación corta provocará su apagado.
Para seleccionar el modo de encendido, pulse, con una punta fina, sobre la tecla C:
· Modo Memoria: una pulsación corta encenderá las lámparas al nivel de regulación que
éstas tenían antes del último apagado.
· Modo No Memoria: una pulsación corta encenderá las lámparas al máximo.
· Modo Auto: una pulsación corta encenderá las lámparas al nivel de regulación que
éstas tenían antes del último apagado. Además, si hay un corte de alimentación, al
restablecerse el suministro eléctrico, las lámparas volverán al mismo estado.
Para que este modo sea operativo, asegúrese de que el Potenciómetro de regulación (B)
esté al mínimo y que no tiene cableado ningún regulador Maestro a las bornas 7 y 8.
Funcionamiento como Esclavo: Fig. 2
Es posible realizar una configuración Maestro/Esclavo para ampliar la potencia regulada.
Un regulador se convierte en Esclavo cuando se cablea a otro él en sus bornas 7 y 8.
Un regulador Esclavo, tiene las siguientes características:
· Su Piloto D parpadeará en rojo para indicar que está en modo esclavo.
· La Tecla C no tiene asignada ninguna función.
· Su entrada de pulsador quedará anulada.
· Su Potenciómetro B deberá estar colocado al mínimo (-).
Se podrán instalar tantos esclavos como sean necesarios para ampliar una instalación.
Para recuperar la opción de pulsador, y sacarlo de modo esclavo, desconecte los cables de
las bornas 7 y 8, y, además, desconectar y conectar nuevamente la tensión de red.
Funcionamiento con Potenciómetro de regulación B (en modo Maestro o Esclavo)
Las lámparas se regularán en función de la posición de este potenciómetro.
Para apagar completamente las lámparas, éste potenciómetro se debe girar, en sentido
anti-horario, hasta alcanzar el mínimo (-).
Para encender las lámparas al máximo, éste potenciómetro debe ser girado, en sentido
horario, hasta alcanzar el máximo (+).
Éste potenciómetro funciona, tanto si el regulador está configurado como Maestro, tanto
como si está configurado como Esclavo.
La acción de éste potenciómetro prevalece sobre el resto de controles (pulsador o esclavo).
De este modo, debe ser colocado al mínimo (-) si las ordenes de regulación proceden de un
pulsador externo.
Este modo de funcionamiento es muyy práctico cuando, por ejemplo, no se quiere conectar
un pulsador externo, simplemente se requiere marcar un nivel de regulación fijo.
INSTALACIÓN
1 - Quite la corriente eléctrica.
2 - Seleccione en el regulador el tipo de lámpara que va a conectar: LED1 ó LED2.
Coloque el Selector A en una de las dos posiciones, en función del tipo de carga.
Es muy importante colocar correctamente este selector para evitar la rotura del
regulador o de las propias lámparas.
Para saber con seguridad qué tipo de regulación admite su lámpara LED 230V, revise
las características de la misma o consulte con su fabricante.
3 - Instale el regulador según el esquema de instalación:
· Fig.1: Instalación sencilla.
· Fig.2: Instalación Maestro/Esclavo.
4 - Asegúrese de tener conectadas las lámparas y alimente la instalación.
5 - Si el control se realiza mediante pulsador externo, encienda las lámparas con una
pulsación corta y realice una pulsación larga hasta alcanzar el nivel mínimo de
regulación. En ese momento, suelte el pulsador y compruebe que a ese nivel las
lámparas siguen ligeramente encendidas y no parpadean. De lo contrario, gire un poco
el selector A hacia el “+”, hasta alcanzar un valor mínimo adecuado.
Si el control se realiza mediante el Potenciómetro B, girelo casi hasta el mínimo, sin
dejar que las lámparas se apaguen completamente, y compruebe que no hay
parpadeos. De lo contrario, gire un poco el Selector A hacia el “+”, hasta alcanzar un
valor mínimo adecuado.
Con este ajuste, evitamos que, al nivel mínimo de regulación, las lámparas parpadeen o
den la impresión de estar apagadas.
LED1 LED2
Mem
L
N
Pulsador
Pushbutton
Fig.1
LED1 LED2
Mem
L
N
Pulsador
Pushbutton
Fig.2
5 6
7 8
1 2
3 4
5 6
7 8
1 2
3 4
LED1 LED2
Mem
5 6
7 8
1 2
3 4
MAESTRO
MASTER ESCLAVO
SLAVE
Parpadeo
Blink
GB
LED D: working mode
Depending on the operation mode, this LED will behave in one way or another:
· LED off: master dimmer in “No Memory” mode.
· LED on: master dimmer in “Memory” mode.
· LED blinks twice: master dimmer in “Auto” mode.
· LED flickering: dimmer in Slave mode.
OPERATION
Working with wired pushbutton (Master mode): Fig. 1
A brief press will turn the lamps on at maximum level (No Memory) or at the level they had
before being turned off (Memory or Auto).
A sustained press will dim the lamps.
Una pulsación larga realizará la regulación de las lámparas. To change the dimming sense
(increasing or decreasing), the pushbutton must be released and kept it pressed again.
With the lamps switched-on, a short press will switch them off.
To select the switch-on mode, press briefly the C key with a fine point:
· Memory mode: a short press will turn the lamps on to the dimming level they had before
the last switching-off.
· No Memory mode: a short press will turn the lamps on to the maximum.
· Auto mode: a short press will turn the lamps on to the dimming level they had before
the last switching-off. Besides that, if the mains supply is cut-out, when it is restored the
lamps will return to the same state they had.
To become this mode operative, make sure that the rotary knob (B) is placed to minimum
and no Master dimmer is wired to terminals 7 and 8.
Working as Slave: Fig. 2
It is possible to do a Master/Slave configuration to extend the load to be controlled.
A dimmer becomes Slave when it is wired to another one at its terminals 7 and 8.
The Slave dimmer has the next features:
· LED D will flicker in red showing it is in slave mode.
· Key C does not have any function.
· Pushbutton input is cancelled.
· Rotary knob B must be placed at minimum (-).
As many slave as necessary can be installed.
To recover the pushbutton control and remove it from slave mode, disconnect the cables
from terminals 7 and 8, and also disconnect and reconnect the mains supply.
Working with Rotary knob B (Master or Slave mode)
The lamps will be dimmed according to the position of this potentiometer.
To turn the lamps completely off, this knob must be turned counter-clock wise until the
minimum (-) is reached.
To turn the lamps on at maximum, this potentiometer must be turned clockwise until it
reaches the maximum (+).
This rotary knob works, whether the dimmer is set as Master, or whether it is set as Slave.
This potentiometer prevails over all other controls (pushbutton or slave). Therefore, it should
be set to the minimum (-) if the control commands come from an external pushbutton.
This working mode is very useful when an external pushbutton control is unwanted. It allows
setting a fixed dimming level.
INSTALLATION
1 - Cut the mains off.
2 - Select the type of lamp to be connected to the dimmer: LED1 or LED2.
Place the Selector switch A in one of the two positions taking into account the load type.
It is very important to place correctly the selector switch A avoiding damaging the dimmer
or the lamps.
In order to know which type of dimming technology accepts your LED lamp, please check
the characteristics of the lamp or consult its manufacturer.
3 - Install the dimmer according the wiring diagram:
· Fig.1: Typical installation.
· Fig.2: Master/Slave installation.
4 - Make sure the lamps are connected and supply the installation.
5 - If the control is performed by an external pushbutton, turn the lamps on with a short
press and keep it pressed until the minimum dimming level is reached. Then, release the
pushbutton and check that at that level the lamps are still slightly on and do not blink.
Otherwise, turn the selector switch A slightly towards the "+" until a suitable minimum
value is reached.
If the control is performed by Rotary knob B, turn it almost to the minimum, without
switching the lamps completely off, and check there is not flickering. Otherwise, turn the
Selector switch A bit towards the "+" until a suitable minimum value is reached.
With this adjustment, we avoid that at the minimum level of dimming, the lamp flickers or
it seems it is off.
Other DINUY Dimmer manuals
Popular Dimmer manuals by other brands
DIODE LED
DIODE LED TOUCHDIAL Mini installation guide
AMX
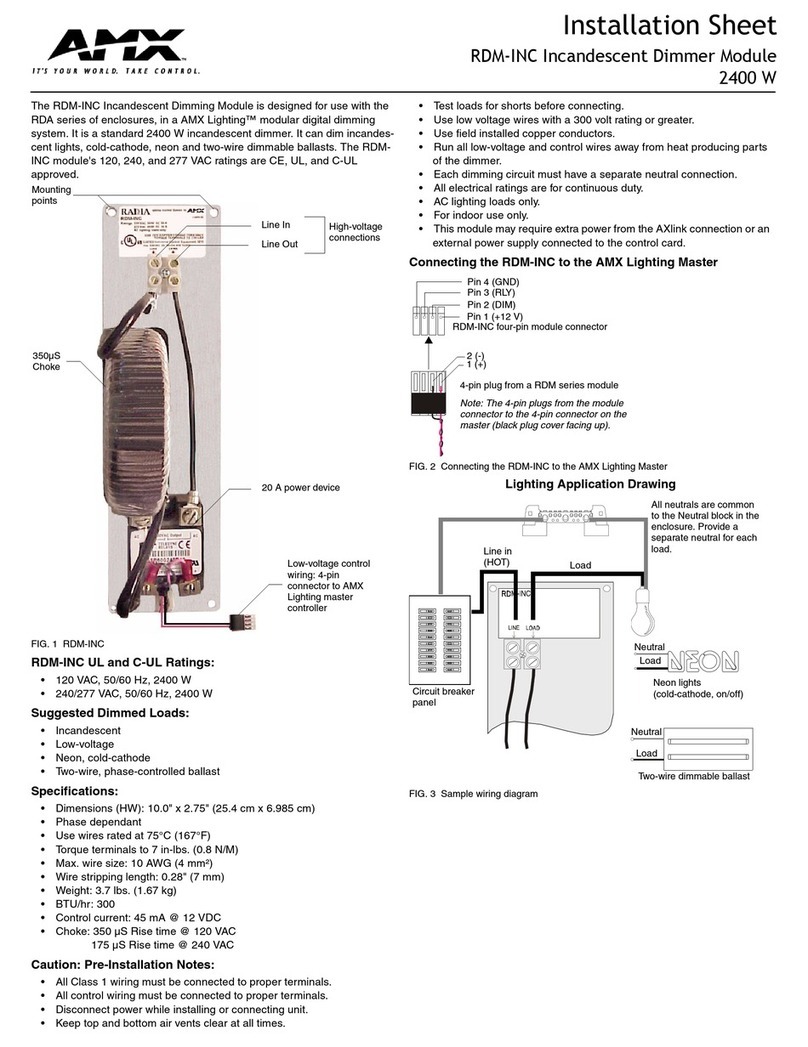
AMX Incandescent Dimmer Module RDM-INC Installation sheet
LEGRAND
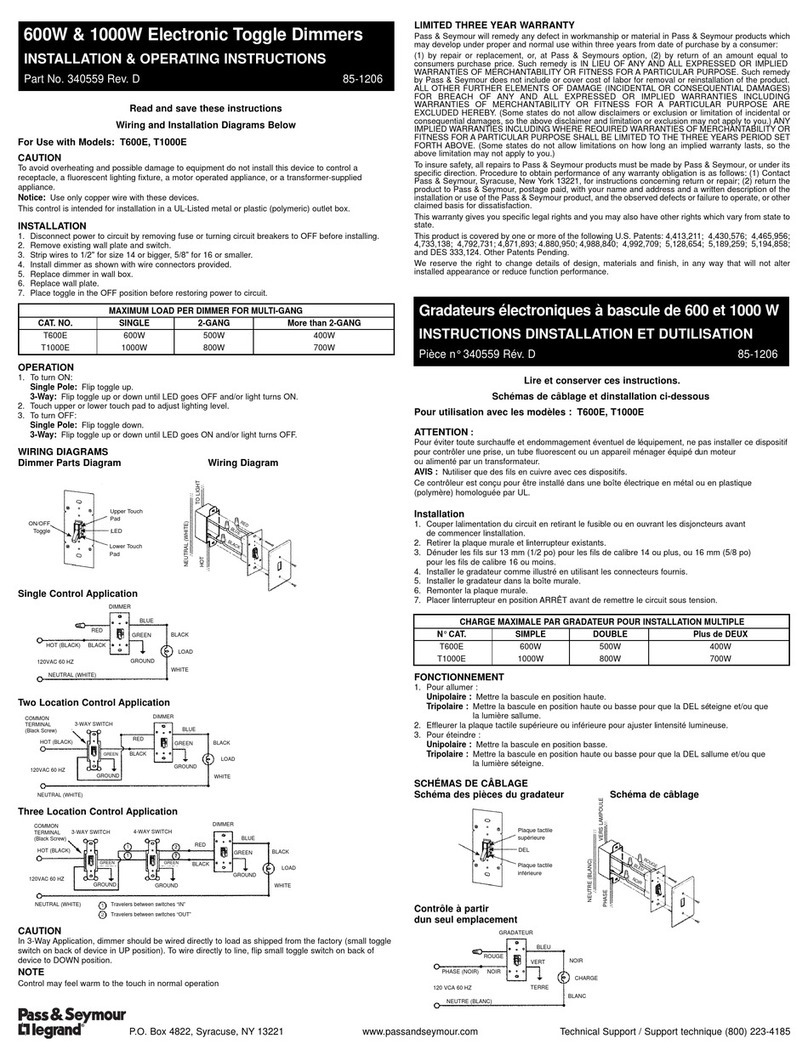
LEGRAND Pass & Seymour T600E Installation & operating instructions
Acclaim Lighting
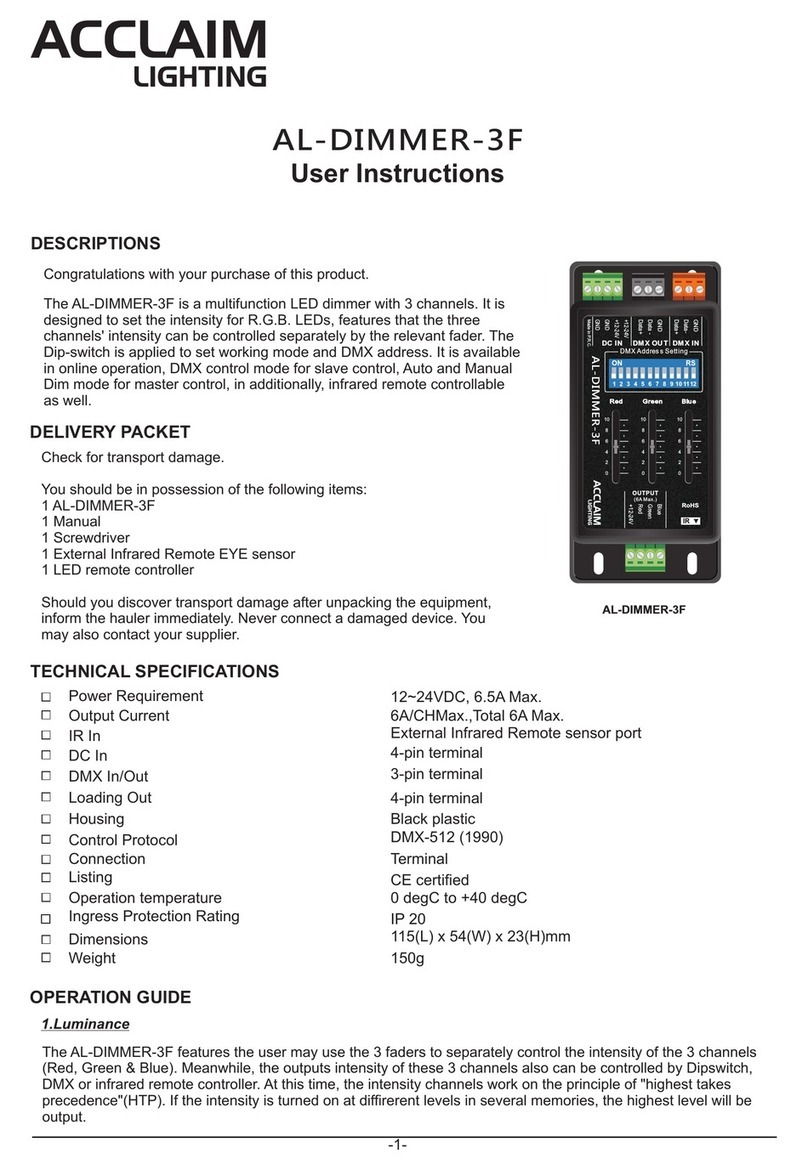
Acclaim Lighting AL-DIMMER-3F User instructions

AMX
AMX ALD-D48 Dimension Guide
Emos
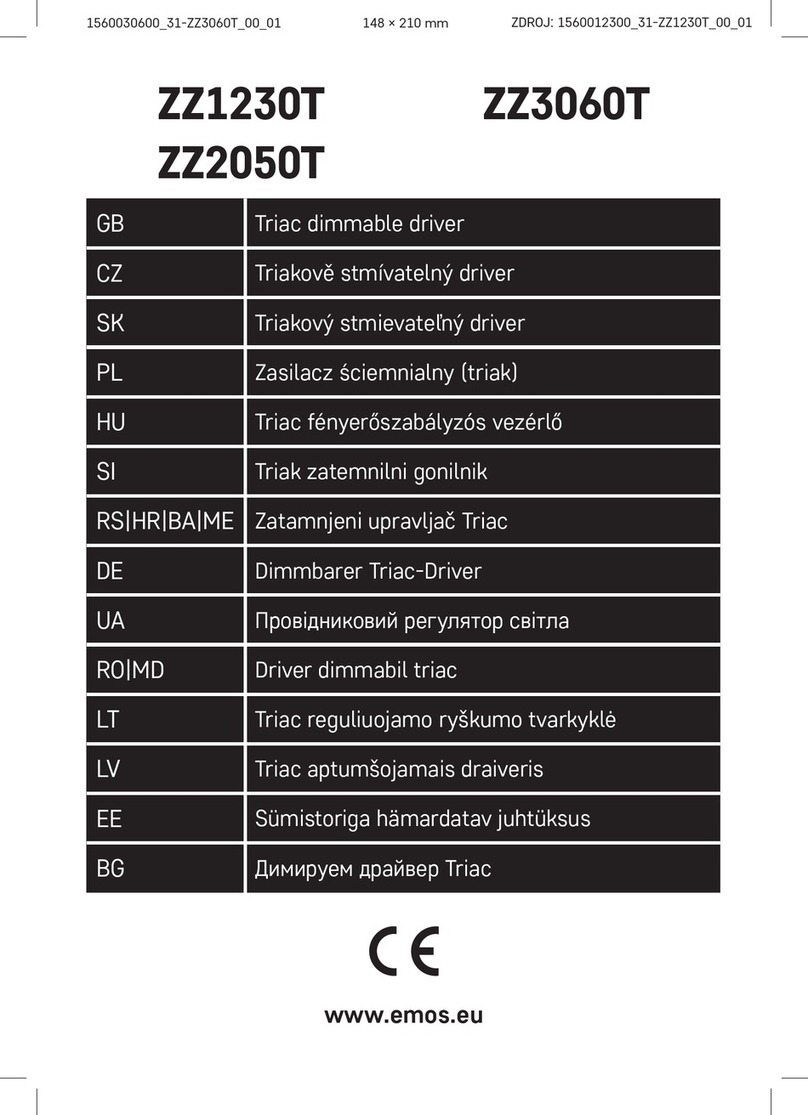
Emos Triak ZZ1230T manual
