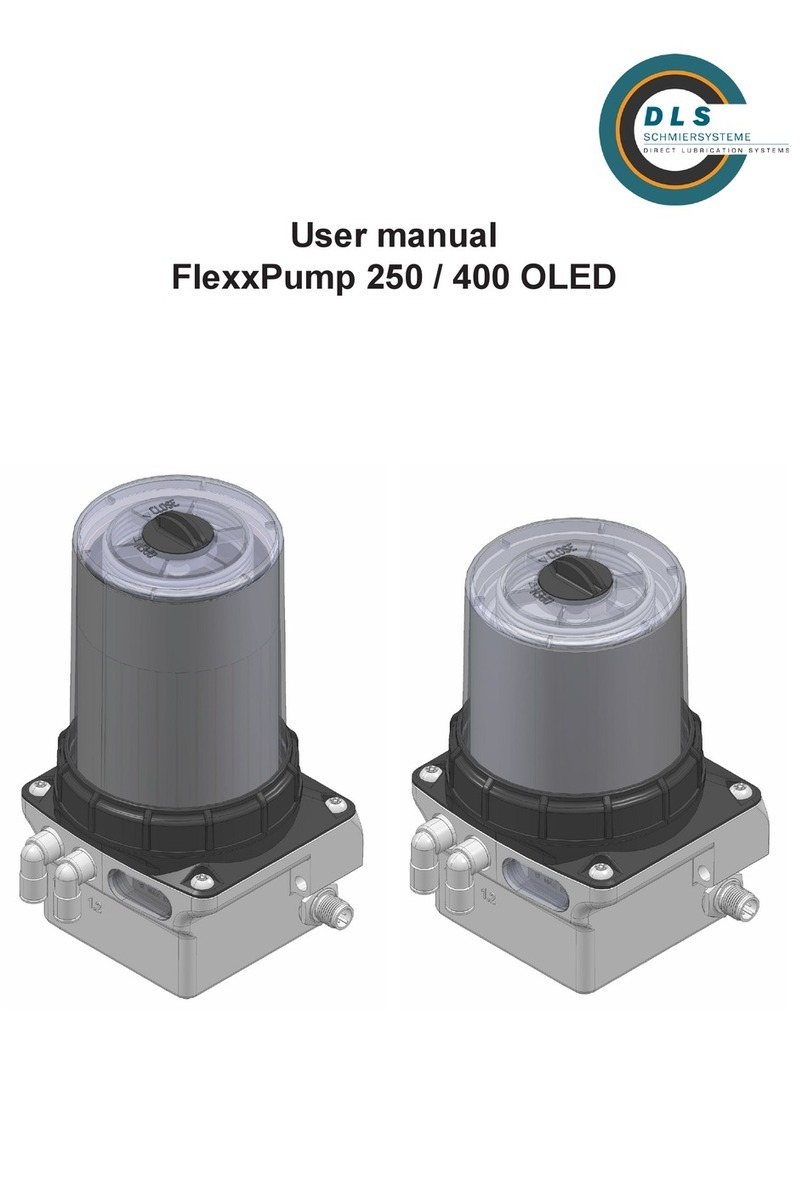
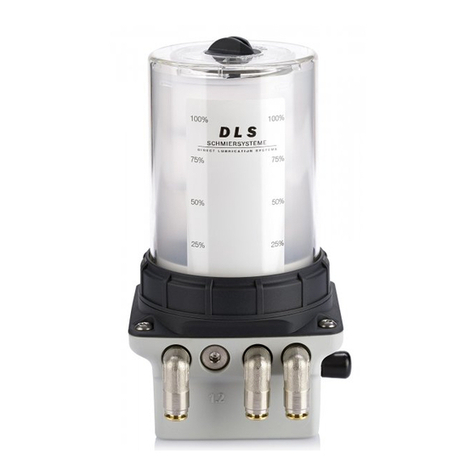
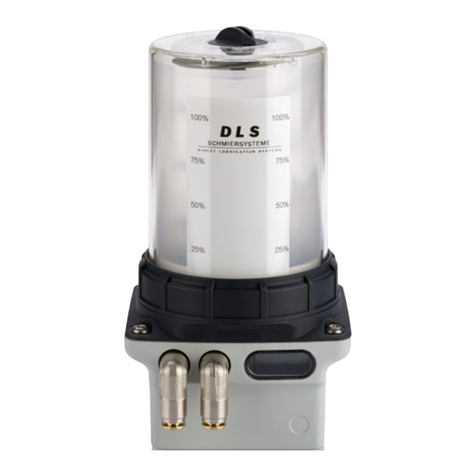
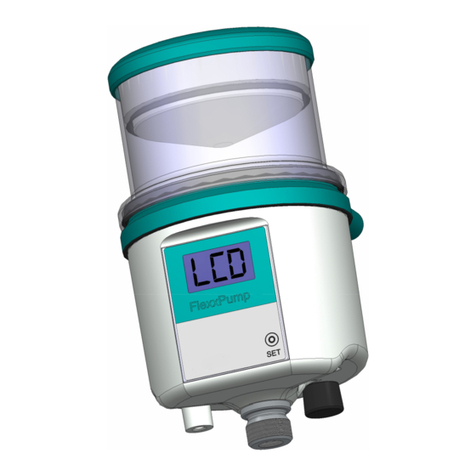
DLS FlexxPump 250 User manual

User Manual
FlexxPump 250/400 Power Supply (24V DC)
time-controlled

revision: 1
FlexxPump 250/400 (24V); time-controlled
User Manual
02
EN-
I. Revision history & Imprint
I.I Revision history
The present user manual is the original user manual.
This user manual is only valid for
Product:
Product designation: FlexxPump 250/400 Power Supply
Product revision: ---
User manual:
date of creation: 09.2020
revision of the user manual: 1
This document is protected by copyright.
All rights for layout, content, texts and corporate design are reserved by
DLS Schmiersysteme GmbH, © 2019.
All rights, including those of photomechanical reproduction, duplication and distribution
by means of special processes (e.g. data processing, data carriers and data networks),
even in part and/or in extracts, are reserved by DLS Schmiersysteme GmbH.
The content and technical specications are subject to change without notice.
I.II Imprint of the manufacturer, distribution and service
Adress:
DLS Schmiersysteme GmbH
Gewerbering 5
D-82140 Olching
Tel: +49 - (0)8142 - 650 69-0
Fax: +49 - (0)8142 - 650 69-29
Internet: www.DLS-Schmiersysteme.de
Personally liable company: DLS Schmiersysteme GmbH
Registered ofce of the company:
Olching
Handelsregister München
HRB 156604
USt.-IdNr.: DE128578324
Managing director: Reiner Hochholzer
Helmut Feicht

revision: 1
FlexxPump 250/400 (24V); time-controlled
User Manual
03
EN-
I. Revision history & Imprint 02
I.I Revision history 02
I.II Imprint of the manufacturer, distribution and service 02
I.III Table of contents 03
1. General information about this manual 06
1.1 Signal words 06
1.2 Warning symbols 07
1.3 Structure of the safety instructions 07
1.4 Symbols for information 07
2. Safety 08
2.1 EC/EU Directive 08
2.2 Hazards 08
2.3 Staff 08
2.4 Reasonably predictable misuse 08
2.5 Usage for the intended purpose 09
2.6 Warranty and Liability 09
2.7 General safety instructions 10
3. Description of function 11
3.1 General information 11
3.2 Nameplate and designation 12
3.3 Scope of delivery 12
3.4 Technical data 13
4. Transport and storage 14
4.1 Packaging 14
4.2 Transport 14
4.3 Storage 14
5. Mounting 15
5.1 Preparations 15
5.2 Assembly 15
5.3 Commissioning 18
6. Operation and settings 19
6.1 General information 19
6.2 Factory settings 21
6.2.1 Default settings Hour-Mode -h- 21
6.2.2 Default settings Empty-Time-Mode Et 22
I.III Table of contents
Chapter Content Page

revision: 1
FlexxPump 250/400 (24V); time-controlled
User Manual
04
EN-
6.3 Menu and LCD messages 23
6.3.1 LCD 26
6.3.2 Actions with the activation and programming key 29
6.3.3 Switching on and off 31
6.3.4 INF-Menu Hour-Mode -h- 32
6.3.5 INF-Menu operating mode Empty-Time-Mode Et 33
6.3.6 SET-Menu 34
6.3.7 RUN-Menu 36
6.3.8 PRO-Menu operating mode Hour-Mode -h- 37
6.3.9 PRO-Menu operating mode Empty-Time-Mode Et 40
6.3.10 FIL-Menu 43
6.4 Error codes 45
7. Input and output signals 46
7.1 Pin assignment - Time control 46
7.2 Output signals and LCD messages - Time control 46
7.3 Output signals at PIN 4 - Time control 47
8. Maintenance and disposal 49
8.1 Maintenance schedule 49
8.1.1 Visual check 49
8.1.2 Cleaning 50
8.1.3 Recommissioning after maintenance 50
8.2 Cartridge change 51
8.3 Disposal 55
9. Released accessories 56
9.1 Lubricants 58
9.2 Tube length 58
10. Appendix 59
10.1 Dimension sheet and installation dimension 59
10.2 EC/EU Declaration of conformity 60
Chapter Content Page

revision: 1
FlexxPump 250/400 (24V); time-controlled
User Manual
05
EN-
1. General information about this manual
This user manual contains all necessary information to use FlexxPump 250/400 in
the power supply version safely and as intended. In the event that supplementary
sheets are attached to these instructions, the information and data contained in the
supplementary sheets are valid and replace the corresponding information in this user
manual. Any contradictory information contained in this user manual thus becomes
invalid.
If you have any questions regarding special applications, please contact
DLS Schmiersysteme GmbH (chapter I.II).
The actual and factual operator must ensure and guarantee that these instructions,
including any supplementary sheets, have been read and understood by all persons
responsible for the installation, operation or maintenance of the FlexxPump 250/400.
Therefore, keep these instructions in a suitable place, ideally in an easily accessible
place, in the surrounding area of the FlexxPump 250/400.
Inform your colleagues who work in the local area of the machine about safety
instructions so that nobody gets hurt.
This manual was written in German, all other language versions are translations of this
manual.
1.1 Signal words
The following signal words are used in this manual to draw your attention to possible
dangers, prohibitions and other important information:
DANGER This signal word points you to an immediate and threatening risk of
serious injury or death.
WARNING This signal word indicates a potentially imminent danger which can
result in serious injury or even death.
CAUTION This signal word indicates a potentially imminent danger that can
result in minor to severe injuries.
NOTICE This signal word indicates a potentially imminent danger which can
result in damage to property.
INFORMATION
This signal word refers to practical application tips or particularly
important information when using the FlexxPump 250/400.

revision: 1
FlexxPump 250/400 (24V); time-controlled
User Manual
06
EN-
General
warning sign
Electricity
hazard
Flammable
material
1.2 Warning symbols
The following warning symbols are used in this user manual to alert you to hazards,
prohibitions and important information:
1.3 Structure of the safety instructions
The safety instructions in this user manual are structured according to the following
system:
CAUTION
The text explains the consequences of disregarding the
reference.
§The text shows what to do as an instruction.
1.4 Symbols for information
The following information symbols are used in the text and instructions in this manual:
Requests you to take action
ÜShows the consequences of an action
Additional information about the action

revision: 1
FlexxPump 250/400 (24V); time-controlled
User Manual
07
EN-
2. Safety
All persons working with the FlexxPump 250/400 must follow these operating
instructions, in particular the safety instructions and the rules and regulations applicable
at the place of use. Generally applicable legal regulations and other rules as well as
the relevant rules and regulations for accident prevention (e.g. Personal Protective
Equipment (PPE)) and environmental protection must be observed.
2.1 EC/EU Directive
Within the scope of the EC/EU Directive, (re)commissioning of a machine on which
the FlexxPump 250/400 has been installed and/or tted is prohibited until it has been
clearly established that the machine complies with the provisions of the applicable
Directive.
An EC/EU declaration of conformity for the FlexxPump 250/400 can be found in the
appendix (chapter 11.2).
2.2 Hazards
In order to avoid danger to the user or damage to the machine on which the
FlexxPump 250/400 is used, the FlexxPump 250/400 may only be used for its intended
purpose (chapter 2.5) and in a technically safe condition.
Always inform yourself about the general safety instructions (chapter 2.7) before
starting to work.
2.3 Staff
Only qualied staff who has read and understood this manual may work with the
FlexxPump 250/400. Local and/or company regulations apply accordingly.
2.4 Reasonably predictable misuse
Any use of the FlexxPump 250/400 which exceeds the maximum permissible technical
data is generally considered to be improper and therefore prohibited.

revision: 1
FlexxPump 250/400 (24V); time-controlled
User Manual
08
EN-
2.5 Usage for the intended purpose
The following points must be observed for the intended purpose of using the
FlexxPump 250/400:
+ The FlexxPump 250/400 is exclusively approved for industrial use.
+ The FlexxPump 250/400 may be used exclusively in accordance with the
technical data (chapter 3.4).
+ Unauthorized structural alterations to the FlexxPump 250/400 are not permitted.
+ Read the user manual and act accordingly.
+ During operation of the FlexxPump 250/400, a visual inspection of the
FlexxPump 400/200 as well as of the lubrication point must be carried out
regularly. Any anomalies must be eliminated immediately and the cause rectied.
+ Relling the cartridge is not permitted.
+ The FlexxPump 250/400 may not be opened or disassembled.
+ Only lubricants approved by the manufacturer may be used.
+ Relevant regulations and rules on work safety, accident prevention and
environmental protection must be observed.
+ Work and activities with and on the FlexxPump 250/400 are only permitted with
appropriate authorisation (chapter 2.3).
All other uses than the aforementioned intended usage or the disregard of one of the
above points shall be deemed improper usage. In this case no liability and/or warranty
is assumed.
2.6 Warranty and Liability
If the following items are disregarded, all warranty and liability claims for personal injury
and/or damage to property are excluded:
+ Non-observance of the instructions for transport and storage;
+ misuse;
+ Improper or unperformed maintenance or repair work;
+ Improper assembly / disassembly or improper operation;
+ Operation of the FlexxPump 250/400 with defective protective devices and
devices;
+ Operation of the FlexxPump 250/400 without lubricant;
+ Operation of the FlexxPump 250/400 with non-approved lubricant;
+ Operation of heavily contaminated FlexxPump 250/400;
+ Modications or alterations which may be carried out without the written permissi
on of DLS Schmiersysteme GmbH have taken place;
+ Opening and/or partial or complete disassembly of the FlexxPump 250/400.

revision: 1
FlexxPump 250/400 (24V); time-controlled
User Manual
09
EN-
2.7 General safety instructions
The following safety instructions are given for the FlexxPump 250/400:
DANGER
Damaged or incorrect electrical connections or unauthorized
live components lead to serious injuries or even death.
§ Have all electrical connection work carried out by qualied
personnel only.
§Replace damaged cables or plugs immediately.
NOTICE
Loose or overloaded screw connections can cause damage to
the FlexxPump 250/400.
§Mount and check all screw connections with the permissible
torques specied for this purpose. Use a calibrated torque
wrench.
WARNING
Lubricants are ammable.
§ In case of re, do not use a water jet to extinguish the re.
§ In case of re, use only suitable extinguishing agents such as
powder, foam and carbon dioxide.
§Observe the relevant safety instructions of the lubricant manu-
facturer on the safety data sheet of the lubricant used.
CAUTION
Lubricants can cause skin irritations.
§Avoid direct skin contact.
NOTICE
Lubricants can contaminate soil and water.
§Use and dispose lubricants properly.

revision: 1
FlexxPump 250/400 (24V); time-controlled
User Manual
10
EN-
3. Description of function
3.1 General information
Nr. Description
0 FlexxPump 250/400
1 LCD
2 Action area (for actions with the activation and programming key)
3 Activation and programming key
4 Lubricant outlet, outlets (different versions possible)
5 Retaining ring
6 Housing
7 M12x1 electrical interface
8 Nameplate with designation, CE mark and serial number
9 Through hole for assembly
10 Lubricant inlet with thread for cartridge
10
9
Fig. 1: Overview FlexxPump 250/400
2
1
4
5
3
0
The FlexxPump 250/400 is designed as an extremely compact double piston pump
for autonomous operation with grease as the lubricant. The two pistons run force-
controlled and counter-rotating. The FlexxPump 250/400 is available as a version with
one lubricant outlet or as a version with two lubricant outlets. The outlets are secured
by an integrated non-return valve. Approx. 0.15 cm³ of lubricant is pumped during each
dispensing operation; multiple dispensers can be set one after the other.
The LCD on the front panel displays the various operating states; further information
(empty cartridge, error) can be read.
The present FlexxPump 250/400 as power supply version has an electrical interface.
The supplied activation and programming key can be used to adjust the operation
mode and the quantity of lubricant pumped per time in order to supply the lubrication
point with the ideal quantity of lubricant.
7
6
8

revision: 1
FlexxPump 250/400 (24V); time-controlled
User Manual
11
EN-
3.2 Nameplate and designation
The nameplate of the FlexxPump 250/400 is visibly attached to the side of the pump
itself. There the CE mark and the serial number of the FlexxPump 250/400 are visible.
Refer to chapter 3, Fig. 1 for the location of the nameplate and serial number.
3.3 Scope of delivery
The FlexxPump 250/400 is available in several different versions. They differ in the
design (housing for 250ml cartridge or housing for 400ml cartridge), the number and
type of lubricant outlets and the scope of accessories supplied.

revision: 1
FlexxPump 250/400 (24V); time-controlled
User Manual
12
EN-
3.4 Technical data
Housing
Dimensions without cartridge 111 x 56,5 x 108 (W x H x D)
mm
Dimensions with housing for 250ml cartridge 111 x 165 x 108 (W x H x D)
Dimensions with housing for 400ml cartridge 111 x 198,5 x 108 (W x H x D)
Weight (without cartridge) appx. 1450 g
Mounting options holes for screw M6
Mounting position grease version: any position;
oil version: vertical
Material Zinc die-cast / PA 6.6 GF30 / POM
Material outlet Nickel-plated brass
Operating temperature -10 ... +60° °C
Lubricant and hydraulics
Cartridge volume 250 / 400 ml
Lubricant characteristics grease until NLGI class 2
Number of outlets 1 / 2
Hydraulic connection via PA-Tube
Number of lubrication points per outlet up to 10 in conjunction with aluminum
progressive distributor**
max. pressure 70 (-10%/+15%) bar
Steady state pressure 70 bar
Grease delivery per stroke 0,15 cm³
Electrics
Display LCD
Operating voltage 24 (20V...28V) V
Protection 0,75 (slow blow) A
Protection class IP 54
Current consumption Imax < 0,3 Iquiescent < 0,025 A
Further information on electrics can be found in Chap. 7!
* The stated value depends on the specic application and may vary considerably in individual
cases depending on the lubricant used and other conditions.

revision: 1
FlexxPump 250/400 (24V); time-controlled
User Manual
13
EN-
4. Transport and storage
4.1 Packaging
The FlexxPump 250/400 is delivered in an outer packaging (cardboard box) and -
depending on the scope of delivery with a lubricant cartridge and other accessories - in
the same package. To protect them from moisture and dirt, they are also packed in PE
lms.
Dispose the packaging materials at the designated disposal points in compliance with
the relevant national and company regulations.
After receiving the FlexxPump 250/400, check the delivery note for completeness and
correctness.
Any missing parts or damage must be reported immediately to the forwarding agent,
the insurance company or DLS Schmiersysteme GmbH in writing.
4.2 Transport
NOTICE
Hard shocks, e.g. due to falling or setting down too hard, can
damage the FlexxPump 250/400.
§Do not throw the FlexxPump 250/400.
Store the FlexxPump 250/400 in its original packaging in a vertical position in a dry,
frost-free environment at an ambient temperature of +5°C to +30°C. The maximum
storage time in unopened condition is 2 years.
The so-called "First-In-First-Out-Principle" (FiFo) is recommended for storage logistics.
4.3 Storage

revision: 1
FlexxPump 250/400 (24V); time-controlled
User Manual
14
EN-
5. Mounting
5.1 Preparations
Before starting to work, inform yourself in detail about the FlexxPump 250/400 using
this user manual; in particular about the general safety instructions (section 2.7).
Prepare the installation site carefully.
NOTICE
Pressurised air can damage the seals of the
FlexxPump 250/400 and can transport dirt and foreign matter
into the FlexxPump 250/400 or the lubricant.
§Do not use pressurised air.
§Make sure that there is no coarse dirt in the mounting area.
2. Remove the housing from the power unit
of the FlexxPump 250/400.
Separate the housing from the
power unit by turning the retaining ring
counterclockwise.
Make sure that no dirt, water or foreign
bodies enters the lubricant inlet.
5.2 Assembly
1. Condition as delivered
The FlexxPump 250/400 is delivered
in a cardboard box. Depending on the
version ordered, further accessories such
as a lubricant cartridge or additional tube
connection parts are included.

revision: 1
FlexxPump 250/400 (24V); time-controlled
User Manual
15
EN-
3. Mounting the lubricant cartridge
Place the full lubricant cartridge on the
FlexxPump 250/400.
Turn the lubricant cartridge clockwise onto
the FlexxPump 250/400.
The end position is reached after two
full rotations when the label of the lubricant
cartridge is aligned with the front label of the
FlexxPump 250/400.
4. Assembling the housing on the power unit
of the FlexxPump 250/400.
Place the dismantled housing on the
FlexxPump 250/400 and press it onto the
power unit.
Fasten the housing to the power unit by
turning the retaining ring clockwise.
The retaining ring must snap into place
when turning and be completely tightened.

revision: 1
FlexxPump 250/400 (24V); time-controlled
User Manual
16
EN-
5. Remove the protective caps on the side
of the FlexxPump 250/400.
Remove the black protective cap from the
side of the electrical M12x1 interface.
6. Connect the electrical interface
Connect the FlexxPump 250/400 to
the external power supply or controller
via the M12x1 interface on the side of
the FlexxPump 250/400 using a suitable
connecting cable.
Depending on the application, both
connection cables with straight or angled
sockets can be used.
Please refer to chapter 7.1 for the
condition of the connection cable.
DANGER
Defective or faulty electrical connections or unauthorized live
components can lead to serious injuries or even death.
§ Have all electrical connection work carried out by qualied
personnel only.
§Replace damaged cables or plugs immediately.
§Before carrying out any electrical installation work, observe the
ve safety rules of electrical engineering:
- Unlocking
- Secure against unintentional restarting.
- Check that there is no voltage.
- Ground and short-circuit.
- Cover adjacent live parts.

revision: 1
FlexxPump 250/400 (24V); time-controlled
User Manual
17
EN-
5.3 Commissioning
Mount the FlexxPump 250/400 carefully according to the steps described in chapter
5.2.
Depending on the scope of delivery, you must also carry out the following additional
measures for the rst-time commissioning:
1. Mechanical fastening
Fix the FlexxPump 250/400 mechanically. Pay particular attention to the maximum
tightening torques permissible for the M5 female threads!
2. Electrical connection
Connect the FlexxPump 250/400 to the external power supply or external controller
(PLC) via the M12x1 interface using a suitable cable.
3. Check the assembly
Make sure that the FlexxPump 250/400 is properly and completely assembled. In
particular, the battery must be inserted and a lubricant cartridge must be tted.
4. Power on
If you want to put the FlexxPump 250/400 into operation, switch on the
FlexxPump 250/400. Only if you switch the FlexxPump 250/400 on, it delivers lubricant
to the lubrication point according to the settings. The detailed description for powering
on can be found in chapter 6.3.3.
5. Execute FIL function
Execute the FIL function. The detailed description can be found in chapter 6.3.10.
FlexxPump 250/400 performs a certain number of strokes and transports the lubricant
from the cartridge to the outlet.
6. Hydraulic connection
Connect the consumer hydraulically to the FlexxPump 250/400. If you connect tubes to
the FlexxPump 250/400, make sure that the tubes and connectors are installed tightly,
cleanly and correctly.
Ideally, use tubes prefilled with the appropriate lubricant!
7. Check the settings on FlexxPump 250/400
Check the factory settings of FlexxPump 250/400 with the required values for the
lubrication point and adjust them if necessary. Changes at the FlexxPump 250/400
must be made in the SET-Menu, chapter 6.3.6 and in the PRO-Menu, chapter 6.3.8,
6.3.9.

revision: 1
FlexxPump 250/400 (24V); time-controlled
User Manual
18
EN-
6. Operation and settings
6.1 General information
What you should know about operating and setting the FlexxPump 250/400:
DThe FlexxPump 250/400 is suitable as a multi-point lubricator for one
or two lubrication points. However, depending on the specific application,
FlexxPump 250/400 can also supply a limited number of lubrication points reliably
and cleanly with lubricant. Accessories from the manufacturer (e. g. distributors or
progressive distributors) can be connected to the FlexxPump 250/400. If
necessary, changes must be made to the FlexxPump 250/400 settings to ensure
safe and reliable operation.
DThe FlexxPump 250/400 is a cycle controlled lubricator , which works time-based
via the integrated microelectronics and is connected to a 24V DC power supply.
The FlexxPump 250/400 cyclically delivers a dened quantity of lubricant from
the cartridge to the outlet. Two operation modes can be selected. The
Hour-Mode -h- allows setting the number of cycles (c) within a dispensing time
(h) in hours. The cycles (c) are evenly distributed over the dispensing time.
Dispensing times (h) between 1...240 hour(s) and cycles (c) between 1...30 can
be set. The Empty-Time-Mode Et allows the emptying time of the cartridge to be
set in months. Emptying times between 1...36 month(s) and cycles (c) between
1... 30 can be set.
DA dispensing cycle consists of at least one (1) donation (stroke) and can
consist of a maximum of thirty (30) donations (strokes). Up to thirty (30) donations
(strokes) per outlet are made in direct succession. After the end of the lubrication
cycle, the FlexxPump 250/400 rests until the set break time time h has elapsed
and automatically carries out the next lubrication cycle after the set break time
time h has elapsed.
DThe disposable interchangeable cartridge with 250ml or 400ml lubricant
guarantees a controlled and constant quality of the lubricant and is lled without
air bubble inclusions. The FlexxPump 250/400 allows a high supply security of the
lubrication point and prevents failures. The FlexxPump 250/400 in its present
version is designed exclusively for the lubricant grease.
DThe FlexxPump 250/400 cannot be used in the present version without a
lubricant cartridge. Depending on the version ordered the cartridge can already
be included in the scope of delivery and may already be connected and installed in
the FlexxPump 250/400.
DThe respective conditiones of the FlexxPump 250/400 can be seen in the LCD,
which additionally enables the optical recognition of the condition by means of
coloured LEDs.

revision: 1
FlexxPump 250/400 (24V); time-controlled
User Manual
19
EN-
DIf you have any questions about your application and the correct settings for
FlexxPump 250/400, please contact the manufacturer (chapter I.II).
If you have purchased a FlexxPump 400, you can use the 250ml and 400ml
cartridge sizes. If you have purchased a FlexxPump 200, you can only use the 250ml
cartridge size.

revision: 1
FlexxPump 250/400 (24V); time-controlled
User Manual
20
EN-
Pause time h = 3 The break time time is 3 hours.
Number of cycles c = 1 The number of cycles is one (1) stroke
after the break time time.
The default settings in the Hour-Mode when using a FlexxPump 250/400 with one (1)
lubricant outlet result in an emptying time (service life) of 333 days (= 11 months) for
a full 400ml lubricant cartridge, provided that the FlexxPump 250/400 is permanently
switched on and no special dispensations have been made. Within approx. 3 hours, the
FlexxPump 250/400 will deliver one donation per stroke (0.15 cm³).
If you use the FlexxPump 250/400 with one (1) lubricant outlet, a dispensing stroke
will be delivered from one outlet at the end of the break time time. If you are using the
FlexxPump 250/400 with two (2) lubricant outlets, one delivery of one stroke per outlet
will be delivered at the end of the break time time. The break time time is doubled.
Verify that the default settings are appropriate for your application and that the
lubrication point is supplied with the correct amount of lubricant per time unit.
If this is the case, you can operate the FlexxPump 250/400 with the default settings in
the Hour-Mode -h-.
If this is not the case, change the values for the dispensing time h and number of
cycles c accordingly; see chapter 6.3.9 for an explanation of how to make these
changes.
To use FlexxPump 250/400, it must first be properly mounted and installed and then
switched on. Installation is very simple and described in detail in chapter 5.2; switching
on is described in chapter 6.3.3.
If you order a special version of FlexxPump 250/400 from the factory, the information
contained in the supplement is authoritative for you!
The FlexxPump 250/400 is always delivered ex works with the following settings:
Operation mode Hour-Mode -h-
State OFF FlexxPump 250/400 is switched off
The factory settings foresee using the FlexxPump 250/400 in the Hour-Mode
-h-. If you want to operate the FlexxPump 250/400 in Empty-Time-Mode Et or
Pulse-Control-Mode PUL, you have to make changes in the SET-Menu of the
FlexxPump 250/400, chapter 6.3.6.
6.2 Factory settings
6.2.1 Default settings Hour-Mode -h-
Other manuals for FlexxPump 250
2
This manual suits for next models
1
Table of contents
Other DLS Water Pump manuals
Popular Water Pump manuals by other brands

CET
CET PFP-9HPHND-M Instruction handbook

Blue-White
Blue-White Flex-Pro Pro M Series quick start guide

Chandler Engineering
Chandler Engineering Ametek Quizix 5000 Series user manual

Pacer
Pacer S Series Assembly instructions

Becker
Becker U 5.200 operating instructions

Stenner Pumps
Stenner Pumps SVP4L1 Installation and maintenance manual