Repair
[2] LUBRICATION
Apply Makita grease N. No.2 to the following portion to protect parts and product from unusual abrasion.
1) Gear room (5g: Refer to Fig. 6.)
2) Crank portion of Blade complete (2g: Refer to Fig. 8)
3) Contact portion of Spindle bottom end and Bush (a little: Refer to Fig. 8)
[3] DISASSEMBLY/ASSEMBLY
[3] -1. Blade complete and Front handle
[1] NECESSARY REPAIRING TOOLS
CAUTION: 1) Unplug the machine for safety before repair/ maintenance !
2) Do not touch the shear blades of Blade complete !
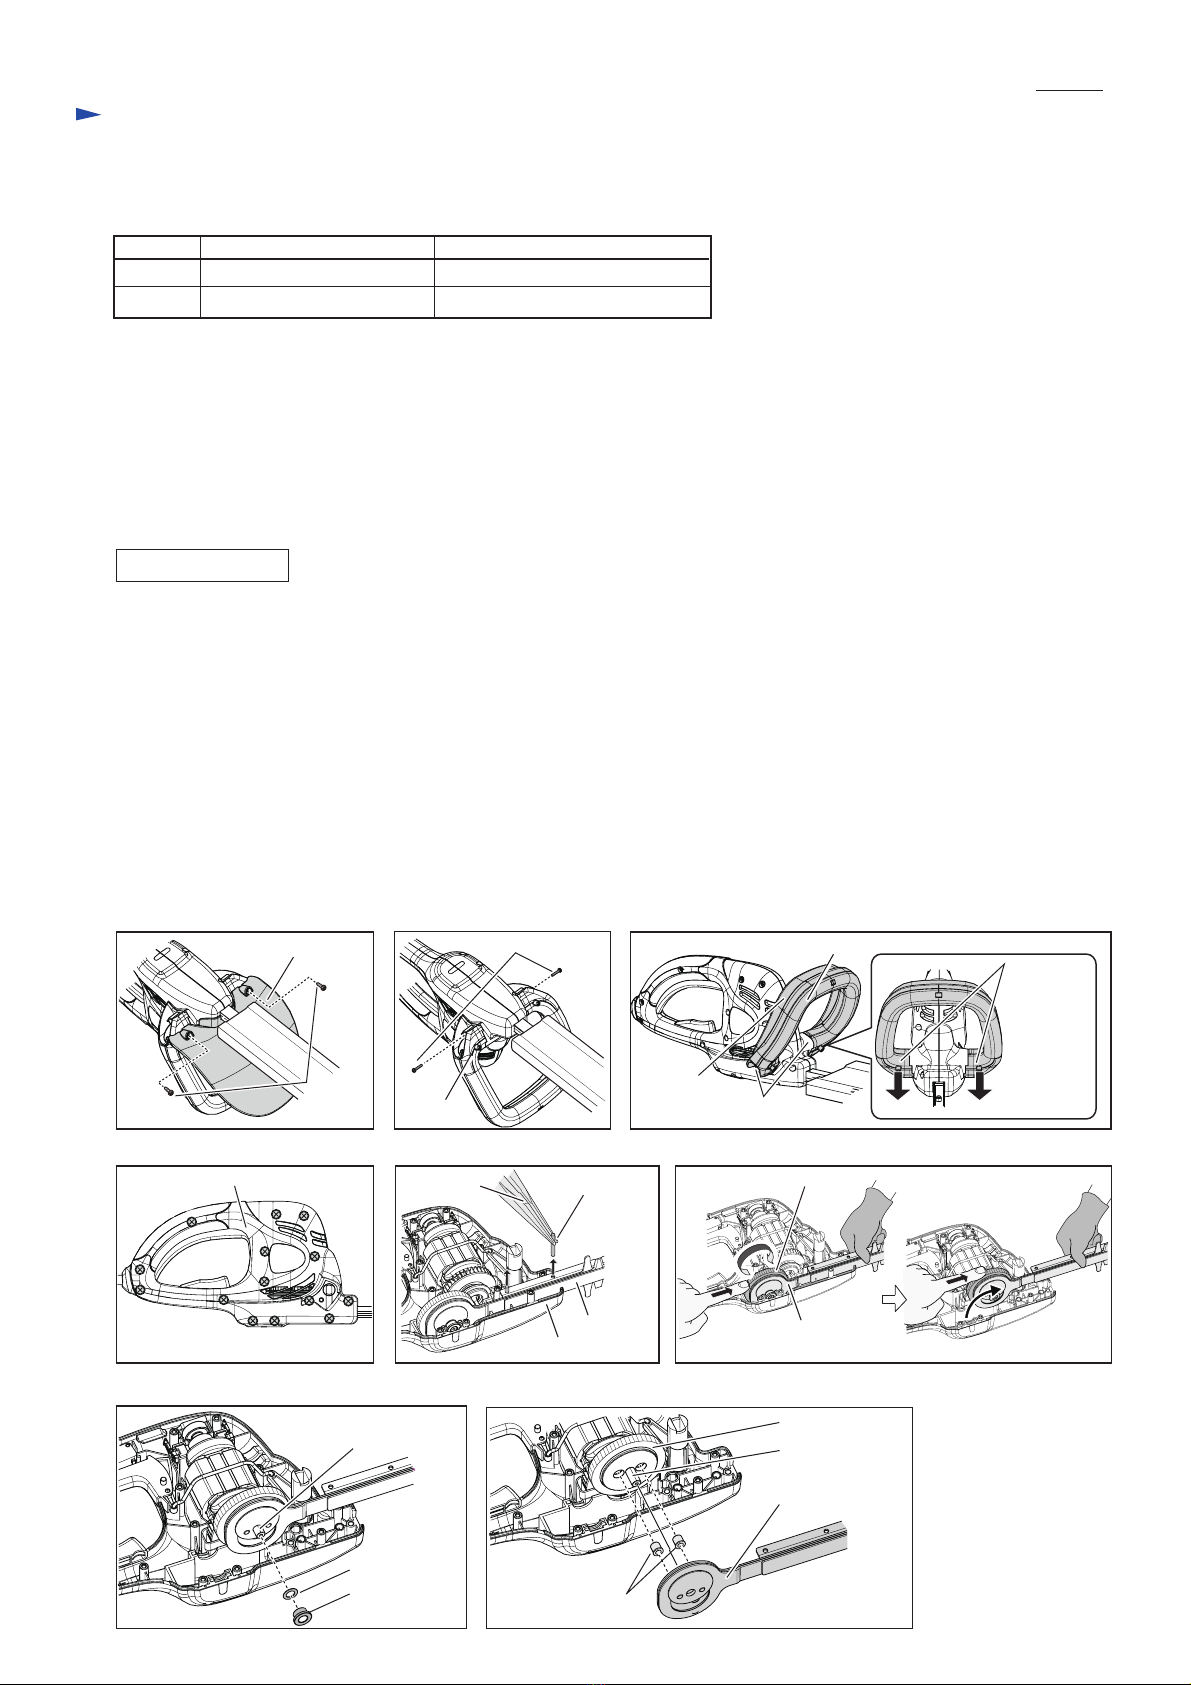
1) Turn the machine upside down and keep it in a horizontal position using Front handle. (Fig. 1)
2) Remove two Screws and Protecting board. (Fig. 1)
3) Remove two Screws on Front handle (Fig. 2) and then push both ends of Front handle with Switch lever B. (Fig. 3)
Front handle with Switch lever B can be separated from L/R housing set.
4) Remove fourteen Screws and Housing R of L/R housing set. (Fig. 4)
5) Pick off two Pins 4 that secure Blade complete to L/R housing set. (Fig. 5)
6) Turn Gear to the direction of Blade top, and Gear itself and Blade crank portion will rise up from the original position.
(Fig. 6)
Note: 1) The shear blades of Blade complete moves when the above step is taken. Therefore, pay attention not to pinch
your finger and a part of clothes.
2) When touching the portion close to shear blades, wear a glove to protect your hand.
7) Remove Bush and Flat washer 8 from Spindle. (Fig. 7)
Blade complete and two Spindle sleeves can be removed from Spindle and Gear. (Fig. 8)
DISASSEMBLING
Fig. 1
Fig. 4 Fig. 5 Fig. 6
Fig. 2 Fig. 3
Fig. 7 Fig. 8
Code No. Description
1R034 Bearing setting plate 12.2 Removing Gear
1R269 Bearing extractor Removing Bearing box complete
Use for
P 2/ 5
Protecting board
Pin 4 Gear
Tweezers
Front handle
Front
handle
Housing R
Bush
Flat washer 8
Spindle Spindle
Screws
(2pcs.)
Screws (2pcs.)
Both ends
of Front
handle
portion
Remove the fittings.
Switch
lever B
Housing L
Blade
complete
Blade
complete
Blade complete
Spindle sleeve
(2pcs.)
Gear


 Guide")


