DOREGRILL NEOGRILL Series User manual

ROTISSERIE OVEN USER MANUAL, NEOGRILL series
Revision from October 2012
1
USER MANUAL
PROFESSIONAL CRADLE-ROAST
ROTISSERIE OVENS
NEOGRILL series, featuring:
NEOGRILL N1
NEOGRILL N2

ROTISSERIE OVEN USER MANUAL, NEOGRILL series
Revision from October 2012
2
Dear customer,
You have recently purchased a DOREGRILL rotisserie oven.
Thank you for choosing our equipment. We have been working hard to perfect the reliability, convenience
and presentation of our products for over sixty years.
DOREGRILL is consistently at the cutting edge of our field. We pour all our skills and experience into our
ovens to ensure that we meet your expectations by striving to combine comfort and safety.
In our range, you can also find a selection of display windows and cooking modules which you can use
alongside your rotisserie oven.
In order to familiarize yourself with your new product as quickly as possible and to make the most out of it,
please read this user manual carefully. It will enable you to use every function on your oven and extend the
product’s lifetime.
We are always seeking to meet your expectations in regard to our products. Our technical team is on hand
to guide you through installation and start-up, and reply to any questions and suggestions you may have.
Please feel free to contact us or visit our website: www.doregrill.com
DOREGRILL S.A.S.
12, rue du Moulin –B.P. 52 –Parc d’Activités du Moulin,
44880 SAUTRON
Tel: +33 (0)2 40 63 80 00 –Fax: +33 (0)2 40 63 82 67
e-mail: [email protected]
We are constantly improving our products and services. To achieve this, we reserve the right to modify
any technical, functional or visual characteristics relating to product development.

ROTISSERIE OVEN USER MANUAL, NEOGRILL series
Revision from October 2012
3
CONTENTS
1. General points
1.1. Labelling
1.2. The importance of the manual
1.3. Guarantee
1.4. Reserved rights
2. Technical description
2.1. General description
2.2. The control panel
2.3. Technical data
2.4. Intended use
2.5. General precautions
2.6. Electrical diagram
3. Transport and handling
3.1. Transport and delivery
3.2. Unpacking and handling
4. Installation and start-up
4.1. General instructions
4.2. Installation
4.3. Electrical connections
4.4. Cooking
5. Maintenance
5.1. Disassembly for cleaning
5.2. Reinforced component longevity
6. Tempered glass windows –main causes of breakage
6.1. Thermal shock
6.2. Impacts on the glass
6.3. Handling
7. Characteristics
8. Maintenance / Customer Service
8.1. Damage identification
8.2. Specific repairs
8.2.1. Replacing a bulb
8.2.2. Opening the technical cabinet
9. Illustrated composition table
9.1. Image 1 –NEOGRILL N1 Electrical diagram
9.2. Image 1 –NEOGRILL N2 Electrical diagram
5
5
5
6
6
6
6
7
9
9
9
9
9
9
9
9
9
10
10
11
12
12
12
13
13
13
13
15
17
17
17
17
18
20
20
20

ROTISSERIE OVEN USER MANUAL, NEOGRILL series
Revision from October 2012
4
INFORMATION FOR THE PRODUCT USER

ROTISSERIE OVEN USER MANUAL, NEOGRILL series
Revision from October 2012
5
-General points
1.1. Labelling
This piece of equipment complies with all applicable European directives. As such, the EC logo
appears on the information panel and a compliance declaration is attached to the present
document.
Manufacturer name
EC labelling
Equipment model (SERIES)
Machine serial n°
Voltage
Year of manufacture
Fig. 1 (EC labelling)
This panel is attached to the left hand side of the rotisserie oven, on the bottom of the technical
cabinet door (15).
1.1. The importance of the manual
The present set of user instructions aims to provide users of this equipment with all the
information they need to make the most out of their rotisserie oven, extend its useable life with
regular and appropriate cleaning, solve minor problems and incidents which often do not require
specialist intervention, and avoid, by following the warnings and recommendations, any risk of
injury to the users.
This manual, valid for the NEOGRILL N1 and NEOGRILL N2 models, is an integral part of our
rotisserie ovens, and must remain accessible to the operators.
The manufacturer is not responsible for any damage caused to people, animals or property
caused by misuse of the equipment or non-adherence to the rules included in the manual.

ROTISSERIE OVEN USER MANUAL, NEOGRILL series
Revision from October 2012
6
IMPORTANT: This equipment is for professional use. As such, and in order to avoid any danger, it
must only be used by qualified personnel. It must be installed in compliance with current
regulations.
1.1. Guarantee
The manufacturer guarantees that the rotisserie ovens listed have been subject to tests and trials in
our workshops.
The guarantee for these rotisserie ovens is 12 (twelve) months. Please see the Guarantee
Certificate attached to your invoice.
The use and/or replacement of components by non-original parts will void the guarantee
and release the manufacturer from all responsibility.
1.2. Reserved rights
The reserved rights concerning this “NEOGRILL series cradle rotisserie oven user manual” remain
the property of the manufacturer. No part of the manual may be reproduced or distributed without
prior written authorization by the manufacturer.
2. Technical description
2.1. General description
The rotisserie oven is generally mounted on a trolley (1) fitted with castors (4 castors, including 2
with brakes)
It comprises:
-A structure (raised base, lateral and rear cladding) made from brushed stainless steel,
-Enameled left and right interior panels,
-Stainless steel Stand Up® cradles,
-A removable cradle support to facilitate cleaning,
-On the lower part, a stainless steel fat tray fitted with a drainage tap,
-Two front and rear windows with a black print finish,
-2 water-resistant quartz lamp-projectors with a maximum power of 300 Watts set into the
ceiling and which provide powerful lighting. They are protected by tempered glass screens.
-A control panel

ROTISSERIE OVEN USER MANUAL, NEOGRILL series
Revision from October 2012
7
2.2. The control panel
2
3 4
A
B
1
The function buttons
1. Illuminated power button –press the touchscreen button for a few seconds to switch on or off
2. Illuminated “cooking” button – press the touchscreen button to start the cooking mode: timer on
3. Illuminated “maintain temperature” button (rotisserie oven maintains the temperature after cooking) –
touchscreen button
4. Illuminated motor rotation button –press the touchscreen button to start the motor
A –Temperature display. B –Time display

ROTISSERIE OVEN USER MANUAL, NEOGRILL series
Revision from October 2012
8
(+) Temperature graduation indicators (LED). Five different settings. These lights indicate the heating
level selected (“cooking” or “maintain temperature” modes)
Increase the temperature: press this button repeatedly to increase the cooking temperature (maximum:
5 LEDs)
(-) Decrease the temperature: press this button repeatedly to decrease the cooking temperature
(maximum: 1 LED)
Cooking mode
Maintain temperature mode
Important: Cooking adjustment recommendation after a 5 LED factory test
Number of LEDs
L0
L1
L2
L3
L4
L5
Approximate temperature
45° C
75° C
80° C
85° C
90° C
95° C
Time display (B)
-(+) Increase the cooking time: press this button repeatedly to increase the cooking time (max: 120 minutes)
-(-) Reduce the cooking time: press this button repeatedly to decrease the cooking time.
Number of LEDs
L0
L1
L2
L3
L4
L5
Approximate temperature
45° C
160° C
200° C
230° C
260° C
300° C

ROTISSERIE OVEN USER MANUAL, NEOGRILL series
Revision from October 2012
9
2.3. Technical data
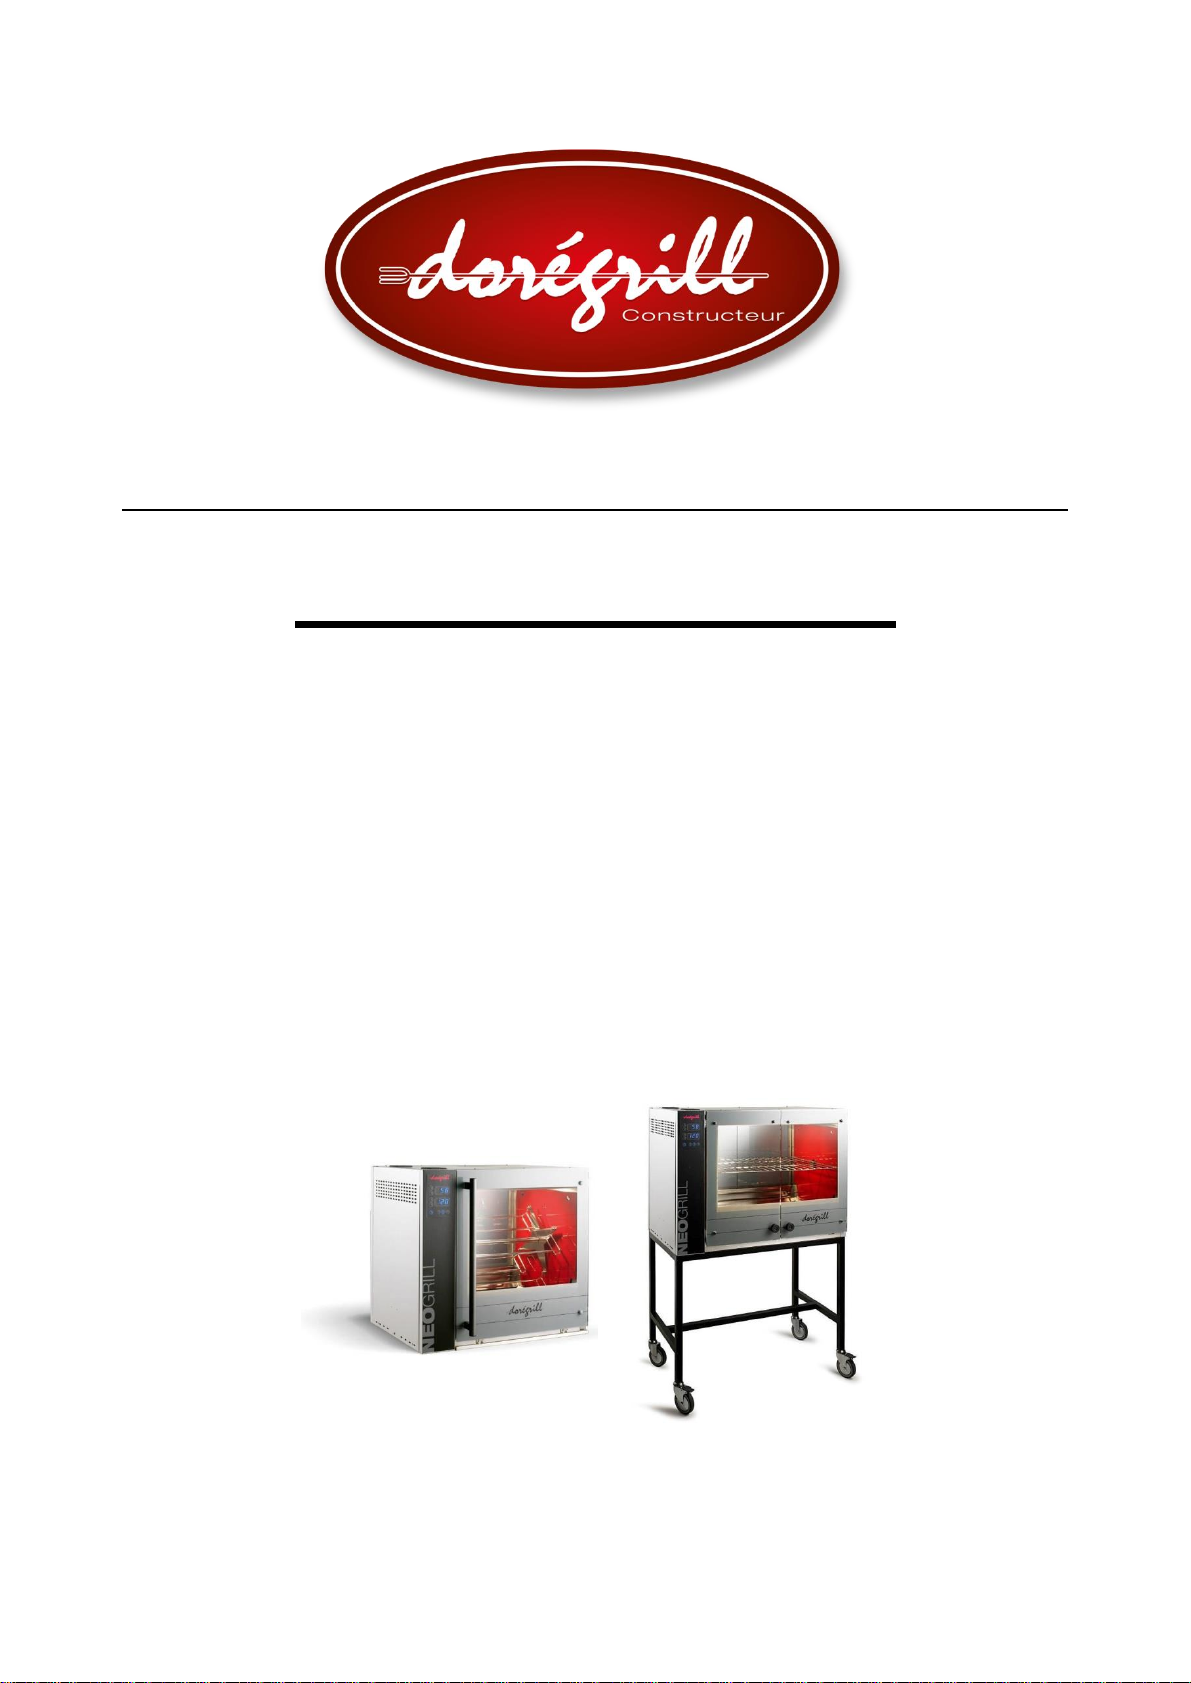
The table Tab. 2 below lists the technical data for our NEOGRILL (N1 and N2) model rotisserie
ovens.
2.4. Intended use
Our rotisserie ovens are designed to cook meat and poultry as part of the warm product offer of
shops and caterers in the food industry
2.5. General precautions
This equipment is not suitable for use by people (including children) with reduced physical,
sensory or mental capacities, or by people with insufficient knowledge or experience unless they
are supervised or instructed in equipment safety by a person responsible for their safety.
2.6. Electrical diagram
See illustrated Composition Table
3. Transport and handling
3.1. Transport and delivery
Our rotisserie ovens are calibrated, tested and checked in our workshops. They are carefully
packaged in order to guarantee that they arrive at their destination in the best possible
condition.
Once the equipment is unpacked, ensure that it has not been damaged during transport. If
this is the case, any damages must be recorded and reported to the transporter. The
reservations stipulated in the Delivery Document must be followed, within 48 hours of
delivery, by a registered letter to the transporter and the forewarned retailer.
3.2. Unpacking and handling
When unpacking your oven, do not pierce the bubble wrap packing with any object that could
damage any of the components.
The oven can be moved around flat surfaces using its castors.
If a forklift truck must be used to lift the oven, it must be passed under the roof of the oven,
once the FRONT and REAR windows have been kept open.
4. Installation and start-up
4.1. General instructions
The rotisserie oven must be installed (in terms of position and connection) by authorized
personnel who have the necessary technical and professional skill to install the oven
according to the current standards in the country of use.

ROTISSERIE OVEN USER MANUAL, NEOGRILL series
Revision from October 2012
10
4.2. Installation
Unpack the rotisserie oven, cradles and accessories.
Install the rotisserie oven at a safe distance from any combustible material (wood, plastic,
etc.). In the event that they cannot be removed, they must be protected by insulation.
Important: Leave an air gap of at least 150mm behind and to the sides of the rotisserie oven
to ensure sufficient ventilation and protection for nearby equipment and walls, as well as for
the oven’s tempered glass windows.
4.3. Electrical connection
Check that the available voltage matches the characteristics listed on the information panel
at the bottom of the left side of the oven.
The connection must be made using an earthed 400 V tri-phase plug. Check that there
are no errors in the connection (inversion of earth and neutral, for example).
Refer to the current electrical standards applicable in the country of use.
Important: The manufacturer may not be held responsible for any accidents following an
absent or faulty earth connection.
Important: It is formally prohibited to place trays or any other object on top of the rotisserie,
or to obstruct the exhausts or ventilation zones in any way.

ROTISSERIE OVEN USER MANUAL, NEOGRILL series
Revision from October 2012
12
Preparation
Voltage required: 400 + Neutral +Earth
230 V Mono (possible as an optional extra for N1)
400 tri +Neutral +T
N
EARTH
If the rotisserie oven is destined for outdoor use, use waterproof plugs and a power shut-off inside
the store.
4.4. Cooking
-Switch the oven on by pressing button 1 and holding for 3 seconds. Displays A and B will light up.
-Pour a centimeter (half an inch) of water into the fat tray, in order to maintain sufficient humidity during
cooking.
-Place the chickens in the cradles after pricking and seasoning them.
-Press button 4 (The cradle rotation motor will start up).
-Display the cooking time using the ↑ and ↓ buttons on display B.
-Start the cooking process by pressing button 2 (the timer will start).
-Choose the temperature using the ↑ and ↓ buttons on display A.
(Normally L5 for cooking chickens)
-At the end of the set cooking program, the rotisserie oven will make a beeping sound. It will
automatically switch to “Maintain temperature” mode and button 3 will light up.
-To manually switch the oven to “Maintain temperature” mode, press button 3.

ROTISSERIE OVEN USER MANUAL, NEOGRILL series
Revision from October 2012
13
Important:
The last program selected in “Cooking” or “Maintain temperature” mode will be stored in the oven’s
memory.
-To modify the last program in the memory, use the ↑ and ↓ buttons on display A.
-At the end of the cooking time, you can cancel the “Maintain temperature” function and cradle rotation by
pressing buttons 3 and 4.
5. Maintenance
Important:
Never use a high pressure cleaning system on the product.
Only use “Oven Special” cleaning products which are approved for use on food equipment (1)
The NEOGRILL series rotisserie ovens are designed to simplify the cleaning process:
-The humidity and ventilation reduce the “baked-on” grease effect.
-The enamel helps prevent fat from sticking
-The heating elements located near the top of the oven neutralize most of the smoke associated with
rotisserie ovens.
-All of the components can be disassembled for fast, complete and easy cleaning: cradles,
enameled interior panels, stainless steel deflectors, fat dray and window guttering.
5.1. Disassembly for cleaning
Machine interior: accessories
-Remove the cradles
-Dismantle the cradle support as follows:
Stop the motor so the flat section of the drive train on the left is in the vertical position,
Lift the central axle until it comes completely away.
-To reassemble, replace the cradle support into its housing, ensuring that it is correctly in
position.
Important:
The system is adjusted to incorporate a minimum amount of “play”
-The left and right enameled lateral panels: hooked onto pins
-Stainless steel deflectors behind the lower resistors: NEVER COVER THESE
5.2. Reinforced component longevity
All of our reinforced heating elements are “Incoloy” quality.
They are located at the top of the oven, and on the base at the front and rear, under the windows.
1DECAGRILL, distributed by DOREGRILL is recommended for cleaning your rotisserie oven

ROTISSERIE OVEN USER MANUAL, NEOGRILL series
Revision from October 2012
14
Despite their quality, and taking into consideration the power of new cleaning products, these
elements may be damaged or weakened. To avoid premature aging for your equipment, we
recommend protecting these elements with aluminum foil while applying your cleaning product.
Before switching the oven back on, carefully wipe the elements with a wrung out (no longer wet)
sponge to remove all traces of cleaning product.
6. Tempered glass windows –main causes of breakage
6.1. Thermal shock
There must not be a temperature difference greater than 80°C between any two points on the
glass. When this occurs, the rupture point is reached and the glass can explode at any moment.
E.g. Cleaning a hot window with a cold sponge.
6.2. Impacts on the glass
When a tempered glass window receives an impact, especially on the edge or the corner, a small
piece of glass, often the size of a pin-head, may break off.
After this, the molecular equilibrium of the glass is broken. The glass will inevitably break,
whether in the hour or within a few days.
This kind of impact may occur when unpacking the equipment, or when the user accidentally
strikes the edge of the glass with an accessory (spit, basket, fat tray, etc.) during installation.
6.3. Handling
Ill-timed and frequent movement (e.g. rolling the oven onto the pavement every day) will
prematurely weaken the glass surfaces.
Important:
Glass, whether tempered or not, is a fragile material which must be handled with care. It is
sensitive to impact, and in no event can break by itself without one of the aforementioned
causes.

ROTISSERIE OVEN USER MANUAL, NEOGRILL series
Revision from October 2012
14
INFORMATION FOR THE PRODUCT
INSTALLER

ROTISSERIE OVEN USER MANUAL, NEOGRILL series
Revision from October 2012
16
7. Characteristics
Dimensions
NEOGRILL N1
NEOGRILL N2
Total width
Total depth
Height
- of the rotisserie unit
- mounted on the trolley
Total empty weight
Technical components
Cradles
Number
Useful length
Drive motors
Number
Ambient lamps
Number
Voltage, unitary power
Fan
Number of hot air housing units
Total system power
Voltage
Power supply cable
Cross-section
Plug: 4 pins + earth
Capacity (2)
Capacity in number of chickens depending on size
850 mm
740 mm
780 mm
1600 mm
85 kg
4
510 mm
1
2
230V/300W
1
6,62 kW
400 V + N + T
5 x 2,5 mm²
Yes
16
chickens,
upright
.
1070 mm
740 mm
780 mm
1600 mm
100 kg
4
730 mm
1
2
230V/300W
1
9,02 kW
400 V + N + T
5 x 2,5 mm²
Yes
24 chickens,
upright
²These capacities are given as a guideline only and depend on the size of the chickens.

ROTISSERIE OVEN USER MANUAL, NEOGRILL series
Revision from October 2012
17
MAINTENANCE

ROTISSERIE OVEN USER MANUAL, NEOGRILL series
Revision from October 2012
18
8. Maintenance / Customer Service
Any interventions on your oven must be performed by a qualified professional.
8.1. Damage identification
The aim of this section is to list the main problems that the user may confront, give the possible
causes and provide the resources to solve them without needing outside help.
Defect observed
Possible causes
Solutions
Electrical circuit
The power indicator light does
not light up
- No electrical power
- Connect the plug to the socket.
Reset the circuit-breaker and
change the fuse on the oven.
If the problem persists, contact
your installer.
1 ambient lamp is not working
- Defective bulb
- Replace the bulb
The cradles do not turn
- Defective motor
- Call the installer
Very long cooking times
- Defective heating elements
- Check the 3 elements
8.2. Specific repairs
8.2.1. Changing a bulb
This operation can be performed by the user.
Warning: Before changing a hot lamp, wait a few minutes for it to cool down in order
to avoid burning yourself.
Disconnect the rotisserie oven’s power supply.
With a number 7 Allen key, unscrew the screws and remove the stainless steel frame.
Unscrew the unit, remove the defective bulb and replace it with an identical, 300W
max bulb. Never hold it in your bare hands; always use paper or a clean cloth. The
slightest fingerprint or trace of oil may, when switching it on, render the bulb unusable.
If the bulb seems unclean, clean it with alcohol and a soft cloth.
Put the glass screen back in place and replace the stainless steel frame.

ROTISSERIE OVEN USER MANUAL, NEOGRILL series
Revision from October 2012
19
8.2.2. Opening the technical cabinet
The technical cabinet is located on the left of the rotisserie oven, behind the control
panel. It enables you to access the various components of the electrical circuits.
This operation must only be performed by qualified personnel.
Before opening the housing, disconnect the rotisserie oven from the power supply.
Using a screwdriver, undo the screw holding the outer panel in place, then remove
it. Once the intervention is finished, it is important to replace this panel and reinsert
the screws.

ROTISSERIE OVEN USER MANUAL, NEOGRILL series
Revision from October 2012
20
ILLUSTRATED COMPOSITION TABLE

ROTISSERIE OVEN USER MANUAL, NEOGRILL series
Revision from October 2012
21
9. Illustrated composition table
9.1. Image 1 –Electrical diagram for NEOGRILL N1
This manual suits for next models
2
Table of contents
Other DOREGRILL Oven manuals