10
CAMERA SETTINGS
Set the aperture and exposure time manually at your camera. The use of the aperture
depends on the object, the set ash power ratio and from the distance of the ash
to the object. In a photo studio, the exposure time has no inuence on exposure. It
should not be shorter than the camera’s x-ash synchronization, which is 1/250s in
many cases. Read the relevant information in your camera’s manual.
WORKING WITH A FLASH METER
The best and fastest way to obtain pictures with correct exposure is to work with a
ash meter. After a comparison of the set ISW values, hold the ash meter in front of
your main object with the metering calotte in direction of the ash. After a test ash,
the ash meter indicates the necessary aperture setting. If another aperture setting
is desired, the ash power ratio must be adjusted, until the desired aperture value
can be measured with the ash meter.
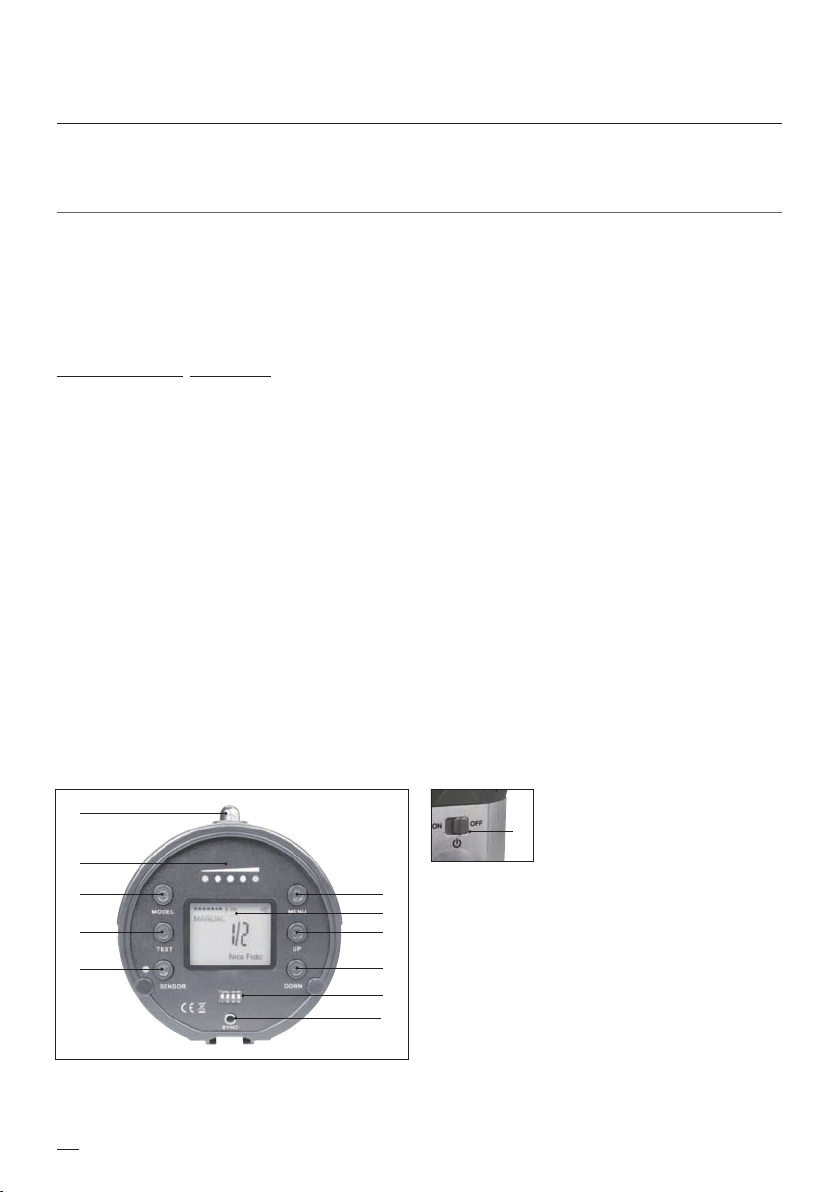
TAKING PICTURES WITH THE FLASH UNIT
Move the main switch ti position ON. The LC displays the set ash power. 1/1 means
full ash power, 1/2 means 50% power ratio, and so on. Using the UP and DOWN
keys, you can set a power ratio between full and 1/64. Use the TEST button to release
a test ash.
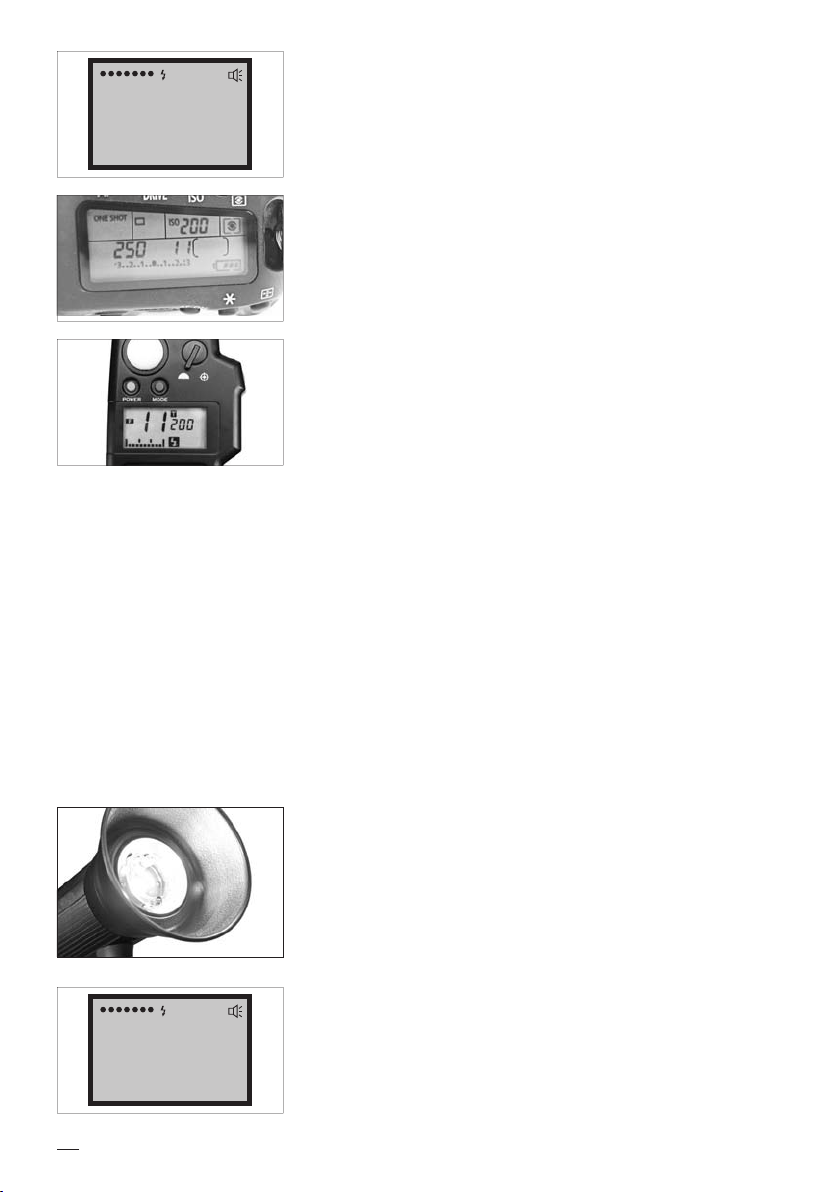
WORKING WITHOUT FLASH METER
You can also obtain pictures with correct exposure without using a ash meter. The trial and error method will help to approach
tov the right settings. We recommend to make a test picture and to evaluate the exposure on your camera display. It may be of
assistance to evaluate the bar chart in your camera display as well.
In case, a specic aperture setting is desired, proceed as follows:
• Select the desired aperture
• Set the exposure time
• Take a test image and evaluate the result on the camera display
• Use the UP and DOWN keys to adjust the ash power, until the exposure suits your expectations
In case you change the distance from ash to object, the exposure result will change. If the distance gets smaller, there will be
more illumination on your object. The “Inverse Square La” applies (If you want to use a variable distance, adapted to illuminate
any desired area, one should remember that the intensity of illumination is inversely proportional to the square of the distance
from the light source)
In practice, doubling of the distance from ash to object means that only ¼ of the light volume will reach the object.
This corresponds to two aperture steps.
LED MODELLING LIGHT
The DMF-480 ash boasts of a LED modelling light, which helps to judge shadows
and reections before taking the picture. Press the MODEL button to switch the light
on. Pressing the button again, the modelling light will be switched o again.
DISPLAY OF FLASH READINESS
After releasing a ash, it may take up to 2,5s until the ash is ready to re again. The
DMF-480 features a ash ready indicator. The charging process is displayed sym-
bolically. As soon as the ash is ready again, a ash symbol and ON are displayed.
Even more useful during photo shootings is the acoustic ash ready indicator, which
can be activated and deactivated using the MENU button. Press until BUZZ shows up
on the display. Usethe UP and DOWNS keys to switch the acoustic signal on or o.
When switched on, there will be a BEEP when the ash is ready.
OK
MANUAL
Nice Foto
1
/
32
OK
BUZZ Nice Foto