Dosze Backyard Pro Quick setup guide

1
TURKEY FRYER
SAFETY, ASSEMBLY
AND USE MANUAL
KEEP THIS MANUAL FOR FUTURE REFERENCE.
THIS INSTRUCTION MANUAL CONTAINS INFORMATION NECCESSARY
FOR SAFETY, ASSEMBLY AND USE OF THIS APPLIANCE. DO NOT USE
THE APPLIANCE UNTIL YOU HAVE READ THIS MANUAL.

2
Contents
1. Assembly Instrucons
2. Food Preparaon Instrucons
3. Pre-Cooking Precauons
4. Lighng and Cooking Instrucons
5. Storage Instrucons
6. Important Facts
7. Frequently Asked Quesons
FOLLOW ALL INSTRUCTIONS IN THIS MANUAL
FOR SAFE AND EFFECTIVE OPERATION.
FAILURE TO FOLLOW INSTRUCTIONS MAY
RESULT IN PROPERTY DAMAGE, GREASE FIRE,
PERSONAL INJURY OR DEATH.
VENDOR AND RETAILER ARE NOT RESPONSIBLE
FOR MISUSE OF THIS PRODUCT.

3
Contents
1. Assembly Instrucons
2. Food Preparaon Instrucons
3. Pre-Cooking Precauons
4. Lighng and Cooking Instrucons
5. Storage Instrucons
6. Important Facts
7. Frequently Asked Quesons
You will need:
1. An adjustable wrench
2. A Phillips head screwdriver
1. Remove all components from the box and individual packaging.
2. Turn fryer base frame upside down.
3. Burner crossbar mounng:
a. Align the crossbar holes with the corresponding frame holes.
b. Aach bolts, washers and nuts.
c. Tighten with wrench.
4. Burner and Heat Shield aachment
a. Remove bolts and washers from burner’s boom
b. Align burner’s long end above the U-shape in the frame if
applicable to your unit.
c. Align the burner’s bolt to the center hole in the crossbar.
d. Insert the burner’s bolt into the crossbar.
e. Place the heat shield over the bolt if applicable.
f. Aach washer and nut.
g. Tighten with wrench.
5. Hose to Burner aachment
a. If the air shuer is not already aached to the burner with
screws, align the air control disc over the end of the burner.
b. Burner’s screws may need ghtening; be careful not to
over ghten.
c. Insert brass hose connector into burner.
d. Turn connector clockwise with wrench unl snug; be careful
not to over ghten.
6. Return fryer base frame upright.
1. ASSEMBLY INSTRUCTIONS
2. FOOD PREPARATION INSTRUCTIONS
1. Allow poultry to thaw completely. Towel dry if necessary.
a. Never insert frozen, parally frozen or wet food into hot oil.
2. Remove giblets, neck, excess skin and extra fat from poultry.
3. Cut a 1” slit in the skin at the leg-thigh joints to allow oil drainage aer cooking.
4. Apply seasonings. Marinade should be injected into breast, thighs and drumscks.
5. Place turkey upside down on rack.
4.
5.
2.
3.

4
FAILURE TO FOLLOW THESE INSTRUCTIONS MAY RESULT IN
PROPERTY DAMAGE, PERSONAL INJURY OR DEATH.
DO NOT OPERATE THIS APPLIANCE UNDER THE INFLUENCE OF DRUGS OR ALCOHOL.
1. Test your propane tank for gas leaks.
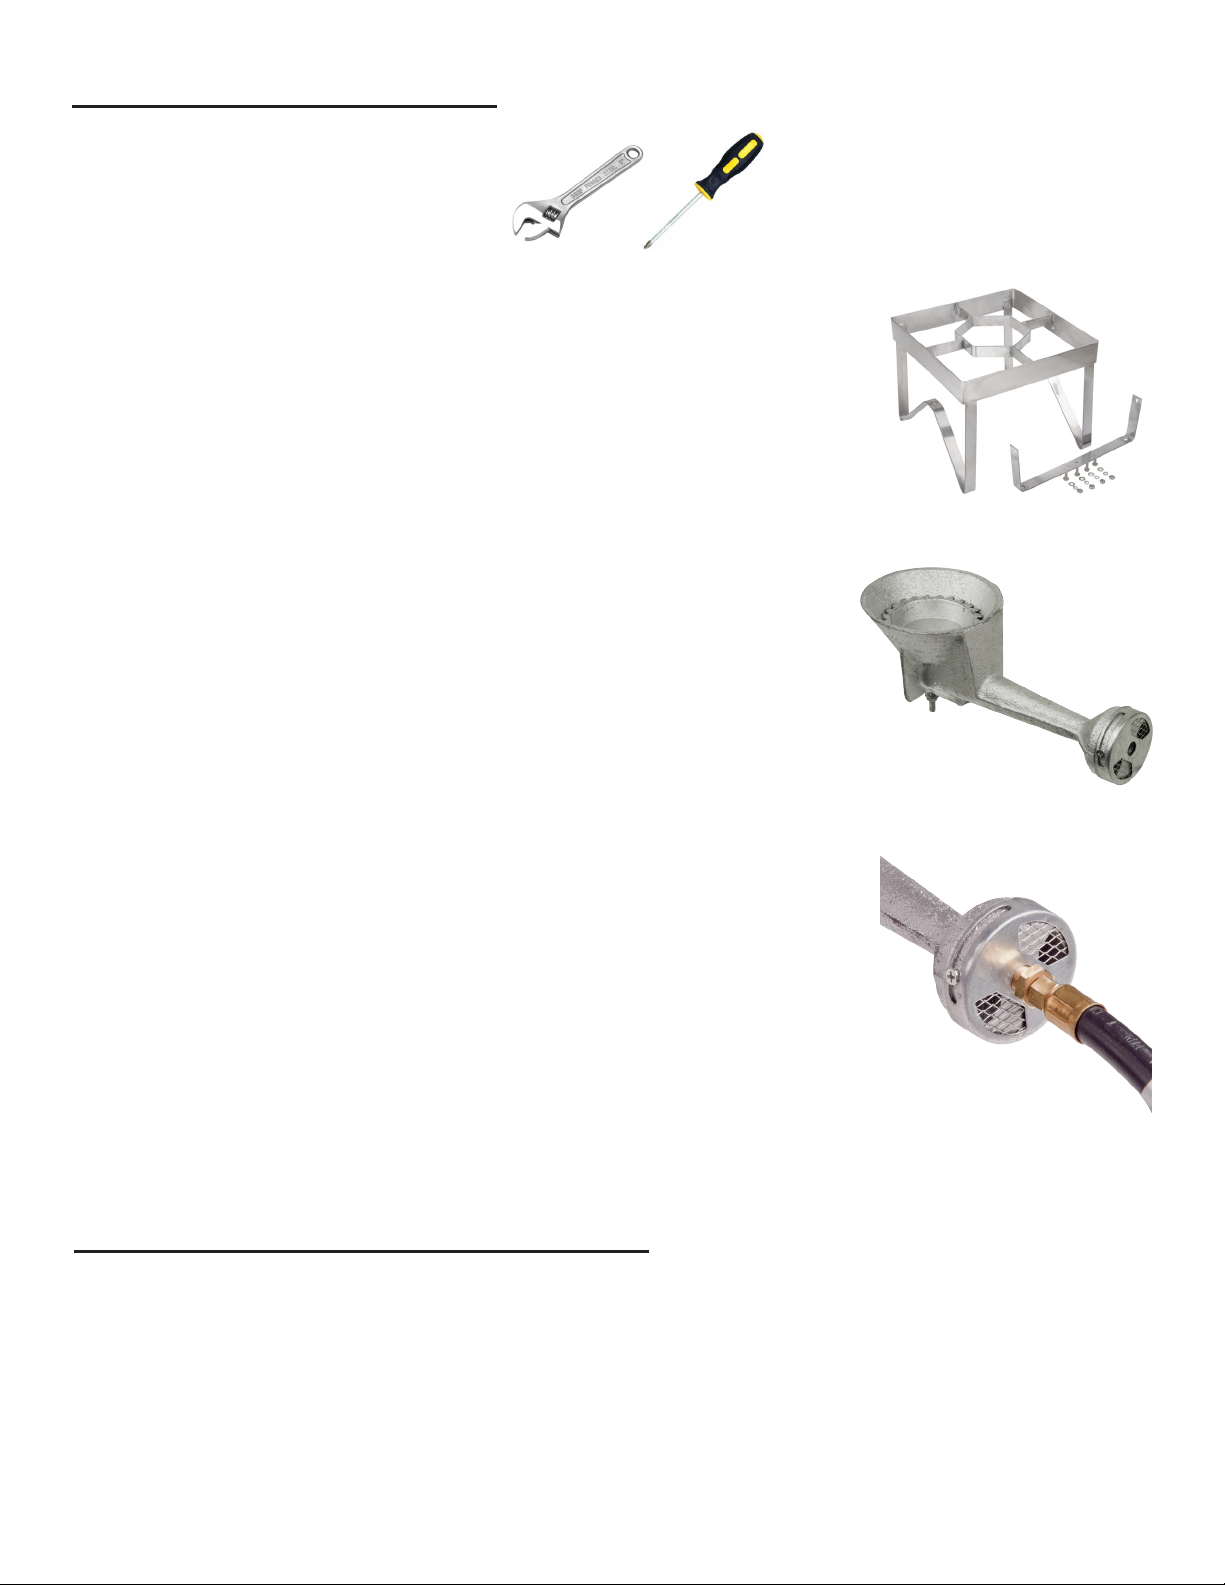
a. Aach the hose and regulator to the propane tank.
b. Close the regulator control valve on the hose to shut o gas ow.
c. Open LP cylinder valve by 1/8 to 1/4 turn.
d. Apply a soapy, non-abrasive liquid to all regulator and tank connecons.
e. If any bubbles appear, there is a gas leak.
DO NOT PROCEED WITH COOKING IF THERE IS A GAS LEAK
2. If you smell gas, immediately shut o the supply at the tank, hose and regulator.
a. Exnguish any and all open ames appropriately.
b. If odor connues, avoid appliance and call local re department.
3. Keep a BC or ABC re exnguisher on hand at all mes for emergencies.
4. Never place dry cookware on this burner.
5. Follow all lighng instrucons in this manual.
6. Never leave this cooker unaended.
7. Maintain 10 feet of clearance on all sides and 25 feet between fryer and other fuels.
8. Do not ll cooking pot above the maximum ll line.
9. Never allow oil to exceed 350 degrees Fahrenheit.
a. Turn o appliance if oil temperature exceeds 400 degrees Fahrenheight or starts to
smoke.
b. Very high risk of spontaneous combuson (grease re) once the oil reaches 450
degrees Fahrenheit.
10. Never touch used cookware unl liquids have cooled to 115 degrees Fahrenheit or less.
11. In the event of wildre, leave appliance, call re department and DO NOT aempt to
exnguish re with water.
12. In the event of precipitaon, cover cooking pot, turn o fuel supply and unhook equipment.
a. Do not aempt to move the equipment.
13. Do not operate this appliance underneath an overhead obstrucon or on a deck.
14. Thoroughly inspect and clean all equipment before cooking.
15. Always use heat protecve gloves when using this appliance.
16. Do not cook in bare feet or sandals.
17. Never use the lid on the pot when cooking with any type of oil. The lid is only for use when
cooking soups, stews or steaming.
18. Never move this appliance when it is in use.
19. KEEP AWAY FROM CHILDREN AND PETS.
3. PRE-COOKING PRECAUTIONS
USE COMMON SENSE WHEN OPERATING THIS APPLIANCE.

5
1. Aer inspecng all applicable ulies for leaks, close tank and hose regulator valves.
2. Reopen tank valve fully.
3. Turn burner’s air control shuer so that it’s almost closed.
4. Hold a lit match or long-nose lighter over the burner and slowly open regulator valve unl
burner ignites.
a. Keep hands and face away from cooker top.
5. Adjust air shuer on burner for a blue ame.
6. Adjust regulator control valve for desired ame height.
7. During rst use, you may smell burning paint. This is normal.
8. Heat oil to 350 degrees Fahrenheit for best results.
9. Once the oil has reached 350 degrees, reduce heat via the regulator valve.
10. Aach grab hook to the top loop of the rack holding food.
11. Wearing gloves, slowly submerge food into oil.
a. This may take as long as 90 seconds to prevent splashing and overow.
b. DO NOT add other items or accessories to hot oil.
12. When poultry is fully submerged, remove grab hook from rack.
13. COOKING BEGINS WHEN POULTRY IS FULLY SUBMERGED.
14. Inserng food will reduce the oil’s temperature. Slowly increase heat to get oil temperature
back to 350 degrees Fahrenheit.
a. This will take several minutes.
b. It is very important to monitor the oil’s temperature.
15. For a turkey:
a. Fry for 3 to 3.5 minutes per pound or unl golden brown.
16. For a single chicken:
a. Fry for about 18 minutes or unl internal temperature of chicken reaches 165 degrees
Fahrenheit when measured with a probe thermometer.
17. For mulple chickens at once:
a. Fry for about 20 minutes or unl internal temperature of chicken reaches 165 degrees
Fahrenheit when measured with a probe thermometer.
18. When poultry is done, shut o all valves and gas supply.
19. Wearing gloves, retrieve the poultry with the grab hook.
20. Place rack and poultry on absorbent paper and let drain.
21. When poultry has cooled to manageable temperatures, remove from rack and serve.
4. LIGHTING AND COOKING INSTRUCTIONS

6
1. Aer cooking, allow oil to cool completely to room temperature. Remove oil per instrucons
in the FAQ secon of this manual. Refrigerate for best results.
2. Thoroughly clean pot and other cookware. Allow it to dry completely.
3. Unless repainted, the cooker will eventually rust.
4. Store all cleaned, maintained equipment in a cool, dry area.
5. Store propane tank away from other cooking equipment in an open area.
5. STORAGE INSTRUCTIONS
1. Water causes hot oil to burst and spray, leading to injury and property damage.
2. Turkey fryers require constant aenon while in use and should never be le unaended.
3. Only adults who have read this manual may operate this appliance.
4. Never ll propane tanks over 80% full.
5. Never allow oil to exceed 350 degrees Fahrenheit.
6. Always use heat protecve gloves.
7. Never operate underneath an overhead obstrucon or on a deck.
8. Use common sense!
9. Misuse of this product may result in injury, property damage or death.
6. IMPORTANT REMINDERS
1. How large of a bird will t in a pot?
a. A 30 qt. pot will hold a 20 lb. bird.
2. What is the best way to season poultry?
a. You can sprinkle and rub powdered seasoning under the skin or inside the bird.
b. Thin liquid injecon marinades may also be used in joints and drumscks.
c. Beer, sherry or wine can also be injected.
3. What oil works best for frying?
a. Peanut oil is preferred for its high smoke point and thorough cooking.
b. Soybean and peanut oil blends are also acceptable.
c. In the event of allergies, any vegetable oil may be used.
4. How do I determine how much oil I should use?
a. Place poultry into pot.
b. Fill pot with water unl the poultry is submerged.
i. There must be at least 3” between the water and the top of the pot.
c. Remove the poultry.
7. FREQUENTLY ASKED QUESTIONS (FAQ)

7
d. Note the water level. This is how much oil should be used.
e. Wash out the pot and allow it to dry completely.
i. Failure to dry pot may result in frying complicaons and injury.
5. What is the ideal oil temperature?
a. 325 to 350 degrees Fahrenheit.
b. Heat-up me varies based on pot size, amount of oil used and weather condions.
6. How long can I keep oil?
a. Refrigerated oil may be stored up to one year.
b. Non-refrigerated oil may be stored from three to six months.
7. How do I strain used oil?
a. Wait for oil to cool.
b. Dip a spouted container into the oil and gently pour into the original container.
c. Used oil and residue is at the boom of the pot.
i. You may discard this oil.
1. Place in a container with a sealing lid and put with garbage.
2. Never discard oil in a sink or plumbing lines.
ii. You may also strain it with a funnel and cheese cloth.
8. Where does the thermometer go?
a. The thermometer goes on the pot’s side with the rst inch submerged in oil.
b. The thermometer should not touch the actual food during cooking.
9. The thermometer needle stopped working. What happened?
a. The thermometer may be stuck in the poultry. If so, remove.
b. The thermometer may not be properly inserted into the frying oil.
i. Make sure the thermometer is submerged at least one inch.
c. The thermometer may be damaged.
i. Hold thermometer stem over an open ame.
ii. The needle should quickly move around the dial.
iii. If the needle does not move, the thermometer is damaged.
FAQ CONTINUED...
Table of contents
Popular Fryer manuals by other brands

Broaster
Broaster 2400 Series Operation manual

Oster
Oster ODF 510 User manual with recipes

Tower Hobbies
Tower Hobbies T17101 user manual

BKI
BKI BLG-TC Series Operation manual

Keating Of Chicago
Keating Of Chicago pre 2000 series Service instructions

Masterbuilt
Masterbuilt 20010306 Operation manual & safety instructions