10
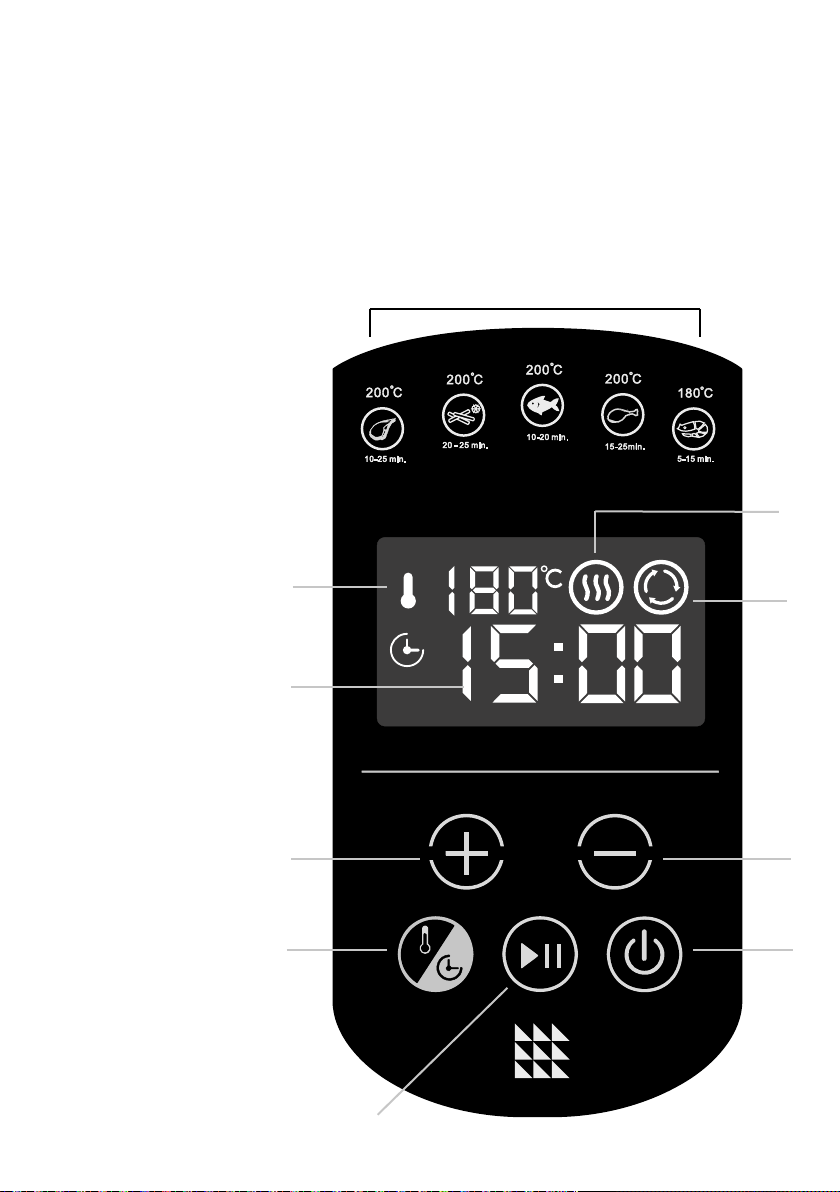
• To set to the temperature, use the (+) or (-) buttons – these
will increase or decrease the temperature in 10°C increments
from 80-200°C. You can press and hold the (+) or (-) buttons
to skip quickly through the temperatures.
• When setting your cooking cycle, if no buttons are pressed for 5 seconds, the
temperature and time will start to flash. Press the time/temperature set button
to start again.
• To start, touch the START/PAUSE button and the motor
light and heating light will illuminate and the Air Fryer
will start heating. The timer will start to count down
in seconds.
• After around 2 minutes when the Air Fryer has heated up to temperature, the heating
light will go out. It will come back on during cooking if the Air Fryer drops below
temperature for example, when you are adding food.
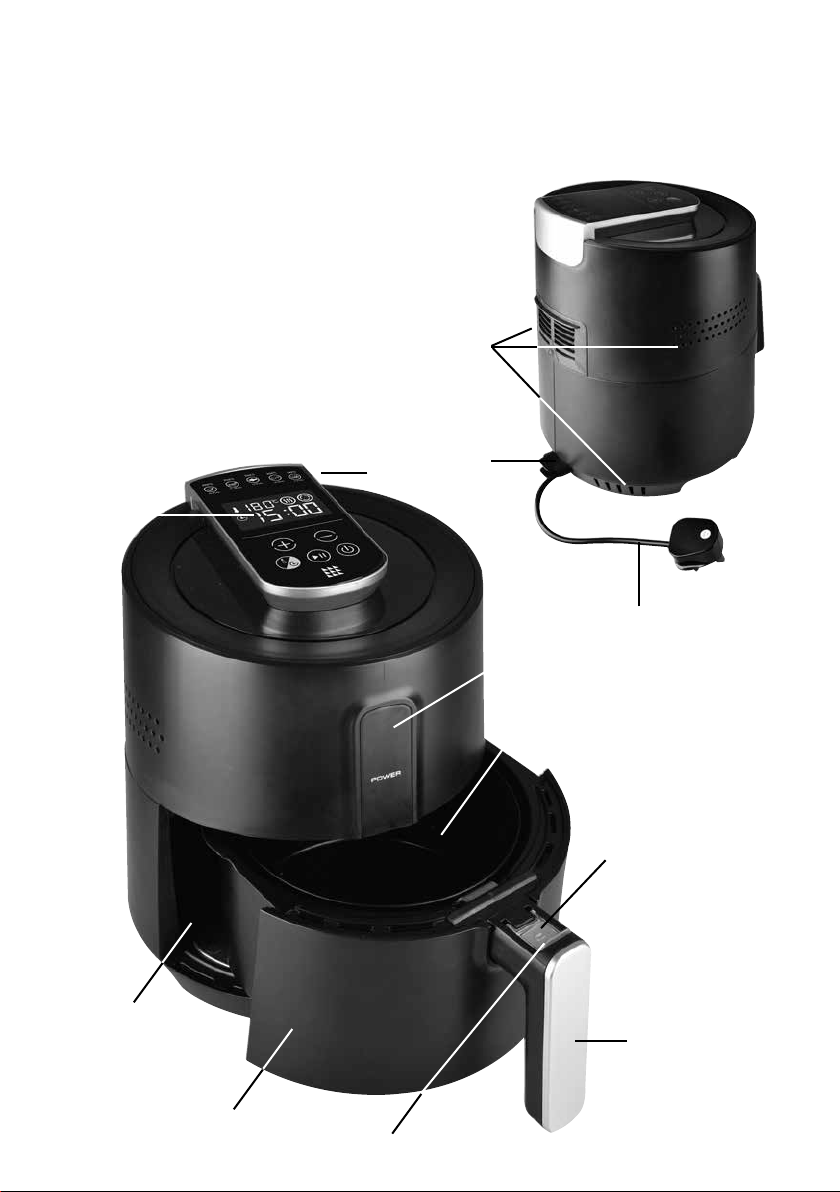
• Slide the pan and basket out of the Air Fryer using the handle.
• The Air Fryer will automatically go into ‘pause’ mode and the display lights will go out.
• Add your food to the basket, do not to exceed the ‘MAX’ mark on the inside.
Never add food to the pan without the basket in place, always cook food in the basket.
Excess oil from your food is drained through the basket into the pan during cooking.
• Slide the pan and basket back into the Air Fryer, when the pan is replaced the cooking
cycle will automatically continue.