Please always unplug the appliance from the power source and let it cool down
before cleaning.
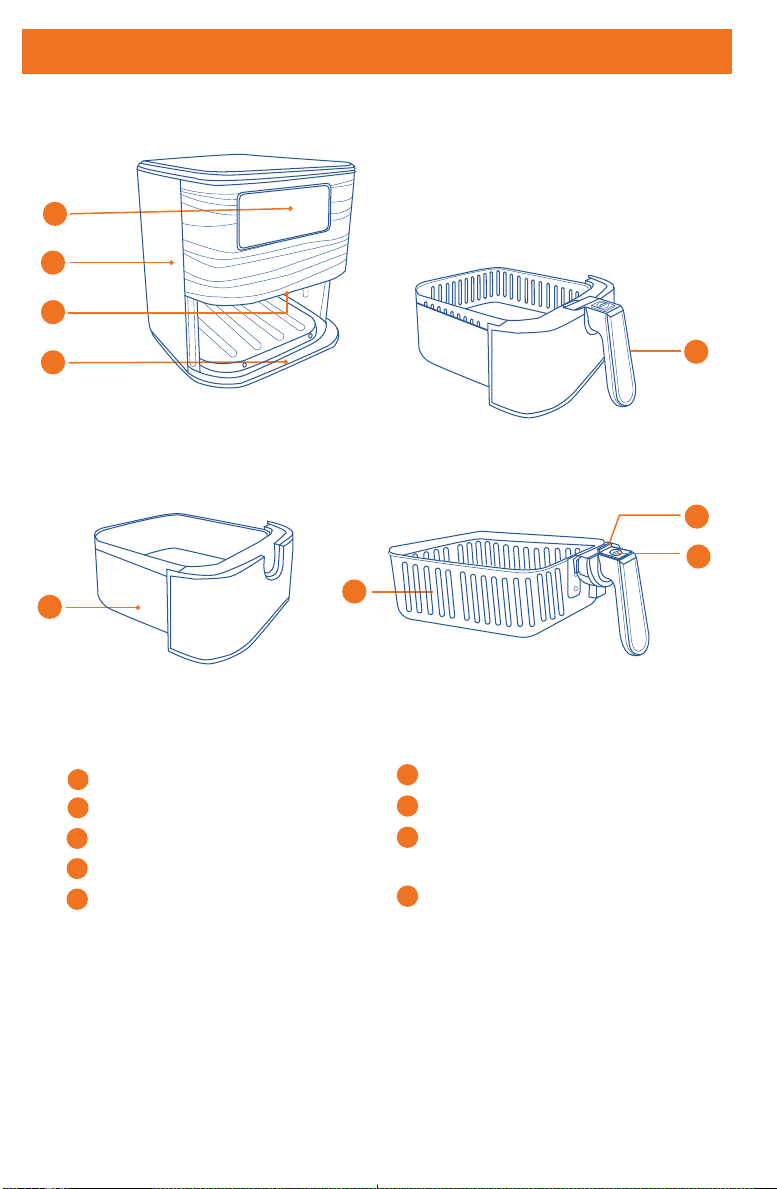
1. Push the Frying Basket Release Button Cover, and press the Frying Basket
Release Button to remove the frying basket from the tray as instructed below.
2. Clean the frying tray and basket with moderate detergent. Rinse under tap
water. Never use metal cleaning brush to avoid damaging the non-stick
coating. Or put them into dishwasher for cleaning.
3. Clean the heating element with a cleaning brush to remove any food residues.
4. Wipe the main body of the unit with damp cloth.
Food Tips
Recommendation for Cooking Time and
Temperature ·The above information is for reference only, cooking time and temper-
ature may vary as per the size, origin, shape and other factors of the
ingredients.
·Add 3 minutes to the preparation time when you start frying while
the air fryer is still cold.
Note:
Cleaning and Maintenance
·Clean the appliance after every use.
·It is recommended to use degreasing liquid to remove any remaining dirt.
Note:
If dirt is stuck to the basket or the bottom of the pan, fill the pan with hot
water with some washing-up liquid. Put the basket in the pan and soak
for approximately 10 minutes.
Tip:
Problem Possible Cause Solution
The air fryer does not
work
The ingredients fried
in the air fryer are not
done
The ingredients are
fried unevenly in the
air fryer
Fried snacks are not
crispy when they
come out of the air
fryer
Failed to slide the pan
into the appliance
properly
White smoke comes
out of the appliance
You are preparing
greasy ingredients
The pan still contains
grease residues from
previous use
White smoke is caused by
grease heating up in the
pan. Make sure you clean
the pan and basket
properly after each use
When you fry greasy
ingredients in the air fryer,
a large amount of oil will
leak into the pan. The oil
produces white smoke and
the pan may heat up more
than usual. This does not
affect the appliance or the
end result
The appliance is not
plugged in
The amount of ingredi-
ents in the basket is too
much
Certain types of ingredi-
ents need to be shaken
halfway through the
cooking time
You used a type of snack
meant to be prepared in a
traditional deep fryer
The basket is overfilled Do not fill the basket
beyond max line
Use oven snacks or lightly
brush some oil onto the
snacks for a crispier result
Take out the frying tray
and shake it during a
cooking process
Tap the Temperature +
Button to increase the
cooking temperature
Tap the Time + Button to
increase the cooking time
The set temperature is
too low
The cooking time is too
short
Plug the power plug into a
grounded wall socket
Put smaller batches of
ingredients into the basket
for more even frying
Tap the Time Buttons to set
the cooking time
Place the pan into the
appliance properly
Did not set the time
Problem Possible Cause Solution
All lights flash and
error code appears
on the display
The pan is not put into
the appliance properly
Troubleshooting
The manufacturer provides warranty in accordance with the legislation of the
customer's own country of residence, with a minimum of 18 months, starting from
the date on which the appliance is sold to the end user.
The warranty only covers defects in material or workmanship, which will not
apply in cases of:
- Normal wear and tear
- Incorrect use, e.g. overloading of the appliance, use of non-approved
accessories
- Use of force, damage caused by external influences
- Damage caused by non-observance of the user manual, e.g. connection
to an unsuitable mains supply or non-compliance with the installation
instructions - Partially or completely dismantled appliances.
Warranty
E1
E2
Broken circuit
of the thermal
sensor
Short circuit
of the thermal
sensor
Contact Customer Care Team
Contact Customer Care Team
www.innsky.co
Manufacturer:ShenzhenXiaojiaTechnologyCo.Ltd
Address:305,BuildingE,Phase2,XingheWORLD,MinleCommunity,
MinzhiStreet,LonghuaDistrict,Shenzhen,China
Facebookpage:https://www.facebook.com/innskyservice/
Website:www.innsky.co
MadeinChina
Importer:株式会社SUNVALLEYJAPAN
Address:〒104-0032東京都中央区八丁堀3丁目18-6PMO京橋東9F
55SA1US_V1.1_EN
Cooking Time and Temperature for Preset Cooking Menu
1 2 3 4
Unfreeze the Frozen Foods
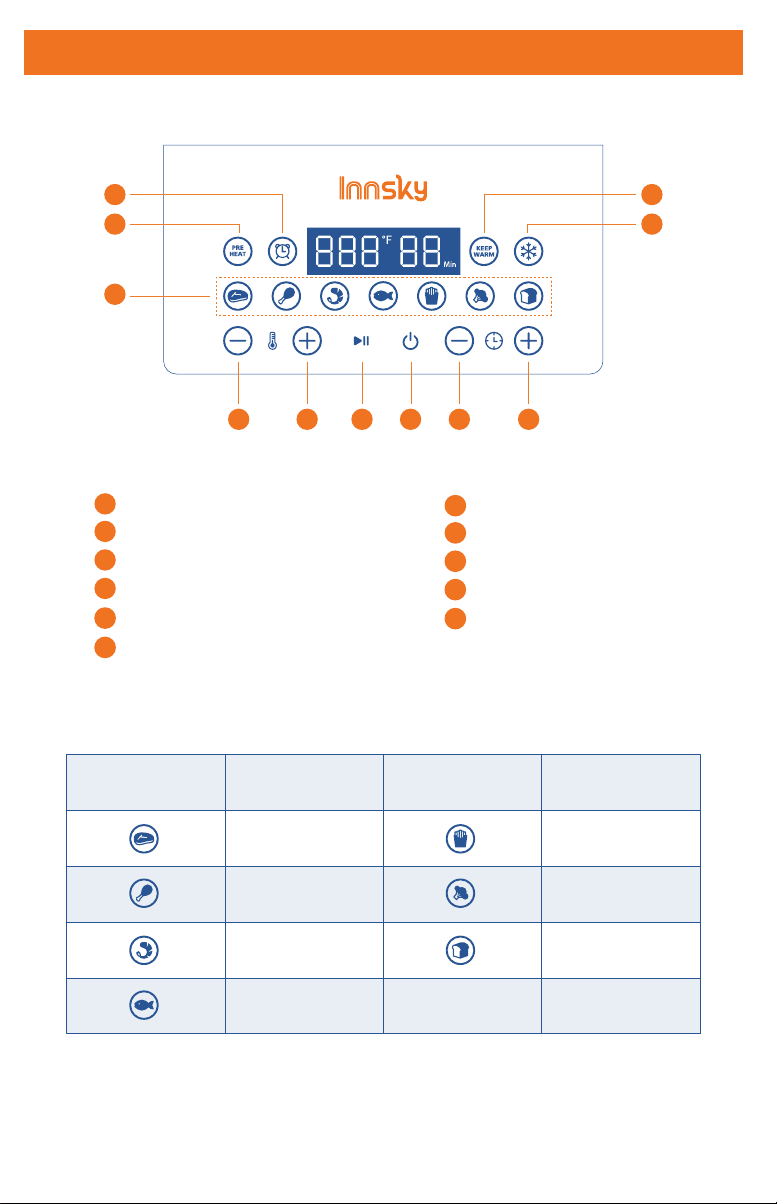
• Tap the Unfreeze Button to unfreeze the frozen foods at default setting
(350°F & 10 Min).
• Optionally, you can tap the Temperature + / - or Timer + / - icons to select your
desired unfreezing temperature or time.
1. You can air fry any frozen foods or goods that can be baked in an oven.
2. To make cakes, hand pies, or any food with filling or batter, place food in a
heat-safe container before placing in the baskets.
3. Air frying high-fat foods will cause fat to drip to the bottom of the baskets. To
avoid excess smoke while cooking, pour out fat drippings after cooking.
4. Liquid-marinated foods create splatter and excess smoke. Pat these foods dry
before air frying.
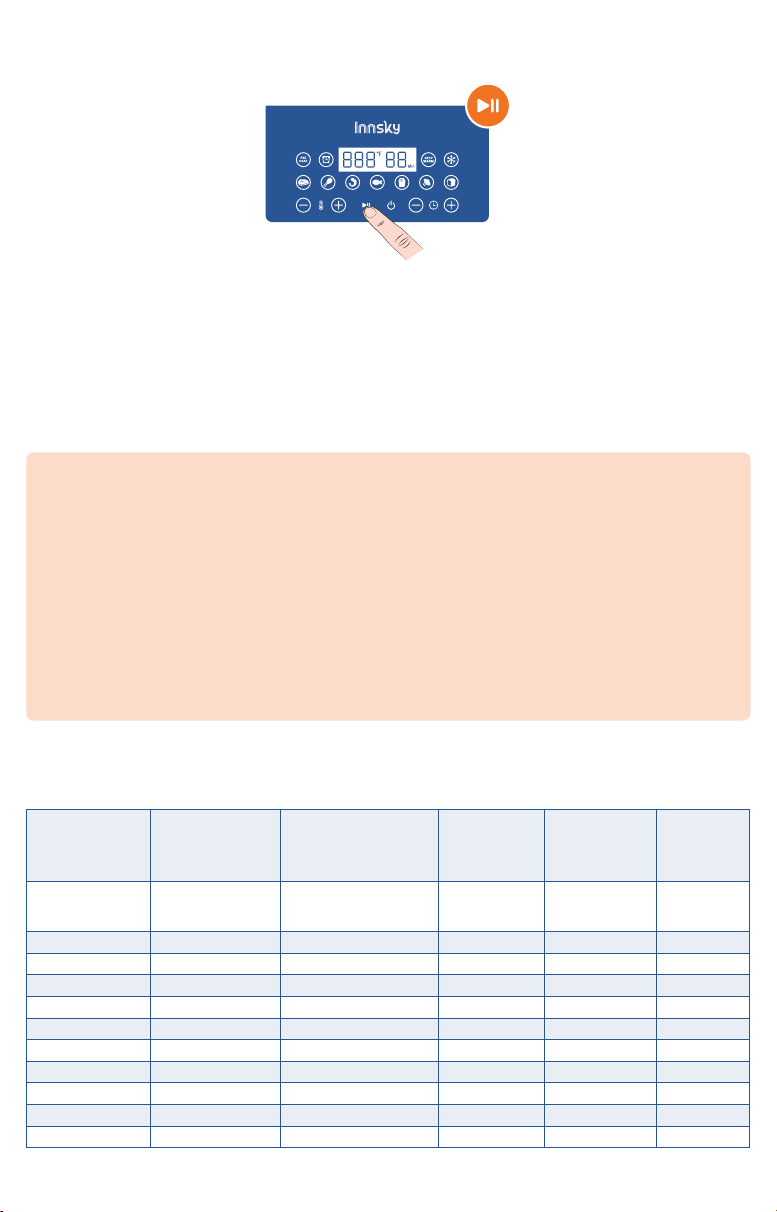
5. After the cooking temperature and time are set, tap the Start/Pause icon to
start cooking.
6. When cooking is done, you will hear 3 beeps. Unplug the air fryer, then pull the
frying tray out of the appliance and place it on a stable, level and heat-resis-
tant surface.
7. Push the Frying Basket Release Button Cover, and tap the Frying Basket
Release Button to remove the frying basket from the tray. Take out the fried
food with tongs or other tools.
Setting the Timer
Use the timer function to start cooking at a specified time.
1. When the air fryer is turned on, tap the Timer Setting icon, then tap Time + or
– icon to set the number of minutes (00-99 Min) you want the unit to start
cooking automatically.
2. The set time will flash 3 times to confirm your setting. Tap Start/Pause icon to
start counting down with the countdown time displaying and Timer icon
flashing every 3 seconds on the LED display. When time is up, the unit will start
running automatically.
3. To quickly skip to the desired time, tap and hold the Time + or – icon.
4. To cancel Timer setting,
a) tap and hold the Timer icon for 3 seconds or
b) set the timer to 00.
Keep Warm
When cooking is done, you can choose to tap Keep Warm to keep the cooked
food under a setting temperature for a certain time (1-60Min). Tap the Tempera-
ture + / - or Timer + / - icons to set your desired keep warm temperature or time.
121110090807
Note:
·When the frying tray is taken out during cooking, the air fryer will stop
working. Place it back into place to resume working under previous
remaining time and temperature.
·Please be careful of hot steam when you remove the frying basket from
the air fryer. Always take out the fried food with tongs or other tools to
prevent scalding.
·Always unplug the air fryer after use and allow it to cool.
Cooking
Mode
Default
Temperature
(°F)
Adjustable
Temperature
(°F)
Default
Time (Min)
Adjustable
Time (Min)
Timer
Setting
(Min)
Default
Menu 370 180~400 15 1~60 1~99
Preheat 400 180~400 5 1~60 1~99
Keep Warm 170 180~400 5 1~60 1~99
Unfreeze 350 180~400 10 1~60 1~99
Steak 360 180~400 8 1~60 1~99
Chicken 360 180~400 20 1~60 1~99
Shrimp 360 180~400 8 1~60 1~99
Fish 400 180~400 10 1~60 1~99
French Fries 400 180~400 18 1~60 1~99
Cake 360 180~400 12 1~60 1~99
Bread 320 180~400 8 1~60 1~99
Potato & fries
Snacks
400-500
100-600
100-600
100-600
100-600
100-600
100-600
100-500
100-600
100-500
100-500
100-500
400
500
400
500
600
18-12
10-15
10-15
10-15
13-15
25-30
15-20
8-10
6-10
6-10
8-10
20-25
20-22
15-18
20
10
20-25
390
350
350
350
390
390
390
390
350
320
320
350
390
320
350
350
390
390
Min-max
Amount (g)
Tempera-
ture (°F) Extra informationTime (min.) Shake
Shake
Shake
Shake
Shake Use oven-ready
Use oven-ready
Use oven-ready
Use oven-ready
Use baking tin
Use baking tin
Use baking tin/
oven dish
Use baking tin
/oven dish
Shake
Thin frozen fries
Thick frozen fries
Potato gratin
Meat & Poultry
Steak
Pork chops
Hamburger
Sausage roll
Drumsticks
Cake
Quiche
Muffins
Sweet snacks
Chicken breast
Spring rolls
Frozen chicken
nuggets
Frozen fish
fingers
Stuffed
vegetables
Baking
Frozen bread
crumbed cheese
snacks