Dovpo Ember User manual


Size: 62mm X 33.5mm X 23mm
Material: Zinc alloy
Threaded connection: 510

Specification
1. 0.69 inch OLED screen.
2. Operating Voltage: 3.2V - 4.2V.
3. Maximum Output Current: 25A.
4. Operating Wattage: 5.0W - 50.0W.
5. Temperature control range: 200°F - 600°F/100℃300℃.
6. Temperature control atomizer working resistance range: 0.1ohm - 1.0ohm.
7. Power mode and Temperature control atomizer working resistance range:
0.1ohm - 3.0ohm.
8. Bypass mode atomizer working resistance range: 0.2ohm - 3.0ohm.
9. Atomizer Short Circuit Protection.
10. Low Voltage Protection when the batteries reach a voltage 3.2V or lower.
11. Overheat Protection.
12. Overcurrent protection
13. Overtime Vaping Warning.
14. Built-in 1500mah high rate battery.
15. Charger Required: DC5V / 1A.
16. Charging current: 700mA.
-

Operation Guide
0.26Ω
50.0W
450Ni℉
0.26Ω
50.0W
450Ti℉
0.26Ω
50.0W
450Ss℉
0.51Ω
0.00V
43.0W
0.51Ω
0.00W
3.85V
Picture 1.1 Picture 1.2 Picture 1.3
Picture 1.4 Picture 1.5
1. Power on
By pressing the fire button 5 times quickly, the screen will display the "DOVPO" logo.
This leads you to the main interface. See picture 1.1 (In Ni200 temperature control
mode), see picture 1.2 (In Titanium temperature control mode), see picture 1.3
(In Ss316Ltemperature control mode), see picture 1.4 (In Power mode) and see
picture 1.5 (In Bypass mode).

2. After 30 seconds of inactivity, the device screen will dim. Wake up the device up
by pressing any button. After 3 minutes of inactivity, the device will enter low
power state.
3. Auto Power-off / Manual Shutdown
3.1 The device will power-off automatically after 60 minutes of inactivity, restart the
device by pressing the fire button 5 times quickly to begin vaping again.
3.2 When in the main interface, press the fire button 5 times quickly, the screen
display " GOOD BYE ", and the device will shut down.
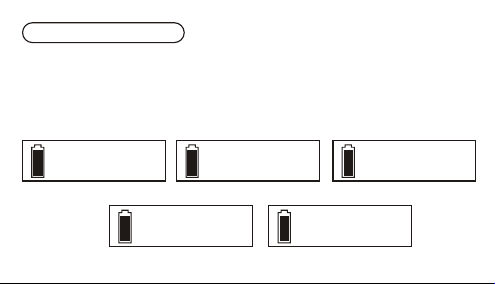
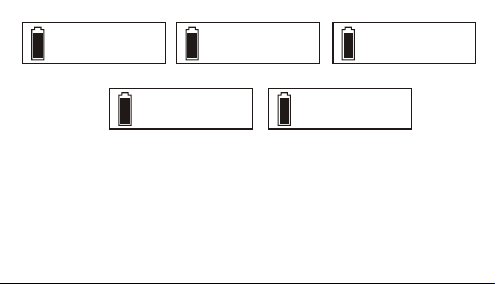
4. Start Vaping
4.1 See picture 4.1 below in Ni 200 TC mode, use only Ni200 coils in this mode.
4.2 See picture 4.2 below in Titanium coil TC mode, use only Titanium coils in this
mode.
4.3 See picture 4.3 below in SS316L TC mode, use only SS316L coils in this mode.
4.4 See picture 4.4 below in Power mode, use non-Temp Control coils in this mode.
4.5 See picture 4.5 below in Bypass mode, use no-Temp Control coils in this mode.

Picture 4.4 Picture 4.5
0.20Ω
23.6W
447Ni℉
0.42Ω
27.6W
468Ti℉
0.32Ω
27.6W
470Ss℉
0.23Ω
3.25V
46.0W
0.51Ω
24.4W
3.53V
Picture 4.1 Picture 4.2 Picture 4.3
5. Work Mode Setting / Hands Mode Setting
When in main interface, press and hold both fire button and "-" button for more
than 1.5s, this will lead you into the main menu which you can set the work mode
and hands mode. It will allow you to choose the option with the "+" and "-" button.
When in the first level menu, by press the fire button will lead you into the second
level menu or return to the main interface. When in the second level menu, by
press the fire button will allow you to confirm the option and return to the main
interface.

6. Wattage Adjustment
When in wattage mode, using the "+" or "-" button will allow you to increase or
decrease desired wattage by 1.0W. Holding either button will cause the wattage
to scroll more quickly.
7. Temperature Settings
When in any TC mode, using the "+" or "-" button will allow you to increase or
decrease desired temperature by 10°F/5°C. Holding either button will cause the
temperature to scroll more quickly.
8. Celsius and Fahrenheit Setting
When in a temperature control mode, change
from Fahrenheit to Celsius by scrolling to the minimum temperature setting.
Then press the "-" button once more to switch to the opposite mode.
9. Replace an atomizer
When replacing an atomizer, the display will show a screen similar to picture 9.1
below,

press the "+" button to confirm that is a new atomizer, press the "-" button to
confirm it is the same atomizer and the resistance will be same as previously
attached. NEW + : 0.54Ω
Picture 9.1
SAME - : 0.23Ω
SET RESISTANCE
Picture 10.1
0.21
10. Check Resistance by Manual
When in TC modes, press and hold both "+" and "-" button, the device itself will
check and display the current resistance. See picture 10.1.
11. Setting Wattage in TC Modes
When in TC modes, press and hold both fire button and "+" button for more
than 1.5s, this will allow you to set wattage directly from a TC mode.

12. Temperature Control Mode
12.1 Temperature Control is available for Ni200, Titanium, and Ss316L coil.
12.2 The device will only display the correct temperature when using the appropriate
mode.
12.3 Temperature control coil working resistance range: 0.1Ω - 1.0Ω.
12.4 Temperature control range: 200°F - 600°F/100℃ - 300℃.
12.5 Please ensure the Ni200, Titanium, or Ss316L coil is at room temperature before
locking resistance, or it may read a wrong resistance value (see sections 9/10).
Correctly locked resistance is required for proper function.
12.6 When in temperature control mode, working temperature of the device is
associated with your set wattage. If your set wattage is too low, the temperature
while vaping may increase slowly, or never meet the set temperature.
13. Overtime Vaping Warning
The device will automatically stop firing after 10 seconds to protect from firing
in a pocket or purse.

14. Low Voltage Protection
14.1 If the battery voltage is as low as 3.2v the device will stop working and display
"LOW VOLTAGE".
14.2 When power on and during vaping with a voltage lower than 2.7v will display
"WEAK BATTERY". If the battery capacity is full and display “WEAK BATTERY" .
This can be adjusted by using a low-drain/overused battery or it could be caused
by poor connection.
15. Short Circuit Protection
If the atomizer has a short circuit, the screen will show "ATOMIZER SHORT" when
pressing fire button. Check to make sure your coil head is seated properly if this
occurs.
16. Overcurrent protection
When the instantaneously current is too high, the device will stop working and
screen will display "OVER CURRENT".

17. Overheat Protection
When the mainboard's temperature is too high the device will stop working and
screen will display "DEVICE TOO HOT". Allow the device to cool before resuming
use.
18. The screen will display “CHECK ATOMIZER” if there's no atomizer attached to the
device or an atomizer that has an open circuit.
19. The screen will display "ATOMIZER TOO LOW" if the resistance of the coil is too low.
20. The screen will display "ATOMIZER TOO HIGH" if the resistance of the coil is too high.
21. The screen will display "DRY COIL NO LIQUID" if there is no liquid in the atomizer
during use in a Temperature Control mode.
22. Charging
When charging the battery with micro USB cable, the battery icon will indicate it's
getting filled up. The energy grid will display full after battery being fully charged.

Operating Instructions
1. Please use all accessories as intended to avoid damage to your device.
2. Please use the original charging cable, or a quality replacement when charging
this device.
3. When not using your device for a long period of time, please turn it off and store
it in a cool dry place to prevent damage. Check the battery periodically for signs
of discharge.
4. Should damage occur, please do not attempt repair yourself. Use any available
warranty, or contact a professional for repairs.
5. Please keep this product and accessories away from children.
6. Please read this manual, and follow it's instructions closely.
7. To clean the device, use only a slightly damp towel, and do not allow moisture to
get in the device.


Table of contents
Other Dovpo Vaporizer manuals