DOYMA Curaflex Nova Uno/M/Z User manual

Curaflex Nova®Uno/M/Z
INSTALLATION INSTRUCTIONS
Curaflex Nova®
Gasket inserts
English
Intended use
The gasket insert Curaflex Nova®Uno/M/Z is especially suitable for
the sealing of several pipes and cables with a smooth surface.
Curaflex Nova®Uno/M/Z is hinged, to accommodate sealing pipes
and cables that have already been laid.
Please note:
• Gasket inserts are not secure points or support bearings; they are
only used for elastic sealing of pipes/cables.
• Slight axial movements of the pipes and cables are permitted.
Furthermore, fixing tabs are optionally available and can be
screwed onto the frame ring (fixing set accessory). These tabs
additionally secure the gasket insert when the pressure loads are
higher.
• Curaflex®gasket inserts are maintenance-free. Once correctly
installed, it is not necessary to re-tighten the bolts.
• The relevant FHRK standard (minimum seal width) can be found
on the product label.
• The applicable national regulations governing the laying and
filling of pipes and cables must be observed.

Curaflex Nova®Uno/M/Z
Curaflex Nova®Uno/M/Z Curaflex Nova®Uno/M/Z
Ø d
A
B
B
Determine the diameter of the core boring or pipe sleeve,
and the media line and check it against the information
on the carton.
1: Take measurements
Installation steps
Page 2
INSTALLATION INSTRUCTIONS
Curaflex Nova® Gasket inserts
Installation conditions
• Breakouts, cracks and/or cavities in core bores in waterproof
concrete should be smoothed in advance.
• Pipe sleeves must be rigid enough to withstand the compressive
forces from the gasket insert and must have a smooth, circular
inner surface. If pipe sleeves are damaged they must be tested in
advance for usability.
• The media line (cable or pipe) to be sealed must be cleaned in
advance and must not have any axial depressions or elevations in
or around the sealing area.
• Compact the substrate and pipe substructure well before laying
the pipe/cable, so that no sinking is possible.
• In addition to the usual standard tool, you also need the following
tools and equipment in order to properly install the gasket insert:
Tools:
1 extension
1 hexagon socket
(for size, see installation steps)
Equipment:
Lubricant
Cleaning agent (solvent-free)
Calliper gauge
Cleaning cloth
• Sealing components for the media pipe/cable/cable protection
pipe must be installed in a core bore in waterproof concrete or a pre-
installed pipe sleeve (the position of the gasket insert must be taken
into account; see installation step 4).
Scope of delivery
• Curaflex Nova®Gasket insert
• 2 onion ring inserts
• Installation instructions
Accessories (optional)
4 fixing brackets with screws
Product No.: 1 88 0 600 004 2 9
ITL nuts (9 units)
Article no. 1 88 0 600 009 0 0
Aquagard primer (Curaflex®1710), 1 litre for 4.0 m2
Product No.: 1 99 0 710 000 0 0
Aquagard primer (Curaflex®1711), 1/3 litre for 1.5 m2
Product No.: 1 99 0 711 000 0 0
Aquagard special paint (Curaflex®1715), 1 litre for 3.5 m2
Product No.: 1 99 0 715 000 0 0
Aquagard special paint (Curaflex®1716), 1/3 litre for 1.0 m2
Product No.: 1 99 0 716 000 0 0
Individual modular sealing ring inserts (optional)
ZS/G/40/EPDM 4-20
Product No.: 4 99 8 001 000 0 4
www.doyma.com
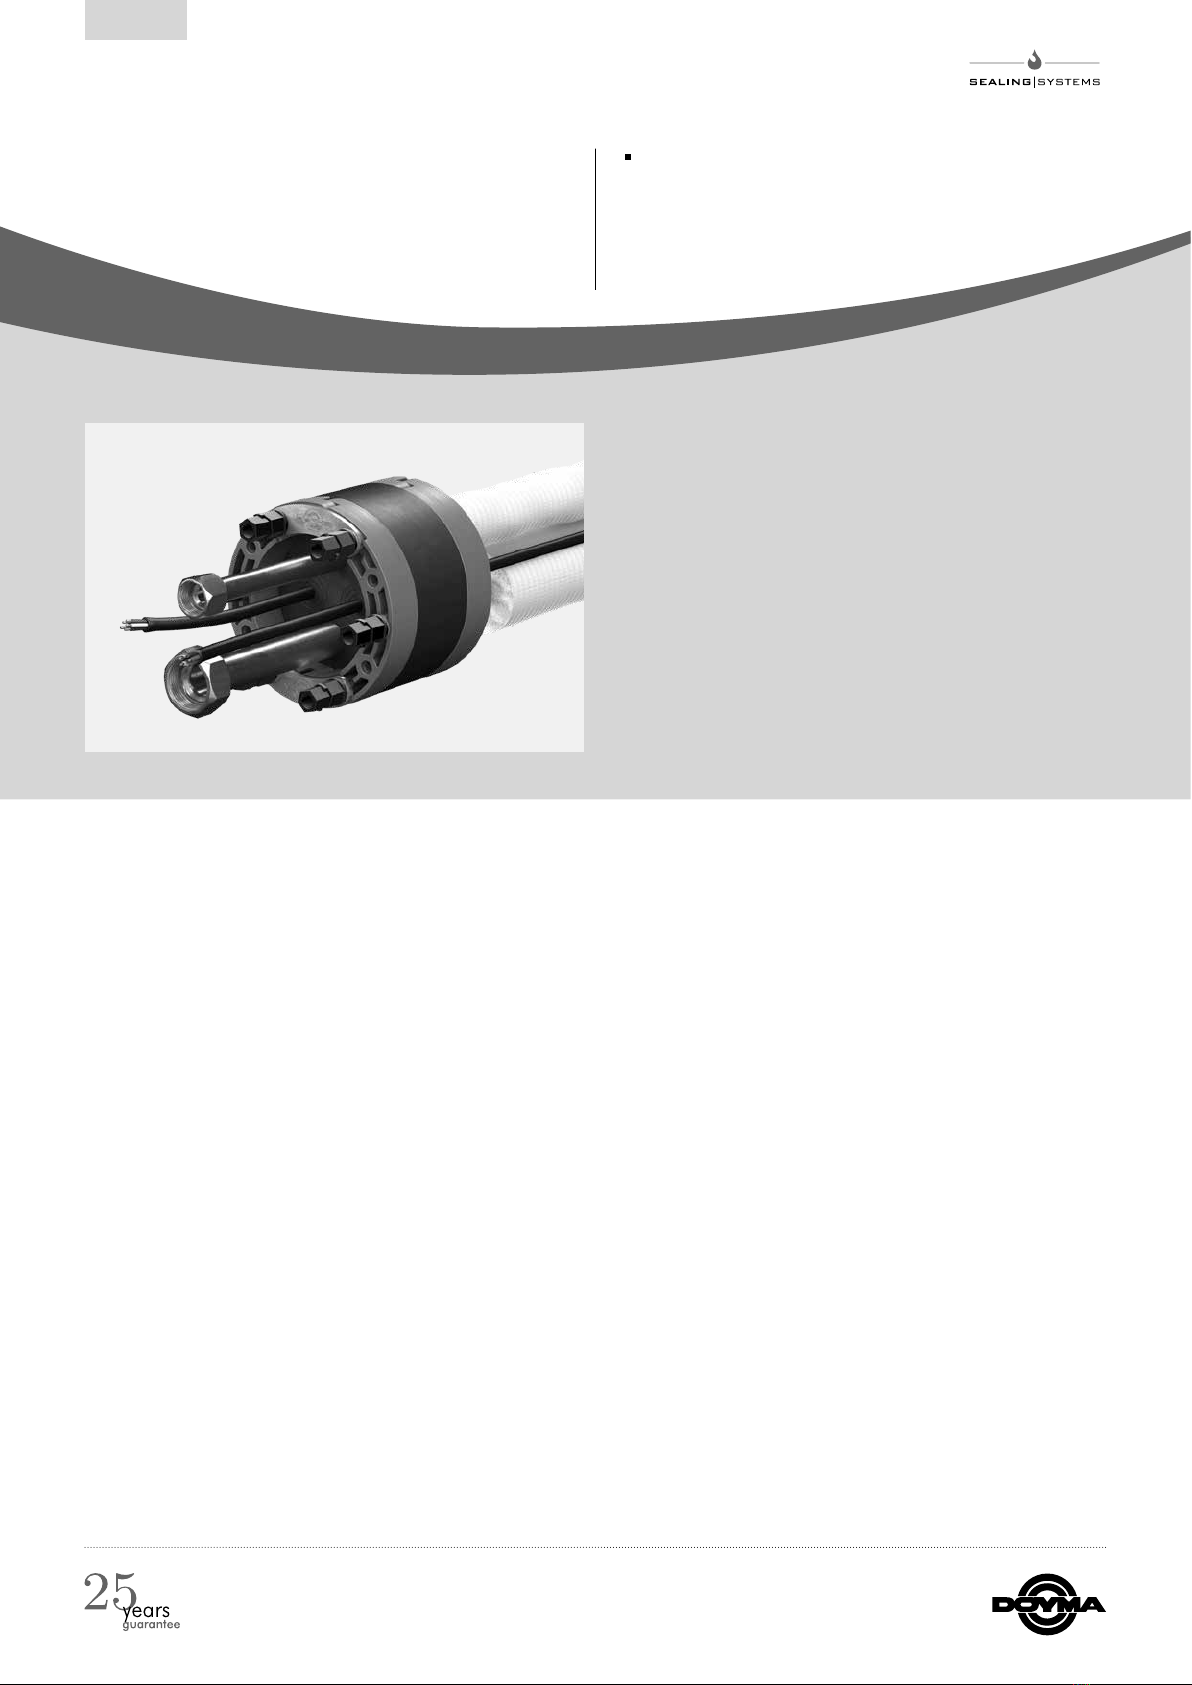
Media lines to be sealed are shown in Table 1.
Media lines to be sealed (outer diameter)
A B1 in[inch]
2x 6-15 mm 1/4 + 1/2
2x 6-15 mm 3/8 + 5/8
2x 6-15 mm 1/4 + 5/8
Table 1
1possible media lines - see on the carton

Curaflex Nova®Uno/M/Z
Curaflex Nova®Uno/M/Z Curaflex Nova®Uno/M/Z
a
b
cd
Curaflex Nova®Uno/M/Z
Curaflex Nova®Uno/M/Z Curaflex Nova®Uno/M/Z
4e: Installation in combi-
nation with a
Quadro-Secura®ADS
4d: Installation in combi-
nation with a Quadro-
Secura®Quick/H
Remove the plug (b) from the modular sealing ring (a) and
fold the modular sealing ring insert around the cable/pipe
(c). Pull out as many layers as needed until the dividing
surfaces of the modular sealing ring insert touch but do not
overlap when closed around the cable/pipe.
The connection point of the modular sealing ring layers
may need to be cut with a blade to make it easier to
pull the layers out.
In the case of insulated media lines, remove the insulation in
the area of the sealing insert before installation.
3: Insert the modular sealing rings2: Installing the gasket insert
Pull out the quick-release fastener and the opposite pin,
unfold the gasket insert and place it and place it around the
media line. Close the quick-release fastener. Reinsert the
pin.
Position the gasket insert in the sealing level of the wall. In
case of doubt in terms of where the sealing level is, clarify
the procedure with the planner or the wall manufacturer.
Position the gasket insert in the sealing level of the wall. In
case of doubt in terms of where the sealing level is, clarify
the procedure with the planner or the wall manufacturer.
Prior to installation in a Quadro-Secura
®ADS the fixing tabs
must be screwed onto the frame ring using a conventional
screwdriver.
Push the gasket insert into the core bore/pipe sleeve until it
stops flush with the outer wall (water/pressure side).
4a: Installation with WR
concrete walls or pipe
sleeves
4b: Installation for double/
element walls - sealing
layer is the in-situ con-
crete (WR concrete)
Page 3
INSTALLATION INSTRUCTIONS
Curaflex Nova® Gasket inserts
www.doyma.com
Insulated pipes
Position the gasket insert to the inside of the basement.
4c: Installation for double/
element walls – sealing
level is in outer concrete
facade
Push the onion ring inserts into the sealing insert from the
side facing the water (!).

Curaflex Nova®Uno/M/Z
Curaflex Nova® Uno/M/T
1 95
2 106
4 1283 117
A B C
Curaflex Nova® Uno/M/T
Curaflex Nova® Uno/M/Z
1 95
2 106
4 1283 117
A B C
Curaflex Nova® Uno/M/Z
INSTALLATION INSTRUCTIONS
Curaflex Nova® Gasket inserts
299130-02/03.22
6: Re-tighten gasket insert again
(e.g. after disassembly)
For the final assembly of the gasket insert, tighten the nuts
(size 10).
Thereby, proceed alternating: crisscross every few turns in at
least 3 intervals (A>B>C).
Proceed until the upper nuts twist off (ITL principle: Integrat-
ed Torque limiter; no special tools necessary.)
5: Final Assembly
Alternately remove already separated nuts crosswise in
several intervals. Use new nuts (optionally available), and
continue the installation as described under 4, or ...
... Tightening of the still remaining nuts (size 11), alternately
crisscross, each with 5 nm torque.
DOYMA products are continuously being further developed. Technical changes will be performed without prior notice.
25 year warranty on all DOYMA products. More information at www.doyma.com
DOYMA GmbH & Co
SEALING SYSTEMS
FIRE PROTECTION SYSTEMS
Industriestr. 43-57
28876 Oyten
Phone: 0 42 07/91 66-300
Fax: 0 42 07/91 66-199
www.doyma.com
Popular Industrial Equipment manuals by other brands

ABB
ABB Relion 620 Series Technical manual

YZ Systems
YZ Systems NJEX ZEO 6400 Instructions & operating manual

RATHI
RATHI Gear-Flex RGD Installation & operation manual

Dixon
Dixon Bayco VR4040CS-ALS45 Maintenance & Operating Instructions

U-Line
U-Line S-9737 instructions

ABB
ABB TPS57-D Series Operation manual