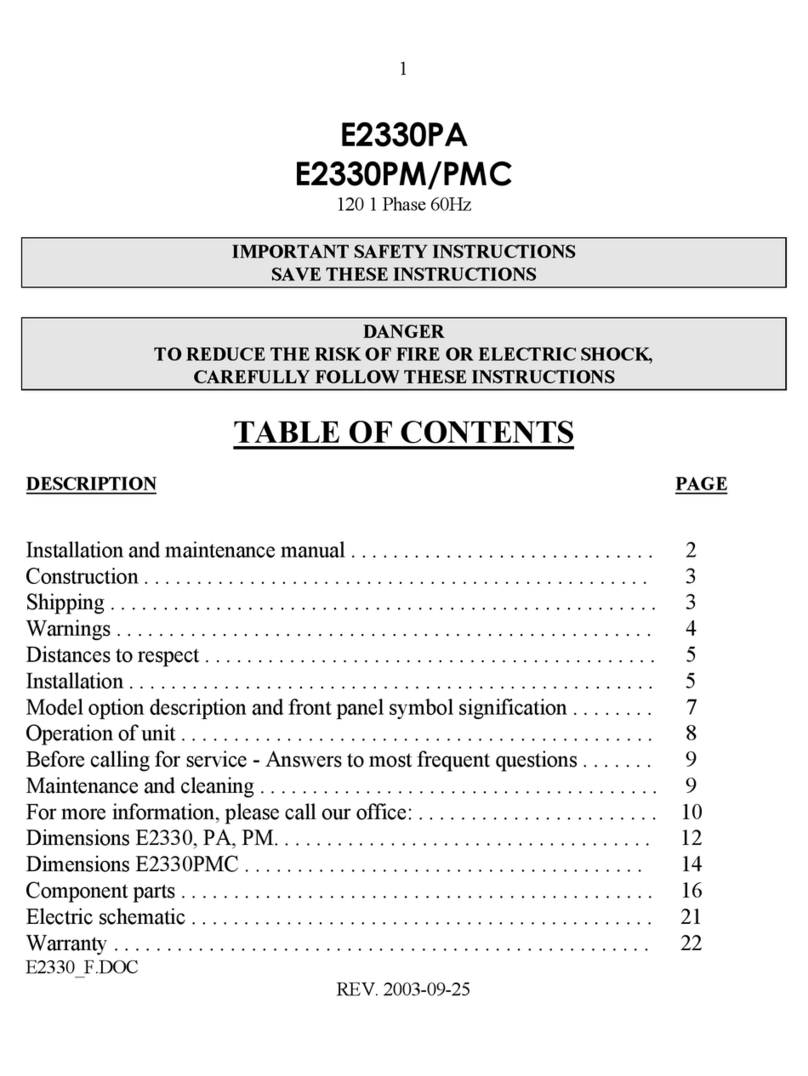
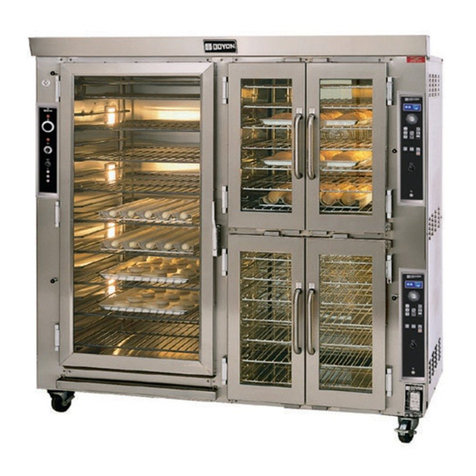
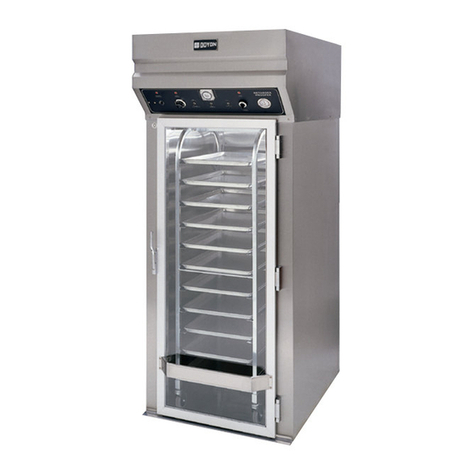
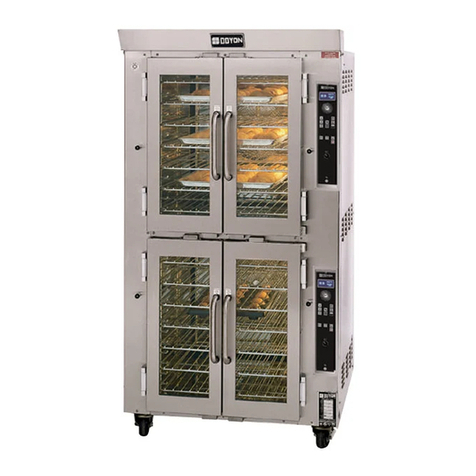
Doyon ER136 User manual

ER136 – ER236 series / série 5000
Product / Produit:
Serial number / Numéro de série:


FAM ER [LIVRET].doc Rev. 01/2010
IMPORTANT SAFETY INSTRUCTIONS
SAVE THESE INSTRUCTIONS
DANGER
TO REDUCE THE RISK OF FIRE OR ELECTRIC SHOCK
CAREFULLY FOLLOW THESE INSTRUCTIONS
TABLE OF CONTENTS
(table des matières :page suivante)
Description ___________________________________________________________________ A-1
Introduction________________________________________________________________ A-2
Construction _______________________________________________________________ A-2
Shipping __________________________________________________________________ A-2
Installation warnings_________________________________________________________ A-4
Distances to respect__________________________________________________________ A-4
Installation ________________________________________________________________ A-6
Operation of the retarder / proofer ______________________________________________ A-8
Timer programming instructions (Grasslin DIGI20E-120) ___________________________ A-9
Example of timer adjustement ________________________________________________ A-10
Timer programming instructions (Grasslin FM1D20E-120) _________________________ A-12
Power failure______________________________________________________________ A-15
Operation of the proofer _____________________________________________________ A-15
Troubleshooting ___________________________________________________________ A-24
Unit maintenance and cleaning________________________________________________ A-26
Maintenance: Water compartment _____________________________________________ A-28
Component parts ________________________________________________________________B-1
ER136 Front view____________________________________________________________B-2
ER136 Top view _____________________________________________________________B-4
ER236 Top view _____________________________________________________________B-6
Control Panels__________________________________________________________________C-1
ER136 1PH 220V 60HZ _______________________________________________________C-2
ER136 1PH 208 - 240V 60HZ___________________________________________________C-3
ER236 1PH 220V 50HZ _______________________________________________________C-4
ER236 1PH 208 - 240 60HZ____________________________________________________C-5
Warranty ________________________________________________________________________1

FAM ER [LIVRET].doc Rev. 01/2010
IMPORTANT INSTRUCTIONS DE SÉCURITÉ
CONSERVEZ CE MANUEL D’INSTRUCTIONS
DANGER
AFIN DE RÉDUIRE LES RISQUES D'INCENDIE OU D'ÉLECTROCUTION
SUIVRE CES INSTRUCTIONS AVEC SOIN
TABLE DES MATIÈRES
Description ____________________________________________________________________A-1
Introduction ________________________________________________________________A-3
Construction ________________________________________________________________A-3
Expédition __________________________________________________________________A-3
Avertissement lors de l'installation_______________________________________________A-5
Distances à respecter _________________________________________________________A-5
Installation _________________________________________________________________A-7
Opération de l'étuve / retardeur ________________________________________________A-16
Programmation de la minuterie (Grasslin DIGI20E-120)____________________________A-17
Exemple de programmation ___________________________________________________A-18
Programmation de la minuterie (Grasslin FM1D20E-120)___________________________A-20
Panne de courant ___________________________________________________________A-23
Opération de l'étuve _________________________________________________________A-23
Dépannage ________________________________________________________________A-25
Entretien et nettoyage de l’appareil _____________________________________________A-27
Entretien: Unité d’évaporation_________________________________________________A-28
Pièces composantes _____________________________________________________________B-1
ER136 Vue de face ___________________________________________________________B-2
ER136 Vue de dessus _________________________________________________________B-4
ER236 Vue de Dessus _________________________________________________________B-6
Panneaux de contrôle ____________________________________________________________C-1
ER136 1PH 220V 60HZ________________________________________________________C-2
ER136 1PH 208 - 240V 60HZ ___________________________________________________C-3
ER236 1PH 220V 50HZ _______________________________________________________C-4
ER236 1PH 208 - 240 60HZ____________________________________________________C-5
Garantie ________________________________________________________________________1

SECTION A:
DESCRIPTION / DESCRIPTION

A-2 INTRODUCTION
This equipment is manufactured with first quality material by experienced technicians. Proper installation and
maintenance will guarantee a reliable service for years to come.
A nameplate fixed to the front of the proofer specifies the serial number, model number, number of phase,
amperage, voltage and frequency.
Drawings and replacement part numbers are included in this manual. The electrical diagram is affixed in the
control panel located on the top of the proofer.
ATTENTION
DOYON is not responsible for damages to the property or the equipment caused by
personnel who is not certified by known organisations. The customer is responsible for
finding qualified technicians in electricity and plumbing for the installation of the
oven.
CONSTRUCTION
You just bought the most advanced proofer in the world, the "DOYON" technology at its best. This proofer is
manufactured using the highest quality components and material.
The DOYON equipments are designed with parts that are easy to find.
SHIPPING
For your safety, this equipment has been verified by qualified technicians and carefully crated before
shipment. The freight company assumes full responsibility concerning the delivery in good condition of the
equipment in accepting to transport it.
IMPORTANT
RECEPTION OF THE MERCHANDISE
Take care to verify that the received equipment is not damaged before signing the delivery receipt. If a
damage or a lost part is noticed, write it clearly on the receipt. If it is noticed after the carrier has left, contact
immediately the freight company in order that they do their inspection.
We do not assume the responsibility for damages or losses that may occur during transportation.

A-3
INTRODUCTION
Votre équipement est fabriqué avec des matériaux de première qualité par des techniciens d'expérience.
Une utilisation normale et un entretien adéquat de l'équipement vous assureront plusieurs années de bon
service.
Une plaque signalétique, située à l’avant de l’étuve, mentionne le numéro de série, le numéro du modèle, le
nombre de phases, l’ampérage, le voltage et la fréquence.
Les dessins et les numéros de pièces de rechange sont inclus dans ce manuel. Le plan électrique est affiché
dans la boîte de contrôle sur le dessus de l’étuve.
ATTENTION
Équipement Doyon Inc. ne peut être tenu responsable pour les dommages causés à la
propriété ou à l'équipement par du personnel non certifié par des organismes accrédités.
Le client a la responsabilité de retenir les services d'un technicien spécialisé en électricité
et d'un plombier qualifié pour l'installation de l'étuve.
CONSTRUCTION
Vous avez maintenant en votre possession l’étuve la plus performante présentement disponible sur le marché,
une étuve utilisant la technologie "Doyon" à son meilleur. Cette étuve est fabriquée avec des matériaux de
première qualité.
L’étuve DOYON est fabriquée avec des matériaux et pièces composantes facilement disponibles sur le marché.
EXPÉDITION
Pour votre protection, cet équipement a été vérifié et emballé avec précaution par des techniciens qualifiés
avant son expédition. La compagnie de transport assume la pleine responsabilité concernant la livraison
de cet équipement en bon état en acceptant de le transporter.
IMPORTANT
RÉCEPTION DE LA MARCHANDISE
Avant de signer le reçu de livraison, prenez soin de vérifier dès la réception si l'équipement n'est pas
endommagé. Si un dommage ou une perte est détecté, écrivez-le clairement sur le reçu de livraison ou
votre bon de transport et faites signer le livreur. Si le dommage est remarqué après le départ du
transporteur, contactez immédiatement la compagnie de transport afin de leur permettre de constater les
dommages causés.
Nous ne pouvons assumer la responsabilité pour les dommages ou les pertes qui pourraient survenir
pendant le transport.

A-4
INSTALLATION WARNINGS
FOR YOUR SAFETY
DO NOT STORE OR USE GASOLINE OR OTHER FLAMMABLE VAPORS
AND LIQUIDS IN THE VICINITY OF THIS OR ANY APPLIANCE.
IMPORTANT
INSTALLATION AND SERVICE
Installation and service must be done by specialized technicians. Contact a certified electrician and plumber
for set up.
The proofer must be connected to the utility and electrically grounded in conformity to the effective local
regulations. If these are not established, the oven must be connected according to the Canadian Electrical
Code (CSA-C22.1-XX) or National Electrical Code (NFPA 70-XX). Refer to last edition year for XX.
DISTANCES TO RESPECT
●Top of the proofer: a clearance of 24’’ to the ceiling must exist to permit maintenance.
●Back and sides:4’’ clearance.

A-5
AVERTISSEMENT LORS DE L'INSTALLATION
POUR VOTRE SÉCURITÉ
NE PAS EMMAGASINER OU UTILISER D'ESSENCE OU AUTRES VAPEURS
ET LIQUIDES INFLAMMABLES À PROXIMITÉ DE CET ÉQUIPEMENT
OU DE TOUT AUTRE APPAREIL.
IMPORTANT
INSTALLATION ET SERVICE
L'installation et le service doivent être faits par un technicien spécialisé. Contactez un technicien spécialisé
en électricité pour l'installation d’une prise de courant adéquate.
Cet appareil doit être branché et mis à la terre (grounded) conformément aux règlements effectifs de votre
localité. Si aucune réglementation n'est établie, l’appareil doit être branché conformément au Code
Canadien de l’électricité CSA 22.1-XX ou au Code National de l'Électricité NFPA 70-XX. Référez vous à
l’année de la dernière édition pour XX.
DISTANCES À RESPECTER
●Dessus de l'étuve : Il est obligatoire d’avoir au moins 24’’ entre le dessus de l’étuve et le plafond afin
d’effectuer le service.
●Arrière et côtés de l'étuve :une distance de 4’’ est nécessaire.

A-6
INSTALLATION
IN GENERAL
Take off the packaging material with care. Take off all the material used for packing and accessories.
If the equipment is delivered with casters, always lock them after installation and use flexible wire. It must
also be installed with restraining device (chain comes with the oven) to guard against transmission of strain
to the gas supply and connectors.
1. To the electrician
Electrical supply installation must be in accordance with the electrical rating on the nameplate.
WARNING
The electrician must make sure that the supply cable does not come in contact with the
oven top which becomes hot.
2. To the plumber
This equipment is to be installed to comply with the applicable federal, state or local plumbing codes.
Connect the steam system (1/4 NPT) to the cold water distribution network.
We highly recommend to use a water softener to eliminate minerals in the water.
We suggest you to use CUNO # CFS6135 (Doyon part number PLF240).
WARNING
Do not adjust the needle valves, it has been done at the factory.

A-7
INSTALLATION
EN GÉNÉRAL
Ouvrir avec soin l'emballage de votre équipement. Enlever tous les matériaux utilisés pour l'envelopper
ainsi que les accessoires.
Si l'appareil est muni de roulettes, veuillez toujours les bloquer après l'installation et utiliser un cordon
flexible. De plus, des équipements de retenues (chaîne comprise avec le four) doivent être installés pour
empêcher le tuyau d'alimentation et les connecteurs de subir des tensions lorsque le four est déplacé.
1. À l'électricien
L'installation de l'alimentation électrique des fours doit être conforme avec la source électrique spécifiée
sur la plaque signalétique de l’appareil.
AVERTISSEMENT
L'électricien doit s'assurer que le câble d'alimentation ne touche pas le dessus du four à
cause du degré élevé de chaleur dégagée par celui-ci.
2. Au plombier
Relier le système de vapeur (1/4 NPT) au réseau de distribution d'eau froide.
Il est fortement recommandé d'installer un adoucisseur d’eau à l’entrée de l’appareil afin d’éliminer les
minéraux dans l’eau.
Nous recommandons la marque CUNO # CFS6135 (numéro de pièce DOYON PLF240).
AVERTISSEMENT
Ne jamais changer l'ajustement des valves à aiguille pré-ajustées.

A-8 OPERATION OF THE RETARDER / PROOFER
1. Program the timer control before turning on the main switch.
2. Turn the power switch to the "1" position.
3. Select for manual proofer or for auto retarder/proofer.
4. " "In this position, it is on proofer mode. The unit heats up to the settings of the humidity control (
about 100°F / 37°C ), and then the humidity increases up to the humidity settings (80% to 85%
humidity). The refrigeration unit can not work at the same time as the proofer.
" "In this position, you can program how long the unit will work in the proofer mode and how
long it will work in the refrigeration mode. Don't worry, both can not work at the same time. See timer
programming instructions.
(See operating instructions for the timer setting and example on next pages).
TIMER STAGE:
Timer "ON" = = STARTING time of proofer
Timer "OFF"= = STARTING time of refrigeration
NOTE: THE STARTING TIME OF PROOFER AUTOMATICALLY STOPS THE REFRIGERATION.
Button ‘OVERRIDE’ : Used for anticipating manually the starting time of the next program and
vice versa.
5. Adjust the thermostat at the desired temperature (100°F / 37°C).
6. Adjust the humidity at the desired value ( 80% ).
7. Adjust the refrigeration at the desired temperature.
**We suggest you to turn off the light when the unit is used as a refrigerator, because the light
heats. Then you will save energy.
8. Loading the proofer. When used on manual mode " " , wait until the "PREH" on the humidity
control disappears before loading.
Leave the product inside until it is ready to bake.
9. When proofing cycle is completed, turn the switch "OFF" or to . "AUTO" mode.
When the proofer is not in operation, open the doors to let out the humidity and then prevent
mold.
P.S. : The doors should not be opened unnecessarily to conserve the heat and humidity in the proofer.

A-9
TIMER PROGRAMMING INSTRUCTIONS (GRASSLIN DIGI20E-120)
The circular keypads are positioned to provide a sequential path for programming.
Starting with Prog to select a program and then HAND to select heating (ON) or cooling (OFF).
Then press hfor hour, mfor minute and finally Dayto select day or days of the week.
If an input is missing or incomplete, the missing segments will flash when the or Prog key is
depressed. For example, if no "ON" or "OFF" is selected, the "ON" symbol will flash.
The missing entry must be completed before programming can resume.
While programming, pressing the h, m, or Day key longer than 2 seconds will cause a rapid roll of the
parameter.
A program consists of
1. Press Prog key
2. Select "ON " or "OFF"
3. Set hour and minute
4. Set day or multiple days on which it is to occur
Note: The program have to be coherent. So it is recommended to use Res to reset the program before
doing any important modification to the program in a way to avoid conflict between the different
programs.
A flashing display indicates either incomplete data entry or the battery is low (more than 5 days).
The ±1h key sets clock time up or down 1 hour for daylight savings time adjustment in the spring and
fall.
SETTING TIME AND DAY OF CLOCK.
1. Select the cycle of 12:00 hours or 24 hours.
2. Depress and hold hkey while pressing ±1h key to toggle between one or the other cycle and from
AM to PM.
3. Press and hold down key.
4. If setting the time when daylight savings time is in effect, press ±1h key once.
5. Set hour with hkey and if AM or PM does not appear in display, it’s a cycle of 24 hours.
6. Set minutes with m key.
7. Press Day key repeatedly to the day of the week (1 is Monday, 7 is Sunday).
8. Release key.

A-10 EXAMPLE OF TIMER ADJUSTEMENT
Monday to Saturday: proofer mode starts at 6:00 Am and stops at 8:00 Pm.
: retarder (fridge) mode starts at 8:00 Pm and stops at 6:00 Am.
Sunday: proofer mode starts at 7:00 Am and stops at 5:00Pm.
: retarder (fridge) mode starts at 5:00 Pm until next mode (proofer mode at 6:00 Am on Monday).
Note: On automatic mode, the proofer or the retarder is on. When the proofer stops, the retarder
automatically starts.
1. The time and day should have been set before doing this example (see previous pages).
2. Press PROG twice, you should see FR=20. Press to go back to the hour display.
If you don’t have FR=20, you should do a reset by pressing RES and return to #1. You have to do this
to avoid the existing program to overlap the new program.
3. Press PROG, you should see 1234567, select the days of the week by pressing DAY until you get
123456.
4. Select the hour (6:00 Am) by pressing H (hour) and M(min).
5. Press the HAND until you get on the bottom of the display.
6. Press PROG, you should see 1234567, select the days of the week by pressing DAY until you get
123456.
7. Select the hour (8:00 Pm) by pressing H (hour) and M (min).
8. Press the HAND until you get on the bottom of the display.
9. Press PROG, you should see 1234567, select the days of the week by pressing DAY until you get 7.
10. Select the hour (7:00 am) by pressing H(hour) and M(min).
11. Press the HAND until you get on the bottom of the display.
12. Press PROG, you should see 1234567, select the days of the week by pressing DAY until you get 7.
13. Select the hour (5:00 Pm) by pressing H(hour) and M(min).
14. Press the HAND until you get on the bottom of the display.
15. Press .

A-11
IMPORTANT :
The timer’s exit will change configuration ("ON " or "OFF") only when determined by programming.
Thus, if the exit is not at the desired value after ending programming, it can be changed using the
HAND key.
Example : you finished programming at 2:00 PM, the exit is at “OFF”, but should be at “ON” from 8:00
AM to 5:00 PM. Press on the HAND key to temporarily activate the exit. The exit’s configuration
will continue according to programming of next transition, at 5:00 PM.
When is shown (regular operation mode), it is possible to give a temporary manual priority using
HAND key (Cancellation or “Override”). This priority changes for the opposite displayed mode each time
the key is pressed and will remain until next change of configuration. It is possible to program several
consecutive cycles “ON” or “OFF” to return to the programmed mode and counter the cancellation effect
for an extended period.
REVIEW AND CHANGE PROGRAM
It is possible to review the program at any time by pressing on the PROG. key. Each time the key
PROG. is pressed, the program will appear in entry order.
To modify the program, select the part that has to be changed and enter the new dates and hours as
described previously. The existing program will be replaced by the new entries. Press PROG to save the
modifications.
To erase an individual program, select the program as described previously and press the Mkey
and the Hkey until "- -" appears. Then, press PROG or until "- -" flickers. After a couple seconds, the
program will be erraced.

A-12
TIMER PROGRAMMING INSTRUCTIONS (GRASSLIN FM1D20E-120)
+/- : (Adjustment keys) By pressing the key longer than 2 sec. while programming, you can adjust the
timer in steps of 5 units
Menu : By pressing this button, progamming is terminated and the system reverts to automatic operation
OK : Confirmation of programming
This programmable timer can be used under two different modes
1.Reset mode (preset program)
2.Menu mode (programming personalized)
Manual or
automatic
o
p
eration
Weekday
display
Setting of 24h
or AM/PM
mode
Switching
status display
ON/OFF
Summer/winter clock
changes
(Areas concerned only)
Reset
1
2
Proofe
r
Refri
g
eration

A-13
RESET MODE (PRESET PROGRAMMING)
This mode includes 3 programs. (P01, P02 and P03). These programs cannot be modified by the
user.
P01 Monday to Sunday (1X ON/OFF)
P02 Monday to Sunday (2X ON/OFF)
P03 Monday to Sunday (3X ON/OFF)
Note: `ON' = Proofer and `OFF' = Refrigeration
SEQUENCE TO FOLLOW FOR THE RESET MODE
1. Press ‘Reset’ button
2. Select 24h or AM/PM (with + or -) and confirm with ‘OK
3. Set hour (with + or -) and confirm with ‘OK’
4. Set minutes (with + or -) and confirm with ‘OK’
5. Set week day (with + or -) and confirm with ‘OK’
6. Select preset program such that described above this, P01, P02 or P03 (with + or -)
7. Two options are now possible :
!Press ‘Menu’ = terminate programming
!Press ‘OK’ = Going through preset programs to modify selection
!This adds programming personalized to that preset (See in following page for the
personalized programming)
These steps are used to
adjust the hour. If the hour
is correct, press `OK' until
step 6

A-14 SEQUENCE TO FOLLOW FOR THE MENU MODE (PERSONALIZED PROGRAM)
1. Press ‘Menu’ button
2. Select 24h or AM/PM (with + or -) and confirm with ‘OK’
3. Set hour (with + or -) and confirm with ‘OK’
4. Set minutes (with + or -) and confirm with ‘OK’
5. Set week day (with + or -) and confirm with ‘OK’
6. Program ON (prog 01) (Starting proofer) and confirm with ‘OK’
7. Set hour (with + or -) and confirm with ‘OK’
8. Set minutes (with + or -) and confirm with ‘OK’
9. Set week day, individual or blocks (with + or -) and confirm with ‘OK’ (See below for possible week
blocks and individual days)
10. Program 02 (prog 02) (Starting refrigeration) and confirm with ‘OK
11. Set hour (with + or -) and confirm with ‘OK’
12. Set minutes (with + or -) and confirm with ‘OK’
13. Set week day, individual or blocks (with + or -) and confirm with ‘OK
14. Two options are now possible :
!Press ‘Menu’ = terminate programming
!Press ‘OK’ = go to a new program ON setting
There are up to 20 memory locations available for 10 OFF and 10 ON commands.
This program can be changed at any time.
Possible week blocks or individual days
Monday * * * *
Tuesday * - * *
Wednesday * - * *
Thursday * - * *
Friday * - * *
Saturday * - * *
Sunday * - *
DELETE A PROGRAM
1. Press ‘Menu’ button, then press ‘OK’ until getting the ‘prog 01’
2. Then select the program that you want to erase with ‘+ or –‘ keys
(you can also press `OK' until the desired program appeared)
3. Press ‘OK’ to go at the flicker hour
4. Press ‘+ or –‘ key until obtaining `--` which flickers at the screen
5. Finally press ‘OK’
!Note that the programs ON and OFF are erased together. If you delete a single ‘ON’ instruction,
the corresponing ‘OFF’ instruction is also deleted
SELECT AUTOMATIC OR MANUAL MODE
The ‘+’ key serves to change over between automatic (AUTO) to override (OVR) ON and override (OVR)
OFF. This priority changes for the opposite displayed mode each time the key is pressed and will remain
until next change of configuration. It is possible to program several consecutive cycles “ON” or “OFF” to
return to the programmed mode and counter the cancellation effect for an extended period.
These steps are used to
adjust the hour. If the
hour is correct, press
`OK' until step 6
Other manuals for ER136
1
This manual suits for next models
1
Table of contents
Languages:
Other Doyon Oven manuals
Popular Oven manuals by other brands

Kuppersbusch
Kuppersbusch EEB6100.8MX Use & care guide

Zanussi
Zanussi ZOB10401 user manual

Gorenje
Gorenje b510x Instructions for use, installation, and connection

STOVES
STOVES SGB600MFSE Users guide & installation handbook

Maytag
Maytag MEW6627 user guide

Sencor
Sencor SEO 2000BK Translation of the original manual