DR Premier Quick start guide

DR®WALK-BEHIND LAWN VACUUM
SAFETY & OPERATING INSTRUCTIONS
Serial No.
Order No.
DR Power Equipment
Toll-free phone: 1-800-DR-OWNER (376-9637)
Website: www.DRpower.com
Read and understand this manual and all instructions before operating the DR WALK-BEHIND LAWN VACUUM.
Models:
-Premier
-Pro SP
Pro-SP Model Shown

2DR® WALK-BEHIND LAWN VACUUM
This indicates a hazardous situation, which, if not avoided, will result in death or serious injury.
Table of Contents
Chapter 1: General Safety Rules............................................................................................................................................................ 3
Chapter 2: Setting Up The DR®WALK-BEHIND LAWN VACUUM..................................................................................................... 8
Chapter 3: Operating the DR WALK-BEHIND LAWN VACUUM......................................................................................................... 15
Chapter 4: Maintaining the DR WALK-BEHIND LAWN VACUUM ..................................................................................................... 21
Chapter 5: Troubleshooting .................................................................................................................................................................. 30
Chapter 6: Parts Lists and Schematic Diagrams.................................................................................................................................. 32
Conventions used in this manual
Serial Number and Order Number
A Serial Number is used to identify your machine and is located on the Serial
Number Label on your machine (Figure 1). An Order Number is used to check
and maintain your order history and is located on the packing slip. For your
convenience and ready reference, enter the Serial Number and Order Number in
the space provided on the front cover of this manual.
Additional Information and Potential Changes
DR Power Equipment reserves the right to discontinue, change, and improve its
products at any time without notice or obligation to the purchaser. The
descriptions and specifications contained in this manual were in effect at
printing. Equipment described within this manual may be optional. Some
illustrations may not be applicable to your machine.
California Proposition 65
This indicates a hazardous situation, which, if not avoided, could result in minor or moderate injury.
This information is important in the proper use of your machine. Failure to follow this instruction could result in damage to your
machine or property.
This indicates a hazardous situation, which, if not avoided, could result in death or serious injury.
Figure 1

CONTACT US AT www.DRpower.com 3
Read this safety & operating Instructions manual before you use the DR WALK-BEHIND LAWN VACUUM. Become familiar with
the operation and service recommendations to ensure the best performance from your machine. If you have any questions or
need assistance, please contact us at www.DRpower.com or call toll-free 1-800-DR-OWNER (376-9637) and one of our Technical
Support Representatives will be happy to help you.
#137581
#188871
#A0000256659
#A0000268281
#10000042667
Chapter 1: General Safety Rules
Labels
Your DR WALK-BEHIND LAWN VACUUM carries prominent labels as reminders for its proper and safe use. Shown below are
copies of all the Safety and Information labels that appear on the equipment. Take a moment to study them and make a note of
their location on your DR WALK-BEHIND LAWN VACUUM as you set up and before you operate the unit. Replace damaged or
missing safety and information labels immediately.
#
A
00002448
#
A
00002448

4DR® WALK-BEHIND LAWN VACUUM
Pinch Point. Keep hands away from
rotating assemblies.
SERIOUS INJURY will occur if hands,
f
eet, or any part of your body
are
placed near or under any moving part
while the machine is running.
Read this safety &operating
Instructions manual before you use
the machine. Become familiar with
the operation and service
recommendations to ensure the
best performance.
This label indicates proximity to
machine openings with rotating blades
inside.
SERIOUS INJURY OR DEATH will occur
if hands, feet, or any part of your body
are placed in the chipper hopper,
discharge opening, or near or under any
moving part while the machine is
running.
Never run without
g
uards in
p
lace.
Never reach into feed hoppers,
discharge opening, or maintenance
openings. SERIOUS INJURY OR
DEATH may occur.
A
lways wear protective goggles or
safety glasses with side shields while
chipping to protect your eyes from
possible thrown debris.
Use ear protectors or ear plugs rated
f
or at least 20 dba to protect your
hearing.
Wear approved respiratory
mask in dusty conditions.

CONTACT US AT www.DRpower.com 5
Tragic accidents can occur if the operator is not alert to the presence of children. Children are often attracted to the machine and
the vacuuming activity. Never
assume that children will remain where you last saw them.
Keep children out of the work area and under the watchful care of a responsible adult.
Be alert and always turn off the DR Walk-Behind Lawn Vacuum engine if children or pets enter the work area.
Before, and while moving backwards, look behind, and down for small children and pets.
Never allow children to operate the vacuum.
Use extra care when approaching blind corners, shrubs, trees, or other objects that may obscure your vision.
This is a high-powered machine, with moving parts operating with high energy at high speeds. Use proper clothing and safety
gear when operating this machine to prevent or minimize the risk of severe injury. You must operate the machine safely. Unsafe
operation can create a number of hazards for you, as well as anyone else in the nearby area. Always take the following precautions
when operating this machine:
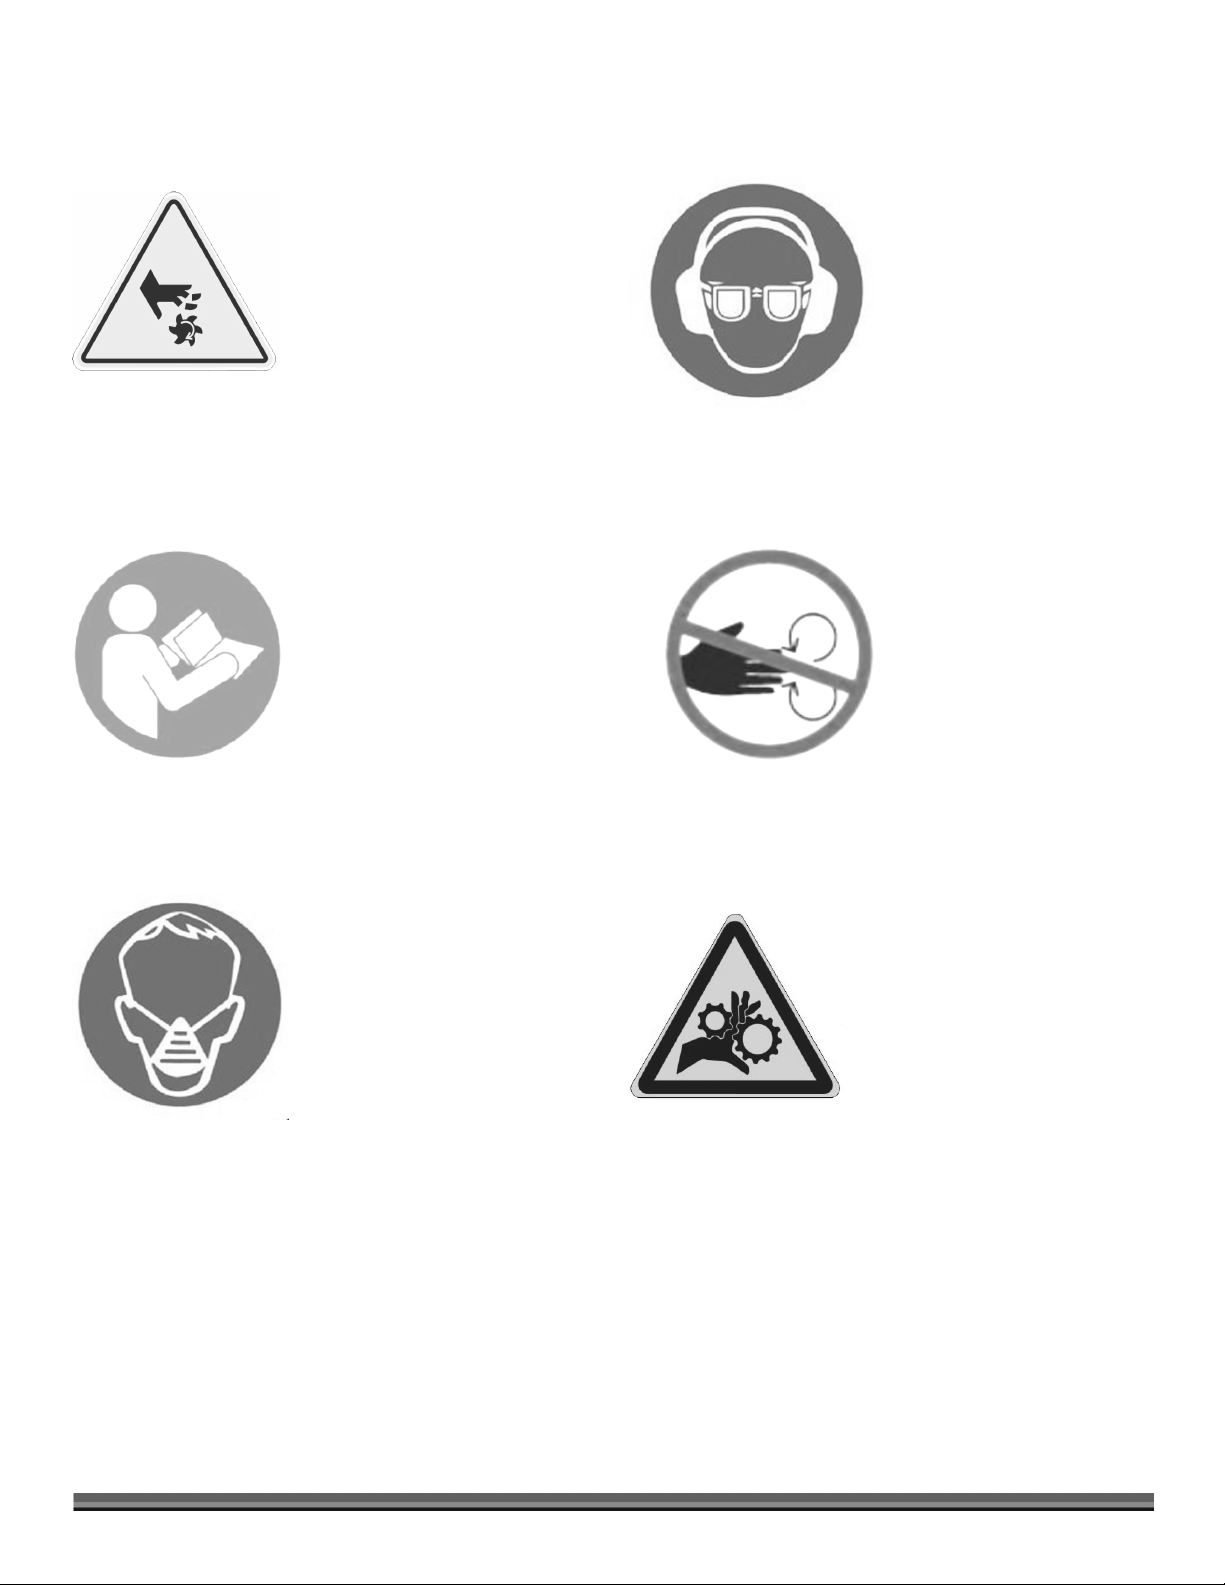
Always wear protective goggles or safety glasses with side shields while operating this vacuum system to protect your eyes
from possible foreign objects thrown from the machine.
Wear shoes with non-slip treads when using your DR Walk-Behind Lawn Vacuum. If you have safety shoes, we recommend
wearing them. Do not use the machine while barefoot or wearing open sandals.
Avoid wearing loose clothing or jewelry, which can catch on the machine’s moving parts.
We recommend wearing gloves while using your DR Walk-Behind Lawn Vacuum. Be sure your gloves fit properly and do not
have loose cuffs or drawstrings.
Always wear gloves when emptying the debris bag.
After vacuuming glass, bottles or cans, dispose of this waste properly, never in a compost pile.
We recommend changing the debris bag after vacuuming glass and other debris and before using the system to vacuum
material that may be used for compost or mulch.
Wear long pants while operating the machine.
Use Hearing Protectors or Ear Plugs rated for at least 20 dba to protect your hearing.
Never allow people who are unfamiliar with these instructions to use the vacuum. Allow only responsible individuals who are
familiar with these rules of safe operation to use your machine.
Never place your hands, feet, or any part of your body near or under any moving part while the machine is running.
Keep bystanders away from your work area at all times. To be safe, do not operate the machine near small children or pets,
and never allow children to operate the vacuum. Stop the engine when another person or pet approaches.
Never use the machine with the collection bag removed.
Clear the work area of objects such as rock, string-like material, wire, rope, or rags. Ingesting these objects into the vacuum
could damage the machine and/or cause injury.
Never, under any conditions, remove, bend, cut, fit, weld, or otherwise alter standard parts on the DR Walk-Behind Lawn
Vacuum. This includes all shields and guards. Modifications to your machine could cause personal injuries and property
damage and will void your warranty
High speed debris may be ejected from opening. Inspect the Bag before each use and if worn or damaged, replace before
using machine.
Protecting Yourself and Those Around You
Safety for Children and Pets

6DR® WALK-BEHIND LAWN VACUUM
Slopes are a major factor related to slip and fall accidents, which can result in severe injury. All slopes require caution. If you feel
uneasy on a slope, do not vacuum it. Always take the following precautions when using this machine on slopes:
A
lways:
Vacuum across the face of slopes; never up and down. Exercise extreme caution when changing direction on slopes.
Remove objects such as stones, wire, rope, or rags.
Watch for holes, ruts, or bumps in the landscape.
Never:
Never vacuum near drop-offs, ditches, or embankments; you could lose your footing or balance.
Never vacuum on slopes greater than 20 degrees, or any excessively steep slopes.
Never vacuum on wet, or slippery slopes; reduced traction could result in slipping.
Never park the vacuum on a steep grade or slope.
Gasoline is a highly flammable liquid. Gasoline also gives off flammable vapor that can be easily ignited and cause a fire or
explosion. Never overlook the hazards of gasoline. Always follow these precautions:
Never operate the engine with the air cleaner or cover over the carburetor air-intake removed, except for adjustment. Removal
of such parts could create a fire hazard. Do not use flammable solutions to clean air filter.
Never run the engine in an enclosed area or without proper ventilation as the exhaust from the engine contains carbon
monoxide, which is an odorless, tasteless, and deadly poisonous gas.
Store all fuel and Oil in containers specifically designed and approved for this purpose and keep away from heat and open
flame, and out of the reach of children.
Fill the gasoline tank outdoors with the engine off and allow the engine to cool completely. Do not handle gasoline if you or
anyone nearby is smoking, or if you are near anything that could cause it to ignite or explode. Replace the fuel tank and fuel
container caps securely.
If you spill gasoline, do not attempt to start the engine. Move the machine away from the area of the spill and avoid creating
any source of ignition until the gas vapors have dissipated. Wipe up any spilled fuel to prevent a fire hazard and properly
dispose of the waste.
Allow the engine to cool completely and empty the debris bag before storing the DR Walk-Behind Lawn Vacuum in any
enclosure. Remember, decomposing material generates heat and could start a fire. Never store the machine with gas in the
tank or a fuel container, near an open flame or spark such as a water heater.
Never make adjustments or repairs with the engine running. Disconnect the spark plug wire and keep the wire away from the
spark plug to prevent accidental starting.
Never check for an ignition spark with the spark plug or spark plug wire removed. Use an approved spark tester.
Never tamper with safety devices. Check their proper operation regularly.
Never change the engine governor settings or modify the engine speed. Modifications will void your warranty.
To reduce fire hazard, keep the engine and muffler area free of debris build-up such as leaves, grass, Oil, grease, or any other
combustible material. Clean the engine area after each use.
Never operate the engine without the muffler. Inspect the muffler periodically and replace if necessary. If equipped with a
muffler deflector, inspect the deflector periodically and replace if necessary.
The muffler and engine become very hot and can cause a severe burn; do not touch.
Always check fuel lines and fittings frequently for cracks or leaks, replace if necessary.
Replace rubber fuel lines and grommets when worn or damaged and after 5 years of use.
Safety with Gasoline-Powered Machines
Safety on Slopes

CONTACT US AT www.DRpower.com 7
Operating this Vacuum safely is necessary to prevent or minimize the risk of death or serious injury. Unsafe operation can create
a number of hazards for you. Always take the following precautions when operating this vacuum:
Keep in mind that the operator or user is responsible for accidents or hazards occurring to other people, their property, and
themselves.
Your DR walk-behind lawn vacuum is a powerful tool, not a plaything. Exercise extreme caution at all times. The design of
this machine is to vacuum debris. Do not use it for any other purpose.
Know how to stop the vacuum quickly.
Never allow people or pets to ride on the DR Walk-Behind Lawn Vacuum.
Never start the engine without the discharge chute fully inserted into the debris bag cuff.
Never attempt to remove the Debris Bag while the DR walk-behind lawn vacuum engine is running. Debris may exit at high
velocity out of the openings created in the seams as you unlatch the debris bag.
Empty the debris bag after each use to prevent spontaneous combustion due to decaying material.
Do not vacuum in sandy areas where you will vacuum large quantities of sand.
Never operate the vacuum near hot or burning debris
Never operate the vacuum near toxic or explosive materials.
Never operate the vacuum near campfire sites. Even seemingly extinguished fires may retain hot embers and coals.
If the machine should start making an unusual noise or vibration, stop the engine and wait five minutes to cool. Vibration is
generally a warning of trouble. Disconnect the spark plug wire and inspect for clogging, damaged, or worn impeller, loose
impeller bolt, or loose engine mounting bolts. Clean and repair and/or replace damaged parts.
Always shut off the DR Walk-Behind Lawn Vacuum engine, wait five minutes to cool, and disconnect the spark plug wire
before attempting to clear any obstructions.
Always keep the equipment in a good safe operating condition. Always make certain nuts and bolts are tight and always use
the supplied self-locking hardware; do not substitute.
Use the DR Walk-Behind Lawn Vacuum only in daylight.
While using the vacuum, do not hurry or take things for granted. When in doubt about the equipment or your surroundings,
stop the machine and take the time to look things over.
Never leave the machine unattended with the engine running.
Do not operate the machine when under the influence of alcohol, drugs, or medication.
See manufacturer’s instructions for proper operation and installation of accessories. Only use accessories approved by DR
Power Equipment.
General Safety
A Note to All Users
Under California law, and the laws of some other states, you are not permitted to operate an internal combustion Engine using
hydrocarbon fuels without an Engine spark arrester. This also applies to operation on US Forest Lands. All DR Walk-Behind Lawn
Vacuums shipped are provided with spark arresters. Failure of the owner or operator to maintain this equipment in compliance
with state regulations is a misdemeanor under California law and may be in violation of other state and/or federal regulations.
Contact your State Park Association or the appropriate state organization for specific information in your area.
No list of warnings and cautions can be all-inclusive. If situations occur that are not covered by this manual, the operator must
apply common sense and operate this Lawn Vacuum in a safe manner. Contact us at www.DRpower.com or call 1 (800) DR-
owner (376-9637) for assistance.

8DR® WALK-BEHIND LAWN VACUUM
A
ccess
Door
Range Select
Lever
Discharge Chute
Collection Bag
Vacuum Snout
Transmission
Engage Lever
Chipper Hopper
Height Adjuster
Handle
Snout Lid
Rear Pneumatic
Steering Wheels
A
ir Vent
Figure 2a
Drive Wheels
Fuel Tank Cap
Chipper
/
Vacuum
Housing
Handlebar with
Foam Gri
p
Chapter 2: Setting Up The DR®WALK-BEHIND LAWN VACUUM
It may be helpful to familiarize yourself with the controls and features of your DR WALK-BEHIND LAWN VACUUM as shown in
Figures 2a and 2b before beginning these procedures. If you have any questions at all, please feel free to contact us at
www.DRpower.com.
DR WALK-BEHIND LAWN VACUUM PRO SP Controls and Features

CONTACT US AT www.DRpower.com 9
Height Adjuster
Handle
Discharge
Chute
Collection Bag
Rear Pneumatic
Steering Wheels
Fuel Tank Cap
Vacuum Snout
A
ir Vent
A
ccess
Door
Vacuum
Housing
Snout Lid
Figure 2b
Handlebar with
Foam Grip
DR WALK-BEHIND LAWN VACUUM PREMIER Controls and Features

10 DR® WALK-BEHIND LAWN VACUUM
Specifications
Premier WB Leaf Vac Pro WB Leaf Vac M/S Pro WB Leaf Vac E/S
Engine See Engine Owner’s Manual See Engine Owner’s Manual See Engine Owner’s Manual
HP 5.9 8
Engine Oil Capacity 0.5 Liters (16.9 oz) 1.1 Liters (37.2 oz)
Engine Oil Type 10W-30
Impeller Drive Method Direct Drive
Chipper Knife Speed N/A 134MPH
Chipper Knife Material N/A Hardened Tool Steel
Chipping Capacity N/A 2"
Vacuum CFM 2038 2237
Vacuum MPH 86 95
Height Adjustment Range 1/4" to 4"
Collection Bag Volume 6 cu ft (4.8 Bushel) 8 cu ft (6.4 bushel)
Leaf Reduction 10:1
Transmission Type N/A Friction Disc
Speeds N/A 3 forward (1st: 0.9 MPH, 2nd: 1.7 MPH, 3rd: 2.6 MPH)
1 reverse
(
1.1 MPH
)
Overall Length 60" 61" 61"
Overall Height 45" 47" 47"
Width 26" 34" 34"
Machine Weight 150 Lbs 250 Lbs 255 Lbs
Parts Supplied in Shipping Crate – (Figure 3 and list below):
Item # Description Qty
1............................. Collection Bag Assembly ........................................ 1
2............................. Product Package ..................................................... 1
3............................. Walk-Behind Leaf Vacuum (not shown) ................ 1
Compare the contents of the Shipping Crate, with the Parts Supplied list above.
If you have any questions, please contact us at www.DRpower.com or call 1-800-
DR-OWNER (376-9637) for assistance.
1
2
Figure 3

CONTACT US AT www.DRpower.com 11
Assembling the DR WALK-BEHIND LAWN VACUUM
Note: Assembly should be done on a clean, level surface.
Tools Needed:
Two 1/2" Wrenches
The pictures reference the Pro model; however, the assembly is the same for
both models.
1. PRO MODEL: Position the Outlet Hose out of the way by swinging it behind
the Chipper Hopper (Figure 4) The Hopper will hold the Hose in this
position.
2. Remove the Lower Bolts and Lock Nuts that secure the Height Adjust to the
Frame using two 1/2" Wrenches (Figure 5).
3. Have a helper hold the Handlebar as you remove the Two Upper Bolts and
Lock Nuts that secure the Handlebar to the Height Adjust, using two 1/2"
Wrenches.
4. Rotate the Handlebars outward in a clockwise rotation until the Foam
Handlebar Grip is towards you. Note: On the Pro Model keep the Cables on
the outside of the Handlebars.
5. Adjust the Handlebars to the preferred working height and secure the
Handlebars to the Height Adjust using the four Bolts and Lock Nuts (Figure
6).
6. Orient the Collection Bag so that the Inlet Cuff is facing towards the Outlet
hose, install the Collection Bag Frame to the Bag Hangers on the Left side of
the Handlebar (Figure 7).
Bag
Hanger
Collection
Bag Frame
Inlet
Cuff
Figure 7
Outlet
Hose
Four Bolts
and Lock
Nuts
Height
A
djust
Figure 6
Foam
Handlebar
Gri
p
Figure 4
Outlet Hose Chipper
Hopper
Figure 5
Upper Bolts
and Lock
Nuts
Handlebar
Height
A
djust
Lower Bolts
and Lock
Nut
s
Frame

12 DR® WALK-BEHIND LAWN VACUUM
7. Swing the Bag Frame upward while pulling toward the Right-Side Bag
Hangers. The Bag Frame will ramp up on the Left Side Bag Hangers allowing
you to secure the Frame to the Right-Side Bag Hangers (Figure 8).
8. Install the Outlet Hose to the Collection Bag by expanding the Inlet Cuff and
sliding it over the Outlet Hose (Figure 9). Ensure the Inlet Cuff is pulled fully
forward onto the Outlet Hose.
9. Connect the Bag Safety Key into the Bag Safety Switch (Figure 10).
10. Flip the Height Adjust Handle from the “Shipped” Position to the “In Use”
position (Figure 11).
Right Side
Bag Hanger
Figure 8
Left Side Bag
Hangers
Collection
Bag Frame
Figure 9
Bag Inlet
Cuff
Outlet
Hose
Handle
Shipped
Figure 11
Handle
In Use
Bag Safety
Key
Bag Safety
Switch
Figure 10

CONTACT US AT www.DRpower.com 13
Adding the Engine Oil and Gasoline
Note: Use only the recommended high detergent Oil. Other types of Oil could
cause problems operating your machine. Please refer to your Engine
Owner’s Manual for detailed Oil information.
Engine Oil Type 10W-30
Engine Oil
Capacity
Premier: 0.5 Liters (16.9 oz)
Pro: 1.1 Liters (37.2 oz)
Fuel Unleaded gasoline
To add Engine Oil on Premier Models:
1. Level the Lawn Vacuum by rotating the Height Adjust Handle (Figure 12).
2. Remove the Oil Fill/Dipstick and add an initial quantity of the Oil
recommended by the Engine Manufacturer (refer to your Engine Owner’s
Manual for recommended quantities) and wait one minute for the Oil to
settle (Figure 13).
3. Insert the Dipstick, but do not screw it down. Remove the Dipstick to check
the Oil level.
4. Continue adding a few ounces of Oil at a time, rechecking the Dipstick until
the Oil reaches the fill mark (Figure 14).Be careful not to overfill.
5. Replace the Dipstick and screw all the way down when full.
You must add Oil before starting the Engine. This machine is shipped
without Oil. Traces of Oil may be in the reservoir from factory testing, but
you must add Oil before starting the Engine. Fill the reservoir slowly,
checking the level frequently to avoid overfilling.
The Engine needs to be on a level surface or overfilling could occur which
could damage the Engine during use.
The Dipstick should not be screwed down to ensure an accurate Oil level
reading.
Oil Fill
Dipstick
Figure 13
Height Adjust
Handle
Figure 12
Raise
Lower
Full Low
Figure 14
Operating Range

14 DR® WALK-BEHIND LAWN VACUUM
To add Engine Oil on Pro Models:
Your PRO DR WALK-BEHIND LAWN VACUUM Engine comes from the factory
with two fill points. The left side has an Oil fill Cap (Figure 15), and the right side
has an Oil Fill/Dipstick (Figure 16). Because of the Chipper Hopper the location
of the Dipstick is inaccessible. To better accommodate adding and checking
your Engines Oil, we recommend swapping the position of the Oil Fill Cap and
Oil Fill/Dipstick.
1. Level the Lawn Vacuum by rotating the Height Adjuster Handle (Figure 12).
2. Remove the Oil fill Cap (Figure 15).
3. Remove the Oil Fill/Dipstick, replace with the Oil Fill Cap (Figure 16).
4. Add an initial quantity of the Oil recommended by the Engine Manufacturer
(refer to your Engine Owner’s Manual for recommended quantities) and wait
one minute for the Oil to settle.
5. Insert the Dipstick, but do not screw it down. Remove the Dipstick to check
the Oil level.
6. Continue adding a few ounces of Oil at a time, rechecking the Dipstick until
the Oil reaches the fill mark (Figure 14). Be careful not to overfill.
7. Replace the Dipstick and screw all the way down when full
To Add Gasoline
1. Remove the Fuel Tank Cap from the Fuel Tank (Figure 17).
2. Fill the Fuel Tank with fresh, clean Unleaded Gasoline to 1 inch below the
bottom of the filler neck to provide space for any fuel expansion.
Note: It may be helpful to use a clean Funnel when adding fuel to the Fuel Tank
3. Reinstall the Fuel Fill Cap securely and wipe up any spilled gasoline.
Connecting the Battery Wire (Electric Start Models)
We ship all Electric-Starting WALK-BEHIND LAWN VACUUM’S with the Green
Negative Battery Wire disconnected. This prevents the Battery from discharging
during shipment. You must connect the Battery wire before using your
machine.
1. Remove the protective Cap that comes on the Battery Terminals for shipping
(Figure 18).
2. Insert the Negative Wire Connector onto the Negative Terminal of the
Battery.
Figure 16
Oil
Fill/Dipstick
Oil Fill Cap
Figure 15
Figure 17
Fuel Tank
Cap
Figure 18
Protective
Cap
Negative
(Green)
Wire
Negative
Terminal

CONTACT US AT www.DRpower.com 15
Chapter 3: Operating the DR WALK-BEHIND LAWN VACUUM
It may be helpful to better familiarize yourself with the features of your DR
WALK-BEHIND LAWN VACUUM by reviewing Figure 2a for Pro Models and
Figure 2b For Premier Models in Chapter 2 before beginning the steps outlined
in this chapter. Always refer to the Engine manual for more specific Engine
information.
Starting the Engine (Manual Start)
1. Move the Fuel Shut Off Lever to the ON position (Figure 19).
2. Move the Choke Control Lever to the “CHOKE” position (leave in the RUN
position if the Engine is already warm).
3. Move the throttle control to “FULL SPEED” (rabbit) position.
4. Turn the On/Off Switch to the ON position.
5. Slowly pull the Starter Cord until you feel resistance, then pull quickly. Once
the Engine starts, release the Cord and it will recoil back into position.
6. As the Engine warms up, slowly adjust the Choke to the Left towards the
“RUN” position. Wait until the Engine runs smoothly before each Choke
adjustment.
Starting the Engine (Electric Start)
1. Move the Fuel Shut Off Lever to the ON position (Figure 20).
2. Move the Choke Control Lever to the “CHOKE” position (leave in the run
position if the Engine is already warm).
3. Move throttle control to “FULL SPEED” (Rabbit) position.
4. Turn and hold the Ignition Key to the start position until the Engine starts
and then release. The key will snap back to the run position and the Engine
will continue to run.
5. As the Engine warms up, slowly adjust the Choke lever to the left towards
the “RUN” position until the engine runs smoothly.
Stopping the Engine (Manual Start)
1. Slowly move the Throttle Control Lever to the “IDLE” (Turtle) position
(Figure 19).
2. Turn the On/Off Switch to the OFF position.
Stopping the Engine (Electric Start)
1. Slowly move the Throttle Control Lever to the “IDLE” (Turtle) position
(Figure 20).
2. Turn the Ignition Key to the OFF position.
Figure 19
On/Off
Switch
Starter
Cord
Throttle
Leve
r
Choke
Lever
Fuel
Shut
Off
Figure 20
Throttle
Lever
Starter
Cord
Choke
Leve
r
Fuel
Shut off
Leve
r
Ignition
Key

16 DR® WALK-BEHIND LAWN VACUUM
Operating the Drive System (PRO Model)
There are two controls, the Range Select Lever, and the Transmission Engage
Lever, that are used to engage and disengage the drive wheels (Figure 21).
Familiarize yourself with these controls before you start the Engine.
The Range Select Lever (Figure 22) is used to select one of the following
Range settings: R (Reverse), and 1,2,3.
The number settings represent forward speeds ranging from “1” (0.9 MPH),
“2” (1.7 MPH), “3” (2.6 MPH).
Shift to R (Reverse) to move the machine in a reverse direction (1.1 MPH).
1st gear is the slowest speed and is used when vacuuming in difficult
conditions such as heavy leaf drop or damp leaves. 1st gear is also useful for
a controlled decent of slopes.
2nd gear is a medium speed and used for average conditions. This is the
gear you should use most of the time.
3rd gear is used for transporting the machine to and from your work site.
Transmission Engage Lever
The Transmission Engage Lever is used to engage and disengage the Drive
wheels.
1. Squeeze and hold the Transmission Engage Lever against the handlebar to
ENGAGE the drive wheels.
2. Release the Lever to DISENGAGE the wheels. The Engine will continue to
run, but the forward and reverse motion will stop.
How to Use the Range Select Lever
1. Release or let go of the Transmission Engage Lever.
2. Shift the Range Select Lever by pulling the lever to the right out of the detent, then pushing or pulling to the desired setting.
Release the Lever and assure the lever is captured in the detent.
Throttle Control
When vacuuming and chipping, the Throttle Control Lever should be set all the way to the left at full throttle or the fast position.
For starting and stopping the Engine refer to the start/stop Engine sections.
Wheel Drive Operating Tips
Operate the machine in a large, level, open area until you are familiar with the unit’s operation. Begin with 1st gear and
gradually work up to 3rd gear.
To avoid damaging the transmission, always release the Transmission Engage Lever before changing speeds.
Forward momentum may cause the machine to gradually coast to a stop after the Transmission Engage Lever is released.
Engage the Transmission Engage Lever slowly when starting off in 3rd gear. The machine may hesitate briefly before the wheels
begin turning.
To make a turn, gently push left or right on the Upper Handlebar.
Shift to the 1st gear if the wheels lose traction when going up a slope (always avoid excessively steep slopes). Before shifting,
turn the machine sideways on the slope to prevent rolling of the machine.
Never go up or down a slope at an angle as the machine may become unstable and tip over. If the machine does tip over,
immediately shut down the Engine and move the machine to stable ground. Check the machine for damage.
Never force the Range Selector as damage may result. If shifting is difficult, it may be necessary to manually move the machine
a few inches forward or backward while trying to move the Range Selector.
Figure 21
Transmission
Engagement
Lever
Range
Control
Lever
Figure 22
Range
Select Lever
Range
Select
Setting

CONTACT US AT www.DRpower.com 17
Using the Chipper Hopper
The Chipper can chip twigs and branches ranging in size up to 2" in diameter. Cut your materials into manageable lengths before
feeding them into the Chipper Hopper. The revolving Chipper Knife mounted on a Rotor, turns branches fed into the Hopper into
“chips”.
Be sure that the collection bag is empty and in place before chipping.
Always wear safety goggles, gloves, and hearing protection when chipping.
Start the Engine on level ground.
Keep a moderate feed rate to prevent overloading the machine.
Use common sense when using the chipper. Learn to recognize the change in sound when the Engine is overloading. Pull
back on whatever you are chipping if overloading should occur.
Green or dry branches chip easily and soft wood will chip easier than hard wood.
Use caution with small diameter green saplings and branches less than 1" in diameter. Chip these grouped or bundled
together to provide support for each other. If the material is 1" or larger, feed only one at a time into the Chipper Hopper.
Some side shoots or side branches may have to be trimmed from the main stalk before chipping.
Short stubs of branches may be pushed through the Chipper section with the next branch. NEVER ALLOW YOUR HANDS TO
ENTER THE CHIPPER HOPPER. If necessary, push the material further down with a long stick or branch.
When chipping branches occasionally a “tail” will be left at the end of the branch (usually green wood), which increases in
length as you chip and eventually wraps around the shaft. To avoid this, slowly turn the branch as you feed it into the Chipper
tube. This will also improve the chipping performance.
When chipping, frequently empty the Collection Bag to make it easier because of the weight of the accumulative chips.
If the machine does not chip well, the Chipper Knife may need sharpening or may need to be replaced.
Using the Vacuum
Before leaves drop, mow your lawn to the shortest recommended height. Your DR WALK-BEHIND LAWN VACUUM will
perform better on short grass.
The DR WALK-BEHIND LAWN VACUUM is designed to be used frequently during periods when leaves are dropping. It is not
recommended to let leaves get 4”, or deeper.
The drier the leaves the better.
The thicker the leaf layer the slower you should proceed. If leaves are wet or matted down use 1st gear and it may be necessary
to fluff up leaves before using the vac. If the snout clogs, try going at a slower speed.
Snout height is critical. The snout should ride above the leaf layer to allow proper vacuuming. Closer is not always better. As a
general reference, the front of the snout should scrape the top of the grass.
You should avoid vacuuming twigs and branches into the snout. This will cause clogging. Twigs and branches should be
processed through the Chipper Hopper.
Avoid overfilling the Vacuum Snout, this will cause clogging.
Vacuuming wet and soggy material will also cause clogging. A steady pace with a smaller flow of materials provides the most
effective results.
The Collection Bag does not have to be removed for emptying, simply unzip the Side Access Door and dump leaves out. You
may need to scoop the heavier debris out.
Avoid clogging when vacuuming loose, stringy material such as hay or pine straw, by picking up a small amount at a time.
Check and empty the Collection Bag frequently.
Avoid vacuuming in sandy areas, as this will cause excessive wear.
Use care when vacuuming near plantings, ornamentals, mulches.
Use extra caution when vacuuming around stone and gravel.

18 DR® WALK-BEHIND LAWN VACUUM
Adjusting the Vacuum Snout Height
The height of the Vacuum Snout can be adjusted to allow you to vary the
suction to meet the surface conditions.
For short turf with light leaf fall, the Snout should be lowered closer to the
surface.
For long turf and heavy leaf fall, the Snout should be raised above the debris.
For moving the machine long distances, you will avoid damage to the snout
by raising it to the highest setting.
1. To raise the Snout: Grasp the Height Adjust Handle, and rotate counter
clockwise (Figure 23).
2. To lower the Snout: Grasp the Height Adjust Handle and rotate clockwise.
Height adjust
Handle
Figure 23
Raise
Lower

CONTACT US AT www.DRpower.com 19
Emptying the Collection Bag
Empty the Bag as soon as it is full (check by feeling sides of Bag). Overfilling
the bag will cause the vacuuming performance to decrease or stop
completely and could lead to clogging of the discharge tube, snout, or both.
Empty the Bag completely BEFORE storing the machine to prevent premature
deterioration of the Bag caused from rotting debris and the possibility of a
fire occurring as a result of heat generated by decomposing debris.
Emptying the Collection Bag while Attached:
1. Shut off the Engine and wait for all moving parts come to a complete stop.
2. Leave the bag in position. Unzip the Access Door and let the debris fall out
(Figure 24). You may have to scoop out the remaining heavy debris with a
stick.
3. Zip the Access Door closed.
Emptying the Collection Bag by Power Discharge:
1. Shut off the Engine and wait for all moving parts come to a complete stop.
2. Leaving the Collection Bag in position, unzip the Side Access Door opposite
from the starting position.
a. Manual Start Models open the Right-Side Access Door from the
operators’ position (Figure 25).
b. Electric Start Models, Open the Left Side Access Door from the
operators’ position (Figure 26).
3. Start the machine and allow debris to discharge from the Collection Bag with
the aid of airflow.
4. Zip the Access Door closed.
Emptying the Collection Bag by removing the Bag:
1. Shut off the Engine and wait for all moving parts come to a complete stop.
2. Detach the Inlet Cuff from the Outlet Hose (Figure 27).
3. Detach the Collection Bag Safety Key from the Bag Safety Switch.
4. Detach the Collection Bag Frame from the Bag Hangers:
a. Unhook one side at a time by first Lifting the Bag Frame (Figure 34).
b. Pull the Bag Frame over to one side, lifting the out of the Bag Hangers.
c. Lift the Bag Frame out of the opposite Bag Hangers.
Never start the Engine without the Collection Bag attached firmly to the
Discharge Chute and Outlet Hose.
Keep bystanders 25 feet away.
Never point the Bag Access Door opening towards people, pets,
vehicles or buildings.
Always Open the Access Door opposite the starting position.
Figure 24
Collection
Ba
g
A
ccess Doo
r
Right Side Access
Doo
r
Figure 25
Collection Bag
Figure 26
Left Side Access
Door
Collection Bag
Figure 27
Hose
Cuff
Bag
Safety
Key
Bag Safety
Switch

20 DR® WALK-BEHIND LAWN VACUUM
5. Carry the Collection Bag to the dumping area, unzip the Access Door and
remove the Material.
6. Zip the Access Door closed.
7. Reattach the Collection Bag (Figure 28).
8. Reinstall the Cuff, pulling the Cuff fully Forward onto the Hose (Figure 27).
9. Reattach the Collection Bag Safety Key to the Safety Switch.
Clearing the Machine of Debris, Clogs or Jams
A clog or jam in the machine can cause the vacuuming and shredding and
chipping operations to decrease or even stop completely. If clogging occurs,
check (and clean, if necessary) the following areas.
Tools needed:
1/2" Wrench
Stick
1. Remove any material left in the Chipper Hopper with a stick.
2. Check that the Collection Bag is not overfilled. Empty the debris if Full.
To check the Chute for clogs:
1. Remove the four Bolts that secure the Chute to the Impeller Front and Back
using a 1/2" Wrench (Figure 29). Remove the Chute.
2. Clear and remove any clogged debris.
3. Reinstall the Chute.
4. Reinstall the Cuff, pulling the Cuff fully Forward onto the Hose.
To Check Behind the Impeller for clogs:
1. Remove the four Bolts that secure the Chute to the Impeller Front and Back
using a 1/2" Wrench (Figure 29). Remove the Chute.
2. Clear and remove clogged any debris using a stick.
3. Reinstall the Chute.
4. Reinstall the Cuff, pulling the Cuff fully Forward onto the Hose.
To check the Snout for clogs:
1. Remove the three Lock Nuts that secure the Snout to the Impeller Front
using a 1/2" Wrench (Figure 30). Remove the Snout.
2. Remove the Lock Nut that Secures the Cable Clamp and Safety Interlock
Harness to the Snout, using a 1/2" Wrench (Figure 31). Remove the Snout.
3. Clear and remove any clogged debris using a stick.
4. Reinstall the Snout, securing with three Lock Nuts using 1/2" Wrench
(Figure 30).
5. Reinstall the Cable Clamp and Safety Interlock Harness, securing with Lock
Nut using 1/2" Wrench (Figure 31).
Before performing any maintenance procedure or inspection, stop the
Engine, wait for all moving parts to come to a complete stop and wait five
minutes to allow all parts to cool. Disconnect the Spark Plug Wire,
keeping it away from the Spark Plug.
Figure 28
Bag Frame
1
2
3
Left Bag
Hanger
Right Bag
Hanger
Figure 29
Chute
Bolts
Hose
Impeller
Front
Cuff
Figure 30
Locknuts
Snout
Impeller Front
Figure 31
Cable Clamp
Safety
Interlock
Harness
Snout
Lock Nut
Other manuals for Premier
6
This manual suits for next models
4
Table of contents
Other DR Lawn And Garden Equipment manuals

DR
DR Manual-Start - Push Quick start guide

DR
DR PILOT Quick start guide

DR
DR Stump Grinder User manual

DR
DR DR LEAF LAWN Quick start guide

DR
DR PRO MAX450 Quick start guide

DR
DR Premier Quick start guide

DR
DR DR TRIMMER/MOWERTM BEAVER BLADE Quick start guide

DR
DR DR Quick start guide

DR
DR 48" LANDSCAPE RAKE Quick start guide

DR
DR Premier Quick start guide