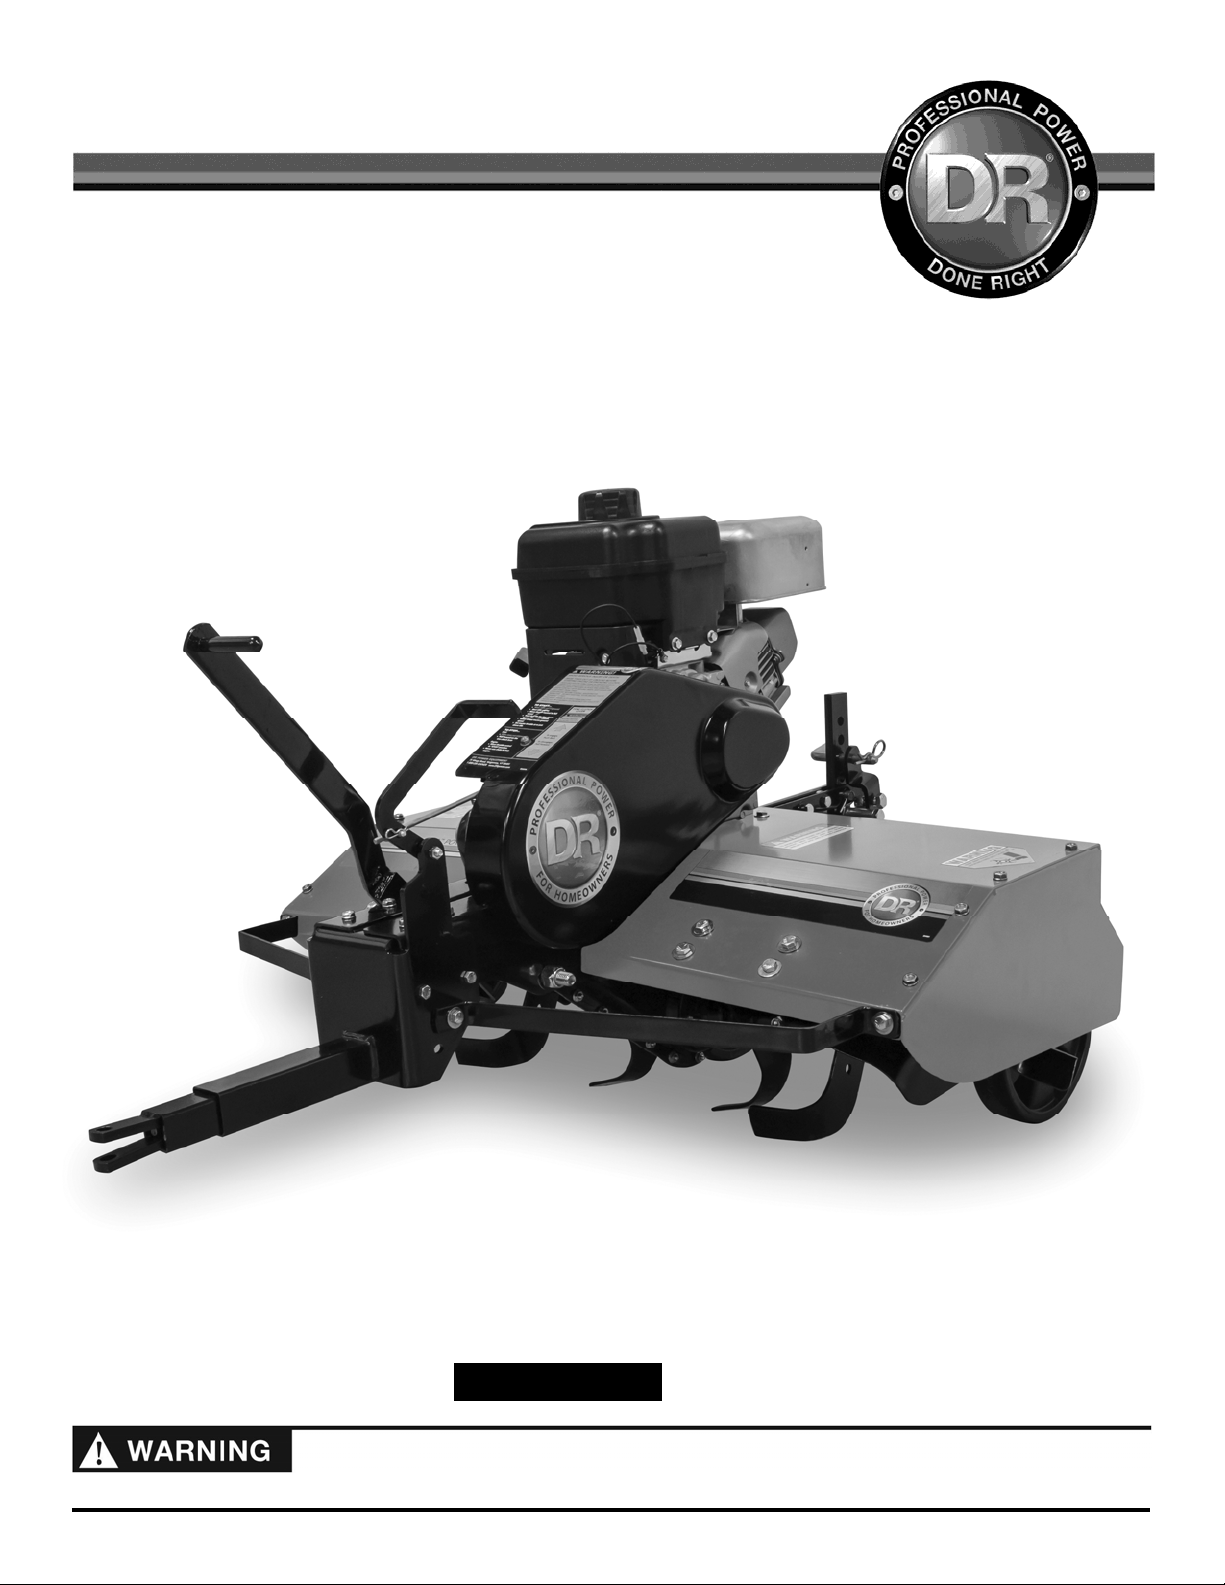
DR ROTO-HOG Premier Power Tiller Quick start guide

Read and understand this manual and all instructions before operating this DR ROTO-HOG Premier Power Tiller.
Serial No. ________________
Order No. ________________
DR®ROTO-HOG™ Premier Power Tiller
SAFETY & OPERATING INSTRUCTIONS
DR®Power Equipment
Toll-free phone: 1-800-DR-OWNER (376-9637)
Fax: 1-802-877-1213
Web site: www.DRpower.com
Original Language

2DR®
ROTO-HOG™ Premier Power Tiller
This indicates a hazardous situation, which, if not avoided, could result in death or serious injury.
Table of Contents
Chapter 1: General Safety Rules................................................................................................................................................................. 3
Chapter 2: Setting Up Your DR ROTO-HOG Premier Power Tiller .......................................................................................................... 7
Chapter 3: Operating Your DR ROTO-HOG Premier Power Tiller......................................................................................................... 11
Chapter 4: Maintaining Your DR ROTO-HOG Premier Power Tiller...................................................................................................... 15
Chapter 5: Troubleshooting ..................................................................................................................................................................... 19
Chapter 6: Parts Lists, Schematic Diagrams And Warranty ................................................................................................................... 21
Conventions used in this manual
Serial Number and Order Number
A Serial Number is used to identify your machine. The number is located on
the Serial Number Label attached to the chassis of your machine (Figure 1). For
your convenience and ready reference, enter the Identification number in the
space provided on the front cover of this manual. An Order Number is used to
check and maintain your order history. The number is located on the upper left
portion of your packing slip. For your convenience and ready reference, enter
the order number in the space provided on the front cover of this manual.
Additional Information and Potential Changes
DR Power Equipment reserves the right to discontinue, change, and improve its
products at any time without notice or obligation to the purchaser. The
descriptions and specifications contained in this manual were in effect at
printing. Equipment described within this manual may be optional. Some
illustrations may not be applicable to your machine.
Serial Number
Labe
l
Figure 1
This information is important in the proper use of your machine. Failure to follow this instruction could result in damage to
your machine or property.
This indicates a hazardous situation, which, if not avoided, could result in minor or moderate injury.

Contact us at www.DRpower.com 3
Read this safety & operating Instructions manual before you use the DR ROTO-HOG Premier Power Tiller. Become familiar with
the operation and service recommendations to ensure the best performance from your machine. If you have any questions or
need assistance, please contact us at www.DRpower.com or call toll-free 1-800-DR-OWNER (376-9637) and one of our Technical
Support Representatives will be happy to help you.
The DR ROTO-HOG Premier Power Tiller is a high-powered machine with fast moving parts operating at high speeds. You
must operate this machine safely. Unsafe operation can create hazards for you, as well as anyone else in the work area. Use
proper clothing and safety gear when operating this machine to prevent or minimize the risk of severe injury. Always take the
following precautions when operating the DR ROTO-HOG Premier Power Tiller:
Always wear protective goggles or safety glasses with side shields to protect your eyes from possible objects thrown from the
machine.
We recommend wearing safety shoes when using this machine. Wear shoes with non-slip treads to improve footing on
slippery surfaces. Do not use the machine wearing open sandals or while barefoot.
Do not wear loose clothing or jewelry, which can catch on the machine’s moving parts.
We recommend wearing long pants and gloves while using this machine. Be sure the gloves fit properly and do not have
loose cuffs or drawstrings.
We recommend the use of ear protectors or ear plugs rated for at least 20 dba to protect your hearing.
Allow only responsible individuals who are familiar with these general safety rules and operating instructions to use your DR
ROTO-HOG Premier Power Tiller. Never allow people who are unfamiliar with these rules and instructions to use your
machine.
Chapter 1: General Safety Rules
Labels
Your DR ROTO-HOG Premier Power Tiller carries prominent labels as reminders for its proper and safe use. Shown below are
copies of the Safety and Information Labels that appear on the equipment. Take a moment to study them and make a note of
their location on your DR ROTO-HOG Premier Power Tiller as you assemble and before you operate the machine. Replace
damaged or missing safety and information labels immediately.
Protecting Yourself and Those Around You
#224521
#
224511
#224531A

4DR®
ROTO-HOG™ Premier Power Tiller
Slope Operation
Safety for Children
Tragic accidents can occur if the operator is not alert to the presence of children. Children can be attracted to the DR ROTO-HOG
Premier Power Tiller and the tilling activity. Never assume that children will remain where you last saw them.
Keep children out of the work area and under the watchful care of a responsible adult.
Be alert and always turn off your Tow Vehicle and the Tiller Engine if children enter the work area.
Before, and while moving your Tow Vehicle backwards, look behind, and down for small children.
Never allow children to operate the DR ROTO-HOG Premier Power Tiller.
Use extra care when approaching blind corners, shrubs, trees, or other objects that may obscure your vision.
Have a complete working knowledge of your Tow Vehicle and know how to handle it with the DR ROTO-HOG Premier Power
Tiller attached.
Never place your hands, feet, or any part of your body near or under any moving part while the DR ROTO-HOG Premier
Power Tiller Engine is running.
Keep bystanders away from your work area at all times. To be safe, do not operate the DR ROTO-HOG Premier Power Tiller
near children or pets, and never allow children to operate the machine. Stop the Tow Vehicle and the DR ROTO-HOG
Premier Power Tiller Engine when another person or pet approaches.
Do not touch the Muffler and Engine when the machine is in use as they become very hot and can cause severe burns.
Clear the work area of objects that might jam or wrap around the tines such as glass, large sticks, stones, metal objects, wire,
rope, and string-like materials. Use on these objects could damage the DR ROTO-HOG Premier Power Tiller and/or cause
injury.
Do not use this machine around large roots and surface rocks that you cannot remove.
Do not use this machine around underground pipes and wiring.
Never engage the Tines when they are in the ground. If the DR ROTO-HOG Premier Power Tiller Engine should stall, raise
the Tines out of the soil and disengage them.
Never, under any conditions, remove, bend, cut, fit, weld, or otherwise alter standard parts on the DR ROTO-HOG Premier
Power Tiller. This includes all shields and guards. Modifications to your machine could cause personal injuries and property
damage and will void your warranty.
Use of machinery on slopes is a major factor related to accidents, which can result in severe personal injury. Use of machinery on
slopes requires caution. If you feel uneasy using the DR ROTO-HOG Premier Power Tiller on a slope, do not operate it. Always
take the following precautions when using this machine on slopes:
Always:
Exercise extreme caution when changing direction on slopes.
Watch for holes, ruts, and bumps on the ground.
Never:
Never operate near drop-offs, ditches, or embankments; you could lose control of your Tow Vehicle and/or the DR ROTO-HOG
Premier Power Tiller.
Never operate on slopes greater than 5 degrees, or on any excessively steep slope.
Never operate on wet, or slippery slopes. Reduced traction could result in tipping over your Tow Vehicle and/or the DR ROTO-
HOG Premier Power Tiller.
Never park the Tow Vehicle on a steep grade or slope.

Contact us at www.DRpower.com 5
California Proposition 65:
Engine exhaust and some of its constituents are known to the state of California to cause cancer, birth defects, and other
reproductive harm.
This product contains or emits chemicals known to the state of California to cause cancer, birth defects, and other
reproductive harm.
Safety with Gasoline-Powered Machines
California Proposition 65
Gasoline is a highly flammable liquid. Gasoline also gives off flammable vapor that can be easily ignited and cause a fire or
explosion. Never overlook the hazards of gasoline and always follow these precautions:
Never run the DR ROTO-HOG Premier Power Tiller Engine in an enclosed area or without proper ventilation as the exhaust
from the Engine contains carbon monoxide, which is an odorless, tasteless, and deadly poisonous gas.
Store all fuel and oil in containers specifically designed and approved for this purpose and keep away from heat, open flame,
and out of the reach of children.
Fill the gasoline tank outdoors with the Engine off and allow the Engine to cool completely. Do not handle gasoline if you or
anyone nearby is smoking, or if you are near anything that could cause it to ignite or explode. Replace the Fuel Tank and Fuel
Container Caps securely.
If you spill gasoline, do not attempt to start the Engine. Move the machine away from the area of the spill and avoid creating
any source of ignition until the gas vapors have dissipated. Wipe up any spilled fuel to prevent a fire hazard and properly
dispose of the waste.
Allow the DR ROTO-HOG Premier Power Tiller Engine to cool completely before storing in any enclosure. Never store the
machine with gas in the Tank or with gas in a Fuel Container near an open flame or spark such as a water heater.
Never make adjustments or repairs with the Engine running. Before making an adjustment or repair, shut off the DR ROTO-
HOG Premier Power Tiller Engine, wait five (5) minutes to cool, then disconnect the Spark Plug Wire and keep the Wire away
from the Spark Plug to prevent accidental starting.
Never check for an ignition spark with the Spark Plug or Spark Plug Wire removed. Always use an approved Spark Tester.
Never tamper with safety devices. Regularly check their proper operation.
Never change the Engine Governor settings or modify the Engine speed. Modifications will void your warranty.
To reduce fire hazard, keep the Engine and Muffler area free of debris build-up such as leaves, grass, oil, grease, or any other
combustible material. Clean the Engine area after each use.
Never operate the Engine without the Muffler. Inspect the Muffler periodically and replace if necessary. If the Engine is
equipped with a Muffler Deflector, inspect it periodically and replace if necessary.
Never operate the Engine with the Air Cleaner or Cover over the Carburetor Air Intake removed, except for adjustment.
Removal of such parts could create a fire hazard. Do not use flammable solutions to clean the Air Filter.
Always check Fuel Lines and Fittings frequently for cracks or leaks, replace if necessary.
Replace rubber Fuel Lines and Grommets when worn or damaged, but do not use over five (5) years.

6DR®
ROTO-HOG™ Premier Power Tiller
General Safety
A Note to All Users
No list of warnings and cautions can be all-inclusive. If situations occur that are not covered by this manual, the operator must
apply common sense and operate the DR ROTO-HOG Premier Power Tiller in a safe manner. Visit our website at
www.DRpower.com or call 1-800-DR-OWNER (376-9637) for assistance.
Under California law, and the laws of some other states, you are not permitted to operate an internal combustion Engine using
hydrocarbon fuels without an Engine Spark Arrester. This also applies to operation on US Forest Lands. All DR ROTO-HOG
Premier Power Tillers shipped to California and Washington State are provided with Spark Arresters. Failure of the
owner/operator to maintain this equipment in compliance with state regulations is a misdemeanor under California law and may
be in violation of other state and/or federal regulations. Contact your local Fire Marshal, Forest Service, State Park Association, or
the appropriate state organization for specific information in your area.
Safe operation of the DR ROTO-HOG Premier Power Tiller is necessary to prevent or minimize the risk of death or serious injury.
Unsafe operation can create a number of hazards for you. Always take the following precautions when operating this machine:
The DR ROTO-HOG Premier Power Tiller is a powerful tool and not a plaything. When using this machine, exercise extreme
caution at all times. The design of this machine is to till soil. Do not use it for any other purpose.
The operator or user of the DR ROTO-HOG Premier Power Tiller is responsible for accidents or hazards occurring to other
people, their property, and themselves.
Know how to quickly stop the DR ROTO-HOG Premier Power Tiller. See page 11.
Never allow people or pets to ride on this machine.
If the machine should make an unusual noise or vibration, shut off the Tow Vehicle and the DR ROTO-HOG Premier Power
Tiller Engines. Vibration is generally a warning of trouble. Wait five (5) minutes for the DR ROTO-HOG Premier Power Tiller
Engine to cool. Disconnect the Spark Plug Wire and then inspect the machine for clogging, damaged Tines, or loose Engine
mounting Bolts. Clear any obstructions and repair and/or replace damaged parts.
Always keep the machine in good safe operating condition. Always make certain Nuts and Bolts are tight and always use the
supplied self-locking hardware. DO NOT USE SUBSTITUTE HARDWARE.
Always shut off the Tow Vehicle and DR ROTO-HOG Premier Power Tiller Engine, wait five (5) minutes to cool, and disconnect
the Spark Plug Wire before attempting to clear any obstructions.
Use the DR ROTO-HOG Premier Power Tiller only in daylight and give complete and undivided attention to the job at hand.
Do not hurry or take things for granted when using the DR ROTO-HOG Premier Power Tiller. When in doubt about the
machine or your surroundings; stop the machine and take time to look things over.
Exercise extreme caution when on or crossing drives, walks, or roads. Stay alert for hidden hazards or traffic.
Never leave the DR ROTO-HOG Premier Power Tiller unattended with the Engine running. If leaving the machine, shift the
Tow Vehicle into neutral, set the Vehicle Parking Brake, turn off the Vehicle Engine and remove Key; raise the Tines of the Tiller
and disengage the Tine Drive then turn off the Tiller Engine.
Prior to transportation to and from the work area, disengage the Tiller Tine Drive, stop the Tiller Engine, and raise the Tines.
Do not operate the machine when under the influence of alcohol, drugs, or medication.
See manufacturer’s instructions for proper operation and installation of accessories. Only use accessories approved by DR
Power Equipment.

Contact us at www.DRpower.com 7
Chapter 2: Setting Up Your DR ROTO-HOG Premier Power Tiller
It may be helpful to familiarize yourself with the Controls and Features on your new machine by reviewing Figure 2 before
beginning the steps outlined in this chapter. For technical assistance, please visit our website at www.DRpower.com.
DR ROTO-HOG Premier Power Tiller Controls and Features
NOTE: The model shown in Figure 2 may look slightly different from your machine.
Figure 2
TINE
CLUTCH
LEVER
THROTTLE
PULL START
FUEL
SHUT
OFF
CHOKE
CONTROL
LIFT HANDLE
FLOATING HITCH
DEPTH STAKE

8DR®
ROTO-HOG™ Premier Power Tiller
DR ROTO-HOG Premier Power Tiller Specification Sheet
Assembling the Machine
NOTE: Assembling the DR ROTO-HOG Premier Power Tiller is a two-person job, as the Unit weighs 169 pounds. We recommend you
have an extra set of hands available before you begin.
Parts Supplied on Shipping Pallet:
DR ROTO-HOG Premier Power Tiller
Wheel Box:
-Two Wheels
-Hitch Bracket Extension
-Bolt, 1/2" x 1-1/4"
-Locknut, 1/2-13
-Safety
&
Operating Instructions Manual
-Briggs & Stratton Engine Manual
Tools and Supplies Needed:
Pliers
1. Position the Wheels onto the Axle against the Washers and
Cotter Pins that were left on the Axle (Figure 3).
2. Secure the Wheels with the Washers and Cotter Pins that you
removed during unpacking and bend the Cotter Pins with
Pliers.
3. Pull the Lift Handle Forward to lower the wheels (Figure 2 on
previous page).
4. Get help from another person to roll the Tiller from the Pallet.
Engine Briggs & Stratton 9.50 FPT, 208 CC, Single Cylinder
Approximate Run Time on a Tank of Fuel 90 minutes
Towing type Pin Hitch
Ground Clearance in Transport Mode 1.5"
Height Adjustment Manual
Range 5.5" deep
Tine Size 12"
Number of Tines 12
Wheels 15" x 6.00"-6 NHS (14" x 5.5")
Machine Size 39"w x 66"L (Transport), 35"H x 77"L (Lowest Position)
Machine Weight 169 lbs
Tongue Weight 90 lbs. (Transport) 112 lbs. (Lowest Position)
Shipping Weight 310 lbs.
Gauge of Steel on Shroud 13
Gauge of Steel on Frame 12 Gauge, 1.5" Tubular Steel
Figure 3
Wheel
Cotter Pin
Flat Washer

Contact us at www.DRpower.com 9
You must add Oil before starting the Engine. This machine is shipped without Oil. Traces of Oil may be in the reservoir from
factory testing, but you must add Oil before starting the Engine. Fill the reservoir slowly, checking the level frequently, to avoid
overfilling.
To get an accurate reading when checking the Oil level the machine should be on a level surface.
Adding the Engine Oil and Gasoline
Capacities
Briggs & Stratton - 950 Series, 9.50 FPT, OHV 20 oz. (.60L) SAE 30 High Detergent Oil
Gasoline Tank Unleaded Gas (85 Octane minimum), 3.2 Qts. (3.0 L)
Tip: To avoid confusion, we recommend leaving the Caps on the Fuel and
Engine Oil Fills and only removing one Cap each time when you are ready to
pour Gasoline or Oil into the correct Fill.
NOTE: Use SAE 30 High Detergent Oil classified “For Service SF, SG, SH, SJ” or
higher. Do not use special additives. Other types of Oil could cause
problems operating your machine. Please refer to your Engine Owner’s
Manual for detailed Oil information.
1. Place the machine on a level surface and initially add 16 oz. (1/2 quart) of
SAE 30 High Detergent oil, recommended by the Engine Manufacturer, and
wait one minute for the oil to settle (Figure 4).
2. Continue adding a few ounces of Oil at a time, until the Oil reaches just
below the threads. Be careful not to overfill.
3. Fill the Gas Tank with fresh, unleaded gas (with a minimum of 85 Octane), to
approximately 1" to 1-1/2" below the top of the Fill Neck to allow for Fuel
expansion. Be careful not to overfill and reinstall the Cap before starting the
Engine. See your Engine Owner’s Manual for more information.
NOTE: To refill the Gas Tank, turn the Engine OFF, and let the Engine cool at least
five (5) minutes before removing the Gas Fill Cap.
Fill
g
as tank outdoors or in a well-ventilated area, awa
y
from s
p
arks, o
p
en flames,
p
ilot li
g
hts, heat, and other i
g
nition sources.
Figure 4
OIL
FULL OIL LEVEL
REMOVE OIL CAP
REPLACE CAP
AFTER FILLED

10 DR®
ROTO-HOG™ Premier Power Tiller
Connecting the DR ROTO-HOG Premier Power Tiller to your Tow Vehicle
2. Place the Tiller on level ground and back up your Tow Vehicle so that the Hitch of the Vehicle is in line with and next to the
Hitch on the DR ROTO-HOG Premier Power Tiller. Set the Parking Brake on the Tow Vehicle.
2. Attach the Hitch Bracket Extension to the SMOOTH-TRAK™ Hitch of the Tiller using a Hitch Pin and the Hair Cotter Pin
(Figure 5).
NOTE: The Hitch Bracket Extension can be attached as shown in Figure 5 or turned upside down for Tractors with lower Draw Bars.
3. Fasten the Hitch Bracket Extension to the Tow Vehicle Draw Bar with a 1/2"-13 x 1-1/4" Hex Bolt and 1/2" Lock nut.
Adjusting the Depth Stake
The top Depth Stake Hole selects a till depth of 1" with each lower Hole increasing the till depth by 1" to a maximum of 5".
1. To change the till depth, remove the Hair Cotter Pin from the Clevis Pin which is connecting the Depth Stake to the Stake
Support Bracket (Figure 2 on page 7).
2. Grasp the top of the Depth Stake, remove the Clevis Pin and reposition the Depth Stake. Insert Clevis Pin and Hair Cotter Pin.
NOTE: The Depth Stake should never be removed from the Tiller. It is designed to protect the Tow Vehicles Trans Axle from the thrusting
action of the Tiller.
Control Box
Figure 5
HAIR COTTER PIN
1/2" NYLOCK
NUT
HEX BOLT,
1/2-13 X 1-1/4"
HITCH PIN
FLOATING
HITCH
HITCH BRACKET
EXTENSION
TRACTOR
DRAWBAR

Contact us at www.DRpower.com 11
Never stop the Engine by moving the Choke Lever to the Choke position. This could cause an Engine backfire resulting in Engine
damage.
Chapter 3: Operating Your DR ROTO-HOG Premier Power Tiller
Before Starting the Engine
1. Raise the Tines and place the machine on level ground.
2. Check the Engine Oil level every time you use the machine (Figure 4 on page 9).
3. Remove any built up debris from the Tines.
4. Attach the Spark Plug Wire to the Spark Plug.
5. Pull the Tine Clutch Lever all the way forward until it locks into place to disengage the Tines. A Safety Interlock Switch prevents
the Engine from starting with the Tines engaged.
Starting
1. When starting a cold Engine, push the Choke Control Lever to the Choke
position and the Throttle Control Lever to Run position (Figure 6).
2. Grasp the Recoil Starter Handle
and slowly pull until you feel resistance,
then pull the cord with a smooth accelerating motion to start the Engine. Do
not let the Starter Handle snap back against the Engine. One or two pulls
usually starts the DR ROTO-HOG Premier Power Tiller.
3. After the Engine starts, slowly push the Choke Control Lever to the left
(RUN). Wait until the Engine runs smoothly before each Choke adjustment.
For the best Engine performance, you should operate the Engine with the
Throttle in the Run position.
Breaking in your Tiller
Break-in the Tiller’s Belts, Pulleys, and the Control before you actually begin tilling.
1. Start the Engine with the Tiller attached to the Tow Vehicle in transport position. Engage the Tine Clutch Lever to start the
Tiller’s rotation. Allow the Tines to rotate for five minutes.
2. Check Tine operation and adjust if necessary. See Tine Operation
Check
in the
Service and
Adjustments section of this
manual.
Stopping the Engine
1. Move the Throttle Control Lever
all the way to the STOP position (Figure 6).
Figure 6
Choke
Control
Leve
r
Fuel
Shut
O
ff
Throttle Control
Lever

12 DR®
ROTO-HOG™ Premier Power Tiller
Failure to remove long vegetation will result in frequent stalling of the Engine due to entanglement of the Tines.
Use common sense when using the machine. Learn to recognize the change in sounds when it is overloaded. Turn off the Engine
immediately if the machine becomes jammed to prevent damage to the drive system.
Operating Safety
Operating Parameters
The DR ROTO-HOG Premier Power Tiller is designed to be used with most ATVs, Lawn\Garden Tractors, and Compact Tractors.
The Tiller should never be used with a Truck (2WD or 4WD). Use of a Truck will void the DR ROTO-HOG Premier Power Tiller
Warranty.
Operating Procedures
There are three (3) applications for the DR ROTO-HOG Premier Power Tiller: Garden Tilling, Sod Busting, and small Food Plot
installation. For all applications, engage the Tines while they are raised and not contacting the soil. Then slowly lower the Tines
into the soil to the proper depth for the different soil conditions.
Gardens:
1. Check the area for large stones and foreign objects that could snag or wedge into the Tines.
2. Perform a soil test to assess needs for soil treatment.
Tip: If a soil test indicates amendments necessary (lime, fertilizers, sulfur, etc) then apply before tilling to best integrate it into the
soil.
3. Check wetness in the soil to determine if clumping will require slower Tow Vehicle speeds.
Food Plot Installation and Sod Busting:
1. Clear the work area of objects such as glass, large sticks and stones, roots, metal objects, wire, rope, and string-like materials.
2. Cut all vegetation to the lowest possible height.
3. Remove the cut vegetation by either rake, vacuum, blowing OR allow it to dry several days and re-cut.
4. Refer to seed specifications to determine the optimal depth of tillage necessary.
5. With initial pass, begin breaking only the top inch of soil to breakup sod.
6. Break the soil thoroughly across the entire area. See the following “Tilling Tips”.
7. Gradually lower the Tines 1-2 inches and repeat step 6 until you are satisfied with the tillage created.
Engage the Tines in the air without contacting the soil. Slowly lower the Tines into the soil while seated on the Tow Vehicle.
Engaging the Tines with them in the soil may cause the DR ROTO-HOG Premier Power Tiller to push the Tow Vehicle forward.
The first pass on unknown soil conditions should be only about an inch to test the soil conditions.
Always check for objects and obstacles in the path of this machine before moving.
Always shut off the DR ROTO-HOG power tiller engine and disconnect the spark plug wire before clearing debris.
Do not refuel the Engine while it is hot or running.

Contact us at www.DRpower.com 13
Figure 7
Tilling Tips
In compacted soil or sod, or in food plot and sod busting applications, several passes may be necessary to till to a depth of five
and a half (5.5) inches. For the first pass, just scratch the surface. The depth for each successive pass needs to be determined
by individual site and soil conditions. If the machine stalls repeatedly, you should till slower or not as deep.
Check the ground moisture. DO NOT till if you can make a ball of soil in your hand from the ground to be tilled; it is too wet.
Create full tillage (depths up to 5.5") after entire area is dry.
To obtain the most efficient tillage, operate the DR ROTO-HOG Premier Power Tiller Engine at full throttle at the slowest speed
of your Tow Vehicle.
When operating the machine for the first time, proceed slowly and carefully until you become familiar with the proper method
of operating the machine.
Soil conditions will determine how deep the machine can penetrate on the first pass.
In damp soil, till only the top inch of seedbed. Allow tillage to dry for several hours in sunny and/or windy conditions.
Listen to your DR ROTO-HOG Premier Power Tiller Engine. When the Engine RPM decreases or stalls (overloaded condition)
raise the Tines for shallower tilling. If the Engine is lightly loaded, lower the Tines to increase the tilling depth.
If the soil is extremely hard and dry, it may be desirable to “cross till” an area at a shallow depth first, then till the soil in the
direction of planting rows on subsequent passes until the desired tillage is obtained.
In soil that was tilled the year before, select the tilling depth at which the Tiller Engine runs comfortable and does not stall or
pull down. Lower the depth for additional passes if great depth is desired.
Where possible, we recommend that you till in a pattern similar to that shown in Figure 7.
1. Make the first pass.
NOTE: If you raise the Tines at the end of a pass, use care to lower them back to the same depth. Tilling too deep on the first pass may
cause the Tow Vehicle to surge forward and/or cause the Tiller to stall or break Shear Bolts.
8. Skip a space equal to the width of the machine then make the return pass.
9. Till the skipped areas.
Cultivating Tips
You can use the DR ROTO-HOG Premier Power Tiller for cultivating (Figure 8), which requires a minimum of two (2) inches of
soil penetration.
Set the tines so they will penetrate the soil to a depth of two (2) to three (3) inches.
Run the DR ROTO-HOG Premier Power Tiller Engine at Full Throttle except when cultivating small plants. A slower Engine
speed is necessary to prevent burying small plants.
Figure 8

14 DR®
ROTO-HOG™ Premier Power Tiller
The DR ROTO HOG Premier Power Tiller is not equipped for towing on any public roadway.
When towed, the maximum safe towing speed is 10 mph.
Slopes and Uneven Terrain
Handling and Transporting
We recommend using two (2) people to lift the DR ROTO-HOG Premier Power Tiller. Lift the machine by the SMOOTH-TRAK™
Hitch to connect and disconnect from your Tow Vehicle. To transport the machine with your Tow Vehicle, first raise the Tines to
the MAX position (lower the Wheels) using the Lift Handle.
Never lift the machine while the Engine is running.
Never operate your DR ROTO-HOG Premier Power Tiller on slopes greater than 5 degrees. Doing so could result in serious
injury or damage to your machine.
When operating the machine over uneven terrain and slopes, use extreme caution to not tip over the machine. Move slowly if
the ground has ruts, bumps, and other depressions.

Contact us at www.DRpower.com 15
Chapter 4: Maintaining Your DR ROTO-HOG Premier Power Tiller
This chapter covers regular maintenance procedures that will ensure the best performance and long life of your DR ROTO-HOG
Premier Power Tiller. For Engine maintenance, please refer to the Engine Owner’s Manual that came with your machine. Service
intervals listed in the checklist below supersede those listed in the Engine Owner’s Manual. Maintenance Kits and accessories are
available through our website at www.DRpower.com.
Regular Maintenance Checklist
NOTE: Consider that the service intervals shown are the maximum under normal operating conditions. Increase frequencies under
extremely dirty or dusty conditions.
PROCEDURE BEFORE EACH USE EVERY 8-10 HOURS EVERY 35 HOURS
Check the Engine Oil Level ▲
Clean the Tines and Debris Shield* After each use
Check the general condition of the machine, e.g. nuts, bolts,
welds, etc. ▲
Clean Engine Exterior & Cooling Fins ▲
Check the Tines Shear Bolts for wear ▲
Grease the Tines Shaft
▲
Check the Transmission Oil Level NOTE: 1st time 5 to 8 hrs.
▲
Clean Air Filter ▲
Inspect the Tine Drive Belt for wear
▲
Check Tines for Wear
▲
Change Engine Oil NOTE: 1st time 5 to 8 hrs.
▲
Replace Air Filter and Pre-cleaner
▲
Replace the Tine Drive Belt
▲
Replace Spark Plug
▲
* Cover the Engine Muffler, Carburetor, and Air Filter before using a hose to clean the Tines and Debris Shield.
Lubrication
Your DR ROTO-HOG Premier Power Tiller was lubricated at the Factory. However, periodic lubrication of the Engine and Tines
Shaft is required.
Supplies Needed:
Grease Gun w/General purpose grease
When performing any maintenance, you must first shut off the Engine; wait five (5) minutes to allow parts to cool and disconnect
the Spark Plu
g
Wire, keepin
g
it awa
y
from the Spark Plu
g
.
When performing any maintenance, you must first shut off the Engine; wait five (5) minutes to allow parts to cool and disconnect
the Spark Plug Wire, keeping it away from the Spark Plug.

16 DR®
ROTO-HOG™ Premier Power Tiller
Be certain to fill the Engine with Oil before starting. See page 9.
Tines Shaft:
Grease the Tines Shaft using a Grease Gun with General Purpose grease every
8-10 hours. Apply about ten (10) pumps of the grease in the Grease Fitting
(Figure 9). Perform this lubrication more often in dry and dusty environments.
Removing and Replacing the Engine Oil
Tools & Supplies Recommended:
Flat Head Screw Driver
Vacuum Pump Oil Drainer
SAE 30 High Detergent, 20 oz. (0.60L)
NOTE: Remove the Oil when the Engine is warm. Warm Oil flows quickly and completely.
1. Using a Flat Head Screw Driver, remove the Oil Fill Cap and vacuum the Oil from the Engine through the Oil Fill (Figure 4 on
page 9) using a Vacuum Pump Oil Drainer.
2. Replace the Oil by following the instructions on page 9.
NOTE: Use SAE 30 High Detergent Oil classified “For Service SF, SG, SH, SJ” or higher. Do not use special additives. Other types of
Oil could cause problems operating your machine. Please refer to your Engine Owner’s Manual for detailed oil information.
3. Replace the Oil Fill Cap and reattach the Spark Plug Wire.
NOTE: Be sure to use environmentally safe disposal procedures for the used Oil.
When performing any maintenance, you must first shut off the Engine, wait five (5) minutes to allow parts to cool and disconnect
the Spark Plu
g
Wire, keepin
g
it awa
y
from the Spark Plu
g
.
Never oil or grease Pivot Points. Viscous lubricants will attract dust and dirt that can cause wear on pivot points. If you feel you
must lubricate them, use only dry powdered graphite type lubricants.
Figure 9

Contact us at www.DRpower.com 17
Do not move or remove the Belt Guide (Figure 10). If you accidentally alter the position of the Belt Guide, return it to the correct
setting of 6-1/2" above the Tine Shield Support Plate (Figure 10).
Transmission Lubrication
Check the Transmission Oil Level after the first 5 hours of operation. Remove the Oil Fill Plug (Figure 9 on page 16). The Oil level
must be even with the Plug Hole (with the Tiller level). Add Oil if necessary. Use SAE 30 non-detergent motor Oil. Replace Oil Fill
Plug.
NOTE: It is not necessary to change the Oil in the Tiller Transmission. If for any reason it must be changed, Oil capacity is 22 oz.
Removing and Replacing the V-Belt
Replace the Tine Drive V-Belt if damaged from slipping under heavy loads or if it shows cracks or frayed edges.
Tools and Supplies Needed:
Screwdriver
7/16" Socket
1. Remove the Screws from the top and rear of the Belt Guard using a 7/16"
Socket and remove the Belt Guard. (Figure 11).
2. Disengage the Tine Clutch Lever and remove the worn Belt.
3. Reverse this procedure to install a new Belt.
When performing any maintenance, you must first shut off the Engine; wait five (5) minutes to allow parts to cool and disconnect
the Spark Plu
g
Wire, keepin
g
it awa
y
from the Spark Plu
g
.
Figure 10
Figure 11

18 DR®
ROTO-HOG™ Premier Power Tiller
Before performing this check, you must first shut off the Engine; wait five (5) minutes to allow parts to cool and disconnect the
Spark Plug Wire, keeping it away from the Spark Plug.
Tine Operation Check
1. Disengage the Tines and raise them up off the ground using the Lift Handle.
2. Rotate one set of Tines with your hand; the other set should also rotate.
3. Replace the Spark Plug wire.
Tine Shear Bolts
The DR ROTO-HOG Premier Power Tiller drive components are protected from damage by Grade 5 Shear Bolts in the Tine
Assemblies. The Shear Bolts hold the Tine Assemblies in proper location on the Drive Axles. Should a Tine Assembly strike or
pick up a large hidden object and jam, the Shear Bolt holding the Tine Assembly to the drive shaft will shear or break, protecting
the drive components of the DR ROTO-HOG Premier Power Tiller from major damage.
Two (2) extra sets of Tine Shear Bolts with Lock Washers are included with the DR ROTO-HOG Premier Power Tiller. They are
located in the Tiller Stake Support Bracket on the rear of the Tiller.
The design of the Tine Shear Bolt is to loosely fit when properly installed.
When performing any maintenance, you must first shut off the Engine; wait five (5) minutes to allow parts to cool and disconnect
the Spark Plug Wire, keeping it away from the Spark Plug.
NEVER attempt to use a Bolt or Pin that is larger or harder than the original Grade 5 Shear Bolts.

Contact us at www.DRpower.com 19
Chapter 5: Troubleshooting
Most problems are easy to fix. Consult the Troubleshooting Table for common problems and their solutions. If you continue to
experience problems, visit our website at www.DRpower.com or call: 1-800-DR-OWNER (376-9637) for support.
Troubleshooting Table
SYMPTOM POSSIBLE CAUSE
Recoil will not pull out
or is difficult to pull.
Check that the Tine Drive Clutch is disengaged.
Check the Engine Oil level; the Engine may be seized.
There may be an Oil compression lock in the Cylinder. Take out the Spark Plug; hold a rag over the
Spark Plug Hole and pull the Recoil Cord several times to blow out any Oil in the Cylinder. Wipe off
the Spark Plug and reinstall it.
The Recoil may be broken or jammed. Visit our website at www.DRpower.com.
The Engine will not
start.
(Please refer to the
Engine Owner’s
Manual for Engine-
specific procedures.)
Check that the Tine Drive Clutch is disengaged.
Check that the Spark Plug Wire is attached.
Check the Oil and Gas level. See page 9.
The Gas may be old; change it if necessary. Use a fuel stabilizer if you keep Gas longer than one
month.
The Fuel Tank may be clogged. Remove it and clean it out.
Check the Throttle and Choke settings, adjustment and travel.
The Engine is Choked improperly flooding the Engine. Move the Choke to the RUN position, move
the Throttle to the FAST position and pull the Recoil Starter several times to clear out Gas.
The Spark Plug may be dirty or cracked; change it if necessary. If it’s oily, leave it out, hold a rag
over the Plug Hole and pull the Recoil Cord several times to blow out any Oil in the Cylinder, then
wipe off the Plug and reinsert it.
The Air Filter may be dirty; change it following the procedure in the Engine Owner’s Manual.
If your Engine still won’t start, visit our website at www.DRpower.com.
The Engine lacks
power or is not
running smoothly.
(Please refer to the
Engine Owner’s
Manual for engine-
specific procedures.)
The Engine is overloaded. Set Depth Stake and Wheels for shallower tilling.
Check the Throttle; it should be set in the FAST position.
The Air Filter may be dirty; change it following the procedure in the Engine Owner’s Manual.
Dirty Air Screen. Clean the Air Screen.
The Spark Plug may be dirty or cracked; change it if necessary. If it’s oily, leave it out, hold a rag
over the Plug hole and pull the Recoil Cord several times to blow out any Oil in the Cylinder, then
wipe off the Plug, check the gap and reinsert it.
The Gas may be old; change it if necessary. Use a fuel stabilizer if you keep Gas longer than one
month.
The Engine Oil may be dirty. Change it if necessary, following the procedure on page 16.
If your Engine still lacks power, visit our website at www.DRpower.com.
When performing any maintenance, you must first shut off the Engine; wait five (5) minutes to allow parts to cool and disconnect
the Spark Plug Wire, keeping it away from the Spark Plug.

20 DR®
ROTO-HOG™ Premier Power Tiller
SYMPTOM POSSIBLE CAUSE
Engine smokes and
overheats.
Check the Oil level and adjust as needed.
The Air Filter may be dirty; change it following the procedure in the Engine Owner’s Manual.
Dirty Air Screen. Clean the Air Screen.
You may be using the wrong Oil. Refer to your Engine Owner’s Manual for detailed information.
Clean the Engine cooling fins and the Carburetor Housing if they are dirty.
If the Engine still smokes, visit our website at www.DRpower.com.
The Engine runs well
but the Tines won’t
move.
The Tine Drive Clutch is not engaged.
The Tine Drive V-Belt is off the pulleys or broken. See page 17.
The Engine runs well
but labors when
tilling.
Operator is being too aggressive; raise the Tines.
The tilling is too deep. Adjust the Depth Stake.
Be sure the Engine Throttle is set on the Fast (RABBIT) position.
Excessive bounce and
difficult handling.
The area you are tilling may be too dry and hard. Moisten the ground or wait for conditions that are
more favorable.
Be sure the Engine Throttle is set on the Fast (RABBIT) position.
The Wheels and Depth Stake are incorrectly adjusted. Readjust the Wheels and Depth Stake.
If your DR ROTO-HOG Premier Power Tiller still bounces, visit our website at www.DRpower.com.
The tilled soil balls up
or clumps.
The ground that you are trying to till is too moist. See Tilling Tips on page 13.
Tow Vehicle surges
forward.
Tines are set too deep. Set the Tines to appropriate depth of 1 to 2 inches per pass.
The Tines are engaged while on the ground or in the soil. Ensure the Tines are raised and are not
in contact with anything before engaging.
The Tines are too low and engaged when coming to an untilled area at the end of tilled area. Stop
the Tow Vehicle so the Tiller Tines are short of the untilled area, disengage and lift the Tines up
before continuing.
Tilling in an area with large roots, surface rocks or other debris. Remove obstacles if possible. If
obstacles cannot be removed, do not use the Tiller in that area.
The rotating Tines are lowered to fast. Lower the Tines slowly into area to be tilled to prevent
overload; especially in untilled sod.
When performing any maintenance, you must first shut off the Engine; wait five (5) minutes to allow parts to cool and disconnect
the Spark Plug Wire, keeping it away from the Spark Plug.
Table of contents
Other DR Tiller manuals