Page 1of 27
CR300 Vers: 2.1
Table of Contents
Introduction ............................................................................................................................................ 3
Important Health and Safety Information ....................................................................................... 3
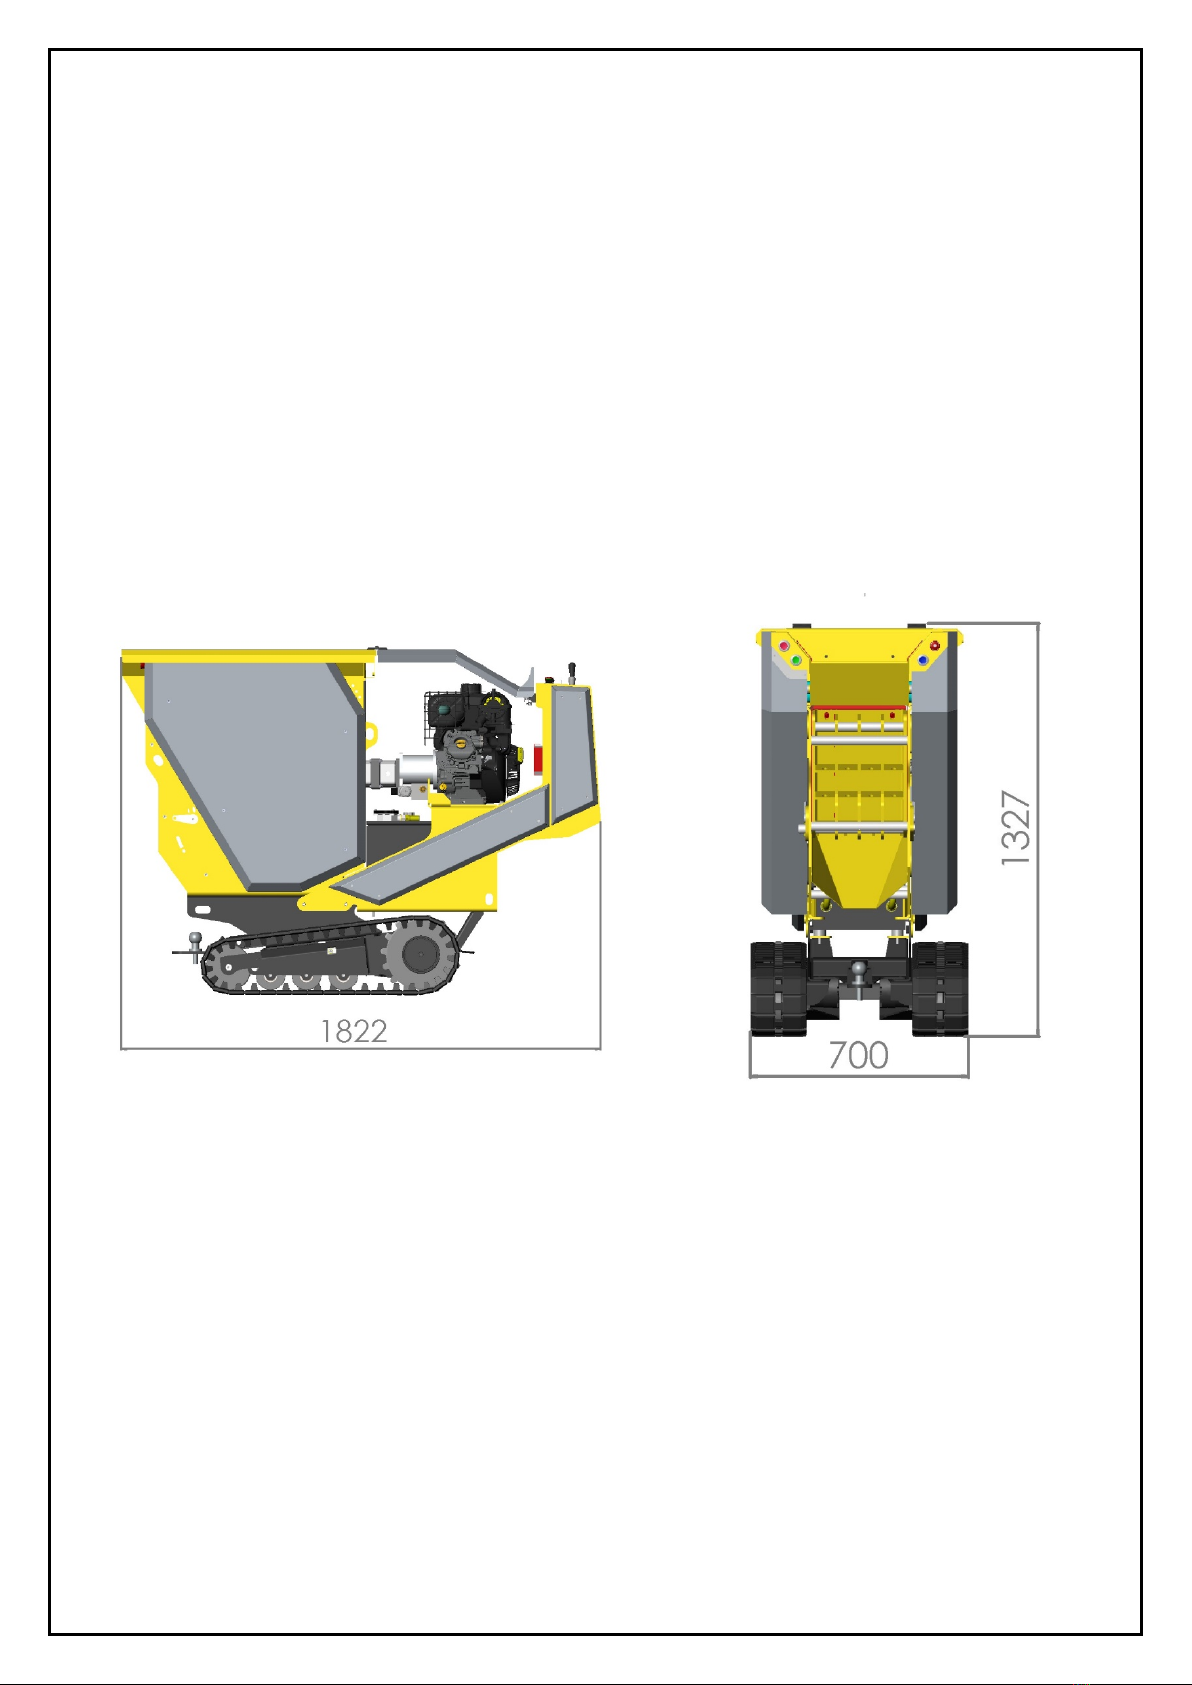
Specifications................................................................................................................................. 4
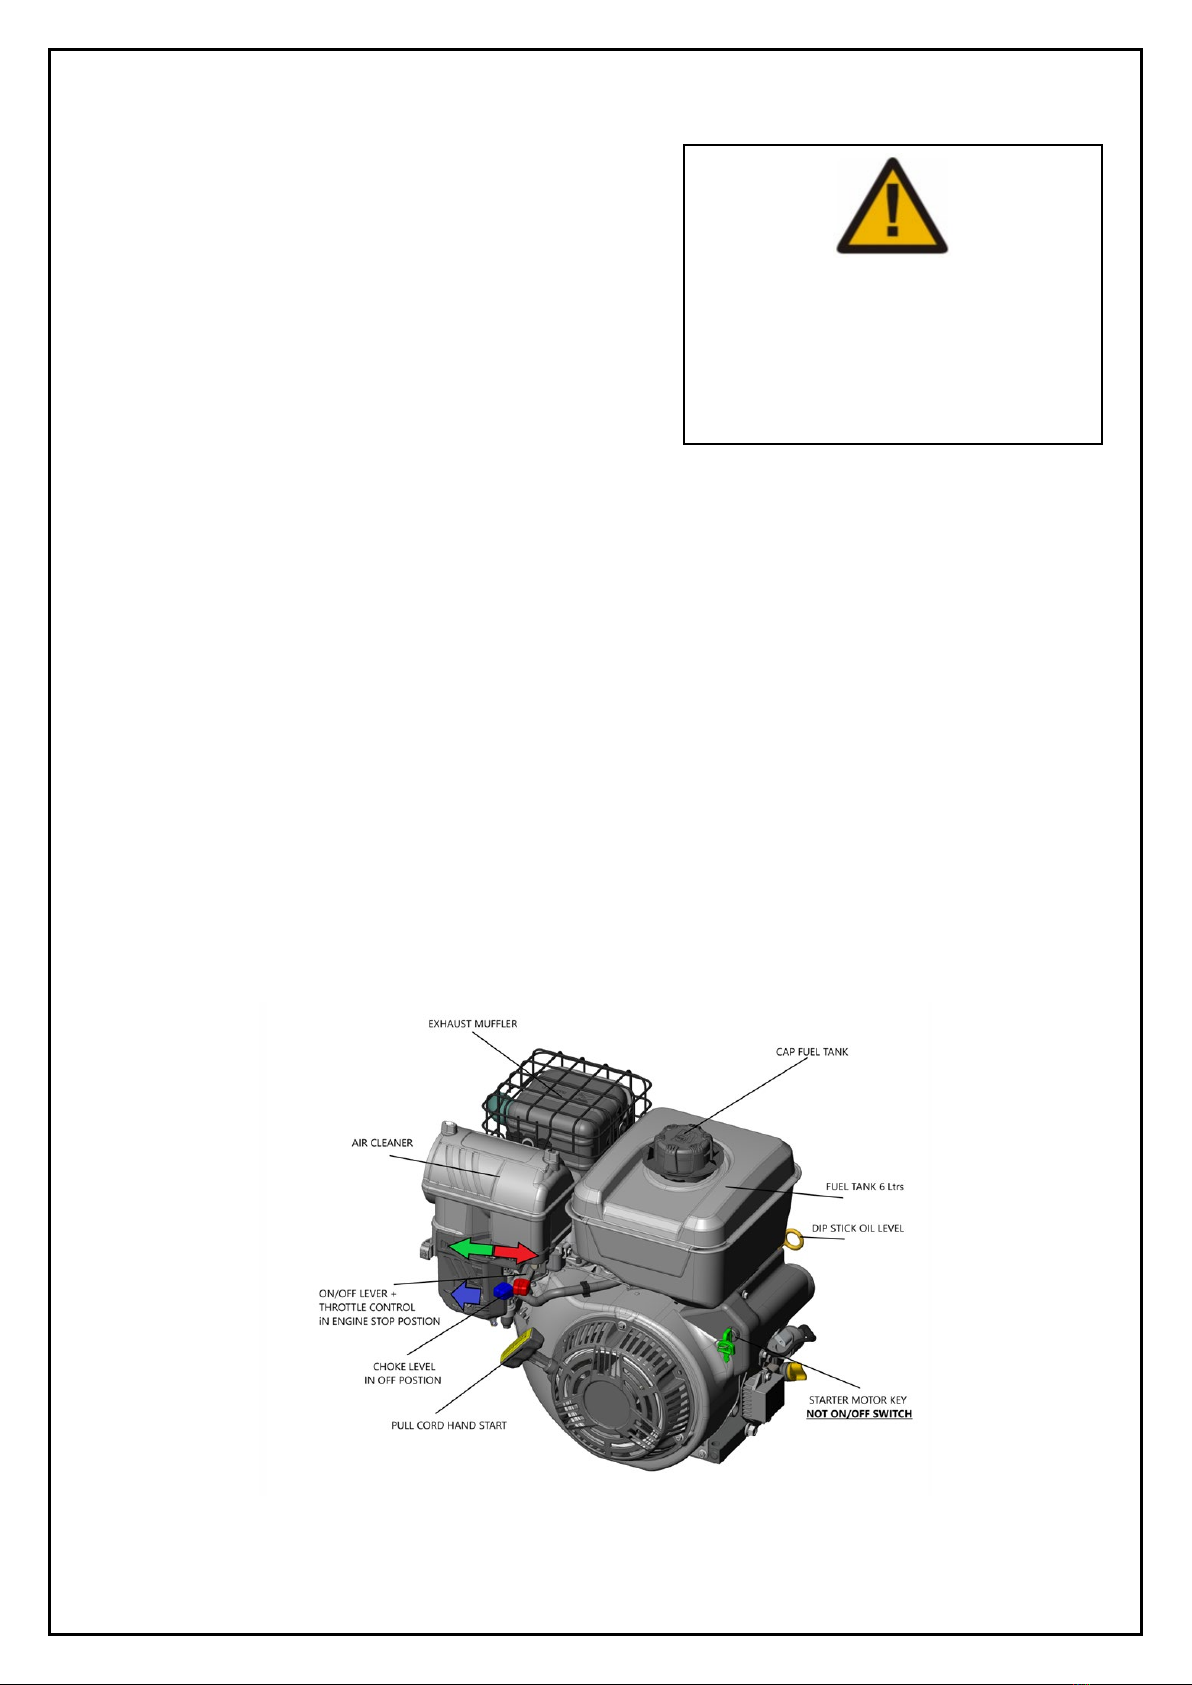
Parts Locator ................................................................................................................................. 5
Safe Working...........................................................................................................................................6
Operator’s Personal Protective Equipment (PPE)............................................................................ 6
Basic Crushing Operation Safety..................................................................................................... 6
General Safety Matters .................................................................................................................. 6
Engine Noise.................................................................................................................................. 7
Refuelling ...................................................................................................................................... 7
Operating Instructions ............................................................................................................................ 8
Storage and Parking ....................................................................................................................... 8
Starting the Engine ........................................................................................................................ 9
Stopping the Engine..................................................................................................................... 10
Crawler Tracking Controls ............................................................................................................ 11
Tracking....................................................................................................................................... 11
Crushing Controls ........................................................................................................................ 13
Crushing ...................................................................................................................................... 13
Troubleshooting .......................................................................................................................... 14
Service Instructions...............................................................................................................................15
Service Schedule.......................................................................................................................... 16
Check Fittings .............................................................................................................................. 18
Hazardous Materials and End of Machine Life .............................................................................. 18
Battery Safety Information ........................................................................................................... 19
Tension Drive Belts ...................................................................................................................... 20
Engine Servicing........................................................................................................................... 20
Hydraulic Servicing....................................................................................................................... 21
Warranty Statement .............................................................................................................................22
Declaration of Conformity ....................................................................................................................24
Identification Plate................................................................................................................................25
Circuit Diagram .....................................................................................................................................26