DUALSUN M-60-0BBP Series User manual

1 / 17 Installation Manual for DualSun PV Modules
Installation Manual for DualSun
PV Modules
Regular Photovoltaic Modules
DualSun xxxM-60-0BBP
Safety Notes
This manual elaborates on installation and safety use information for PV power generating
modules (hereinafter referred to as module) of DualSun SAS (hereinafter referred to as
DualSun). Please abide by all safety precautions in this guide and local regulations.
Installation of modules requires professional skills and knowledge and is to be carried out
by qualified personnel. Please read this manual carefully before installing and using this
module. Installation personnel shall get familiar with mechanical and electrical requirements
of this system. Please keep this manual properly as reference for future maintenance or
upkeep or for sales and treatment of modules.
If you have any doubts, please contact DualSun global quality and customer service
department for further interpretation.

2 / 17 Installation Manual for DualSun PV Modules
Contents
1Introduction....................................................................................................................................................3
2Laws and regulations...................................................................................................................................3
3General information......................................................................................................................................3
3.1 Module identification...........................................................................................................................3
3.2 Regular safety......................................................................................................................................4
3.3 Electric performance safety...............................................................................................................5
3.4 Operation safety..................................................................................................................................5
3.5 Fire safety.............................................................................................................................................6
4Installation conditions.................................................................................................................................6
4.1 Installation site and working environments......................................................................................6
4.2 Selection of tilt angles.........................................................................................................................7
5Mechanical installation................................................................................................................................7
5.1 Regular requirements.........................................................................................................................7
5.2 Way of installation...............................................................................................................................8
6Electric installation..................................................................................................................................... 11
6.1 Electric performance......................................................................................................................... 11
6.2 Cables and connecting lines............................................................................................................13
6.3 Connector...........................................................................................................................................13
6.4 Bypass diode......................................................................................................................................13
7Grounding.....................................................................................................................................................14
7.1 Grounding by grounding clamp.......................................................................................................14
7.2 Grounding by unoccupied mounting holes....................................................................................15
7.3 The third party grounding devices ..................................................................................................16
8Operation and maintenance.....................................................................................................................16
8.1 Cleaning..............................................................................................................................................16
8.2 Module appearance inspection.......................................................................................................17
8.3 Inspection of connectors and cables..............................................................................................17
9The list of the modification.............................................................................................................17

3 / 17 Installation Manual for DualSun PV Modules
1 Introduction
First thank you very much for choosing DualSun PV modules!
This installation manual covers key electric and mechanical installation information, so please
understand such information before installing DualSun modules. In addition, this manual also
covers some safety information that you shall get familiar with. All contents in this manual are
intellectual properties of DualSun which originates from long term of technical exploration and
experience accumulation of DualSun.
This installation manual does not entail any explicit or implicit quality warranty and does not
stipulate on compensation schemes for losses, module damages or other costs caused by or
related to module installation, operation, utilization and maintenance process. If patent rights or
the third party rights are infringed by use of modules, DualSun will not take any responsibility.
DualSun reserves the rights for modifying product manual or installation manual without notice
in advance.
If customers fail to install modules as per requirements set forth in this manual, the quality
warranty provided for customers during sales will become invalid. In addition, suggestions in this
manual are to improve safety of module installation, which are tested and proved by practices.
Please provide this manual to PV system users for reference to and advise them of safety,
operation and maintenance requirements and suggestions.
2 Laws and regulations
Mechanical and electrical installation of PV modules shall follow proper regulations such as
electric law, building law and electric connecting requirements. These regulations differ with
different installation sites, such as building roofing installation, vehicle-mounted application.
Requirements may also differ with installation system voltage, DC or AC. See specific clauses in
local authorities.
3 General information
3.1 Module identification
Each module is pasted with 3 labels providing information below:
1. Nameplate: It describes product type, standard rated power, rated current, ratedvoltage, open
circuit voltage, short circuit current under testing conditions, certification indicator, maximum
system voltage, etc.
2. Current level label: Divide modules as per their optimal working current and there are values:

4 / 17 Installation Manual for DualSun PV Modules
H, M or L (H means the highest current level). The best practice is to install modules with the
same current level (such as H) in one strand in the process of installation.
3. Serial No.: Each module has a unique serial number which is solidified inside the module
permanently and it can be seen from front top of the module. Each serial number is put in before
laminating of the module. In addition, you can find the same serial number on the module
nameplate.
1
Frame
2
glass
3
EVA
4
cell
5
backsheet
6
silicon
7
Connecting
box
8
Nameplate
9
Cables
10
Connector
11
Mounting
hole
12
Grounding
hole
13
Leakage
hole
14
shape code
Figure 1Module Section Structure and Components
3.2 Regular safety
DualSun module is considered to be in compliance with IEC61730 only when the module is
mounted in the manner specified by the mounting instructions below.
When the module is installed on roof, it is necessary to take the overall fire rating of the finished
structure as well as later overall maintenance into account. The roofing PV system shall be installed
after assessment by construction experts or engineers and with official analysis results for the entire
structure. It shall be proved capable of supporting extra system bracket pressure, including PV
module weight.
For your safety, please do not work onthe roof without safety protective measures which include
but not limited to fall protection, ladder or stair and personal protective articles.
For your safety, please do not install or handle modules in unfavorable conditions including but
not limited to strong wind or gust, damp or sandy roofs.

5 / 17 Installation Manual for DualSun PV Modules
3.3 Electric performance safety
The application level of DualSun module is Application Class A, which can be used in systems
operating at greater than 50 V DC or 240 W, where general contact access is anticipated;
In case of no connected load or external circuits, modules can also produce voltage. Please
use insulation tools and wear rubber gloves when operating modules in the sunlight.
PV modules do not have switch. PV modules can only stop work when they are kept from
sunlight or covered by cloth, hard board or light-proof materials or when front side of modules are
placed on smooth and flat surfaces.
To avoid electric arc or electric shock hazards, please do not break down electric connection
in loaded conditions. Wrong connections will also lead to electric arc or shock. Keep connectors
dry and clean and make sure that they are in good working condition. Do not insert other metals
into the connectors or carry out electric connection by whatever means.
Snow and water in surrounding environments will intensify light reflection and lead to increase
of current and output power. And module voltage and power will increase under low temperature.
If module glass or packaging materials are damaged, please wear personal protective articles
and isolate modules from the circuit.
Working is onlyallowed in dry conditions bymeans of dry tools. Do not operate when modules
are wet unless you wear the proper electric shock protection device. Please operate following the
cleaning requirements in this manual when cleaning modules.
3.4 Operation safety
Do not open DualSun Package in transportation and storage process unless the modules
arrive at the installation site.
Do not damage the package and do not make packaged modules on pallet fall directly.
Do not exceed the highest layer limit indicated on the packaging carton when piling modules
up. Put packaging carton in the ventilated, rain-proof and dry places before unpacking of modules.
Open DualSun’s packaging carton following unpacking instructions.
Do not hold the connecting box or wires to lift the entire module in any cases.
Do not stand or walk on modules.
Do not pile one module onto another.
To avoid glass damage, do not put heavy objects on module glass.
Be careful when placing modules on a surface and at corners in particular.
Do not try to unpack the module or remove nameplate or parts of modules.
Do not paint surface of modules or apply any other glues.
Do not damage, grad or scratch back film of modules.
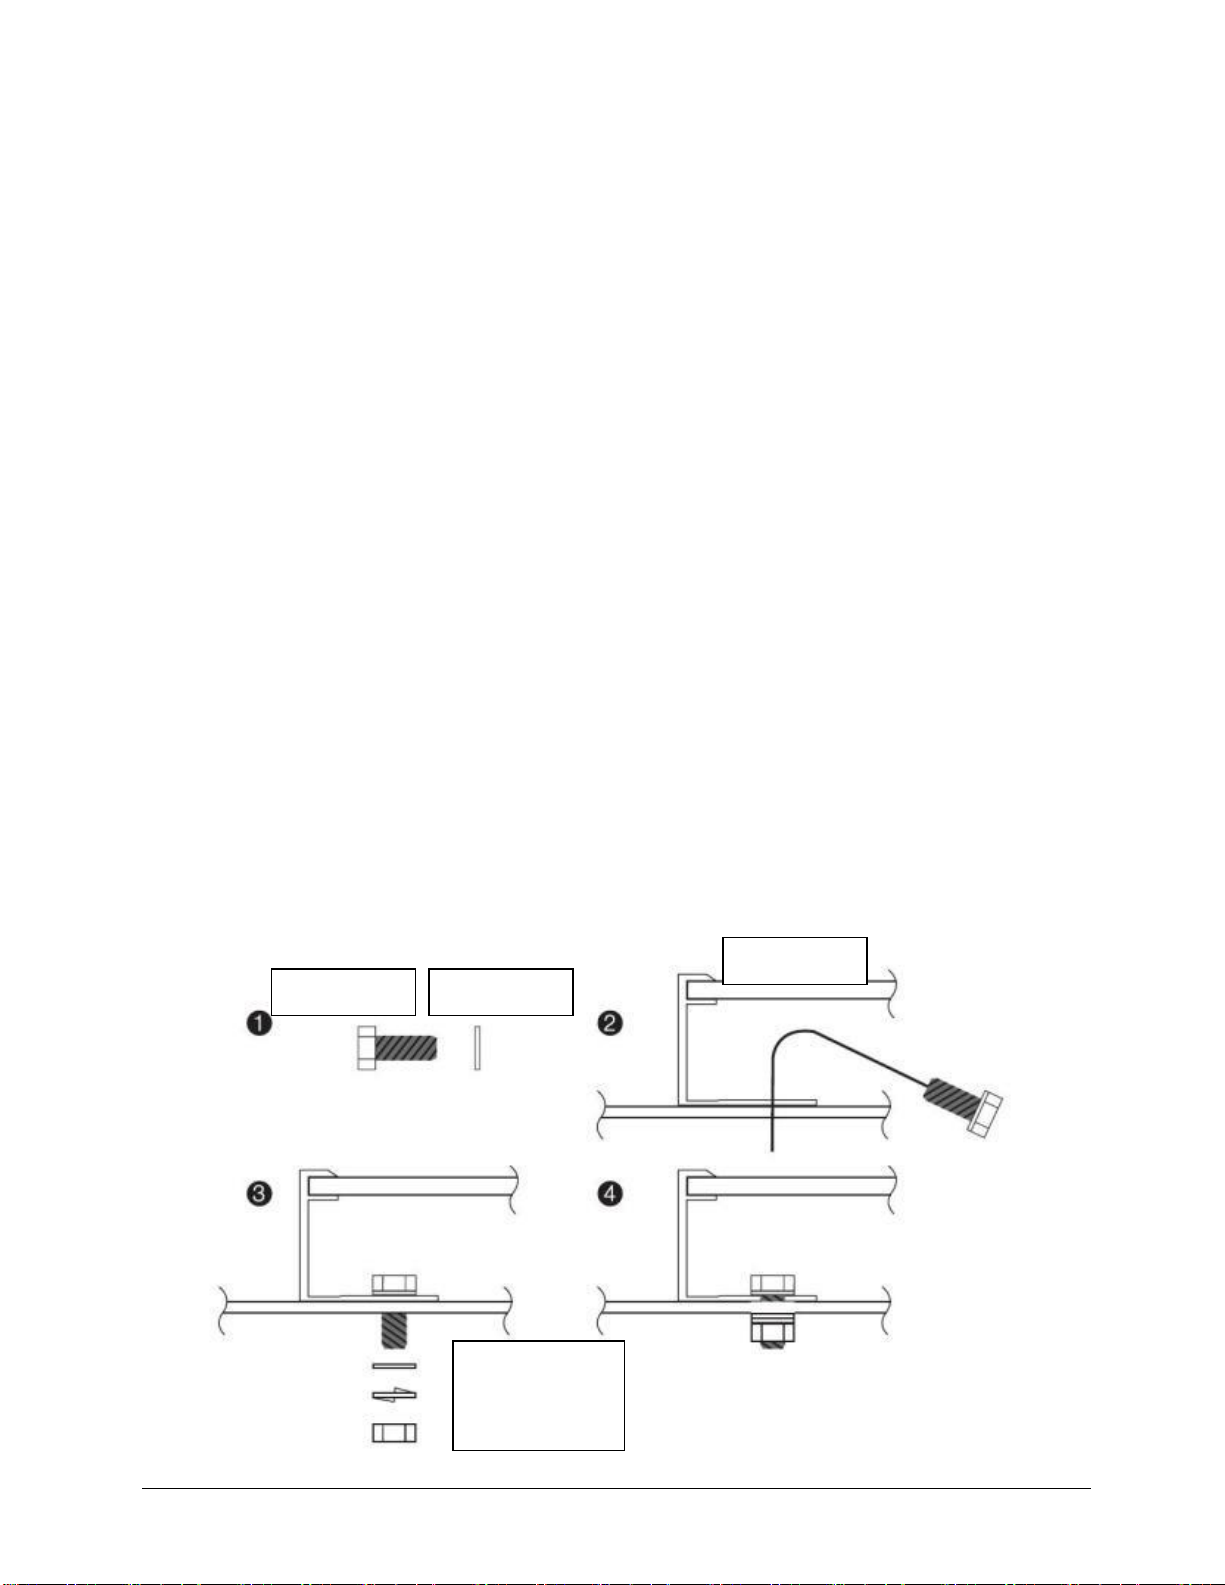
Do not drill frame of modules, which may reduce frame loading capacity or lead to frame
corrosion.
Do not scratch anodic coating of aluminum alloy frame except for grounding connection.
Scratch may lead to frame corrosion and reduce frame loading capacity.

6 / 17 Installation Manual for DualSun PV Modules
Do not repair glass or modules whose back film is damaged on your own.
3.5 Fire safety
Please consult local laws and regulations before installing modules and abide by requirements on
building fire protection. Fire rating of DualSun modules is Class C according to IEC 61730-2.
The roof shall be coated with a layer of fireproof materials of such rating for roofing installation and
make sure that the back plate and the mounting surface are fully ventilated.
Difference of roofing structures and installation modes will affect fireproof performance of buildings.
Improper installation may lead to fire disasters.
To guarantee roof fire rating, the module frame shall be at least 10cm from the roof surface.
Adopt proper module accessories such as fuse, circuit breaker and grounding connector
according to local regulations.
The fire rating of this module is valid only when mounted in the manner specified in the
mechanical mounting instructions.
Please do not use modules if there are exposed inflammable gases nearby.
If the module are installed on the roof, Please refer to the IEC61730-1 Clause 12.4
a)Fire resistant rating of roof covering ≥ Class C;
b)Module installation Angle ≤22.5°
4 Installation conditions
4.1 Installation site and working environments
The modules can only be used on earth but not in outer space.
Do not focalize sunlight with mirrors or magnifying glass artificially onto modules.
DualSun modules shall be installed on proper buildings or other appropriate places (such as
ground, garage, building outer wall, roof, PV tracking system) but shall not be installed on any mobile
vehicles.
Do not install modules at such places as that are possible to be submersed.
The maximum altitude the PV module is designed for≤2000m;
DualSun suggests that modules be installed in the working environment with the temperature of
-20℃to 50℃which is the monthly average highest and lowest temperature of the installation places.
The extreme working environment temperature for modules is -40℃to 85℃.
Make sure that installed modules do not suffer wind or snow pressure that exceeds the
permissible maximum load.
Modules shall be installed in places free from shades throughout the year. Make sure there are
no light-blocking obstacles in the installation places.
Carry out lightning protection for modules installed in places with frequent lightning and thunder.

7 / 17 Installation Manual for DualSun PV Modules
Do not install modules in places with possible inflammable gases.
Modules can not be used in environments with too much hails, snows, flue gas, air pollution and
soot or in places with strong corrosive substances such as salt, salt mist, saline, active chemical
steam, acid rain, or other substances corroding modules, affecting module safety or performance.
Please take protective measures to ensure reliable and safe installation of modules in severe
environments such as heavy snow, cold and strong wind or islands close to water and salt mist or
deserts.
4.2 Selection of tilt angles
Tilt angle of modules: Included angle between module surface and horizontal surface; the
module will obtain the maximum power output in direct facing of sunlight.
Modules are preferred to be south-facing in the north hemisphere and north-facing in the south
hemisphere.
A specific installation angle shall be determined according to installation guide for standard
modules or suggestions from PV module installer.
DualSun suggests that module installation tilt angle be no less than 10° so module surface dust
can be washed away easily by rainfall and times of cleaning can be reduced. And it is easy for
ponding to flow away and avoid water print on the glass due to long time of water ponding which
may further affect module appearance and performance.
5 Mechanical installation
5.1 Regular requirements
Make sure that module installation mode and bracket system are solid enough to bear the
expected load, which is requisite assurance that the bracket installer must provide. Installation
bracket system shall be tested and inspected by the third party testing institution with static
mechanical analysis capacity in accordance with local national or international standards.
Module bracket shall be made from durable, corrosion resistant, ultraviolet proof materials.
Modules shall be fixed on the bracket solidly.
Use higher brackets in places with heavy snow accumulation so the lowest point of modules will
not be covered by snow for a long time. In addition, make the lowest point high enough so as to
avoid sheltering of vegetation and woods or damage of flying sands and stones.
If modules are installed on brackets parallel to the roof or wall, the minimum gap between the
module frame and theroof/wall shallbe 10cmforair ventilation so as to prevent module line damage.
Do not make holes on glass or frame of modules.
Make sure the building is suitable for installation before installing modules on roof. Moreover,
seal permeable parts properly to prevent leakage.
The module frame has thermal expansion and cold contraction so the frame interval between
two adjoining modules shall be less than 10mm.

8 / 17 Installation Manual for DualSun PV Modules
Make sure that back plate of modules will not contact bracket into the module or building
structures, especially when the module surface is imposed by pressure.
DualSun Modules have been certified for a maximum design static load on the back of the
Modules of up to33.4 lb/ft2(i.e. wind load) and a maximum design static load on the front of the
Modules of up to33.4 lb/ft (i.e. wind and snow load), depending on the clamp mounting (please
refer to follow installing data for this information). And this is printed on the label of modules.
Maximum static load of the PV module by: front 5400pa and back 2400pa, it depends on the
components of the installation type (please refer to the following installation), as described in this
manual load for the test load. Note: on the basis of IEC61215 - 2016 installation requirements, when
computing the corresponding maximum design load, need to consider the safety factor of 1.5 times.
Module installation methods cannot lead to electrochemicalcorrosion between module aluminum
frame and different metals.
Modules can be installed horizontally or vertically.
5.2 Way of installation
Module and bracket system connection can be realized by mounting holes, clamps or embedded
systems. Installation shall follow the demonstration and suggestions below. If installation mode is
different, please consult DualSun and obtain approval. Otherwise, modules may be damaged and
quality warranty will become invalid.
5.2.1 Install modules by mounting holes
Make use of bolts to fix modules on the bracket through mounting holes on the back frame. See
details in Figure 2.
Bolt
Washer
PV module
Washer,
Spring washer
Nut

9 / 17 Installation Manual for DualSun PV Modules
Figure 2 Way of Installation
Accessories recommended:
1. Bolt2. Washer
Material: stainless steel Material: stainless steel
Dimension and length: M8*16mm Dimension: M8
3. Spring washer4. Nut
Material: stainless steel Material: stainless steel
Dimension: M8 Dimension: M8
Torque range for fastening bolts: 14N•m to 20N•m
5.2.2 Use clamps to install modules
Use the special clamp to install modules. See Figure 3.
A. Fix modules on the bracket by metal clamp. The following clamps or those clamps recognized
by module system installer are recommended.
Width: no less than 40mm;
Thickness: no less than 4mm;
Material: aluminum alloy;
Bolt: M8.
B. Torque range for bolt fastening: 18N•m to 24N•m
C. The clamp shall not contact glass or make module frame deformed in any case. The contacting
surface of the clamp and frame front side shall be neat and smooth. Otherwise, frame and module
may be damaged. Make sure that the clamp will not produce shading effect. Drain holes can not be
sheltered by the clamp.
Clamp B
At least 2
Clamp A
At least 2
Bracket
PV module
Clamp B
Clamp A
Mounting rack

10 / 17 Installation Manual for DualSun PV Modules
Clamp A for tail end module edge Clamp B for middle modules
(X=module frame thickness)
Figure 3 Clamp Illustration (unit: mm)
5.2.3 Position of installation connecting points
The modules have been evaluated by TUV according to IEC61215 for a maximum testing
loadof below112.78lb / ft2 (+5400Pa,-2400pa)------- design load(+3600pa,-1600pa)*1.5;
ML(≤)
Frame
Way of Installation
﹢5400pa
-2400pa
Mounting hole
Use 4 Mounting
holes(outside)
Bolt
Washer
Clamp A
Washer
Spring
washer
Nut
Pressing
parts
Aluminum
frame
Mounting
rack
Pressing
parts
Aluminu
m frame
Mountin
g rack
Clamp B
Bolt
Washer
Washer
Nut
Spring washer
72
pc

11 / 17 Installation Manual for DualSun PV Modules
﹢5400pa
-2400pa
Mounting hole
Use 4 Mounting
holes(inside)
﹢5400pa
-2400pa
clamp
(1/4L-50)≦S≦(1/4L+50)
Figure 4 Position requirements of connecting points
6 Electric installation
6.1 Electric performance
Module electric performance parameters such as Isc, Voc and Pmax nominal values have ±3%
error with those under standard testing conditions of: irradiance of 1000 W/m2, cell temperature of
25℃and air mass of AM1.5.
Under normal conditions, a photovoltaic module is likely to experience conditions that produce
more current and/or voltage than reported at standard test conditions. The values of Isc and Voc
marked on this module should be multiplied by a factor of 1.25 when determining component
voltage ratings,
If modules are connected in series, the total voltage is equal to the sum of individual voltages.
The recommended max.
N= System voltage / (1.25*Voc)
Where
N No modules in series
60pc

12 / 17 Installation Manual for DualSun PV Modules
Voc Open circuit voltage of each module (refer to product label or data sheet)
Maximum number of parallel to 1
When modules are in series connection, the final voltage is sum of that of the single module.
When modules are in parallel connection, the final current is sum of the single module.
Modules with different electric performance models can not be connected in one series.
Serial connection
Parallel connection
Parallel connection after series connection
Figure 5: Series connection and parallel connection circuit diagram
The number of modules in series connection in each strand shall be calculated as per requirements.
The open circuitvoltage value under the expected lowest temperature shallnot exceed the maximum
system voltage value stipulated for modules and other values required by DC electric parts.
Maximum series overcurrent protective device, where required.
If there is reverse current exceeding the maximum fuse current flowing through the module, use
overcurrent protection device with the same specifications to protect the module; if parallel
connection strands are more than 2, there shall be an overcurrent protection device on each strand
of module. See Figure 5.
Diode
Overcurrent protector
Connector

13 / 17 Installation Manual for DualSun PV Modules
6.2 Cables and connecting lines
In module design, adopt enclosed connecting boxes with the protective level of IP67 for on-site
connection to provide environmental influence protection for wires and connections and contacting
protection for non-insulating electric parts. The connecting box has well connected cables and
connectors with the protective level of IP67. These designs facilitate parallel connection of modules.
Each module has two independent wires connecting the connecting box, one is negative pole and
the other is positive pole. Two modules can be in parallel connection by inserting the positive pole
at one end of wire of one module into the negative pole of the adjoining module.
Cables connecting modules shall satisfy the module maximum short circuit current. Adopt the
special PV system sunlight resistant cables.
The minimum standards of cables connecting modules are:
The minimum and maximum outer diameters of the cable are 5 to 7mm2.
Each module has two standards 90°C sunlight resistant output cables each terminated with plug &
play connectors. The wire type and gauge of the output cables are 1000V/1500V DC rated PV Wire
cable and are 4mm²in size. This cable is suitable for applications where wiring is exposed to the direct
sunlight. We require that all wiring and electrical connections comply with the appropriate National
Electrical Code.
When cables are fixed on the bracket, avoid mechanical damage to cables or modules. Do not
press cables by force. Adopt special designed light resistant wires and clamps to fix cables on the
bracket. Though cables are light resistant and water proof, it is still necessary to prevent cables from
direct sun radiation and water immersion.
The minimum bending radius cables should be 43mm.
6.3 Connector
Please keep connectors clean and dry. Make sure connector nuts are fastened before
connection. Do not connect connectors that are damp or dirty or under other status. Protect
connectors from direct sun radiation and water immersion or fall onto ground or roof.
Wrong connection may lead to electric arc and electric shock. Please make sure that all
electric connection is reliable. Make sure all connectors with lock are fully locked.
The connector type are ZH202(for SUNTER)and PV-LR4(for Lerri), which only mated with
the same connector type;
6.4 Bypass diode
DualSun module connecting box contains bypass diode which is in parallel connection with the
cell strands. If heat spot occurs locally with the module, the diode will come into operation to stop
the main current from flowing through the heat spot cells with the view to restrain module heating

14 / 17 Installation Manual for DualSun PV Modules
and performance loss. But bypass diode is not the overcurrent protection device.
If the diode is found or doubted to get out of order, the installer or system maintenance supplier
shall contact DualSun. Please do not try to open the module connecting box on your own.
Currently, DualSun modules are equipped with bypass diodes in the junction box. The diodetype
is 20SQ045(for SUNTER, Rated current is 15A, peak reverse voltage is45V); Do not try to open
the junction box to change the diodes even if it malfunctions. This should be done by qualified
personnel only.
The maximum rating of a fuse connected in series with an array string is typically 15A but the
actual module specific rating can be found on the product label and in the product datasheet.
Diodes that are used as blocking diodes must have a:
−Rated Average Forward Current [IF(AV)] above the maximum system current at the highest
module operating temperature.
−Rated Repetitive Peak Reverse Voltage [VRRM] above the maximum system voltage at the
lowest module operating temperature.
7 Grounding
In design of modules, the anodized corrosion resistant aluminum alloy frame is used for rigidity
support. For safety utilization and to protect modules from lightning and static-electricity damage,
the module frame shall be grounded.
The grounding device shall be in full contact with inner side of the aluminum alloy and penetrate
the frame surface oxide film.
Do not drill additional grounding holes on module frame.
To get the optimal power output, DualSun suggests that DC negative pole of the module
array shall be grounded in installation of modules. Otherwise, the system power output will
be reduced.
All module frames and mounting racks must be properly grounded in accordance with
appropriate respective National Electrical Code.
Proper grounding is achieved by bonding the module frame(s) and all metallic structural
members together continuously using a suitable grounding conductor. The grounding
conductor or strap may be copper, copper alloy, or any other material acceptable for use as
an electrical conductor per respective National Electrical Codes. The grounding conductor
must then make a connection to earth using a suitable earth ground electrode.
DualSun modules can be installed with the use of third party listed grounding devices for
grounding the metallic frames of PV modules. The devices have to be installed in
accordance with the grounding device manufacturer’s specified instructions.
Grounding methods below are permissible:
7.1 Grounding by grounding clamp
There is a grounding hole with the diameter of Ø4.2mm at the edge of the module back frame.

15 / 17 Installation Manual for DualSun PV Modules
The central line of the grounding sign and that of the hole overlaps and is consistent with the frame
length direction.
Grounding between modules shall be confirmed by qualified electricians and grounding devices
shall be manufactured by qualified electric manufacturer. The torque is recommended to be 2.3N•m.
4mm² copper core wire is used for the grounding clamp. And copper wires can not be pressed
damaged in installation.
Figure 6 Grounding Clamp Installation
Note: TYCO. 1954381-1 (recommended) is used in figures above.
7.2 Grounding by unoccupied mounting holes
Mounting holes on modules that are not occupied can be used for installing grounding devices.
1. Align grounding clamp to the frame mounting hole. Use grounding bolt to go through the
grounding clamp and frame.
2. Put the tooth side of the washer on the other side and fasten the nuts. The recommended
torque for nut fastening is 2.0Nm to 2.2Nm.
3. Put grounding lines through the grounding clamp and grounding wire material and dimension
shall meet requirements in local national and regional law and regulations.
4. Fasten bolts of grounding lines and installation ends.
Grounding clamp
Grounding line
Frame
Mounting
Slot
Push
Frame
Grounding line
Fasten base bolts and keep base
and frame parallel
Grounding line is at bottom of line
slot
Cover the base and the line
is clamped tight.

16 / 17 Installation Manual for DualSun PV Modules
Figure 7 Way of Installation
7.3 The third party grounding devices
The third party grounding device can be used for grounding of DualSun modules but such
grounding shall be proved to be reliable. Grounding device shall be operated in line with stipulations
of the manufacturer.
8 Operation and maintenance
Carry out regular inspection and maintenance for modules and this is the user’ responsibility
within the quality warranty period in particular; and, inform the supplier within two weeks when
modules are found to be damaged.
8.1 Cleaning
Accumulated dust on module surface glass will reduce the power output and lead to local heat
spot, such as industrial waste water and birds droppings. The degree of influence is determined by
transparency of wastes. Small amounts of dust will affect sunlight strength and evenness but are not
dangerous and power will not be reduced remarkably in general.
During operation of modules, there shall be no environmental factors projecting shades or shelter
partial or the entire module, including other modules, module system bracket, birds, dust, soil or
plants. These will reduce output power. DualSun suggests that the module surface should not be
sheltered in any case.
Frequency of cleaning depends on dirt accumulation speed. In normal situations, rainwater will
clean the module surface and the cleaning frequency is reduced therefore. It is suggested to use
damp clean water sponge or soft cloth to wipe the glass surface. Do not use acid and alkaline
detergents to clean modules.
Frame
Grounding line
Grounding line fastening bolt
Grounding bolt
Fixing end of grounding clamp
Tooth washer
Fasten nuts

17 / 17 Installation Manual for DualSun PV Modules
8.2 Module appearance inspection
Check module appearance defects visually, especially:
1. Module glass cracks.
2. Corrosion at welding parts of the cell main grid: it is caused by moisture into the module due
to damage of surface packaging materials during installation or transportation.
3. Check whether there is burning traces on the module back plate.
8.3 Inspection of connectors and cables
It is suggested to carry out a preventive inspection once every 6 month:
1. Check connector sealing and cable connection solidness.
2. Check whether sealant of the terminal box is cracking with gap.
Module
DualSun 300M-60-
0BBP
DualSun 305M-60-
0BBP
DualSun 310M-60-
0BBP
DualSun 315M-60-
0BBP
Open-circuit voltage [V]:
39.9
40.2
40.5
40.8
Short-circuit current [A]:
9.96
9.99
10.02
10.05
Voltage at max. power [V]:
32.3
32.7
33.1
33.5
Current at max. power [A]:
9.28
9.33
9.36
9.41
Max. power (tolerance 0,+5)
[W]:
300
305
310
315
Maximum system voltage [V]
1000
1000
1000
1000
Series Fuse Rating [A]
20
20
20
20
DualSun SAS
Address: 2 rue Marc Donadille 13013 Marseille France
TEL: +33 4 13 41 53 71
This manual suits for next models
4
Table of contents
Popular Control Unit manuals by other brands

CEBEK
CEBEK E-8 user manual

power automation
power automation PA 8000 EL installation instructions

National Instruments
National Instruments PXI-6683 Series user manual

Alstom
Alstom GEM80 Technical manual

Pololu Corporation
Pololu Corporation A-Star 328PB user guide

Burkert
Burkert 2000 INOX operating instructions