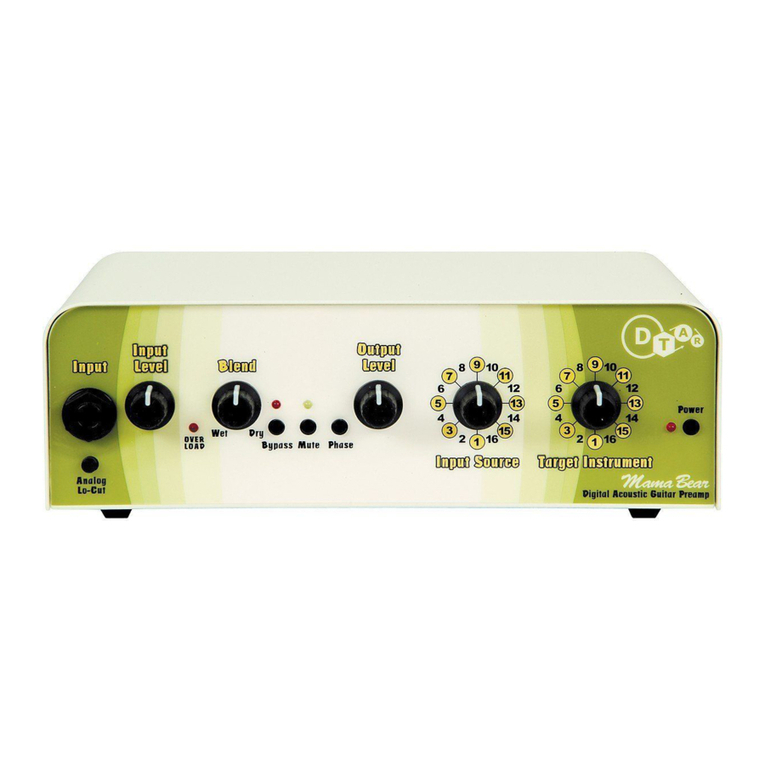
Duncan MAMA BEAR User manual

For years, acoustic guitars have relied on pickups for
amplification. One problem: Even the best acoustic
guitars deliver an oversimplification of true acoustic
tone complexity when amplified. Using
something called AGE™ tecnology,
D-TAR’s Mama Bear takes your guitar
into the digital realm and restores the
natural body resonance. The result:
now the finest acoustic guitars can
sound like, well… themselves.
Only louder.
“WITH RESPECT TO ACOUSTIC TONE”TM
MAMA BEARTM
User Manual for MAMA BEAR
Digital Acoustic Guitar Preamp

FCC INFORMATION (U.S.A.)
1. IMPORTANT NOTICE: DO NOT MODIFY THIS UNIT!
This product, when installed as indicated in the
instructions contained in this manual, meets FCC
requirements. Modifications not expressly approved
by D-TAR may void your authority, granted by the FCC,
to use this product.
2. IMPORTANT: When connecting this product to
accessories and/or another product, use only high
quality shielded cables. Follow all installation
instructions. Failure to follow instructions could void
your FCC authorization to use this product in the USA.
3. NOTE: This equipment has been tested and found
to comply with the limits for a Class B digital device,
pursuant to part 15 of the FCC Rules. These limits are
designed to provide reasonable protection against
harmful interference in a residential installation. This
equipment generates, uses and can radiate radio
frequency energy and, if not installed and used in
accordance with the instructions, may cause harmful
interference to radio communications. However, there
is no guarantee that interference will not occur in a
particular installation. If this equipment does cause
harmful interference to radio or television reception,
which can be determined by turning the equipment
off and on, the user is encouraged to try to correct
the interference by one or more of the following
measures:
—Reorient or relocate the receiving antenna.
—Increase the separation between the equipment and
receiver.
—Connect the equipment into an outlet on a circuit
different from that to which the receiver is connected.
—Consult the dealer or an experienced radio/ TV
technician for help.
If these corrective measures do not produce
satisfactory results, please contact the local retailer
authorized to distribute this product. If you cannot
locate the appropriate retailer, please contact D-TAR
Customer Service at:
5427 Hollister Ave.
Santa Barbara, CA 93111-2345
USA.
The above statements apply ONLY to those products
distributed by D-TAR or its subsidiaries.
Table of Contents
QUICK START pg. 1
INTRODUCTION pg. 3
AGE TM pg. 5
PANEL DRAWINGS pg. 6
CONTROLS EXPLAINED pg. 7
TECHNICAL SPECIFICATIONS pg. 15
LIMITED WARRANTY pg. 15
MAMA BEARTM
Fill in the following for your reference:
Date of Purchase:
Purchased From:
Serial Number:

Quick Start: Get Up And Running Fast
You’re anxious to start using Mama Bear,
but you don’t want to read a manual yet.
Fair enough. However, read these next two
pages so that you get on the right track
immediately. Play around and then read the
rest of the manual. It covers important details
about Mama Bear, and tells you how to get
the most out of it and to get the best sound
ever from your acoustic guitar.
1. Plug the AC adapter’s cord into the back of
Mama Bear, and plug the AC adapter into a
live outlet.
2. Plug Mama Bear into a mixing console,
preamp, or acoustic guitar amp in one of
these ways:
A. Use a cable with XLR (3-pin) plugs to
connect to a mixing console.
B. Use a shielded cord with 1/4” plugs to
connect to an amp or preamp.
For best results, connect your Mama Bear to a
high-quality sound system (P.A. system, high-
quality powered speakers, etc.).
3. Plug your acoustic guitar’s cord into Mama
Bear’s input jack.
4. Set all the controls like this (pay careful
attention to the switch settings):
5. Turn on Mama Bear by pressing the Power
switch.
6. Turn on your amp, preamp, or mixing console.
7. Strum your guitar and slowly bring up Mama
Bear’s Input Level control until you see the
Overload LED barely light up when you hit the
strings hard.
8. With your amp, preamp, or mixing console
volumes set to normal levels, bring up Mama
Bear’s Output level. Be careful not to make it
too loud, and adjust your other equipment’s
input levels if necessary to maintain good
levels without distortion.
9. Check the Phase switch setting. If you are
encountering feedback or if your guitar sounds
extra-hollow, try pushing the Phase switch.
This inverts the signal’s phase and can thwart
feedback or bring more “body” into your tone.
(If your amp is on the floor, try raising it up.
The “bass coupling” effect that comes from
a speaker close to the floor causes extra bass
heaviness and can cause feedback.)
MAMA BEARTM
1
Note: If your guitar has a volume control,
make sure it’s turned up at least 50% or
higher. Also check its battery (if it uses one)
and replace it if it’s dead or weak.
Note: If you connect Mama Bear to
high-quality powered speakers, you will
need cables with the appropriate connectors.

10. Here’s the fun part. Try different settings on
the Input Source and Target Instrument selectors
and listen to how your guitar sounds. Adjust
the Blend knob to change the mix between
your straight guitar sound and Mama Bear’s
enhanced sound.
11. Experiment with the Blend control.
Turning the knob to the Dry end of the
dial gives just the sound of your guitar
without any of Mama Bear’s processing. The
Wet end of the dial is the processed sound only.
Every setting between these two extremes is
a blend of your original guitar tone and the
enhanced tone from Mama Bear.
You’re now ready to experiment with Mama
Bear’s expressive qualities. After you play for
a while and become familiar with the controls
and how they affect your tone, read the rest of
this manual. It provides in-depth information
about getting the most out of Mama Bear and
the best sound ever from your guitar.
MAMA BEARTM
2
Important! Feedback is possible at some
settings, so always monitor your volume levels.

Introduction
For years, acoustic guitars have relied on
pickups for amplification, but even the best
acoustic guitar tone is reduced to an oversimpli-
fication of its true complexity when amplified.
Mama Bear takes your acoustic guitar’s tone
into the digital realm through its 32-bit digital
signal processor. Then it restores the natural
body resonance and provides you with a broad
range of sonic enhancements that make your
guitar sound its absolute best when amplified or
recorded. Because of its input source matching
capabilities and its tonal shaping that emulates
the complexities of 16 classic acoustic guitars,
Mama Bear will take your guitar into previously
uncharted sonic territories.
Mama Bear is a unique digital signal processor
preamp/effects unit featuring AGETM (Acoustic
Guitar Emulation) technology that improves
the character of amplified acoustic guitars by
adding the spatial dimension that no pickup
system or analog effects can produce alone.
It is designed to work with all acoustic guitars
outfitted with magnetic pickups, under-saddle
acoustic transducers and electric guitars with
piezo bridge saddles. It is not designed to work
with microphones, soundboard transducers or
accelerometers. Mama Bear provides you with
the means to give your acoustic guitar the sonic
qualities of a broad range of great-sounding
acoustic guitars, both vintage and modern.
More Important Stuff
Mama Bear can be used as a stand-alone
preamp or placed in the channel insert loop of
a mixing console. In addition, Mama Bear has
a balanced direct output to interface with
recording consoles or PA systems. Therefore,
it’s not only perfect for the solo guitarist or
player in a group, but it’s also a great tool
for anyone running a sound system in which
acoustic instruments are being amplified. You
can quickly bypass the AGETM sonic shaping to
hear what your guitar sounds like unprocessed,
plus you can blend the straight sound of your
guitar with the processed signal, allowing an
incredible range of new acoustic tones. With
Mama Bear, it’s possible to make a fine-quality
acoustic guitar sounds its best; plus, it smooths
out and improves the tone of lower-quality
guitars or those with lower-quality pickup
systems. Mama Bear works equally well with
steel-string and nylon-string acoustic guitars,
providing a wide range of tone-shaping options.
The sonic qualities of hybrid instruments that
employ magnetic and under-saddle transducers
can also be improved, smoothed, or altered.
Despite giving you unprecedented control in
sonic shaping of your acoustic tone, Mama Bear
is simple to use. With just two controls—Input
Source and Target Instrument—you can:
1. Alter or smooth out the response of your
guitar’s pickup. Surprisingly, even the best
acoustic guitars with the best pickups often
need fine-tuning due to the sonic inconsisten-
cies of amplifiers or speakers, or the way
pickups and speakers interact with your instru-
ment. Rather than spend hours experimenting
with graphic and parametric equalizers (or
replacing a low-quality pickup), you can put
Mama Bear’s advanced signal processing
to work balancing the tonal range from low
to high. You’ll find that placing Mama Bear
between even the best pickup/guitar combina-
tion and amplifier will improve the tone.
2. Overlay 16 “sonic signatures,” the sound that
comes from the interaction of wood and air in a
guitar, onto the sound produced by your strings,
fingers, and guitar. These “sonic signatures” are
based on some of the greatest guitars ever built.
MAMA BEARTM
3

We call this aspect of the AGETM technology 3-D
EQTM.
An added bonus is that you don’t need to alter
your instrument, and can use virtually any
magnetic pickup or under-saddle transducer
(“UST”). Plus, Mama Bear lets you mix your
guitar’s straight sound with the enhanced tone
to give you an infinite range of “custom blends.”
What won’t Mama Bear do? While Mama Bear
can make a mediocre guitar sound pretty darned
good, nothing can make a bad-sounding
guitar or a bad-sounding amplifier sound great.
A bad-sounding guitar or poorly designed
pickup starts you out with a deficient tone, and
no amount of electronic wizardry can complete-
ly compensate for such a problem. And, ampli-
fiers designed for electric guitars are voiced to
sound best with an electric guitar, with exag-
gerated bass response and a natural tendency
to distort. While this sounds good for electric
guitar, it’s the opposite of what you want for an
acoustic: namely clean, evenly balanced tone
over a wide range. As mentioned above, it’s
not compatible with soundboard transducers
or microphones. Its capabilities are maximized
with USTs, magnetic soundhole pickups or solid
body electric guitars with piezo bridge saddles.
MAMA BEARTM
4

The Secret of Mama Bear’s Success:
Acoustic Guitar Emulation (AGETM)
Our research has shown that the true sound of
an acoustic instrument consists not only of
variations in frequency response, but also of
changes in that response over time. As different
areas of a guitar’s top are excited into motion
when you play, some of these areas move
in and out of phase, certain frequencies are
delayed as they’re turned into acoustical energy,
and the air resonance of the body takes some
time to store and release its energy contribution
to the overall tone of the instrument. It is the
sum and difference of all these complex
vibrations that become the tone we seek.
The signature sound doesn’t happen on any
particular spot of the instrument, but rather
coalesces at a distance from it, where all the
complexity comes together in a form we
recognize as its characteristic sound.
Unfortunately, this phenomenon of sonic
buildup, shaping, and blooming in the air
means that the best place to hear—and to
amplify—the sound of an acoustic guitar is
several feet away from the top. It’s the sound
you love when playing with others in a circle
in your living room or at a festival, but it’s also
the sound you can never quite get onstage, no
matter how complex a pickup system you use or
how much conventional EQ you employ while
trying to achieve that combination of clarity and
warmth you know your guitar has.
Of course, placing a microphone several feet
away from your guitar isn’t practical in onstage
settings or anywhere amplification is involved.
Feedback, stray room resonances, and other
noises conspire to make a guitar sound inferior,
or at least “off.”
A variety of magnetic pickups, transducers (UST
or otherwise attached to the top), and small
microphones are employed in many guitars,
often with uneven results. Possible mismatches
between the pickups and amplifiers, speakers
that aren’t suited to the task of amplifying an
acoustic guitar, and bad room acoustics can
erode the sound of even the best pickups. Using
EQ can often tame some of the problems like
feedback and boominess, and remedy some
weaknesses; but still, there can still be a
gulf between what your guitar sounds like
unamplified, and what it sounds like through
an amp or PA system. With Mama Bear’s
sophisticated Acoustic Guitar Emulation (AGE)
technology, it’s possible to bring your amplified
sound more in sync with the tone that naturally
comes from your guitar, even if you don’t have
an elaborate or expensive pickup system.
The 3-D EQ in Mama Bear not only corrects
frequency imbalances and the sometimes
ever-present harshness of some pickups,
but it also adds in the critical time and
phase adjustments that make up the sonic
“fingerprint” of your instrument. This results in
restoring its tone and integrity, making it sound
truer. Mama Bear also provides the flexibility to
blend in the characteristics of some of the
greatest acoustic guitars of all time, bringing
out new dimensions in your guitar’s sonic
personality.
MAMA BEARTM
5

Front & Rear Panels
MAMA BEARTM
6
23457 9 10 11 12 13
614 15
18
Front Panel
1. Input jack (1/4” mono)
2. Analog Lo-Cut filter
3. Input Level control
4. Overload LED indicator
5. Blend control (wet/dry)
6. Bypass LED indicator
7. Bypass pushbutton switch
8. Mute LED indicator
9. Mute pushbutton switch
10. Phase pushbutton switch
11. Output Level control
12. Input Source selector
13. Target Instrument selector
14. Power LED indicator
15. Power on/off pushbutton switch
Rear Panel
1. 16 volts AC input from AC adapter
2. Ground Lift pushbutton switch
3. XLR Balanced Output jack
4. 1/4” Unbalanced Output jack
23
14

MAMA BEARTM
Inputs, Outputs, And Controls
Front Panel
1. Input jack (1/4” mono)
Plug your guitar into this jack. Use a high-qual-
ity shielded guitar cord (never use a speaker
cable). When you are not using Mama Bear, it’s
a good idea to unplug your cord to reduce risk
of damaging Mama Bear.
2. Analog Lo-Cut filter
When overlaying the Target Instrument (13)
tones onto your guitar’s natural sound, an
excessive build up of low frequencies can
occur. Depressing the Analog Lo-Cut filter
button tames the low frequencies and removes
any “woofy” tonal features by engaging a
gentle rolloff of frequencies below 200Hz. This
can be helpful in compensating for a bottom-
heavy speaker system or poor room acoustics.
You may find it more necessary when using
Target Instruments with larger bodies or deeper
bass response. If you don’t encounter any
excessive low frequency content when you use
Mama Bear, then leave the Analog Lo-Cut filter
unengaged.
3. Input Level control
This knob sets the Mama Bear’s sensitivity to
the signal coming from your guitar’s pickup.
Use this knob to set the input level so that
Mama Bear has a nice, clean, strong signal,
but not one that distorts. Use the Overload
LED indicator (4) to help guide you.
Typically, it will be desirable to have your
guitar’s volume up at least 50% or higher.
Play as hard as you normally would. In fact,
7

MAMA BEARTM
play a little harder, and set the volume so that
Mama Bear’s Overload LED barely blinks (see
the next section for setting the Level control in
conjunction with the Overload LED). The right
combination of levels from your guitar and
Mama Bear’s input level are critical, so use care
in getting a sound that’s clear and strong. If
either level is set too low, you can end up with
a weak and perhaps noisy signal (depending on
the type of preamp in the guitar).
4. Overload LED indicator
When the Overload LED indicator starts to blink,
it’s telling you that Mama Bear’s digital section
has about 6dB of headroom before overload.
Overloading at this point in Mama Bear or any
other digital device sounds bad and defeats
the point of trying to make your acoustic guitar
sound its best, so keep an eye (and an ear) on
the Input Level control and the Overload LED.
The best signal-to-noise ratio is achieved by
running the guitar’s volume and the input level
as high as possible without clipping (the type
of distortion you hear when there’s too much
signal for the circuitry to handle). This allows
you to run Mama Bear’s output lower, thereby
minimizing noise. If you’re in doubt about the
correct starting point for your guitar’s volume (if
it has one) and Mama Bear’s Input Level setting,
turn both knobs to their halfway point and start
turning each one up slowly until the Overload
LED blinks when you hit your strings hard.
5. Blend control (Wet/Dry)
The Blend control adjusts the mixture of the
straight sound coming from your guitar’s pickup
(Dry) and the AGE-enhanced sound (Wet). This
lets you custom-blend a sound that’s uniquely
yours. Once you start experimenting with
different settings of the Input Source (12)
selector and Target Instrument (13) selector,
8

MAMA BEARTM
you will discover an extremely wide range of
tones and textures.
6. Bypass LED indicator
The Bypass LED tells you when the Bypass
pushbutton (7) is engaged.
7. Bypass pushbutton switch
When the Bypass pushbutton is pushed in,
the signal from your guitar’s pickup passes
through to Mama Bear’s output without
any sonic shaping from Mama Bear’s AGE,
although Mama Bear’s input buffers keep the
signal strong. Using this switch is great for
comparing your “straight” sound with the
sound that comes from Mama Bear.
8. Mute LED indicator
The Mute LED tells you when the Mute
pushbutton (9) is engaged.
9. Mute pushbutton switch
Push the Mute button, and the output signal is
turned off. This is useful when you’re tuning or
changing guitars, so you don’t annoy the
audience or damage speakers.
9

MAMA BEARTM
10
10. Phase pushbutton switch
This switch reverses the phase of the signal
delivered to the speakers, relative to the
vibration signal produced by the top of your
guitar. Reversing the phase can help to fight
feedback and provide a dramatically different
tone. Use this with care, though, because it
can sometimes make your tone very strange
or make the guitar sound less present. In
addition, if you are not experiencing feedback,
reversing the phase can possibly introduce
feedback. Finally, if you are splitting the signal
from your pickup to both Mama Bear and an
amp or mixing console where Mama Bear’s
output will also go, it’s possible that one of the
signals may end up out of phase with the other,
causing either a weak tone or one that’s
especially “honky” and feedback-prone. If
you’re splitting the signal in this way, try
pushing in and pushing out the Phase switch
to see which setting sounds best.
11. Output Level control
Use the Output Level to set the amount of
signal going to an amp, mixing console, etc.
If the equipment that Mama Bear is plugged
into has an overload indicator at its input, check
that and use your ears to get the best level
match between Mama Bear and that equipment.
Start with both levels turned down, and
gradually bring them up. Listen for distortion,
and remember that if either Mama Bear’s
Output Level or the other equipment’s input
level control are set at opposite extremes or if
Note: When you move from one location to
another on stage (relative to your speakers),
it may be necessary to change your phase
switch’s setting (in or out) for best feedback
cancellation.

MAMA BEARTM
11
you hear a weak or noisy signal, you should
probably “rebalance” the levels. The goal is to
get the most signal and the least noise. This is
almost always achieved by using the highest
input level before clipping and the lowest output
level possible—while making sure the sound is
loud enough, of course.
12. Input Source selector
This 16-position switch lets you neutralize the
effect of your guitar’s pickup on its tone, or it
can impart a totally new sonic complexion to
the instrument. The Input Source selector covers
the range from the thinnest, brightest-sounding
under-saddle transducer to fattest magnetic
pickup. Starting at 1 and moving to number 15,
the texture starts thin and gets progressively
thicker. Think of this control as a way to prepare
your guitar before it is processed. Select an
Input Source setting that matches the type of
pickup in your guitar. Keep in mind, there
may be more than one match; so listen to a
few settings to find the one or two that are
best-suited to your instrument. Once you get
a feel for what the next control, the Target
Instrument selector (13), can do, you’ll definitely
want to come back and experiment with
different Input Source settings. Together, there
are 256 possible combinations!
Input Sources
1 Ceramic Piezo UST #1
2 Ceramic Piezo UST #1
3 Ceramic Piezo UST #2
4 Ceramic Piezo UST #2
5 Coax film
6 Coax film
7 Flat Film UST #2
8 Flat Film UST #2
9 Coax film UST in semi-hollow
10 Coax film UST in semi-hollow
11 Solid body, metal piezo bridge
12 Solid body, metal piezo bridge
13 Solid body, metal piezo bridge #2
14 Magnetic soundhole pickup
15 Magnetic soundhole pickup
16 Neutral, no input compensation

MAMA BEARTM
12
13. Target Instrument selector
All 16 positions of this selector give your
guitar distinctive characteristics of famous,
great guitars. Each one is based on careful
recording and analysis of the tone that comes
from the design, shape, size, age, wood, and
moving air that make up the character of great
vintage and modern luthier-crafted instruments.
Your guitar takes on sonic proportions that go
far beyond mere one-dimensional tone control
or simple equalization. Its tone is reshaped in
multiple frequency ranges and with a new set
of dynamics, sustain, and resonant qualities that
add complexity and subtlety to its tone.
14. Power LED indicator
When this LED glows, Mama Bear is getting
power from the AC adapter. If the Power switch
is on (pressed in) and you don’t see the LED
glowing, then ensure that Mama Bear’s AC
adapter is plugged into a working AC outlet.
If you’re not sure whether the outlet is “live,”
try another one or test it with another piece of
equipment that you know works. If the outlet is
controlled by a switch, make sure it’s on.
15. Power on/off pushbutton switch
When this pushbutton is depressed, power to
Mama Bear should be on and the Power LED
indicator should glow.
Target Instruments
1 Parlor
2 Small Body Fingerstyle
3 Small Body Blues
4 Mahogany Orchestra Model
5 Rosewood Orchestra Model
6 Boutique Fingerstyle
7 Slope-shouldered Dreadnought
8 Grand Auditorium
9 Slope-shouldered Jumbo
10 Mahogany Dreadnought
11 Rosewood Dreadnought
12 Super Jumbo
13 Hollow Body Archtop Jazz
14 Gypsy Jazz
15 Biscuit Blues Resonator
16 Tricone Resonator

Rear Panel
1. Input from AC adapter
Mama Bear is powered by an external AC
adapter. Always make sure that its output plug
is securely plugged into the rear of Mama Bear,
and that the adapter is held firmly in an
electrical outlet.
Never operate Mama Bear or the AC adapter
in the rain or in wet locations. To prolong its
life, unplug the adapter when Mama Bear is
not in use. Alternatively, the AC adapter can be
plugged into a switched power strip so that you
can conveniently turn it off with your other gear.
Refer to the label on the adapter for proper
operating voltages.
MAMA BEARTM
13
Note: If your AC adapter, its cord, or its plug
is ever damaged or if the adapter fails to
work, do not use it. Replace it with the same
kind only. Failure to use the proper 16VAC/
560mA adapter can be hazardous and could
damage your Mama Bear. Contact your
D-TAR dealer or the D-TAR factory to
purchase a replacement.

MAMA BEARTM
14
2. Ground Lift pushbutton switch
If you use an XLR balanced cable to connect
Mama Bear to other gear, it is possible that a
ground loop may occur. A ground loop is an
unwanted secondary path between electrical
devices that can introduce a steady, annoying
60Hz hum. If you hear such a hum, depress this
switch, which disconnects the grounding por-
tion of the XLR output (3) and often removes the
ground loop and its hum.
3. XLR Balanced Output jack
This output is designed to provide a strong
clear signal to professional recording gear, PA
systems, and any equipment that accepts a
low-impedance source via an XLR (3-pin)
connector.
4. 1/4” Unbalanced Output jack
This output is optimized for sending a strong,
clear signal via a shielded guitar cord to
amplifiers, effects devices, and many mixers
that have 1/4” inputs.
Important! Feedback is possible at some
settings, so always monitor your volume
levels.

Technical Specifications
Size
Width 8.5” / 216mm
Depth 6.25” / 159mm
Height 2.72” / 69mm
Unit Weight 2.7 lbs. / 1.2 kg
Shipping Weight 4.5 lbs. / 2.1 kg
Analog Characteristics
Nominal Input Level -10dBu
Input Impedance 4.4M Ohm
Gain, input to output 15.5dB, bypassed
Maximum signal level before
input stage clipping 2.0Vrms
Nominal Output Level *
Single ended 0dBu
XLR Balanced -20dBu
Maximum Output Level before clipping **
Single ended 7.2Vrms, bypassed;
3.5Vrms through
processor
Balanced XLR 1 Vrms, bypassed;
0.5Vrms through
processor
Noise, 20 Hz to 20 KHz, bypass mode,
referenced to input:
109 dBv, input shorted
97.5 dBv, input open
Digital Characteristics
Microprocessor 32 bit, 100MHz,
floating point,
600 MFLOPS
Sample Rate: 44.1
KHz
Latency: 3ms
A/D Conversion 24 bit
64x oversampling
S/(N+D): 94dB
Dynamic Range, S/N:
108dB
D/A Conversion 24 bit
128x oversampling
24 bit 8 times digital
filter
Ripple: +/-0.005dB,
Attenuation: 75dB
S/(N+D): 94dB
Differential outputs
Dynamic Range:
110dB, A weighted
Power Supply External wall mount-
ed transformer 16
VAC/560mA
Current Draw: 200mA
@ power jack
* Nominal levels measured using pink noise
generator set to 250mV rms. Input level control
set to produce flickering of overload indicator;
output level control set to maximum.
**Maximum output levels in bypass mode
measured using 1KHz sine wave. Maximum
output levels through processor measured using
sine waves of various frequencies from 800Hz to
1.2KHz.
Limited Warranty
D-TAR offers the original purchaser a one-year limited warranty
on both labor and materials starting from the day this product
is purchased from an Authorized D-TAR Dealer. D-TAR will
repair or replace this product, at its option, if it fails due to faulty
workmanship or materials during this period. Defective products
should be returned to your USA dealer, international distributor,
or sent direct to our factory postage prepaid along with dated
proof of purchase (e.g., original store receipt) and a RMA number
clearly written on the outside of the box. Please call our factory at
805-964-9610 for an RMA number.
This warranty does not apply to damage to this product or an
instrument caused by misuse, mishandling, accident, abuse, or
alteration. Product appearance and normal wear and tear (worn
paint, scratches, etc.) are not covered by this warranty. D-TAR
reserves the right to be the sole arbiter as to the misuse or abuse
of this product. D-TAR assumes no liability for any incidental or
consequential damages, which may result from the failure of this
product. Any warranties implied in fact or by law are limited to the
duration of this express limited warranty.
P/N 501055-125
15

5427 hollister ave santa barbara ca 93111.2345 USA
tel 805.964.9610 fax 805.964.9749 www.D-TAR.com
D-TAR and Mama Bear are trademarks of D-TAR, LLC. © 2005 D-TAR, LLC.
Other manuals for MAMA BEAR
1
Table of contents
Other Duncan Amplifier manuals

Duncan
Duncan Convertible Head User manual

Duncan
Duncan 84-50 Tube User manual

Duncan
Duncan Convertible 60 WATT User manual

Duncan
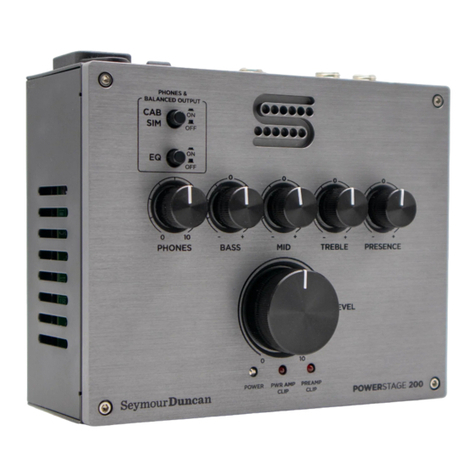
Duncan POWERSTAGE 200 User manual

Duncan
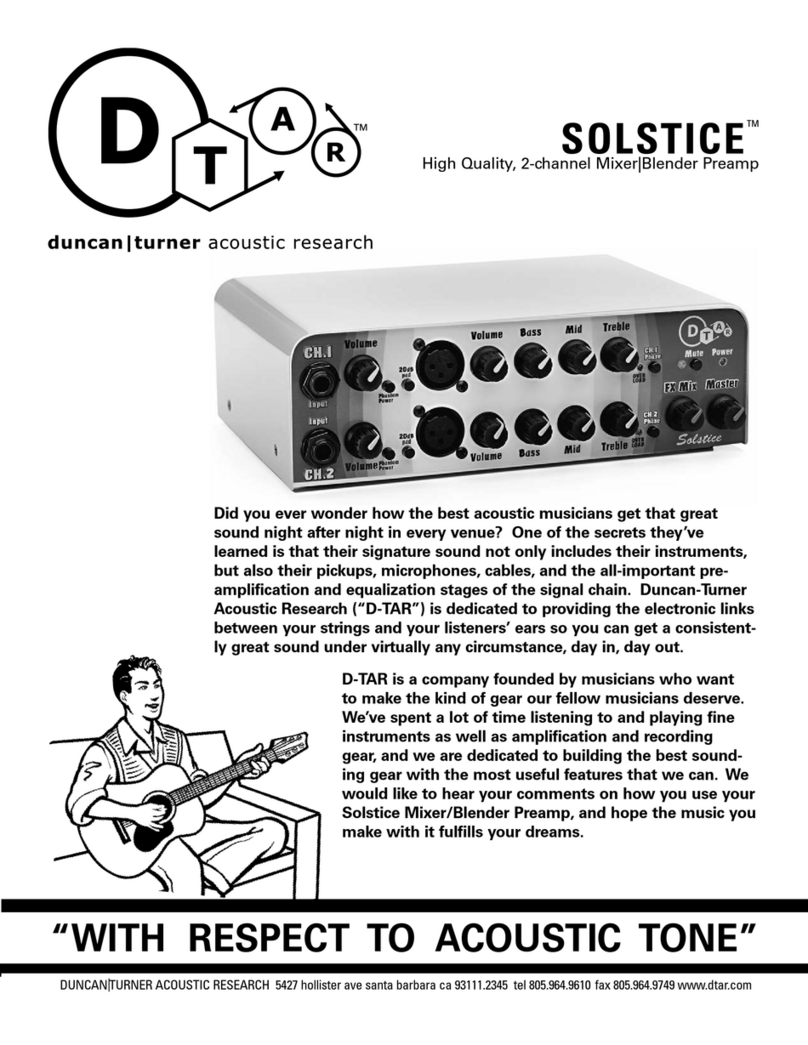
Duncan Solstice User manual

Duncan
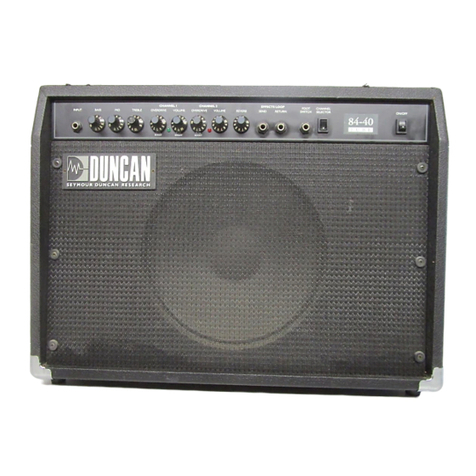
Duncan 84-40 User manual

Duncan
Duncan A E C User manual

Duncan
Duncan BASS 400 X 2 User manual

Duncan
Duncan KTG-2075 User manual

Duncan
Duncan KTG-1 Tube User manual