Page 2of 4
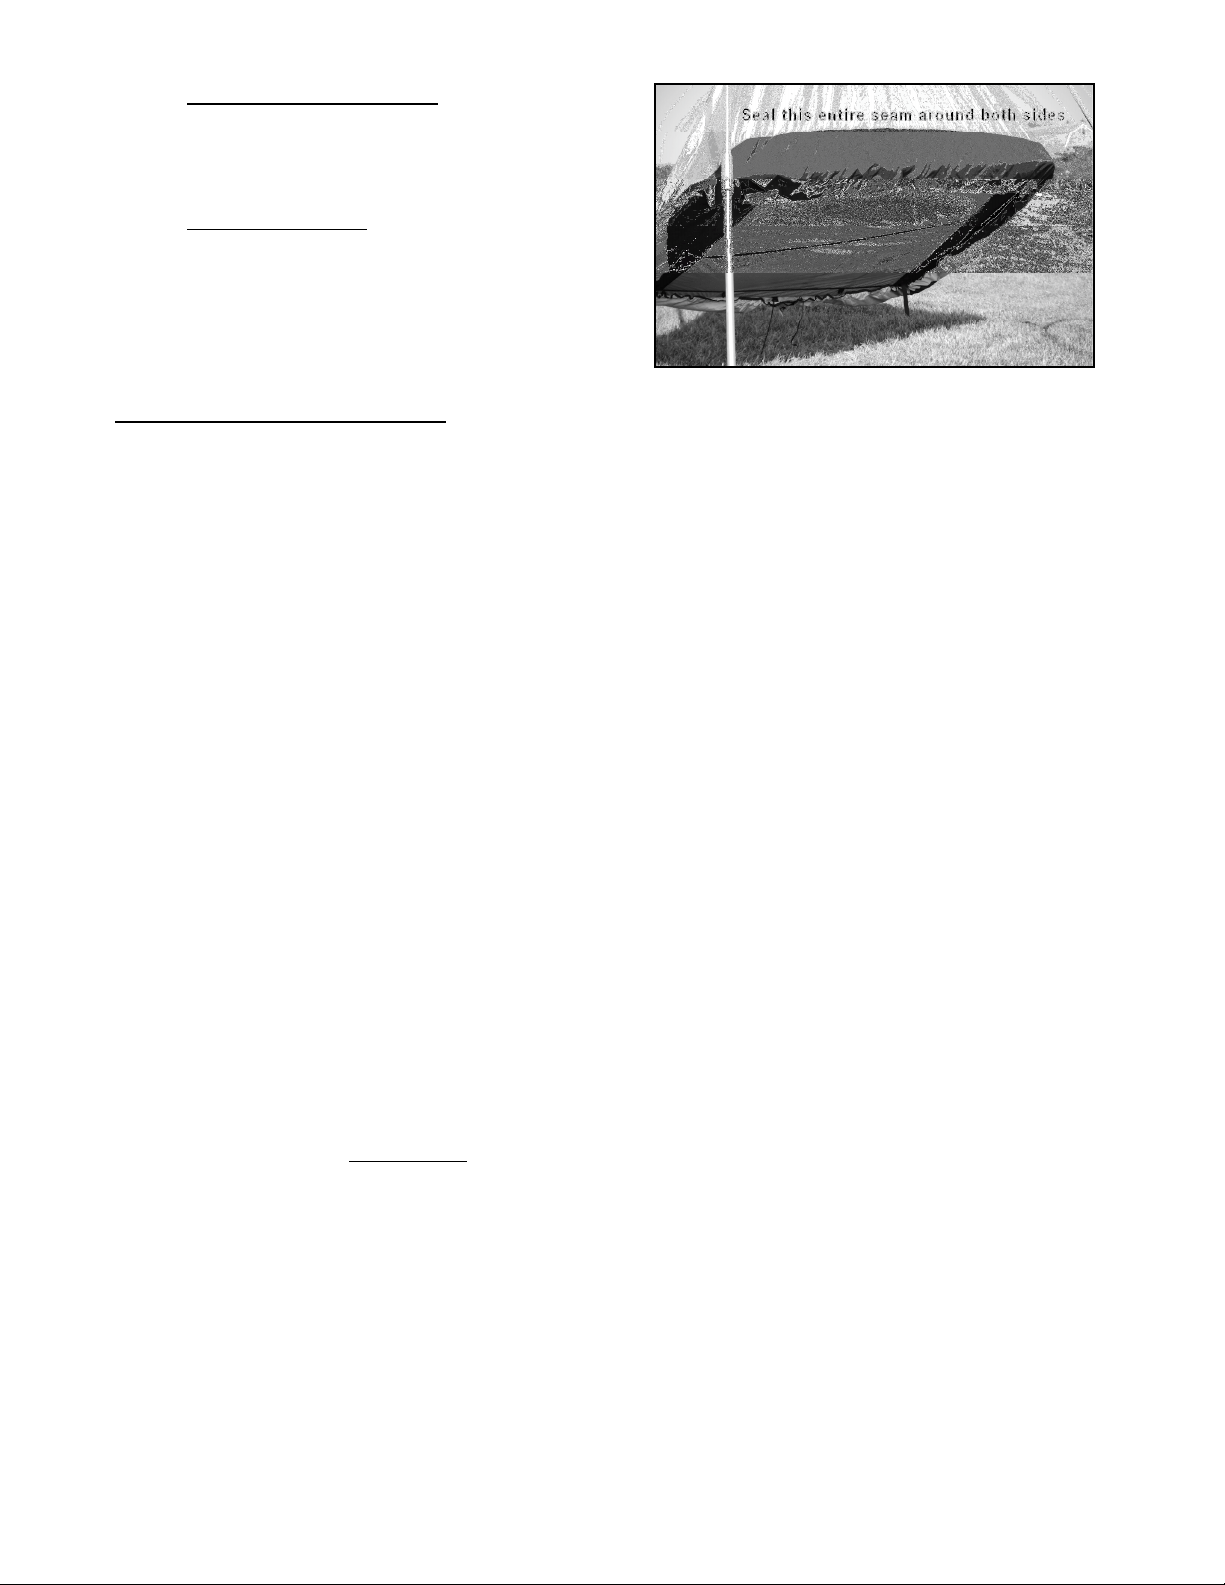
2. RAIN FLY ZIPPER AREA. Apply Shoe-Goo
to the vertical stitches of the zipper and the
flap on the front of the rain fly.
3. SCUFF GUARDS. Seam seal where the wall
scuff attaches to the rain fly. Also seal the
seams on the outside corner scuff guards.
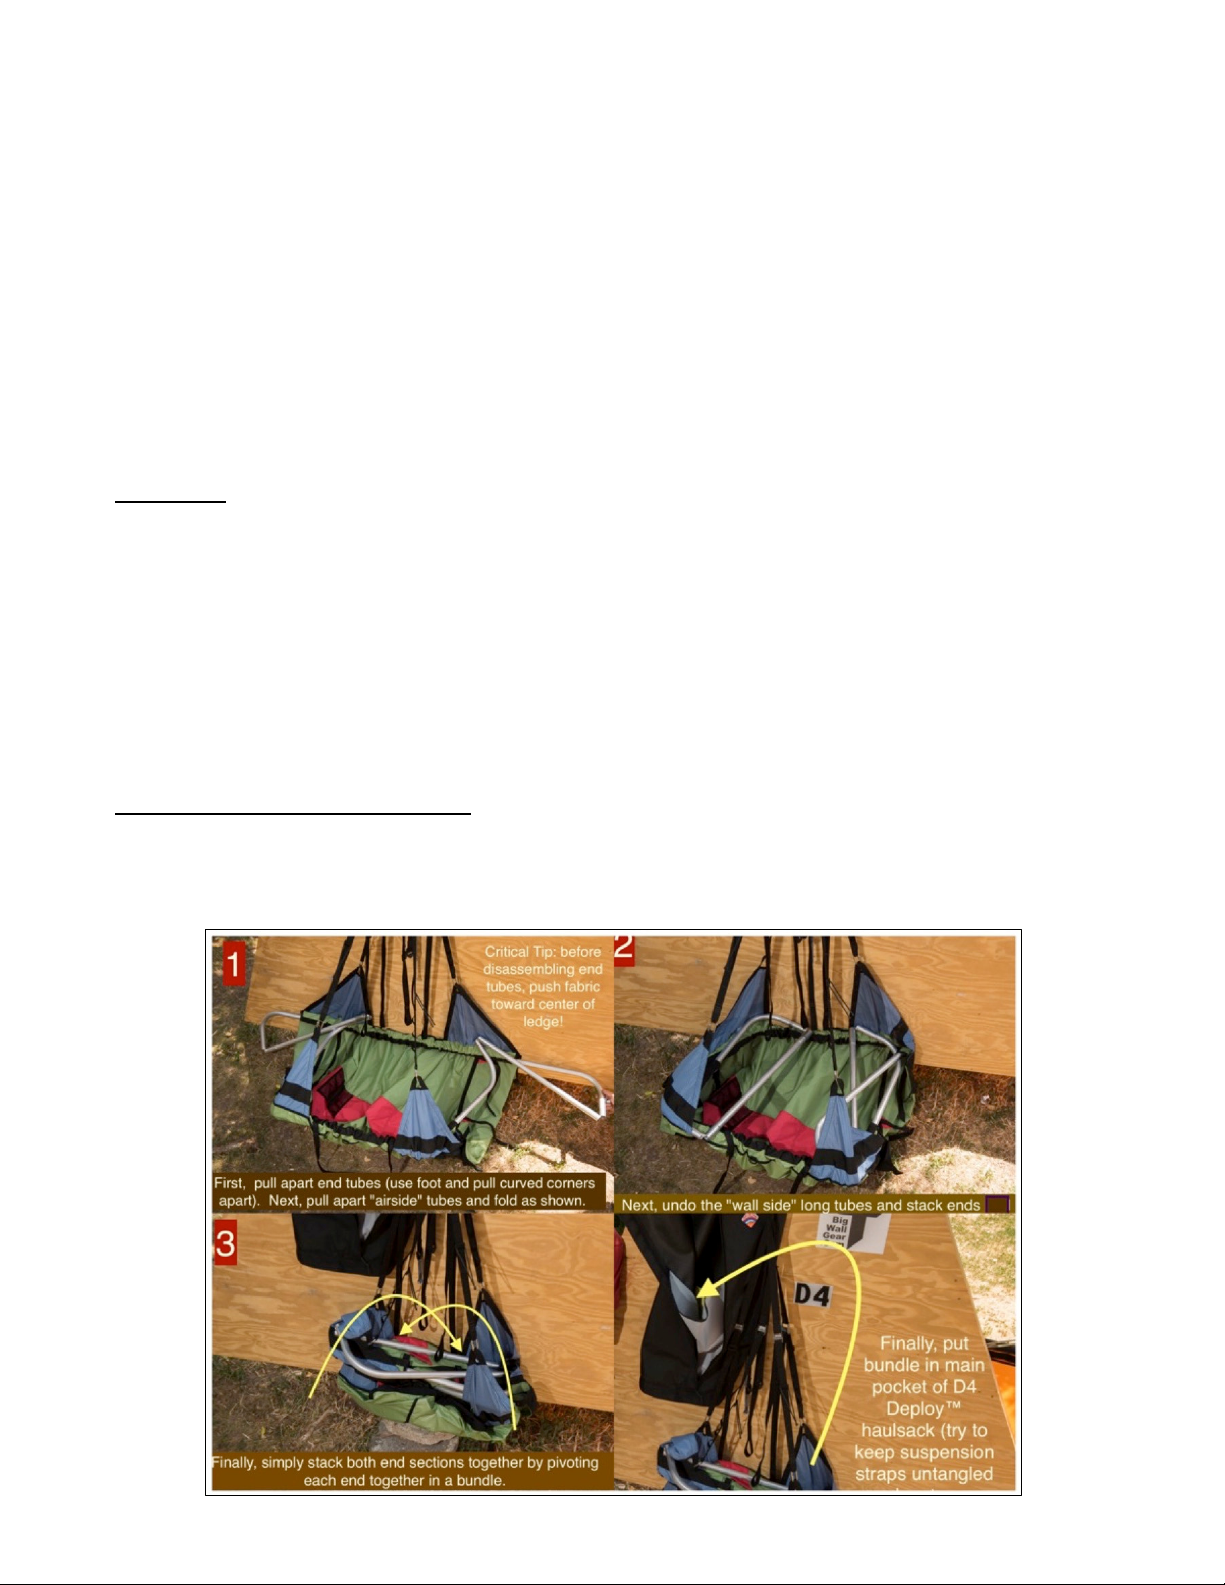
DEPLOYMENT & ASSEMBLY
1. Unzip the Haul bag and carefully unfold the portaledge. Let it drop below you RIGHT SIDE UP
and free of tangles. The bed tensioners should be on the top of the properly set up ledge.
2. Assemble the "long" metal tubes first - these are the 3-section tubes on the "Wall Side" (the
side that rests against the wall or tree) and the "Airside" (the side that is furthest from the wall).
Note that the D4 ledge has reinforcements on both sides and can be set up with EITHER side
against the wall (“ambidextrous”).
3. Next, assemble the "Ends" (the two end tubes with the bed tensioners).
IMPORTANT TIP: Be sure to push the fabric bed down toward the center as much as possible
when assembling the metal tubes. If the fabric is too close to the curved corners, it can be very
hard to assemble and disassemble the portaledge. Try to fit one end as best as possible first
then move to the other end. With a little practice, tube assembly can be done in one go
without the other end falling out.
Once one end is in, the other end usually snaps in fully-inserted. Sometimes, when the last
two end joints do not seem to want to go together, you can push one corner against the wall,
and the portaledge squares up and all joints fully snap in place.
DOUBLE-CHECK TO MAKE SURE ALL TUBES ARE FULLY INSERTED BEFORE
WEIGHTING THE LEDGE.
We recommend painting a little marker on the tubes to help identify how far one tube is
inserted into the other. Watch the videos for more tips on assembling the frame.
4. Next, tension the bed using the six bed tensioners. It is important to only fully tension the bed
when it is sitting perfectly flat. This takes a bit of practice to do well. Lightly tension one side
(3 tensioners) as evenly as possible, then move to the other side and tension the center
tensioner first while the portaledge is flat. If the portaledge starts to “taco” during tensioning,
push it against a flat surface to get it flat.
Next, tension the other two bed tensioners, in small steps, incrementally. Tensioned properly,
the D4 portaledge will be flat like a board and very resistant to “taco-ing.” On the other hand,
a sloppy tensioning job will result in a taco puzzle.
IMPORTANT NOTE! ALWAYS MAKE ADJUSTMENTS WITH ONLY ONE PERSON IN
LEDGE!