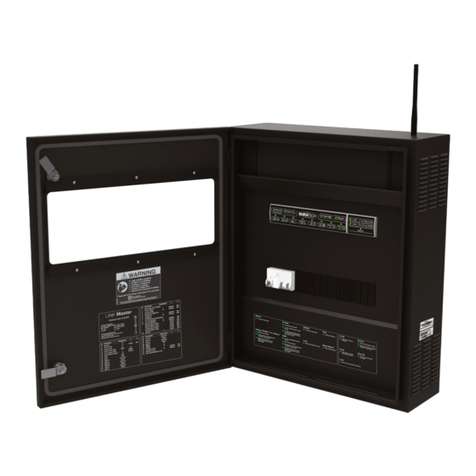
Duratech DLM-450 User manual

LINK Master
Manual
DLM-450 & DLM-600

2
Contents
1. Introduction 7
1.1. About the LINK Master 7
1.2. Box content 8
1.3. Keypad 9
1.3.1. Controller keypad 10
1.3.2. Gateway keypad 10
2. LINK Master 11
2.1. Installation 11
2.1.1. Mechanical installation 11
2.1.1.1. Positioning 11
2.1.1.2. Provisions 12
2.1.1.3. Phyisical installation 13
2.1.2. Electrical installation 14
2.1.2.1. Wiring instructions 16
2.1.3. Network installation 18
2.1.4. DMX controller installation 19
2.1.5. RS485 controller installation 20
2.2. Configuration 21
2.2.1. System start-up 21
2.2.2. DuraCloud app pairing 21
2.2.2.1. Account and permissions 21
2.2.2.2. DuraCloud - owner of the pool 21
2.2.3. Configure other devices 23
2.2.4. Configure relays A & B 23
2.2.5. Configure input C as level sensor 24
2.2.6. LINK Touch pairing 24
2.2.7. Configuring smart rules 26
2.2.8. Scheduler 28
2.2.8.1. Schedules 28
2.2.8.1.1 Schedules overview 29
2.2.8.1.2. Create schedules 29
2.2.8.1.3. Schedule detail 30
2.2.8.2. Schedule events 31
2.2.8.2.1. Creating events 31
2.2.8.2.3. Deleting events 32
2.2.8.2. Duratech Schedules 32
2.3. Operation 37
2.3.1. Keypad operation 37
2.3.1.1. Controller keypad 37
2.3.1.2. Gateway keypad 38
2.3.2. Discovery/Pairing mode 39
2.3.3. Automatic mode 40
2.3.4. Automatic mode with user override (service mode) 41
2.3.5. Cleaning Mode 43
2.3.6. Direct Wifi 44

3
2.3.7. Error codes 45
2.4. Updating 46
2.4.1. Controller 46
2.4.2. Gateway 46
2.5. Safety Conditions 47
3. Pool light 48
3.1. Installation 49
3.1.1. Wiring instructions 49
3.2. Configuration 51
3.2.1. Lamp type selection 51
3.2.2. Pool light synchronisation 52
3.2.3. Manual pool light synchronization 52
3.3. Operation 53
3.3.1. LinkTouch 53
3.3.1.1. Control functions 54
3.3.1.2. Advanced control functions 55
3.3.2. App 56
3.3.3. DMX controller operation 56
3.3.4. RS485 command set 56
3.4. Updating 58
3.5. Safety conditions 58
4. Heat pump 59
4.1. Installation 59
4.1.1. DURAHEAT heat pump 59
4.1.2. Multi-brand heat pump with LINK dongle 61
4.1.3. Multi-brand heat pump without LINK dongle 62
4.2. Configuration 63
4.2.1. Pairing the DURAHEAT heat pump 63
4.3. Operation 64
4.3.1. LINK Touch 64
4.3.2. App 64
4.3.3. RS485 64
4.4. Updating for ‘DURAHEAT’ heat pump 65
4.5. Safety conditions 66
5. Filter pump 67
5.1. Installation 67
5.1.1. DURAFLOW Variable Speed filter pump wiring instructions 65
5.1.2. Multi-Brand Single Speed filter pump wiring instructions 69
5.1.3. Multi-Brand Variable Speed filter pump wiring instructions 70
5.2. Configuration 72
5.2.1. Pairing the DURAFLOW Variable Speed filter pump 72
5.2.2. Multi-Brand Single Speed filter pump 73
5.2.3. Multi-Brand Variable Speed filter pump 73
5.3. Operation 74
5.3.1. DURAFLOW Variable Speed filter pump 74
5.3.2. Multi-Brand Single Speed filter pump 75

4
5.4. Updating 76
5.5. Safety conditions 77
6. Cover 78
6.1. Installation 78
6.1.1. DURACOVER Cover System wiring instructions 78
6.1.2. Multi-Brand Cover wiring instructions 80
6.1.3. Key Switch installation 81
6.2. Configuration 82
6.2.1. DURACOVER Cover System 82
6.2.1.1. Pairing 82
6.2.1.2. Calibrating 82
6.2.1.3. Configuration of the Dead Man Switch (DMS) 83
6.2.2. Multi-Brand Cover 84
6.2.2.1 Pairing 84
6.3. Operation 85
6.3.1. DURACOVER Cover System 85
6.3.1.1. Controller keypad 85
6.3.1.2. LINK Touch 86
6.3.1.3. DURACloud App 86
6.3.1.4. Key Switch 88
6.3.2. Multi-brand Cover 89
6.3.2.1. Controller keypad 90
6.3.2.2. LINK Touch 90
6.3.2.3. DURACloud App 91
6.3.2.4. Key Switch 92
6.4. Updating 92
6.5. Safety conditions 93
7. DuraCloud 94
7.1. Installation 94
7.2. Configuration 94
7.3. Operation 94
7.3.1. Accessibility 94
7.3.2. Features 95
7.3.3. Remote support 95
7.4. Updating 95

5

6

7
LINK MASTER
1. Introduction
1.1. About the LINK Master
Thank you for purchasing this House of DURATECH product. To ensure proper operation,
please read this manual carefully before using the device. After reading this manual, be
sure to keep it for future reference.
The LINK Master is a pre-wired central electrical hub, linking all technical pool-related
devices. It makes complex swimming pool installations easier to install and connect.
Making it possible for different devices to work together without adding dedicated cabling
between these devices.
House of DURATECH devices are automatically recognized and set by default. You also
have the possibility to add and connect Multi-Brand devices.
The LINK Master is equipped with multiple ‘smart’ input and output connections for your
pool devices. Giving you full access to the DuraLinkTM connected range of products.
Connect the LINK Master to the internet and it will automatically connect to the Dura-
Cloud App and Portal for easy configuration and operation of the different devices.
The LINK Master ensures efficient and safe operation of your pool.
Be aware that the LINK Master is an exact and sensitive system that must always be
handled with care. During installation, the regulations and provisions applicable for the
country and site of installation must be respected.

8
1.2. Box content
Check that the following parts are supplied with the product.
- 1 x Cabinet
- 1 x Wall mounting plate (only DLM-600)
- 2 x Cabinet door triangle keys (only DLM-600)
- 1 x Quick guide
- 1 x Fixing set (screws, plugs)
- 1 x Antenna
DLM-600
DLM-450

9
1.3. Keypad
High level overview of the LINK Master and the two keypads that are inside.
DLM-450
DLM-600

10
1.3.1. Controller keypad
Manual button Filling button Aux button Cover button
Used for switching between
manual and automatic mode.
Used for enabling/disabling
the filling mode of the pool.
Used for turning Auxiliary port
on or off.
This button will open/close
the pool cover
DuraLink button Heating button Sensors button Relay A button
Used for enabling/disabling
discovery mode.
Used for turning the heat
pump on or off.
Used for turning the sensors
on or off.
(By default this led is on.)
Used for activating your
Relay A function. (→
2.2.3.)
Cleaning button Filtration button Lights button Relay B button
Used for enabling/disabling
cleaning mode for the pool
Used for turning the filtration
pump on or off.
Used for turning the pool lights
on or off.
Used for activating your
Relay B function (→ 2.2.3.)
1.3.2. Gateway keypad
On/Off button Cloud LED
This button will turn on/off the
gateway.
This led will be on if your
LINK Master has an internet
connection.
DuraLink LED Direct Wifi button
This led will blink if it receives
a wireless DuraLink message.
This button will enable
an access point on your
gateway.
Owner button
This button is used to
become owner in the Dura-
Cloud App (→ 2.2.2.2.)

11
LINK MASTER
2. LINK Master
2.1. Installation
2.1.1. Mechanical installation
2.1.1.1. Positioning
Important guidelines to observe when choosing the correct location for installing the LINK
Master.
- The antenna needs to be attached on the top right of the
LINK Master
- The LINK Master cabinet needs to be mounted vertically and
permanently on a solid wall with sufficient bearing capacity.
- Respect a free space around the LINK Master cabinet for
unobstructed airflow. (see drawing below)
DLM-600
DLM-450
300 mm
300 mm

12
- The location where the LINK Master will be installed must be protected from
dust and water in order to ensure that the device functions properly.
- The ambient temperature must be between 0°C and +40°C and must be as
constant as possible.
- The relative humidity at the location of installation must not exceed 90%, no
condensation may occur.
- Direct heat or sun rays on the device must be avoided. The LINK Master is not
suitable for outdoor installation.
- The DuraCloud App and LINK Touch need access to the LINK Master for
configuration of certain settings and calibrations.
- For the DuraCloud App to fully communicate with the LINK Master it needs to
be connected to a ‘router’ device providing wireless (cloud) access. (→2.1.3)
- For the LINK Touch to correctly communicate with the LINK Master it needs to
have an unblocked radio signal.
- Also be aware that for ‘cover operation’ safety reasons the LINK Touch may
only be mounted in a place that allows full visibility of the entire pool.
2.1.1.2. Provisions
Before commencing with the electrical installation, the following supplies need to be avail-
able at the place of installation.
- Power supply 230VAC 32A
- Network cable
Make sure that the cable section (mm²) for the power cable is in accordance with the
cable length and complies with the applicable ‘country’ standards.

13
LINK MASTER
2.1.1.3. Phyisical installation
DLM-450 installation
Using the screws the DLM-450 can be installed
securely.
DLM-600 installation
1. Fix the wall mounting plate to the wall using the included (plugs) and screws.
2. Lift the Link Master up, and position in front of the hooks on the mounting plate. (best
with 2 persons)
3. Lower the Link Master and let the hooks slide into the holes on the back of the cabinet.
Make sure the Link Master is securely attached.
DLM-600
DLM-450

14
2.1.2. Electrical installation
High level overview of the DLM-450 and the parts that are inside.
DLM-450 overview
DLM-450 terminal blocks
Antenna
Transformer
Gateway
Circuit
breakers
Terminal
Blocks
Controller

15
LINK MASTER
High level overview of the DLM-600 and the parts that are inside.
DLM-600 overview
DLM-600 terminal blocks
Antenna
Transformer
Gateway
Circuit
breakers
Terminal
Blocks
Controller

16
2.1.2.1. Wiring instructions
Before opening the housing, it is necessary to always de-energize the device electrically.
The electrical connection as well as the work of adjustment and servicing should only be
carried out by an qualified electrician!
- Check the sticker on the inside of the cabinet door for easy installation.
Connect all the devices to the connection terminals at the bottom of the cabinet.
- Refer to each individual chapter (3-6) for device specific installation instructions.
Ensure all connections are stable by tightening the connection terminal
screws firmly.
- Connect the 230VAC power supply cable
- Ensure the correct connection of the grounding (terminal 1)
The load of the DLM-450 may not exceed 350VA.
The load of the DLM-600 may not exceed 500VA.
DLM-450 inside cabinet sticker
Heatpump
Heatpump
Filtration pump
Filtration pump
Aux (Purification)
Aux (Purification)
/
Cover sensor ground
Cover sensor supply
Cover sensor input
Cover motor
Cover motor
Electrolysis
Electrolysis
RS485
RS485
DMX
1
2
3
4
5
6
7
8
9
10
11
12
13
14
15
16
17
32A
32A
16A
16A
16A
16A
230VAC
230VAC
230VAC
230VAC
230VAC
230VAC
24VDC
24VDC
24VDC
24VDC
24VDC
L
N
L
N
L
N
GND
Signal
A
B
A
B
P
N
P
Description Designation VNr. A
DMX
CAN
CAN
Input A (Keyswitch open)
Input B (Keyswitch close)
Input C (Filling)
Input GND
Relay A
Relay A
Relay B
Relay B
Aux
Aux
Lamps
Lamps
Lamps
Lamps
18
19
20
21
22
23
24
25
26
27
28
29
30
31
32
33
34
5A
5A
5A
5A
16A
16A
25A
25A
25A
25A
12VAC
12VAC
12VAC
12VAC
12VAC
12VAC
N
P
N
Signal
Signal
Signal
Common
Signal
Common
Signal
Common
L
N
N
N
L
L
Description Designation VNr. A
230VAC
/
30VDC

17
LINK MASTER
DLM-600 inside cabinet sticker

18
2.1.3. Network installation
For the DuraCloud App to communicate with the LINK Master it needs to be connected
to a ‘router’ device providing wireless (cloud) access. This access is essential to be able
to fully configure your LINK Master (→ 2.2)
The ‘router’ device cable should be connected in the LAN socket. (drawings below)
DLM-600DLM-450
ROUTER

19
LINK MASTER
2.1.4. DMX controller installation
The DMX controller can be connected to the LINK Master in the following way.
Connect the DMX controller wires to the connection terminal blocks
- 17 and 18 on the DLM-450
- 24 and 25 on the DLM-600
For more information about how to use the DMX commands please refer to (→3.3.5.)
DLM-450 DMX connection
DLM-600 DMX connection

20
2.1.5. RS485 controller installation
A controller with RS485 connection can be connected to the LINK Master in the following
way.
Connect the RS485 controller wires to the connection terminal blocks
- 15 and 16 on the DLM-450
- 20 and 21 on the DLM-600
For more information about how to use the RS485 commands please refer to (→4.3.3.)
DLM-450 RS485 connection
DLM-600 RS485 connection
This manual suits for next models
2
Table of contents
Other Duratech Switch manuals