9
3. Functions
Note: see product overview (chapter 1) for
reference.
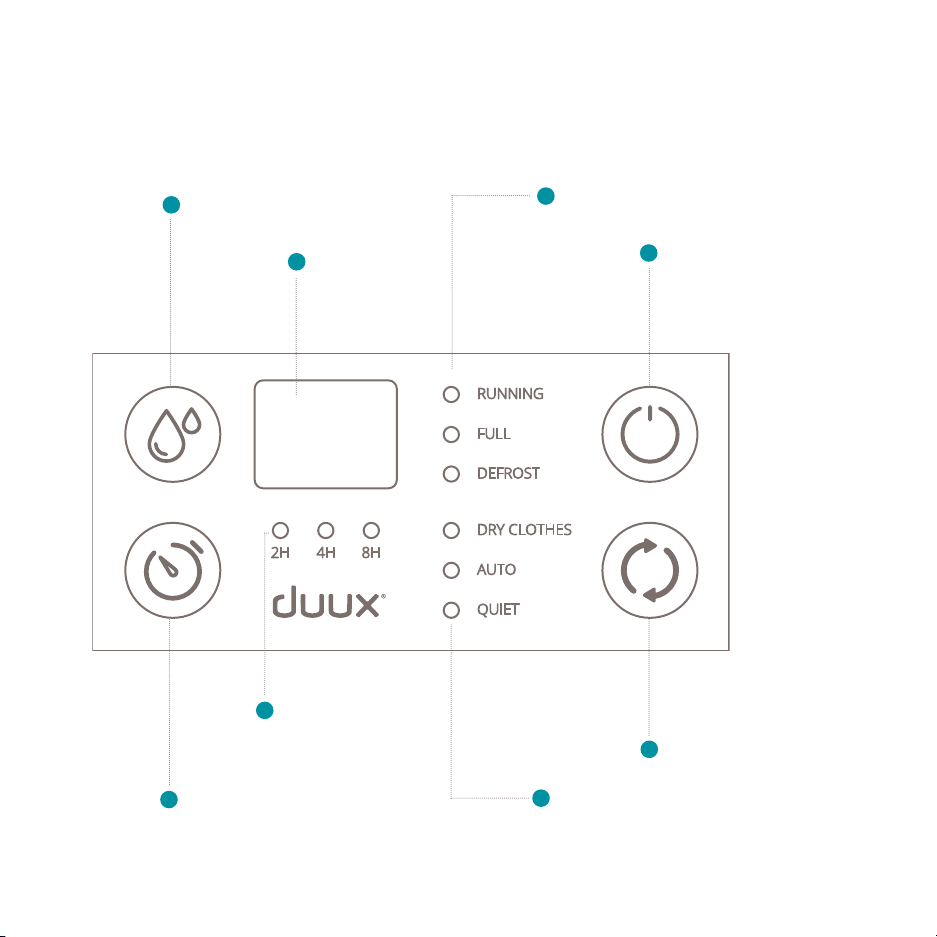
1Control panel
Use the control panel to adjust the settings.
Hygrostat button
Press to increase the desired humidity with
intervals of 5% for each press. The hygrostat
can be set from 40- tot 80% RH (relative
humidity). When the set humidity dissapears, the
display shows the ambient humidity in the room.
Note: when disconnecting the power cable, the
hygrostat setting will automatically reset to factory
pre-set.
Power button
Switch the device on and o by pressing this
button.
Status indicator LEDs
• Running – indicates the device is extracting
moisture. When the ambient humidity reaches
below the set humidity, the running status
indicator will turn o to save power.
Attention: If the running status indicator is
blinking, it means that the ambient temperature is
below 0⁰C or above 40⁰C. Please adjust temperature.
• Full – this indicator will light up when the water
tank is full or removed from the device. Please
empty the water tank or place it in proper
position.
.
• Defrost – indicates the device is defrosting.
Note: If the defrost indicator is blinking, it means
the humidity and/or temperature sensor(s) are cut
o or made short circuit.
Timer button
Use this button to activate timer modes.
1 Press once – activate 2 hour time-out (2hr timer
indicator LED will light up);
2 Press twice – activate 4 hour time-out (4hr timer
indicator LED will light up);
3 Press three time – activate 8 hour time-out (8hr
timer indicator LED will light up);
4 Press four times – deactivate timer.