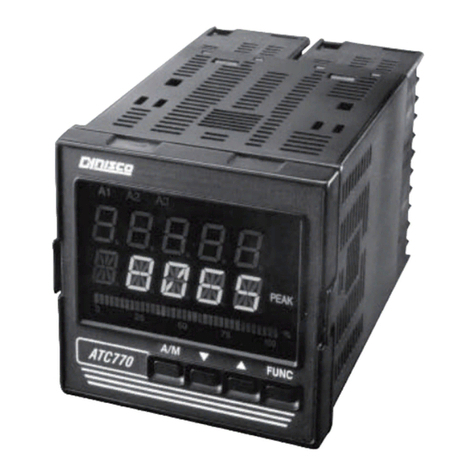
Dynisco ATC990 User manual

From lab to production,
providing a window into the process
-1-
www.dynisco.com
Rev: n/aP/N: n/a ECO: n/a
Dynisco ATC990 Graphical 1/4 DIN
Process Controller Concise Product
Manual
Operang Manual

From lab to production,
providing a window into the process
-2-
www.dynisco.com
Rev: n/aP/N: n/a ECO: n/a
The following symbols are used on the product labels:
1. Installation
CAUTION: Installaon should be only performed by technically
competent personnel. It is the responsibility of the installing engineer to
ensure that the conguraon is safe. Local regulaons regarding
electrical installaon & safety must be observed - e.g. US Naonal
Electrical Code (NEC) and/or Canadian Electrical Code. Impairment of
protecon will occur if the product is used in a manner not specied by
the manufacturer.
Installing Option Modules
Cauon, refer to installaon manual
when connecng
General danger to life or limb
Alternang current
Equipment protected
throughout by double
insulaon
Both direct and
alternang current
Second Input + Linear out Module
Opon A Module
Opon 1 Module
Opon 2 Module
Opon 3 Module
Opon 3 Module
Universal Input + Linear out Board
Power Supply Band

From lab to production,
providing a window into the process
-3-
www.dynisco.com
Rev: n/aP/N: n/a ECO: n/a
To access the opon modules, rst pull the instrument from the housing.
a. Detach the main boards by liing rst the upper, and lower mounng struts.
b. Plug the required opon modules into the correct connectors, as shown below.
c. Locate the module tongues in the corresponding slot on the opposite board.
d. Hold the Power and Input boards together while relocang on their mounngs.
e. Push the boards forward to ensure correct connecon to the Display board.
f. Replace the instrument by aligning the boards with the guides in the housing,
then slowly push the instrument back into posion.
Note: Opon modules are automacally detected at power up.
Main Board Connectors
Power Supply Board
Transformer Colour Code
100-240V (Yellow)
24-48V(Blue)
Opon 3 Slot
Connector PL4B
Opon Slot A
Connectors PL5 & PL6
Opon 1 Slot
Connectors PL7 & PL8
PC Congurator Socket SK1
Opon 2 Slot
Connectors PL4A
Display Board
Connecons
Universal
Input Board
Note: Plasc pegs
prevent ng of older
nonreinforced single
relay modules – remove
the peg to t dual relays

From lab to production,
providing a window into the process
-4-
www.dynisco.com
Rev: n/aP/N: n/a ECO: n/a
Replacement of Main Boards
CAUTION: Replacement of main boards should only be carried out if
unavoidable, and must only be carried out by trained personnel.
When replacing the power supply board, observe the transformer colour and case
labelling to check the supply voltage, otherwise irreparable damage may occur. If the
display or input boards are replaced, a full recalibraon must be carried out.
Panel Mounting
Gasket
Mounng Panel
Ratchets
Instrument
Housing
Slide mounng clamp over the
instrument housing towards
rear face of mounng panel
unl the tongues engage in
ratchets and instrument is
clamped in posion.
Hold instrument rmly in
posion (apply pressure to
bezel only)
CAUTION: Do not remove the panel gasket; it is a seal against dust and
moisture.
CAUTION: The instrument is double insulated. All external circuits
connected must provide double insulaon. Failure to comply with the
installaon instrucons may impact the protecon provided by the unit.
Rear Terminal Wiring
Note: The wiring diagrams shows all possible opon combinaons. The connecons required depend
on the opons ed. Use single strand (1.2mm / AWG18 max size) copper wire, except for the
thermocouple input, where the correct thermocouple or compensang cable and connectors should
be used.

From lab to production,
providing a window into the process
-5-
www.dynisco.com
Rev: n/aP/N: n/a ECO: n/a
CAUTION: Check correct operang voltage on the side label before
connecng power. A UL listed 1A an-surge fuse, rated 250V (for AC)
65V (for DC) should be ed to the power input. An IEC60947-1 &
IEC60947-3 compliant isolaon switch should be ed close to the unit,
in easy reach of the operator, and appropriately marked.
All connecons to the device must be made through a spade format or
similar connecon, with connecon to the spade terminal touching both the
insulaon and conductor material.(Use a standard crimping tool) All
connecons must be Mechanically secured so as to prevent any wiring
becoming loose and coming in contact with other wires or the instrument
casing.
The above applies to any and all connecon to hazardous mains supply
either direct or indirect (Through a switch (Relay))
Main Terminals
CAUTION: External compung devices connected to the
communicaons port must comply with the standard, UL 60950.

From lab to production,
providing a window into the process
-6-
www.dynisco.com
Rev: n/aP/N: n/a ECO: n/a
Additional Option Terminals
Electrical shock can result in death or serious injury. Avoid contact with
the leads and terminals. High voltages that may be present on leads can
cause electrical shock
2. Specifications
Process Inputs 1 and 2
Sampling Rate: Beer than 10 per second.
Resoluon: 16 bits. Always four mes beer than display resoluon.
Impedance: >10M resisve, except DC mA (5 ) and V (47k ).
Temp Stability: Error <0.01% of span per °C change in ambient temperature.
Supply Variaon: Supply voltage inuence negligible within supply limits.
Humidity Inuence: Negligible if non-condensing.
Process Display: Displays up to 5% over and 5% under span limits.
Process Variable
Input Oset:
Sensor Break
Detecon:
Reading adjustable ± Controller Span. +ve values added to Process
Variable, -ve values subtracted from Process Variable
High or Low range break acvates.as per user denion (default is to
Break to a High scale range)
Isolaon: Isolated from all outputs and other input at 240V AC.

From lab to production,
providing a window into the process
-7-
www.dynisco.com
Rev: n/aP/N: n/a ECO: n/a
Strain Gauge Inputs: 350 to 5K Strain Gage
Bridge Connecon 4 or 6 wire (6 to use internal shunt cal switch)
Bridge Excitaon 10 V +/- 7%
Bridge Sensivity 1.4 - 4 mV/V
Input Signal Span - 25% to +125% of full scale (approximately - 10 mV
to +50 mV)
Calibraon Internal switch between CAL2 & CAL1 terminals(7&6 or 39&40).
External resistor only.
Shunt Value From 40% to 100%
Supported
Thermocouple
Types & Ranges:
Thermocouple
Calibraon:
Supported RTD
Types & Ranges:
RTD Calibraon:
RTD Excitaon: Sensor current 150 A ± 10%.
Type Range °C Range °F
B +100 to 1824°C +211 to 3315°F
C 0 to 2320°C 32 to 4208°F
D 0 to 2315°C 32 to 4199°F
E -240 to 1000°C -400 to 1832°F
J -200 to 1200°C -328 to 2192°F *
K -240 to 1373°C -400 to 2503°F *
L 0 to 762°C 32 to 1402°F *
N 0 to 1399°C 32 to 2551°F *
PtRh 20%:40% 0 to 1850°C 32 to 3362°F
R 0 to 1759°C 32 to 3198°F
S 0 to 1762°C 32 to 3204°F
T -240 to 400°C -400 to 752°F *
Oponal decimal place can be displayed up to 999.9°C/F
± 0.1% of full range, ± 1LSD (± 1°C for internal CJC if enabled). Linearizaon
beer than beer ± 0.2°C (± 0.05 typical) on ranges marked * in the table
above. Linearizaon for other ranges is beer than beer than ± 0.5°C.
BS4937, NBS125 & IEC584
Type Range °C Range °F
3-Wire PT100 -199 to 800°C -328 to 1472°F
NI120 -80 to 240°C -112 to 464°F
Oponal decimal place can be displayed up to 999.9°C/F
0.1% of full range, ± 1LSD.
Linearization better than ± 0.2°C (± 0.05 typical).
PT100 input to BS1904 & DIN43760 (0.00385 / /°C).

From lab to production,
providing a window into the process
-8-
www.dynisco.com
Rev: n/aP/N: n/a ECO: n/a
Lead Resistance: <0.5% of span error for max 50 per lead, balanced.
Supported Linear
Types & Ranges:
Maximum Overload: 1A on mA input terminals, 30V on voltage input terminals.
DC Calibraon: ± 0.1% of full range, ± 1LSD.
DC Input Mul-Point
Linearizaon:
Digital Inputs
Volt-free contacts
(or TTL):
Isolaon: Reinforced safety isolaon from inputs and other outputs.
Digital Input
Sensivity:
Response Time:
Selectable Digital
Input Funcons:
Type Range Oset Range
mA DC 0 to 20mA DC 4 to 20mA DC
mV DC 0 to 50mV DC 10 to 50mV DC
V DC 0 to 5V DC 1 to 5V DC
V DC 0 to 10V DC 2 to 10V DC
Scalable from -99999 to 100000. Decimal point selectable from
0 to 3 places, but limited to 5 display digits (e.g. 9999.9)
Up to 15 scaling values can be dened anywhere between 0.1
and 100% of input.
Open contacts (>5000 or 2 to 24VDC signal = Logic High
Closed contacts (<50 or -0.6 to +0.8VDC signal = Logic Low.
Edge Sensive. Requires High-Low or Low-High transion to
change funcon.
Slot A <0.25 second,
Funcon Logic High Logic Low
Peak Reset No Acon Reset Peak reading
Alarm and Peak Reset No Acon Reset Peak reading and
Resets latched alarm if
alarm condions no longer exists
Zero Calibraon No Acon Perform zero Calibraon
Zero Calibraon, No Acon Perform zero Calibraon,
Reset Peak reading and
Resets latched alarm if
alarm condions no longer exists
Reset Latched No Acon Resets latched alarm if alarm
Alarms condions no longer exists
Alarm and Peak
Reset

From lab to production,
providing a window into the process
-9-
www.dynisco.com
Rev: n/aP/N: n/a ECO: n/a
Data Recorder Stop
Recording
Set Point Select Select Local
Setpoint
1A/2A
Auto Manual Control Automac
Select Control mode
PID Control Output Enable PID
Control outputs
Engage Pre Tune No Acon
Engage Self Tune No Acon
Increment Control No Acon
Output
Decrement Control No Acon
Output
Start Recording
Select Alternate Setpoint
Manual Control Mode
Disable PID Control Outputs
Engages tuning mode selected
Increments control output
percentage (0-100% in 20secs)
Decrements control output
percentage (100-0% in 20secs)
Outputs
Cauon: Plasc pegs prevent ng of older non-reinforced single relay modules –
Remove the peg to t dual relays (all dual relay modules have reinforced isolaon)
Single Relay
Type & Rang: Single pole double throw (SPDT); 2A resisve at 120/240VAC.
Lifeme: >500,000 operaons at rated voltage/current.
Isolaon: Reinforced safety isolaon from inputs and other outputs.
Dual Relay
Type & Rang: Single pole single throw (SPST),2A resisve at 120/240VAC.
Dual relay modules have shared common.
Lifeme: >200,000 operaons at rated voltage/current.
Isolaon: Reinforced safety isolaon from inputs and other outputs.
Linear DC
Ranges 0 to 5, 0 to 10, 1-5, 2 to 10V & 0 to 20, 4 to 20mA (selectable)
with 2% over/under-drive when used for control outputs.
Resoluon: 15 3/4 bit (1 part in 52K)
Accuracy: 0 to 20mA, 4 to 20mA into 500 max, 0 to 10V, 2 to 10V, 0 to 5V into 500
min updated at about 65ms intervals. (130ms seling me)
Stability: ± 76ppm
Isolaon: Reinforced safety isolaon from inputs and other outputs.

From lab to production,
providing a window into the process
-10-
www.dynisco.com
Rev: n/aP/N: n/a ECO: n/a
Transmitter PSU
Power Rang: 24V nominal (19 to 28V DC) into 400 minimum resistance(60mA Drive).
(Opon to use DC Linear output as 0- 10V stabilised PSU).
Isolaon: Reinforced safety isolaon from inputs and other outputs.
Communications
PC Configuration
Connecon: RS232 via PC Congurator Cable to RJ11 socket under case.
Isolaon: Not isolated from input or SSR Driver outputs. For bench
conguraon only. CAUTION: Do not use in live applicaons.
RS485
Connecon: Locates in Opon Slot A. Connecon via rear terminals
(refer to wiring diagram).
Protocol: Modbus RTU.
Slave/Master Mode Slave address range 1-255 or Setpoint master mode.
Supported Speeds: 4800, 9600, 19200, 38400, 57600 or 115200 bps.
Data Type: 8 data bits and 1 stop bit. Odd, even or no parity.
Isolaon: 240V reinforced safety isolaon from all inputs and outputs.
Ethernet
Connecon: Locates in Opon Slot A. Connecon via RJ45 connector on top of case.
Protocol: Modbus TCP. Slave only.
Supported Speed: 10BaseT or 100BaseT
Isolaon: 240 V reinforced safety isolaon from the supply, inputs and outputs
(except SSR Drivers).
Alarms
Alarm Types: Up to 3 alarms selectable as Process High, Process Low, Rate of Signal Change
(per minute), Sensor/input Break, PV-SP Deviaon, Band, Control Loop,
Percentage of memory used, High and Low power
Alarm Hysteresis: A deadband from 1 LSD to full span (in display units) for Process,.Rate Of
Change Alarm hysteresis is the shortest me (1 to 9999 secs) the rate of
change must be above the threshold for the alarm acvate, or fall below the
threshold to deacvate. Note: If the duraon is less than this me, the alarm
will not acvate no maer how fast the rate of rise.
Combined Outputs: Logical OR of alarms 1 & 2, 1 to 3,

From lab to production,
providing a window into the process
-11-
www.dynisco.com
Rev: n/aP/N: n/a ECO: n/a
Operating Conditions (For Indoor Use)
Temperature: 0°C to 55°C (Operang), –20°C to 80°C (Storage).
Relave Humidity: 20% to 95% non-condensing.
Supply Voltage and Mains versions: 100 to 240VAC ± 10%, 50/60Hz, 24VA.
Low voltage versions: 20 to 48VC 50/60Hz 15VA or
22 to 65VDC 12W.
Conformance Norms
EMI: CE: Complies with EN61326.
Safety CE: Complies with EN61010-1. UL, cUL to UL61010C-1.
Polluon Degree 2, Installaon Category II.
Front Panel Sealing: To IP66 (IP65 front USB connector). IP20 behind the panel.
(IP rang not recognised / approved by UL).
Front Panel Wash with warm soapy water and dry immediately.
Close the USB cover (if ed) before cleaning.
Display
Display Type: 160 x 80 pixel, monochrome graphic LCD with a dual colour
(red/green) backlight.
Display Area: 66.54mm (W) x 37.42mm (H).
Display Characters: 0 to 9, a to z, A to Z, plus ( ) - and _
Trend View: 120 of 240 data points shown in a scrollable window. Data is not
retained when power turned o or if me base is changed.
Trend Data: Any acve alarm plus PV (solid) & SP (doed) at sample me or
Max/Min PV between samples (candle-sck graph).
Auto scales from 2 to 100% of Input Span.
Trend Sample Rate: 1; 2; 5; 10; 15; 30 seconds or 1; 2; 5; 10; 15; 30 minutes.
Dimensions
Weight: 0.65kg maximum.
Size: 96 x 96mm (Front Bezel). 117mm (Depth Behind Panel).
Mounng Panel: Panel must be rigid. Maximum thickness 6.0mm (0.25inch).
Panel Cut-out Size: 92mm x 92mm. Tolerance +0.5, -0.0mm.
Venlaon: 20mm gap required above, below and behind.
Manufacturing Site
Address: The Hyde Business Park, Brighton, BN2 4JU, United Kingdom
Power:
Consideraons:
Cleaning

From lab to production,
providing a window into the process
-12-
www.dynisco.com
Rev: n/aP/N: n/a ECO: n/a
3. Power Up Sequence
Following the power-up self-test and logo screen, the instrument normally enters Operaon Mode,
from which the user can select the instrument’s Main Menu (refer to the Screen Sequence list). The
excepons to this are the rst power-up aer purchase, when opon modules have been changed
or if an error is detected.
Setup Wizard
An easy Setup Wizard runs automacally at rst ever power-up. Follow the Wizard to setup
parameters required for typical applicaons (screens marked w in the Screen Sequence list). A
paral Wizard also runs whenever opon modules have been changed, this only shows
parameters aected by the changes. The Wizard can also be run from the Main Menu. It exits to
Operaon Mode once completed.
Start-Up Errors
These messages indicate that a hardware or conguraon an error has occurred.
Cauon: Do not connue with the process unl the issue is resolved.
Message Displayed Reason
Opon Slot n Error Fault detected. Replace the module in slot n
Conguraon Problem Check all instrument parameters before using
For Service Contact Details of who to contact if a fault persists
4. Operation Mode
This mode is entered at power on, or accessed from the Main Menu. If required, all Operaon Mode
parameters can be made read only (see Display Conguraon).
Note: Conguraon must be completed before starng normal operaons.
Normal Operaon
Subsequent screens allow the display and selecon/adjustment* alarm status and trends.
LED Indicators LED Funcon Labels
Engineering Units
Input as Percentage of Span
Process Variable Value 1
Process Variable Value 2
Typical Operaon Screen

From lab to production,
providing a window into the process
-13-
www.dynisco.com
Rev: n/aP/N: n/a ECO: n/a
Press or to move forward or back though the screens. Where adjustment is possible*, press or
to alter the values. *If adjustment is not disabled in Conguraon.
5. Tuning Error Description
Err Timeout
Timeout for Pulse experiment: Determined by empiric for pulse experiment of temperature
processes. At start of phase limit start meout with one minute (60sec set for pressure controller)
When limit is reached the slope of the Pv is saved. At start of phase max reset meout generator (4.5
minutes) Check acve slope of Pv. When slope goes less then 0.35 of saved value, Save elapsed me
of the running experiment and reset meout generator with 4.5 of elapsed me. At start of phase
Delta2 reset meout generator (4.5 saved me) At start of phase Delta reset meout generator (4.5
saved me)
Err limit
The process reacon goes into the wrong direcon aer seng the controller output pulse.
Err Parameter
The esmated process characterisc values are not valid
(Tg < 0.5 sec) or (Gain < 0.005)
Err Deviaon
For pressure controller this is not used. For temperature controller we used this to monitor a
maximum deviaon of 6% for PV.
Err InputFail
Indicate a fail state of measured Pv at screen for tuner state. Step experiment is a hidden opon
acvated by controller parameter (PreDi > 1.0)
Err Timeout
Timeout at step experiment. No visible reacon of process value 1000 seconds aer start of
experiment.
Err Step
Error_Step: Found a deep point of inexion and the condion ([Tu * Vmax] >50.0) is true
Trend View
Acve Alam(s)
Process Variable Trend
Setpoint Trend (doed)
Time Markers
(10 samples per marker)
Trend Upper Scale Value
Cursor Line
PV Value At Cursor Line
Trend Lower Scale Value
Sample Interval (or Time at
Cursor Line)
Trend View

From lab to production,
providing a window into the process
-14-
www.dynisco.com
Rev: n/aP/N: n/a ECO: n/a
Trend View graphs PV; or Max/Min PV between samples, plus acve alarms. Trend Scale Values
adjust automacally to visible data (between 2 to 100% of the input span). Sample intervals are
set in Display Conguraon. Pressing or moves the Cursor Line back through the last 240 data
points. Note: Data is not retained at power down or the Sample Interval is changed.
Over/Under Range & Input Fail Indications
If the process or auxiliary inputs are >5% above or below the scale max/min, their displayed value is
replaced with the word “HIGH” or “LOW”. If a signal break is detected, their value is replaced with
“OPEN” and an uncalibrated input is replaced by “ERROR”. In OPEN or ERROR condions, the
Control Outputs go to the pre-set power value (see Control Cong).
Cauon: Correct the problem before connuing normal operaon.
6. Serial Communications
Set Ethernet opon IP address with supplied soware for networks without DHCP.
Refer to the User guide (from your supplier) for help with communicaons.
7. Strain Gauge Calibration Mode
Press the + to enter calibraon mode from any locaon for quick access (see Strain Gauge
Calibraon in Conguraon Mode)Only applicable when Sensor input type is set to Strain Gauge.
8. Auto/Manual Key Press
Press the + to change the control mode. When pressing these keys it will put the unit into
manual mode if already in Auto and move back to the main operator screen. Pressing while in
Manual will put the controller into Auto control and back to Main operator screen. Use with Cauon
9. Pressure Control Description
This mode is entered at power on, or accessed from the Main Menu. If required, all Operaon Mode
parameters can be made read only (see Display Conguraon).
Note: Conguraon must be completed before starng normal operaons.
Output value indicaon:
Selectable between the following modes:
- range 0/100.0%.
- scalable with two proper values for RPM indicaon. (Same value as above only two
point scaled to give RPM)
In automac mode either mode is available (not at the same me)
In manual mode a parameter is provided to select the rst or second method of
indicaon.

From lab to production,
providing a window into the process
-15-
www.dynisco.com
Rev: n/aP/N: n/a ECO: n/a
Tune algorithm:
The Tune procedure is acvated by selecng Yes on Automac Tune selecon screen
The Tune can select two types of procedures:
1) The Pre-TUNE algorithm
2) The Self-Tune algorithm
1) Pre-TUNE ALGORITHM
To implement the Pre-TUNE algorithm set the instrument in manual mode and then
select Run "Pre-Tune". "Pre-Tune" will switch to OFF aer PID parameters calculaon
(during this procedure the LED will be ashing).
The basic concepts of auto tuning system are based on the open loop pulse response,
for this reason the Pre-TUNE funcon may be acvated only in manual mode.
The equivalent mathemacal model of the process is characterized by three
parameters: the gain, the me constant and the equivalent me delay.
The power output of the controller is changed by a small step value (This value has to
be entered by the user before the pre tune can take place in manual mode) and the
controller stores the process variable response. If the pre-tune step is set too high it
will create an overshoot and therefore needs to be reduced. The pre-tune step power
is added to manual power and displayed to the user but is not changeable. The
expected range is from –25.0% to 25.0% of full scale. The default value is 10.0%.
2) Self-Tune ALGORITHM
In order to implement the Self-Tune algorithm the instrument should be in automac
mode. Then select run “Self-Tune”. In this case the “ON” will be remembered by the
instrument even if the instrument was switched o. In order to deacvate the
Self-Tune, it is necessary to return the “Self-Tune” parameter to “No”
The self-tune is a on-line algorithm that “observes” the measured value and looks for
oscillaon due to variaons of the load or set-point changes. When a
signicant paern is “recognized” a decisional procedure starts in order to
recalculate the parameters of PID controller.
When the Self-tune procedure is enabled the PI parameters (PB, TI) are read only.
Automac stand-by:
This funcon avoids overshoot due to temporary process interrupons (PV goes to
zero). When the input signal goes to zero the controller output reaches the
saturaon for integral factor eect; when the process restarts the controlled output
will have an excessive and dangerous overshoot.

From lab to production,
providing a window into the process
-16-
www.dynisco.com
Rev: n/aP/N: n/a ECO: n/a
When the “automac stand-by” funcon is acvated by seng the Pressure Standby
Threshold to something other than OFF the algorithm monitors the controller input.
When the input value leaves the requested band (specied by the “Pressure Standby
Threshold” parameter) the control output assumes immediately the last value stored
when the process was stable. (For steady state condion the process value must
be inside of the requested band [Setpoint +- Standby Threshold] for more than one
minute. Once Calculated this value remains unchanged unl there is a change of the
setpoint, or changing the controller main state from manual to automac mode. )
If the process value is inside of the band for more than one minute, the actual
controller output value will be saved to become acve during the recovery me and
the delay me phase of standby sequence. Addionally an extra limitaon of the
controller output value will be acvated to prevent very fast changes in the rotaon
speed of the motor by the Standby Acve Limit.
Min: [actual controller output - Standby Acve Limit]
Max: [actual controller output + Standby Acve Limit]
The freezing of the output of the controller will last for a me specied by the
“Pressure stand-by recovery me” parameter. If the parameter “Pressure standby
recovery me” is set to O, the controller will set to manual mode and the stored
value for controller output becomes acve unl otherwise changed.
If the controller input does not recover within the specied me, the output value
is forced to zero. If the controller input recovers within the specied me, the
algorithm wait for two and half me the integral value; aer this me has elapsed,
the controller will come back automacally to normal “running” condion (limited by
Standby Acve Limit) to the output level calculated when the process was stable.
Auto-manual Start Up:
This parameter seng will allow the user to start the controller in either manual
mode, where they will be able to start their process under their own manual control
output value or in automac mode where the controller outputs power to control
the process automacally. Tuned values in manual mode should be dened from
manual mode before this seng is changed from its default of starng process in
Manual mode.
Dierenal Pressure value:
This is always to be calculated as A-B or pressure 1- pressure 2. Only available when
controller has a 2nd Universal input card ed.

From lab to production,
providing a window into the process
-17-
www.dynisco.com
Rev: n/aP/N: n/a ECO: n/a
Manual to Automac transfer:
When transferring from manual control to Automac control there are two methods:
Bumpless Mode (without modicaon of set point) and Set Point mode (when the
current Set Point is modied it will be set to the actual measured input value). If in
Manual mode runs as open loop i.e SP is really the percentage output power, hence
how the transfer can be bumpless or SP change.
Input n Calibraon Set the percentage of range the calibraon shunt resistor needs to be set at between
40%and 100%. Default 80%
Start Input n Low Point Calibraon Press +keys to begin calibraon procedure
Start Input n HIgh Point Calibraon Press +keys to begin calibraon procedure (Can only be accessed once a
successful low calibraon has been completed)
Error Messages Count Fail means the low calibraon will fail if the oset is less than -10mV or
greater than +10mV. This signies potenal faulty sensors or the high
calibraon will fail if the count value is less than +20mV or greater than +50mV. This
signies potenal faulty sensors RCal Fail means the high calibraon will fail if the
mV value is within 10mV of the low calibraon value. This is a potenal RCAL failure.
Control Conguraon
Control Type w Select From Pressure or Single/Dual**
Power Up Control State Select From Automac Control or Manual control on start up Default: Manual
Cauon: Use with care!
Control Input Source Select from Universal Input 1 or Dierenal Input (only applicable if Input2 card
ed and set to non temperature
Primary Control Acon** Reverse or Direct acng
Primary/Secondary**
proporonal band
Integral Time Enter Value of required integral me from O to 99mins 59secs
Derivave Time** Enter Value of required derivave me from O to 99mins 59secs
Manual Reset/Bias** Enter Value of required bias to apply to Proporonal band from -100 to 100%
Default: 25%
Dierenal for On-O Control** Enter Value of required ON-O dierenal (a band centred about Setpoint to stop
excessive on-o switch when output control is set to be on-o) 0-300 units of span
Prop band Overlap and Deadband** Enter value of required Overlap (+ive) or Deadband (-ive) of primary and seconday
control ouputs. -20to +20% of Span (Overlap both output on at same me dead
band both output never on at the same me).
Scaled Power Enables or Disables Display of Manual Power in RPM
Scaled Power lower and Upper Limit Enter value to be displayed at 0% power and 100% power (must be a minimum
of 100 units between upper and lower value)
Set point Upper and Lower Limits Enter values to limit the maximum or minimum allowable Set point values
Local Set point value Enter Value of required Local Set point (Constrained by input range and set point
upper and lower limits)
Manual to Auto Power transfer Select from Bumpless or Set point Mode
Pressure Tune Output Pulse Enter Value of maximum output pulse to be applied in Pressure tuning mode.
Pressure standby Threshold Enter Value of required threshold that acvates Standby by recover period from OFF
resistor Percentage
Enter Value of required Proporonal band ( up to 100 me input span, maximum of
999900 in pressure control, ON-OFF to 9999 in temperature control)

From lab to production,
providing a window into the process
-18-
www.dynisco.com
Rev: n/aP/N: n/a ECO: n/a
Pressure standby Recover Time Enter Value of me allowed for control output to be in saturaon before turning
output o, from 0 to 60 secs
Pressure Standby acve Limit Enter Value of allowed control output power value that is applied once PV enters
Stable Band 0-100% Default: 20% Cauon: Limits Max+ Min Output Power Value
Output Conguraon:
Linear Output n Type w From: 0-5, 0-10, 1-5, 2-10V & 0-20, 4-20mA or 0-10VDC adjustable Transmier PSU.
Adjustable 0-10V Transmier w Voltage required if Output n is 0-10VDC adjustable Transmier PSU.
Output n Usage w From: Alarms; Retransmit Process Variable .Primary Power, Secondary Power and
Unused.
Output n Alarm Selecon w Alarm 1; 2; 3; or Logical OR of alarms 1 to 2; 1 to 3;. Selectable Direct or Reverse
Acon.
Retransmit Output n Scale Low w Displayed value at which the retransmission output = minimum. Adjustable from
-1999 to 9999.
Retransmit Output n Scale High w Displayed value at which the retransmission output = maximum. Adjustable from
-1999 to 9999.
Alarm Conguraon:
Alarm n Type w From: Unused; High; Low; Rate Of Signal Change per minute; PV Signal Break; PV-SP
Deviaon, Band, Control Loop, Percentage Memory Used, High and Low Power
Alarm n Input Selecon From: Universal Input 1 or 2
Alarm n Value w Alarm acvaon point. – applicable if type is High; Low;Deviaon;Band.
Alarm n Hysteresis Deadband on “safe” side of alarm, through which the signal must pass before alarm
deacvates.
Signal change Alarm n Min. Minimum me the rate of PV change must be above the alarm threshold for a Rate
Of Change Alarm to change state (on or o). 1 to 9999 secs.
Alarm n Inhibit Prevents alarm acvaon if the alarm condion is true at power up. Acvaon
occurs only aer the condion has passed and then reoccurred.
Alarm n Filter Time Filter the me the alarm needs to be acve for the acon to take place from 0.5s to
100s
Control loop Alarm Type Manual Loop alarm me, from 1s to 59minus 59s or Automac (2× integral)
Percentage of Memory used 0-100%
High or Low power value 0-100%
Communicaons Conguraon:
No Comms Warning If Communicaons Conguraon menu is entered without a communicaons
module ed.
Modbus RTU Parity w From: Odd; Even or None.
Modbus RTU Data Rate w From: 9600; 19200; 57600 or 115200 bps.
Master Mode, or Slave Address w Slave address (1 to 255), or mul-zone Setpoint Master Mode.
Master Mode Format The data format required by the aached setpoint slaves. From: Integer; integer with
1 decimal place & oat.
Serial Communicaons Write Enable Enables/disables wring via RS485 or Ethernet (if ed). When disabled, all
parameters are read only.
Recorder Conguraon: Refer to the Supplementary Product Manual for informaon about the addional screens when Data
Recorder is ed.
No Recorder Warning If the Recorder Conguraon menu is entered on an instrument without this opon.
Recording In Progress Warning If recording in progress when Recorder Conguraon entered. - Access to the Start/
Stop or Abort screens only unl the recording is stopped.
PSU n
Duraon

From lab to production,
providing a window into the process
-19-
www.dynisco.com
Rev: n/aP/N: n/a ECO: n/a
Recording Mode Record Unl Memory Used (Stop recording when full) or Connuous FIFO
(First In - First Out - overwrites oldest data when full).
Recording Sample Interval From: Every 1; 2; 5; 10; 15; 30 Seconds, or Every 1; 2; 5; 10; 15; 30 Minutes.
Recorder Trigger The recording Start/Stop trigger method. From: Operaon Mode; Recorder Menu;
On Alarm; Digital Input
Trigger On Alarms Any from: Alarm n – Where n is alarms 1 to 5. Any combinaon of these can be set
to trigger (TRG) or not (OFF).
Values To Record Any from: Process Variable value; Maximum or Minimum PV (since previous
sample); Setpoint; Primary Power or Secondary Power.
Events To Record Any from: Alarm n Status or Unit On/O. Note: An alarm state change between
samples is also recorded. This uses addional recorder memory.
Recorder Status Informaon Shows if a recording is in progress; the recording mode; memory usage per sample;
memory remaining and approximate recording me remaining.
Recorder Clock Conguraon: Refer to the Supplementary Product Manual for informaon about the addional screens when Data
Recorder is ed.
Date Format w The format used for displayed dates: dd/mm/yyyy (Day / Month / Year) or mm/dd/
yyyy (Month / Day / Year). – Recorder versions only.
Set Date w Sets the internal clock Date. – Entered in the format dened by Date Format screen.
– Recorder versions only.
Set Day Of Week w Sets the day of week used by the internal clock. – Recorder versions only.
Set Time w Sets the internal clock Time. - In hh:mm:ss (Hours : Minutes : Seconds) format.
– Recorder versions only.
Display Conguraon:
Enable Custom Display Mode Enables/disables Custom Operaon Mode, if congured
(requires PC conguraon soware).
Read Only Operaon Mode? Allows Operaon Mode to be Read-Only or Read/Write. Screens can be seen but,
values cannot be changed if Read-Only.
Operaon Mode Bar Graph Format From: PID Power or Control Deviaon or.
Trend Sample Interval Interval between display of next value on the trend graph From: Every 1; 2; 5; 10; 15;
30 Seconds, or Every 1; 2; 5; 10; 15; 30 Minutes.
Select Trend Mode From: PV only, PV and SP or Max/Min PV between samples (candle-sck graph).
Alarm acvity is always shown.
Display Colour From: Red only; Green only; Red to Green on Alarm or Green to Red on Alarm.
Invert Display Standard or Negave display image.
Display Contrast Screen contrast (0 and 100) to improve clarity. 100 = maximum contrast.
Language Select English or the alternate local language. The alternate language type can be
changed using the PC soware.
Lock Code Conguraon:
Lock Code View 1 View and edit the Setup Wizard; Conguraon Mode; Tuning Menu, Supervisor
Mode, USB Menu and Recorder menu Lock Codes (1-9999 or OFF).
Default Values = 10
Reset To Defaults:
Reset To Defaults Set all parameters to default values. Cauon: User must recongure all required
sengs before using the instrument following a reset.
*Both Recorder Trigger state and Digital input selecon must be the same to start recording
** Applies to Temperature control Only not pressure control.

From lab to production,
providing a window into the process
-20-
www.dynisco.com
Rev: n/aP/N: n/a ECO: n/a
10. Screen Sequences
The parameters displayed depend on how the instrument has been congured. Aer 2 minutes without key
acvity, most screens revert to the next higher menu level, unl reaching the base Operaon Mode display.
Note: Addional screens will be displayed if the USB, Proler or Recorder Opons are ed - Refer to the
Supplementary Manual. Screens marked persist unless changed by the user. Screens marked W are also
included in the Setup Wizard. Menus marked = Require an un-lock code for access
Screen Navigaon
= Accept Value & Move Back = Next Item/Increment = Prior Item/Decrement
= Accept Value & Move Forward + = Move Up One Menu Level
The symbols are showed to the right of the lists when more menu opons are available above or below .
Operaon Mode:
Base operang screen. LED Labels;
PV value; Percentage Output
power(As % or RPM);Bar Graph
Peak Display Screen(s) PV1 or PV2 and the Peak value(Peak Max or Min values shown
depend on conguraon Display parameters)
Control Loop Setpoint Select the acve Control Set point From Local or Remote
Set point Value Shows the Remote and Local Set point values
Alarm Status Acve / inacve status of all congured Alarms.
Trend View(s) A trend graph of PV1,PV2 or Dierenal, or the Max/Min value of
the PV between samples. Any acve alarm(s) are indicated at the top
of the graph.(Values shown depend on conguraon Display
parameters)
Select Auto/Manual Control Select between automac or manual Control
- Custom Display screens … Up to 50 Conguraon parameters can be copied into Operaon
Mode using the PC soware. In this mode they are not pass code
protected.
Note: Operaon Mode screens can be made globally read only from Display Conguraon
Setup Wizard:
Setup Wizard Unlocking w Enter correct code number to access Setup Wizard.
Default Value = 10
- Screens marked w … w Press to select each major conguraon parameter in turn. Follow
the on-screen prompts to alter the values.
Setup Wizard Completed w Conrms compleon of the Setup Wizard. Exits to Operaon Mode.
Supervisor Mode:
Supervisor Mode Unlocking If Supervisor Mode is congured (requires PC soware), enter
correct code number to connue. Default Value = 10
- Supervisor Mode Screens … Press to select up to 50 Conguraon parameters in turn. Follow
on-screen prompts to alter the values.
LED Labels = LED indicator funcons. Defaults are STBY,ALM1, ALM2
& ALM3 - these labels can be altered with conguraon soware
Bar Graph = SP-PV deviaon ( 20 units +ive or –ive Deviaon
maximum)
Other manuals for ATC990
1
Table of contents
Other Dynisco Controllers manuals