E-Lux Tahoe User manual

"Tahoe"
E-Lux Fat Tire Electric Beach Cruiser
Owner’s Manual
1760 Monrovia, Ste. A11
Costa Mesa, CA 92627
www.EluxBikes.com

2|Page
Thanks so much for purchasing your new E-Lux Fat Tire Electric Beach
Cruiser and welcome to a world of new possibilities!
With your new electric bike you will be able ride further, faster, and easier
than ever before on a bicycle which equates to Fun, Fun, and more Fun! All
while travelling for less than half a cent a mile it’s not only good for your
wallet but it’s good for the planet!
If you have any questions, suggestions, concerns, or if you just want to say
Happy Trails!

3|Page
Table of Contents
Carton Contents ………………………………..………..4
Bicycle Parts ID Chart …………………………..…..…..5
Assembly………………………………………………….6
Battery Care and Charging…………………………....20
Battery Life ……………………………………………..24
Before Your First Ride ………………………………....24
Understand the Power/Throttle Control ………..…….26
Stopping the Motor ………………………………..…...28
Brakes…………………….………………………….…..29
Gears ……………………………………………..….…..30
Tires ……………………………………………….….....32
Disconnecting Power to Rear Motor…………….….....32
Appearance and Care ….…………………………...….33
Commonly Asked Questions .…….………………........33
Technical Assistance .……………………….……....…..33
Important! Read Before Riding!………………….……34
One Year Limited Warranty ..……………………....…35
Recording Your E-Lux Bike Info .………………….....38

4|Page
Carton/Box Contents
Caution – Please us care when opening box with sharp objects to avoid cutting any bicycle
parts inside.
After opening please check the box for the following content:
1. Bicycle frame with the following attached but not assembled:
A. Front Wheel
B. Handlebar
C. Front Brake Calipers
2. Small Box Containing Battery Charger
3. Small Box Containing Manual, Spair Tool Bag, and Pedals
5|Page
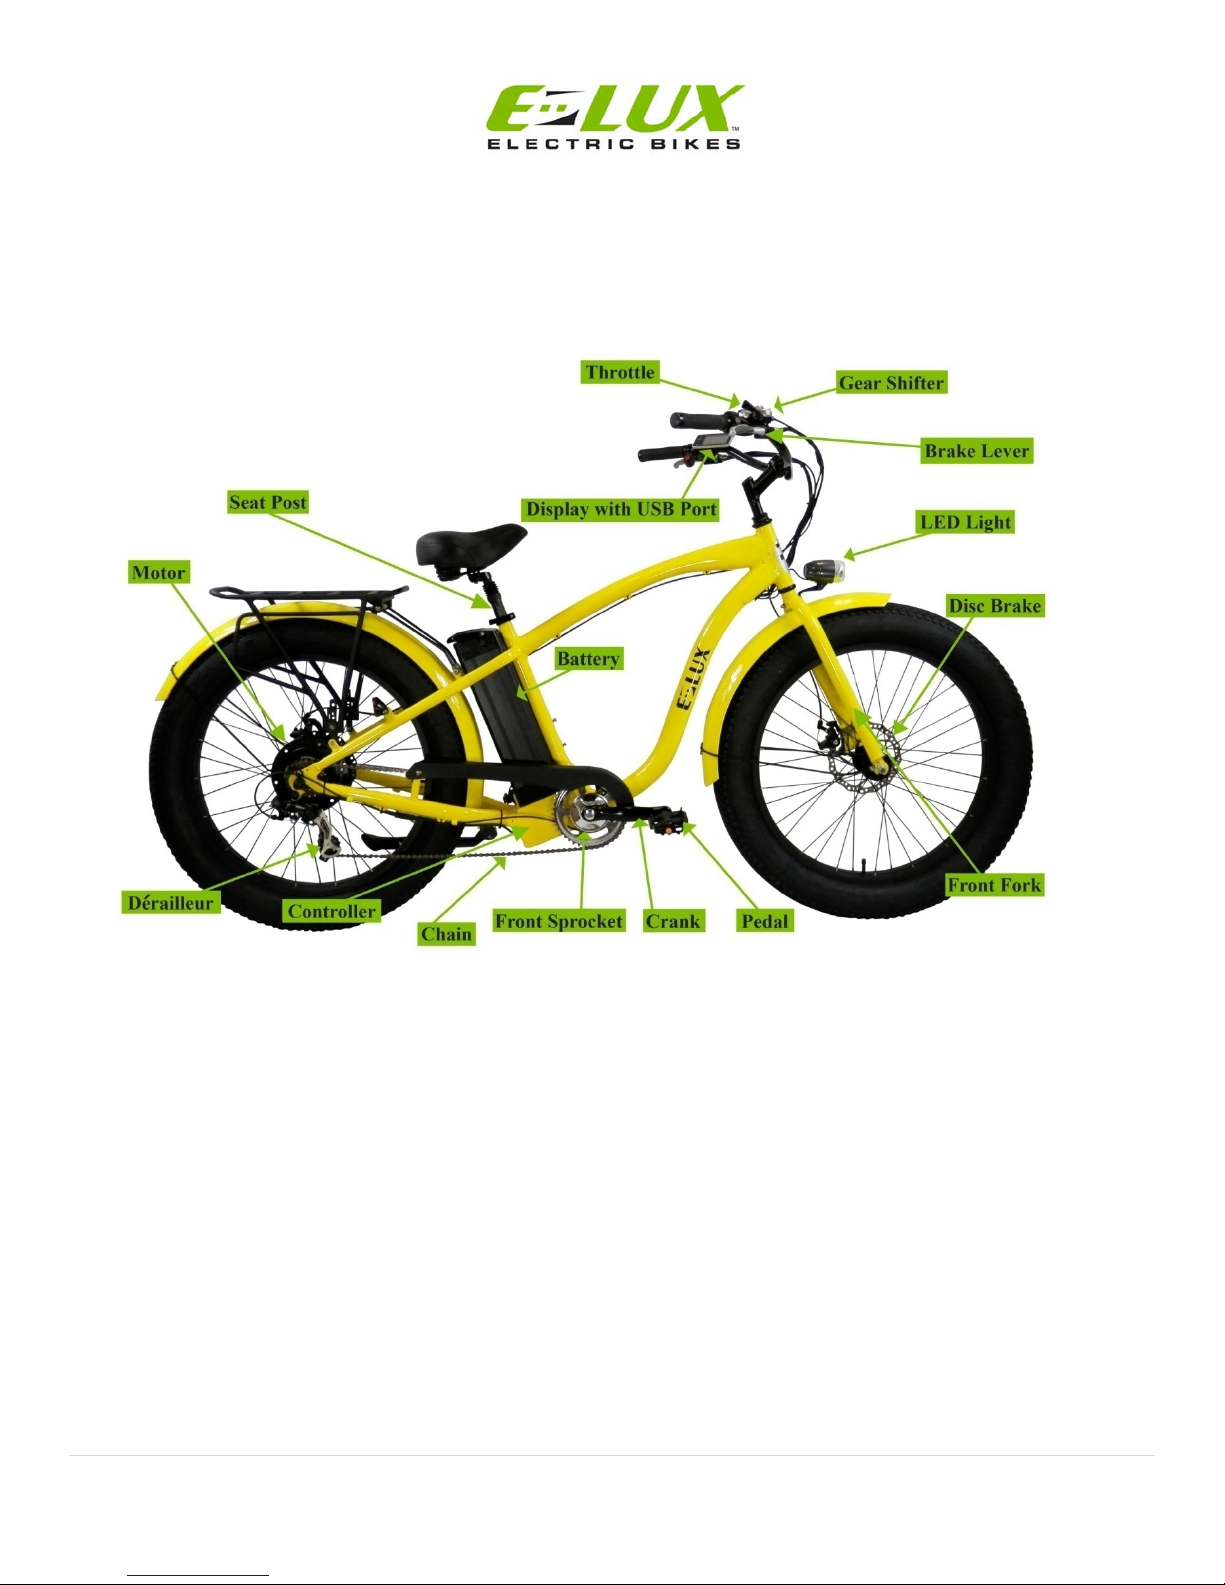
Bicycle Parts ID Chart

6|Page
Assembly
E-Lux suggests taking your electric bike to a professional bike technician for assembly.
This can be done for a nominal fee at your local bike shop. If you are comfortable
assembling it on your own then please refer to the directions below.
Warning – When removing packaging and zip ties do not use box cutters or knives as you may
damage paint or tires. We suggest a pair of scissors.
1. Carefully remove the packing from around bicycle.
2. Carefully cut the zip ties holding the front wheel and handlebars to the frame.
3. Mount front tire to front forks using a 15mm wrench to tighten outside nuts.
7|Page
4. Place bike upright on wheels and kickstand.
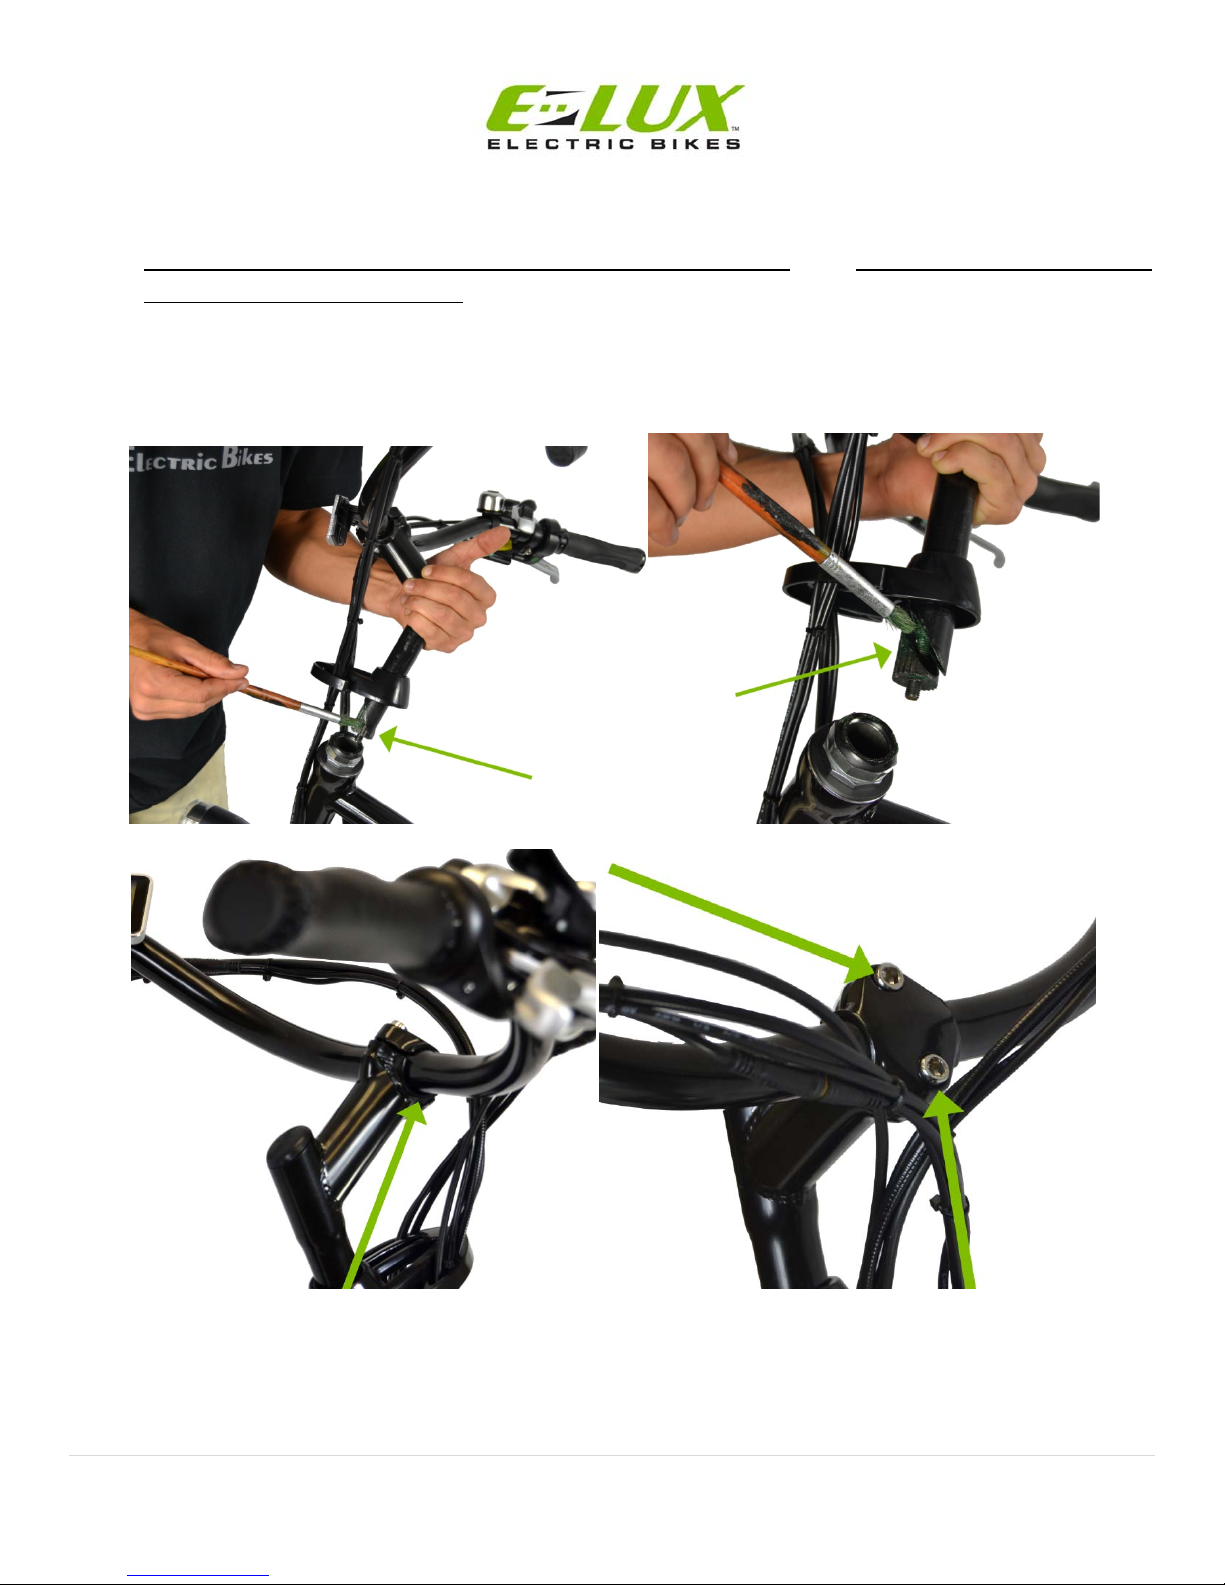
5. Apply a small amount of grease inside of the gooseneck tube as well as the threads and
slider on stem of gooseneck.
6. Making sure that all wires and cables are facing front and not twisted; install handlebar
into handlebar stem tightening the two bolts on handlebar stem using an allen wrench.
Tighten handlebar as tight as possible.

8|Page
7. Pull the seat clamp handle out from the seat post to release pressure allowing you to
remove the seat. Remove seat post and apply a small bit of grease inside seat tube. Then
replace seat.

9|Page
8. Caution – When installing pedals there are two separate pedals for the left and right sides
of the bike. They have different thread patterns and it is important to be sure each is
installed on the correct side of the bike to avoid stripping the threads. The following
procedure is performed so that when the bike is pedaled it tightens the pedals.
9. Apply small amount of grease on pedal threads.
10.Right Pedal – Facing the bike from the chain side, place pedal with R on the end of its
bolt on chain side of bike and tighten by turning clockwise (top of wrench turning
towards the front of bike as noted in the picture below.) Tighten pedal very tight.

10|Page
11.Left Pedal – Facing the bike from the kickstand side, place pedal Place remaining pedal
on the kickstand side of bike and tighten by turning counter clockwise (top of wrench
turning towards the front of bike as noted in the picture below.) Tighten pedal very tight.
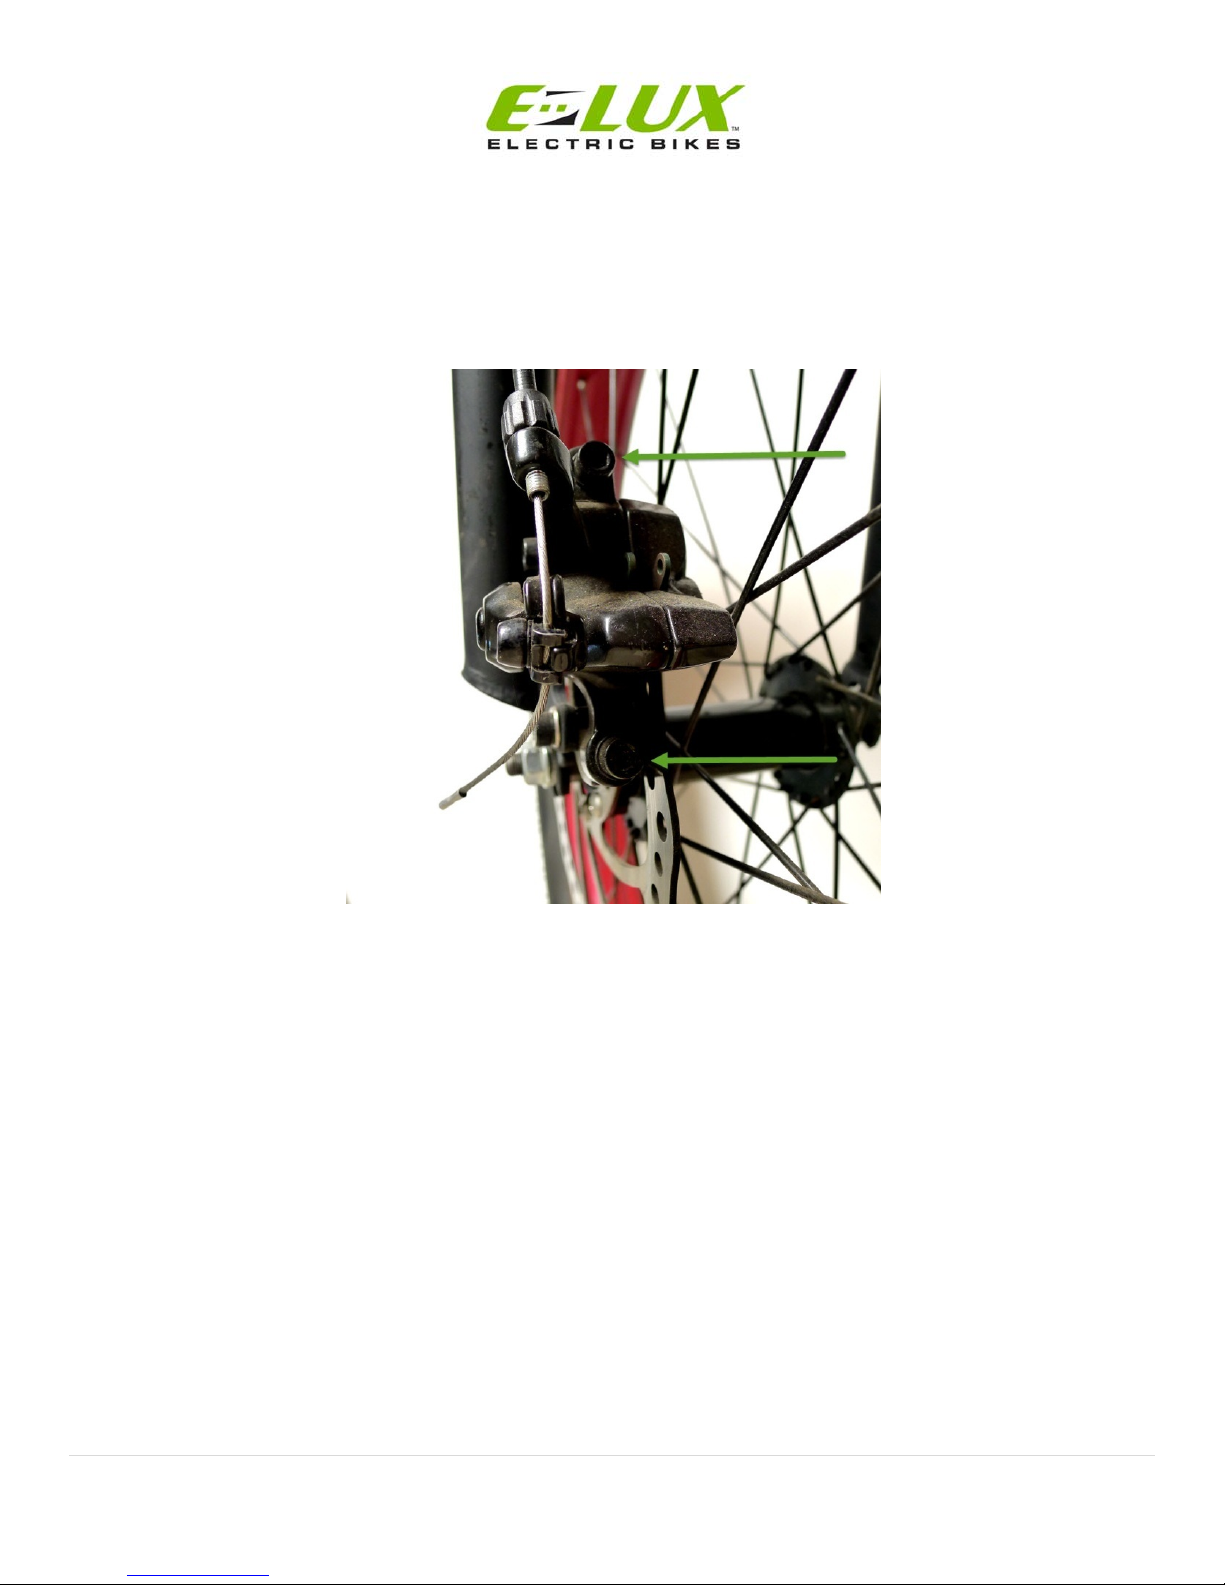
12.Slide brake calipers over the front brake disc and bolt to front fork using allen wrench.
11|Page
13. Spin front wheel to determine if disc is rubbing. A small amount of rubbing is OK but if
it is slowing the wheel then an adjustment is needed. To adjust use two bolts on calipers
to move in and out as needed. If you have issues then we suggest bringing bike to a local
professional bike shop for brake adjustments.
14.Align seat on seat post.
15.Inflate tires to 20-30 PSI.

12|Page
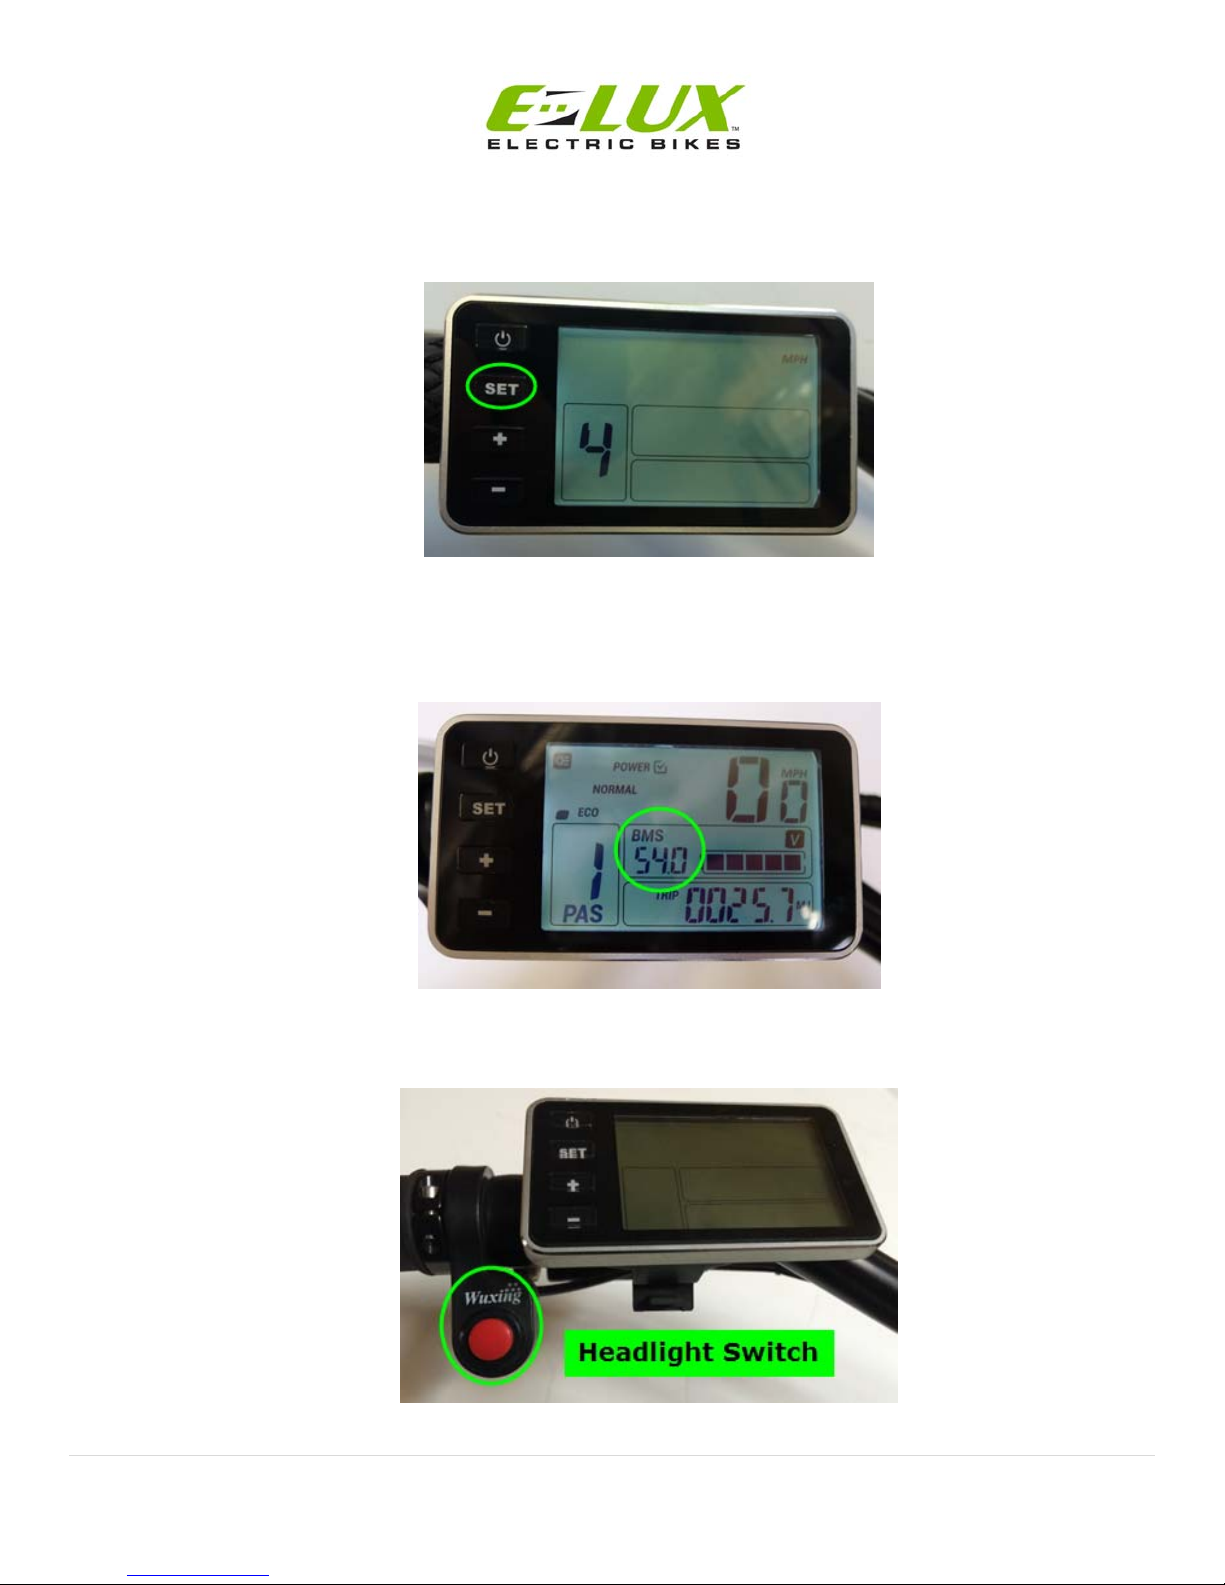
Understanding the Display and Display Settings
1. To turn on be sure key in battery is turned on then press the power button on the display.
2. To turn on backlight for display press the power button a second time.
13|Page
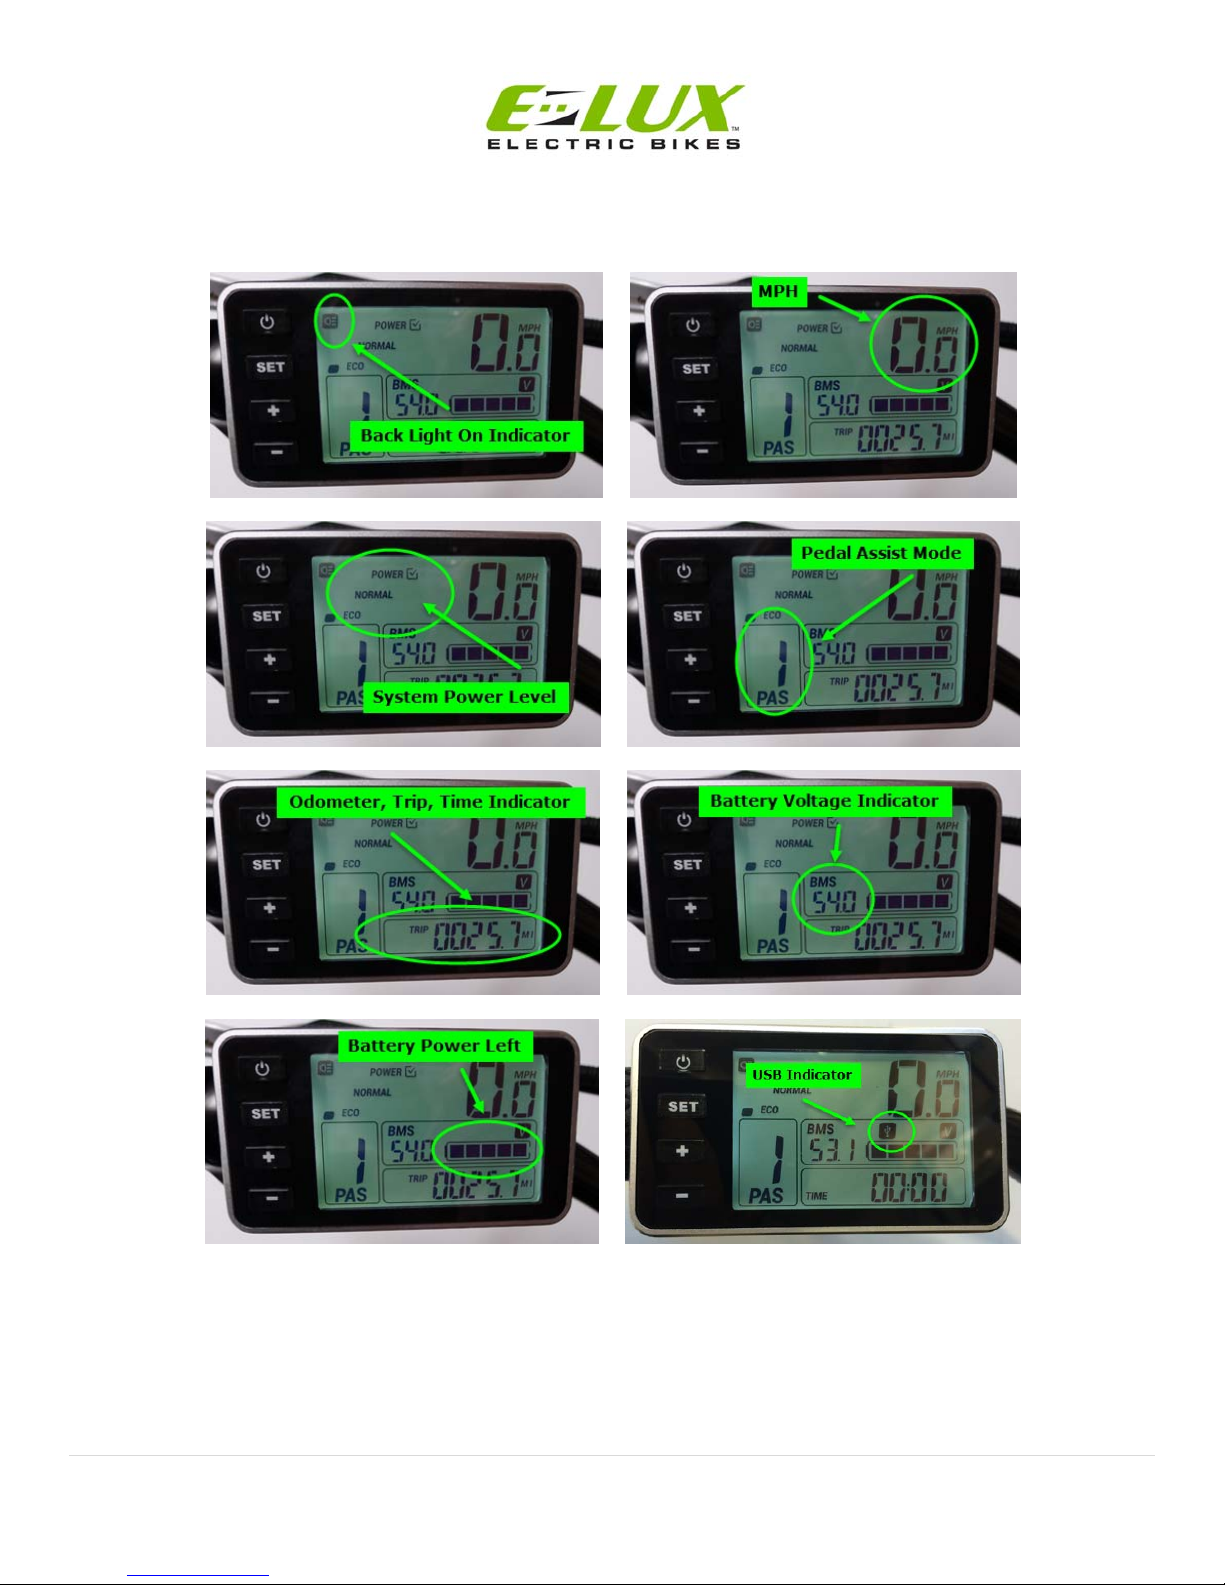
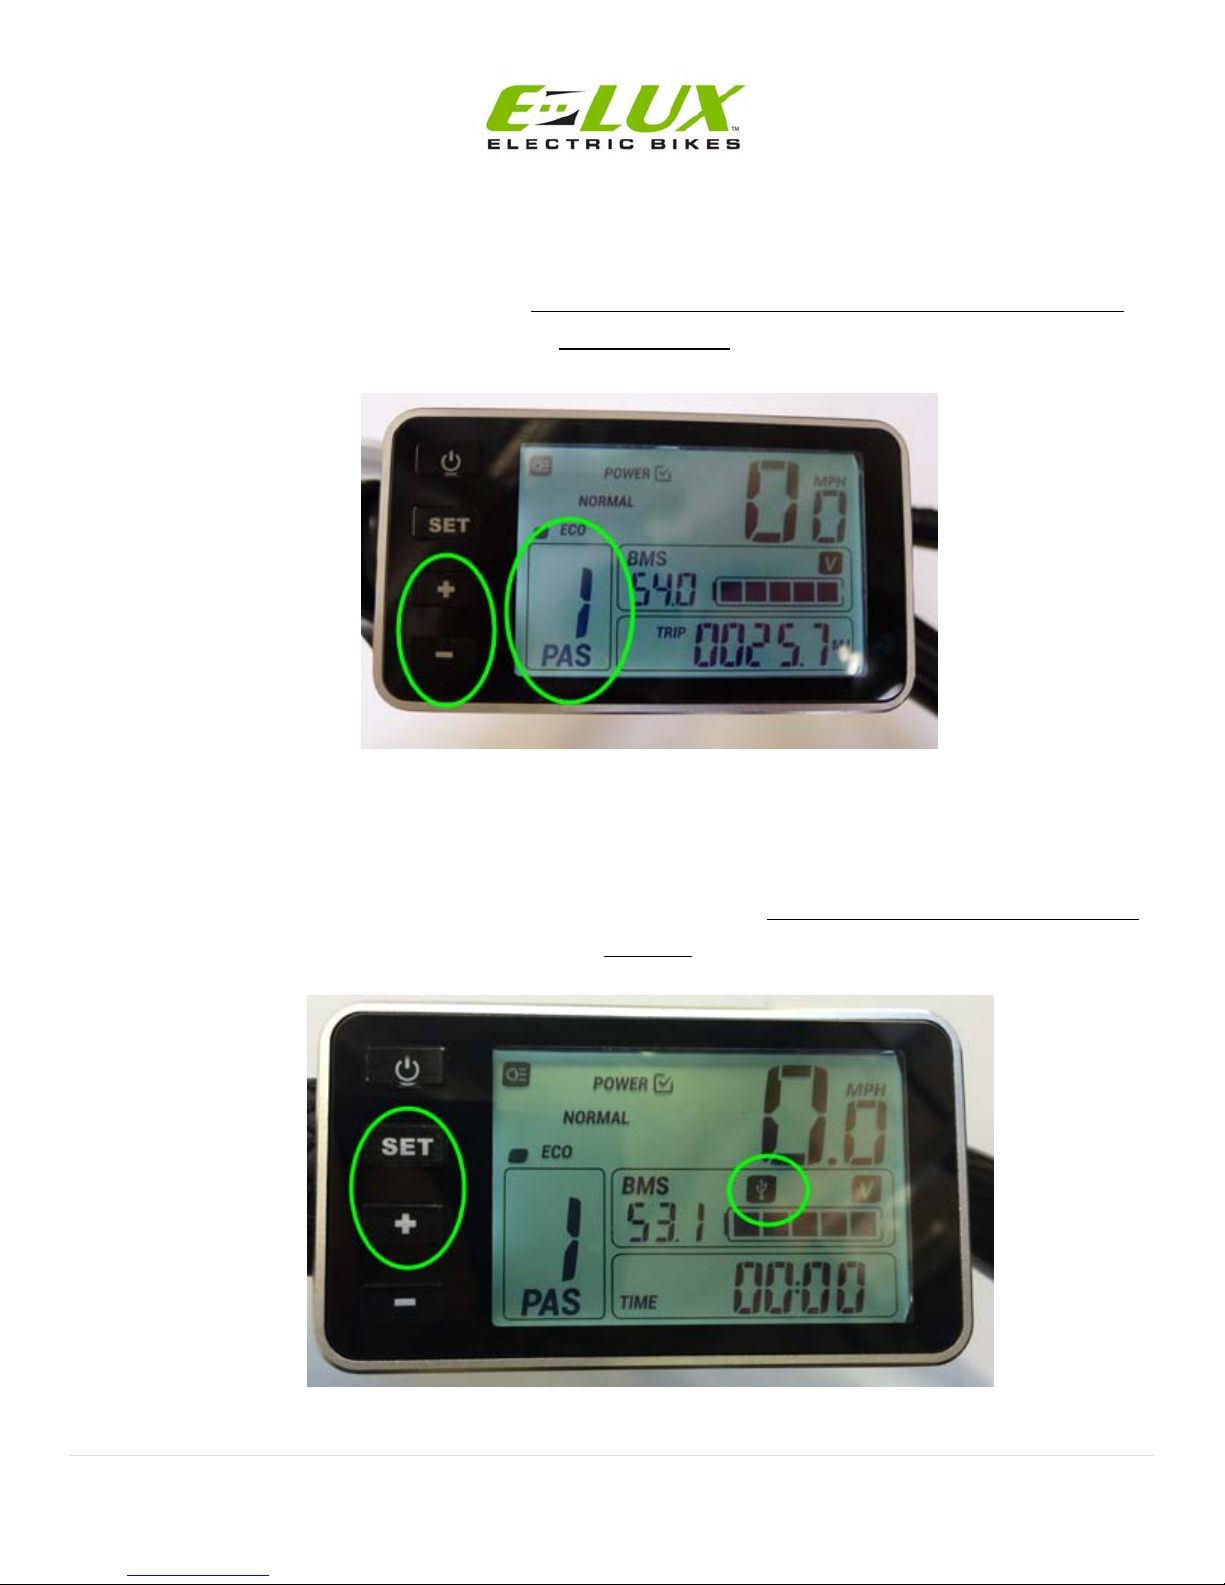
3. The following pictures describe the data on the display:

14|Page
4. IMPORTANT! – Holding the minus key down more than 5 seconds will put the bike into
walk mode. The motor will turn on and the bike will move forward at 6 mph until you
release the minus button or apply the brakes.
5. Briefly pressing the set button will alter the data displayed at the bottom of the screen
from trip to time riding and then finally to odometer.
15|Page
6. Briefly pressing the plus or minus key will cycle the pedal assist mode. For more on
pedal assist modes please read the section called “Understanding the Power/Throttle
Control” section of the manual. To quickly place the bike in throttle only mode cycle
PAS mode to 0.
7. Pressing the set and plus key at the same time for 5 seconds will turn on the USB port.
The USB indicator will appear. To turn off either press set and plus at the same time for
five seconds or turn the display off and then on again. USB port is located on bottom of
display.
16|Page
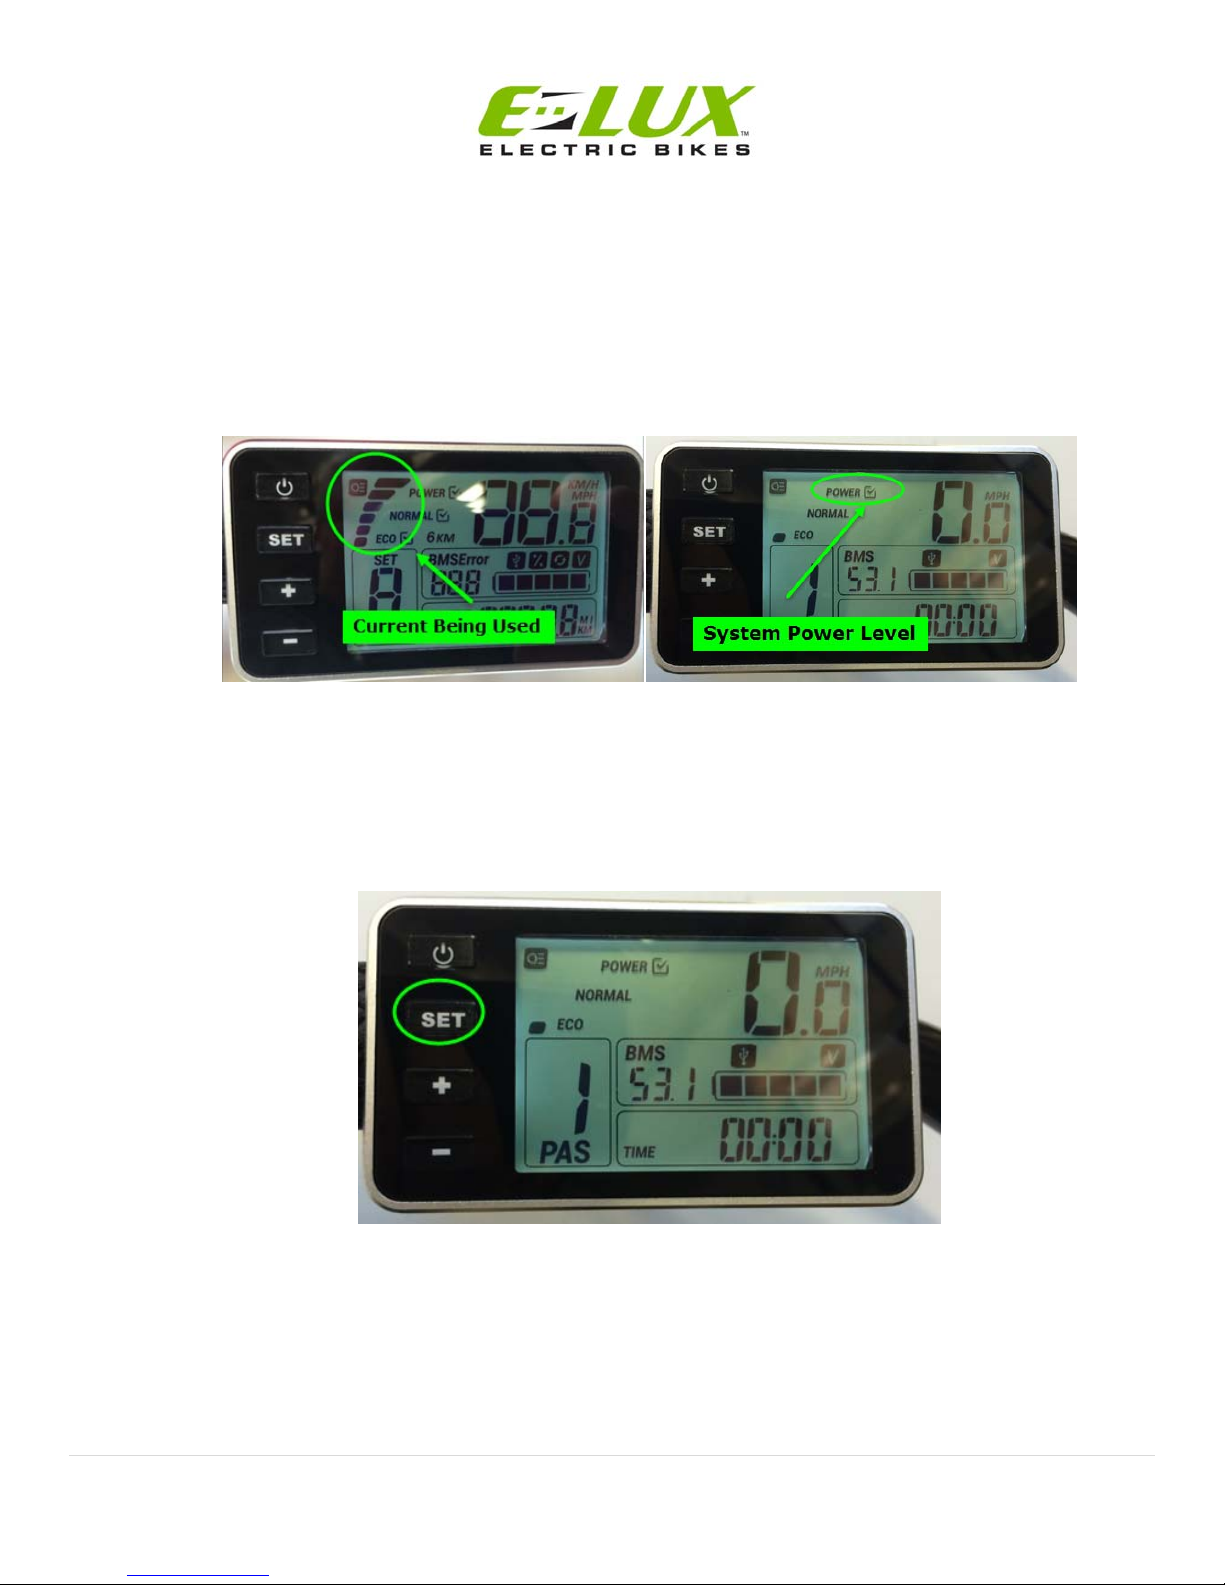
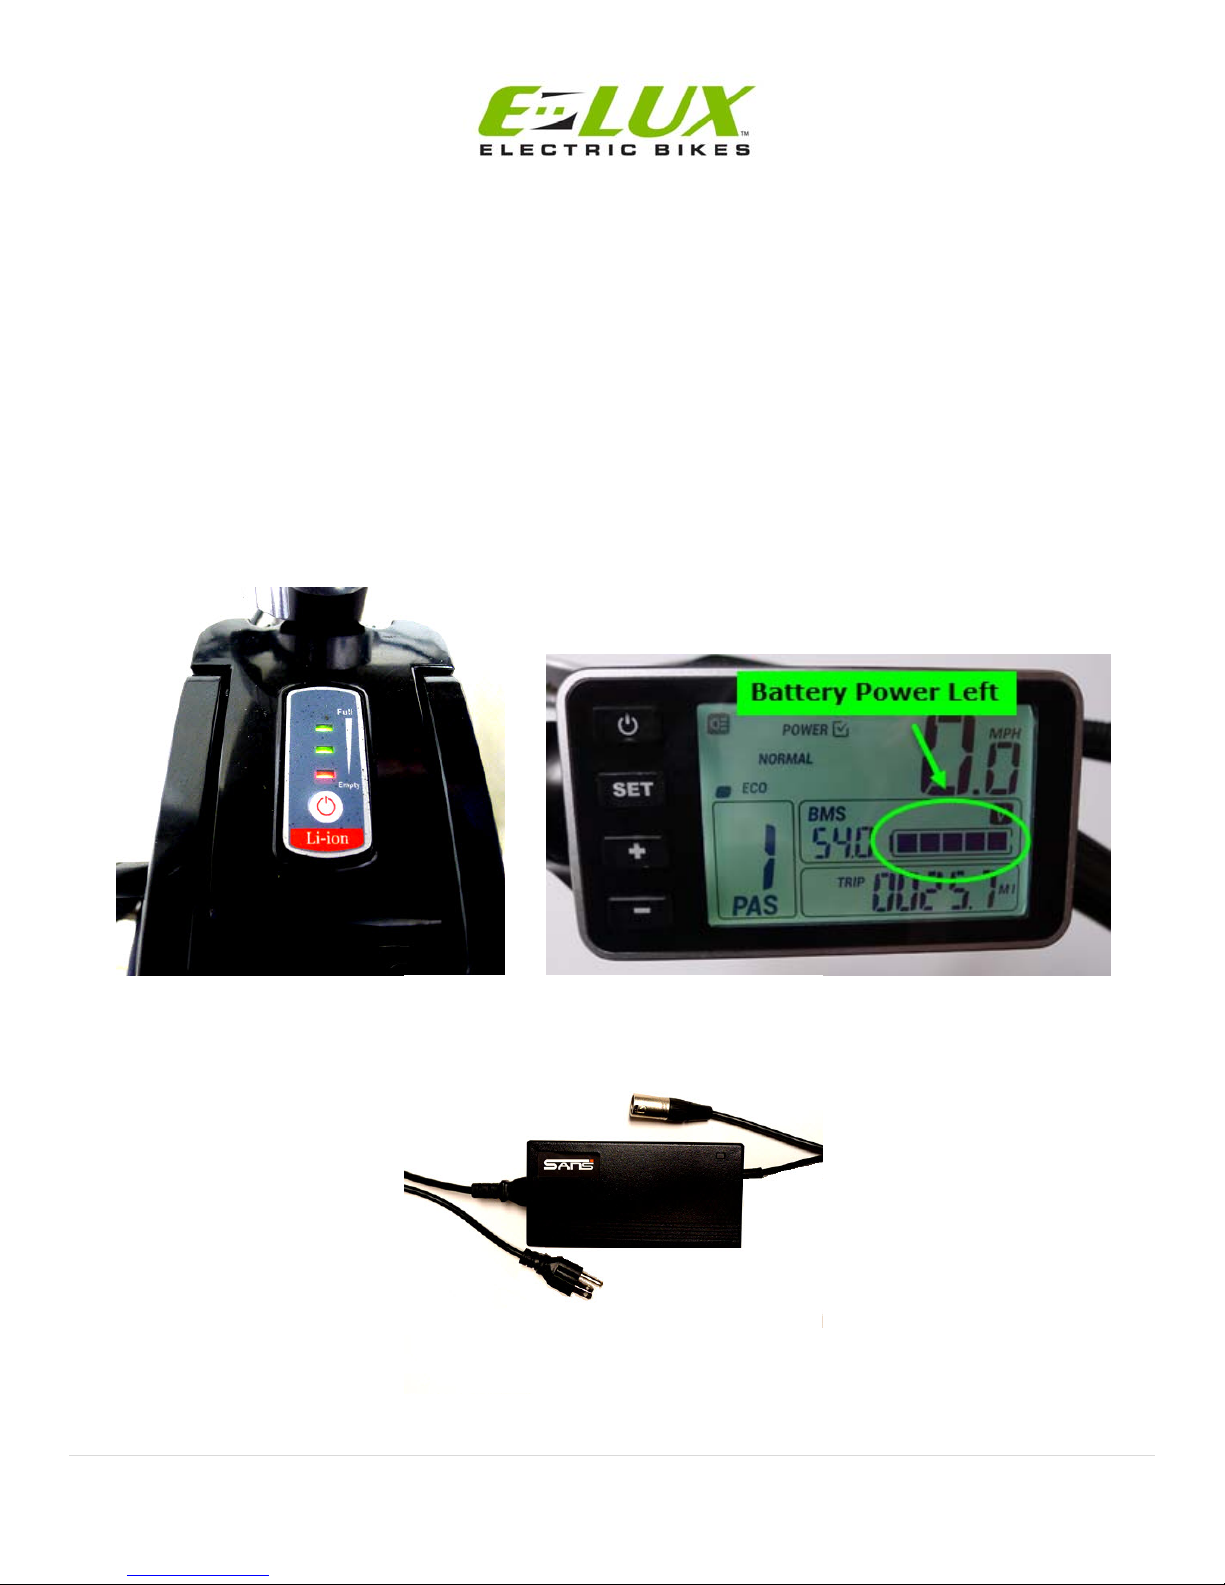
8. There are two indicators for power. One has black bars and indicates power being
consumed/used. It will vary with terrain/load on the system. The other is a system power
mode indicator. The indicator is a small check box next to eco, normal, or power.
Directions for changing the mode are in the next section. Use eco mode for longer trips to
save battery. Use Power mode for higher performance and hill climbing.
9. Holding the set key down for 5 seconds will place the display into the first of 5 setting
modes. Use the plus and minus keys to adjust the settings in each mode. Briefly pressing
the set key again will cycle to the next setting mode.
17|Page
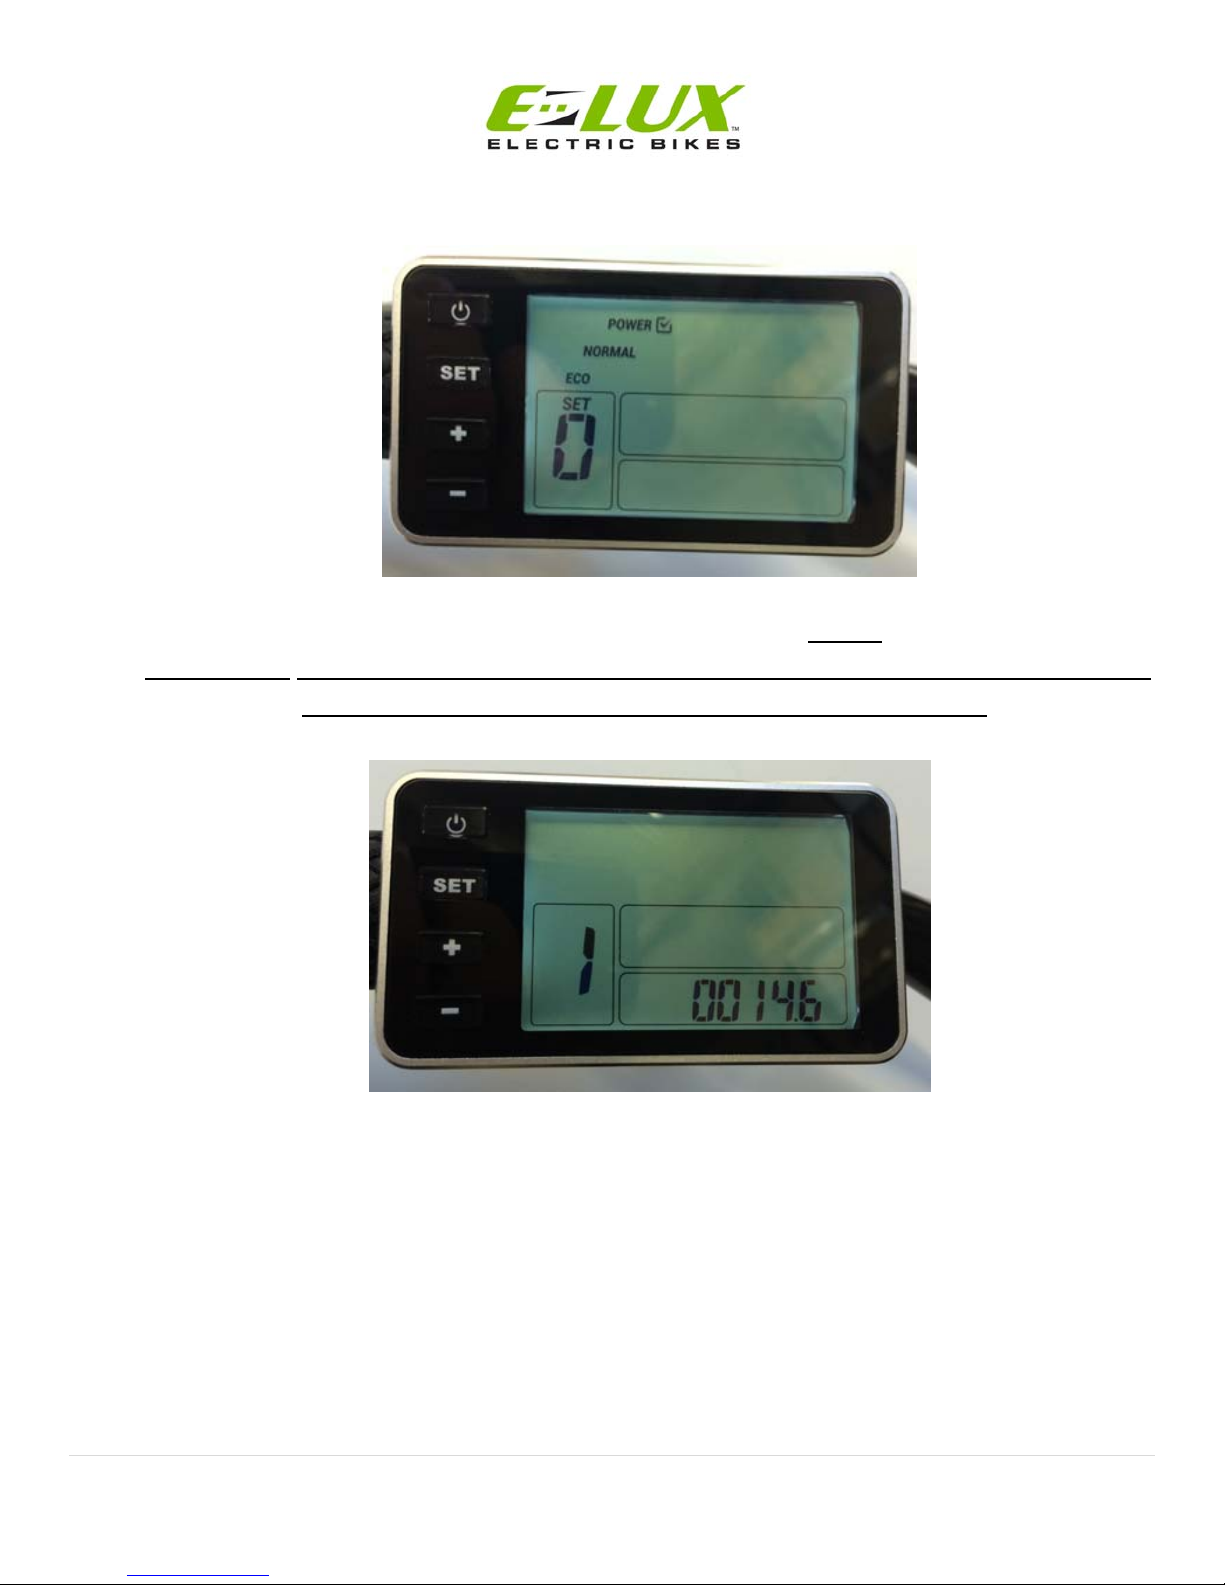
10. Set Mode 0 – Allows you to select system power mode using plus and minus keys.
11.Set Mode 1 – Allows you to reset the trip odometer by briefly pressing minus key.
WARNING! Holding minus key for 5 seconds will put bike into walk mode and bike will
begin moving at 6mph unless you are holding the brake lever.
18|Page
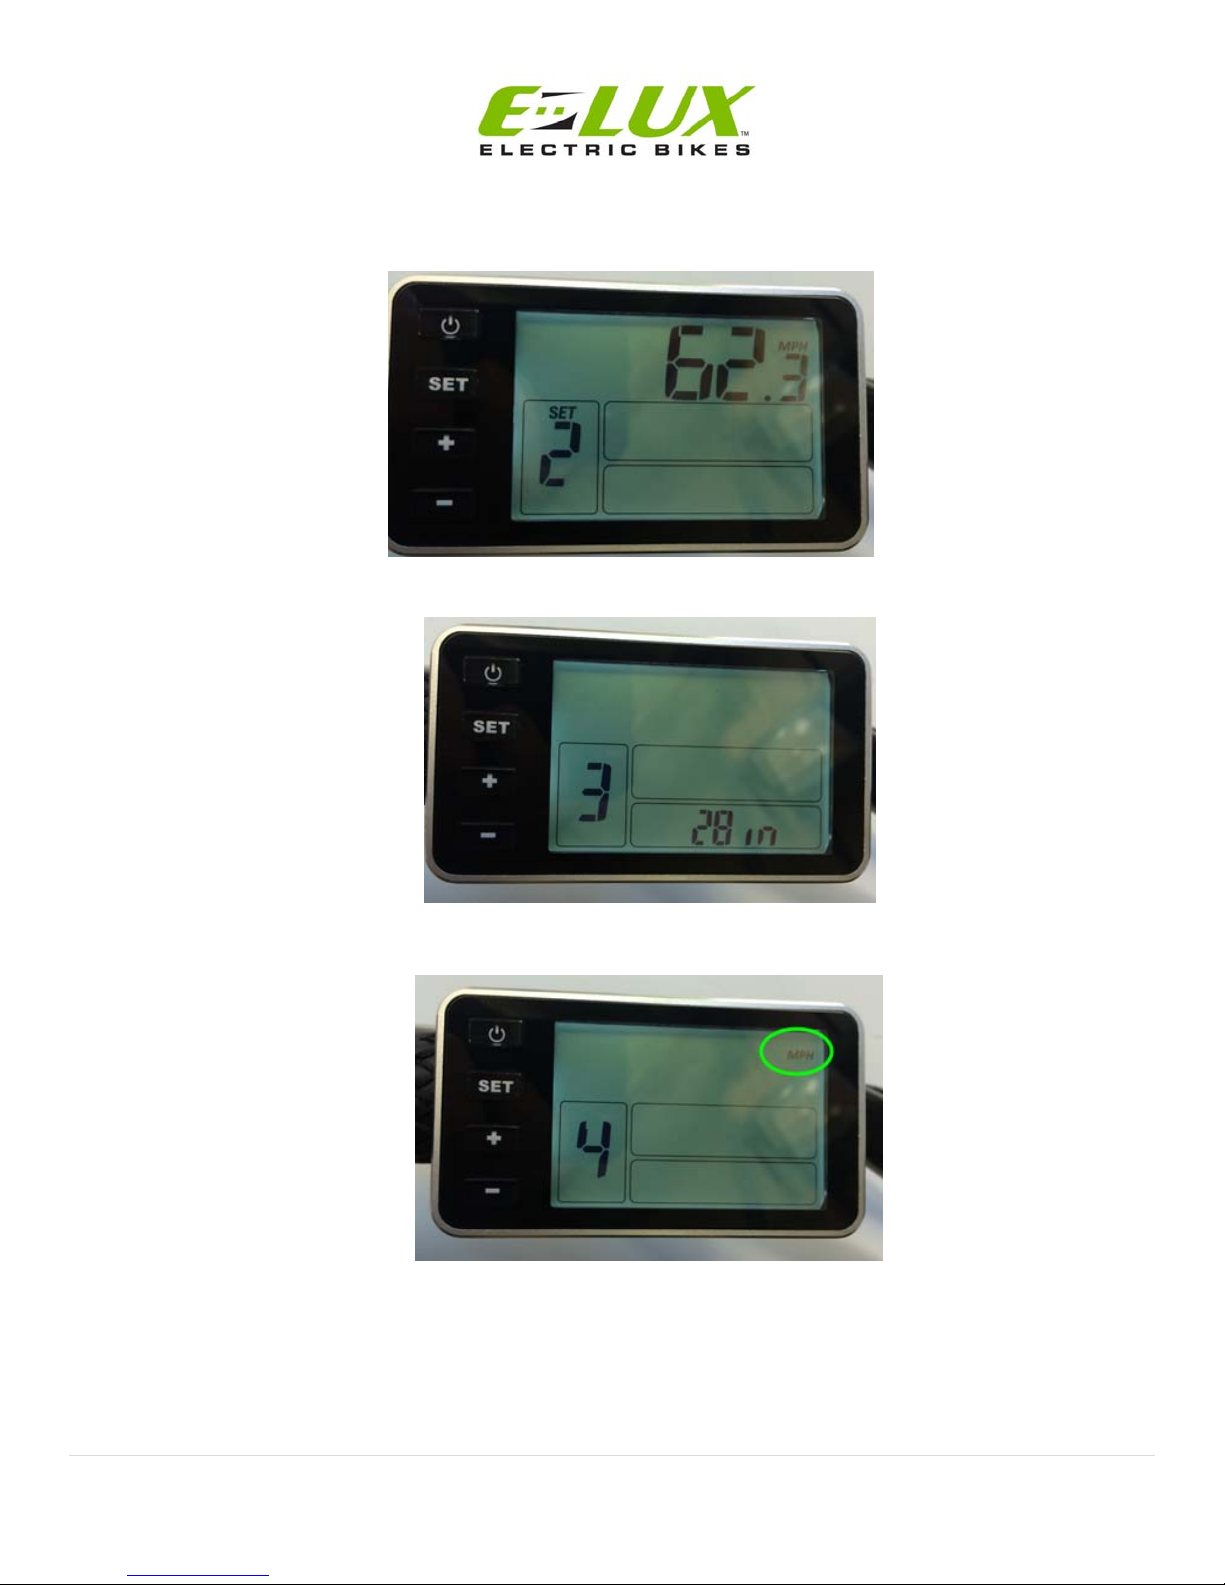
12.Set Mode 2 – Indicates bike top speed.
13. Set Mode 3 – Indicates wheel size.
14.Set Mode 4 – Allows you to change the from MPH to KPH using plus and minus keys.
19|Page
15.Hold set button down for 5 seconds to return to operating mode.
16.In operating mode the volt indicator will display 54 volts when the battery is fully
charged. At 42 volts you will be out of power.
17.To turn on headlight press the red button below the display.
20|Page
Battery Care and Charging
Your E-Lux Bike comes with a 48 Volt 13 amp lithium battery and charger. Please be aware of
the following:
1. Only use the charger provided with your battery. Using a different charger may result in
overheating, fire, or an explosion damaging your battery and everything around it…
2. You should recharge your battery after each use or when the battery indicator on the
battery or display indicates that the battery charge is low.
Table of contents
Other E-Lux Scooter manuals


