E-MOTO VeloCity 2.0 User manual

ELECTRIC
BICYCLE
Assembly Guide
www.emotoev.com
VeloCity 2.0 and 2.5
with Headlights

Getting Started...
Set out the carton paying attention to the “This Side Up” markings on the box.
Next, open both the inner and outer cartons. With the box open you should
remove the seat and any other loose accessories laying on top of the bike. With
the loose parts removed, lift the bike out of the carton and rest it on the oor.
Check the bottom of the box for any other remaining accessories. Accessories
included in the box are:
Battery Charger•
Seat•
Fenders•
Owners Manual•
Tool Kit•
Headlight•
Lock Chain•
Warranty Registration Card•
If anything is missing from the carton contact e-Moto immediately at 888-443-6686
for a replacement.
Remove the Packing...
With the bike sitting on the ground, begin to carefully remove the packing
material on the bike-- and separate the parts bound to the bike with wire ties.
When removing the packing material use diagonal wire cutters instead of a knife
to prevent scratching of the frame.
Tool List
#1 and #2 Phillips Screwdriver•
Metric Combination Wrenches, Size M8, M10, and•
M15
Metric Hex (Allen) Wrench, Size M4, M5, M6•
Diagonal Wire Cutters•
Utility Knife•
Note: Your e-Moto bicycle comes with a tool kit that contains most every tool
needed for assembly. Even though these tools are included, mechanics tools make
for an easier assembly and should be used if available.

Remove the protective plastic cap from the end of the handle bar
assembly, and insert the two pieces at the end of the stem into the headset
bearing as shown above. There is a maximum installed height etched into the
stem- pick a height within the allowed range and tighten the jam nut using your
M6 hex wrench. Install the Seat.
If you do not have a bicycle assembly stand, at this point you can turn
the bike upside down so that it rests on the seat and handlebar. If you do have
a stand, mount the bike now.
Installing the Handlebar

Installing the Fender
Remove the bolt and lock nut from the horseshoe bracket on the front forks
using 2 M10 wrenches. Find and remove the packing from both the Front
Fender and Headlight assembly.
Mount the headlight on the removed bolt so that it rests on the front side of
the bracket, then mount the fender to the back side of the bracket. Tighten.

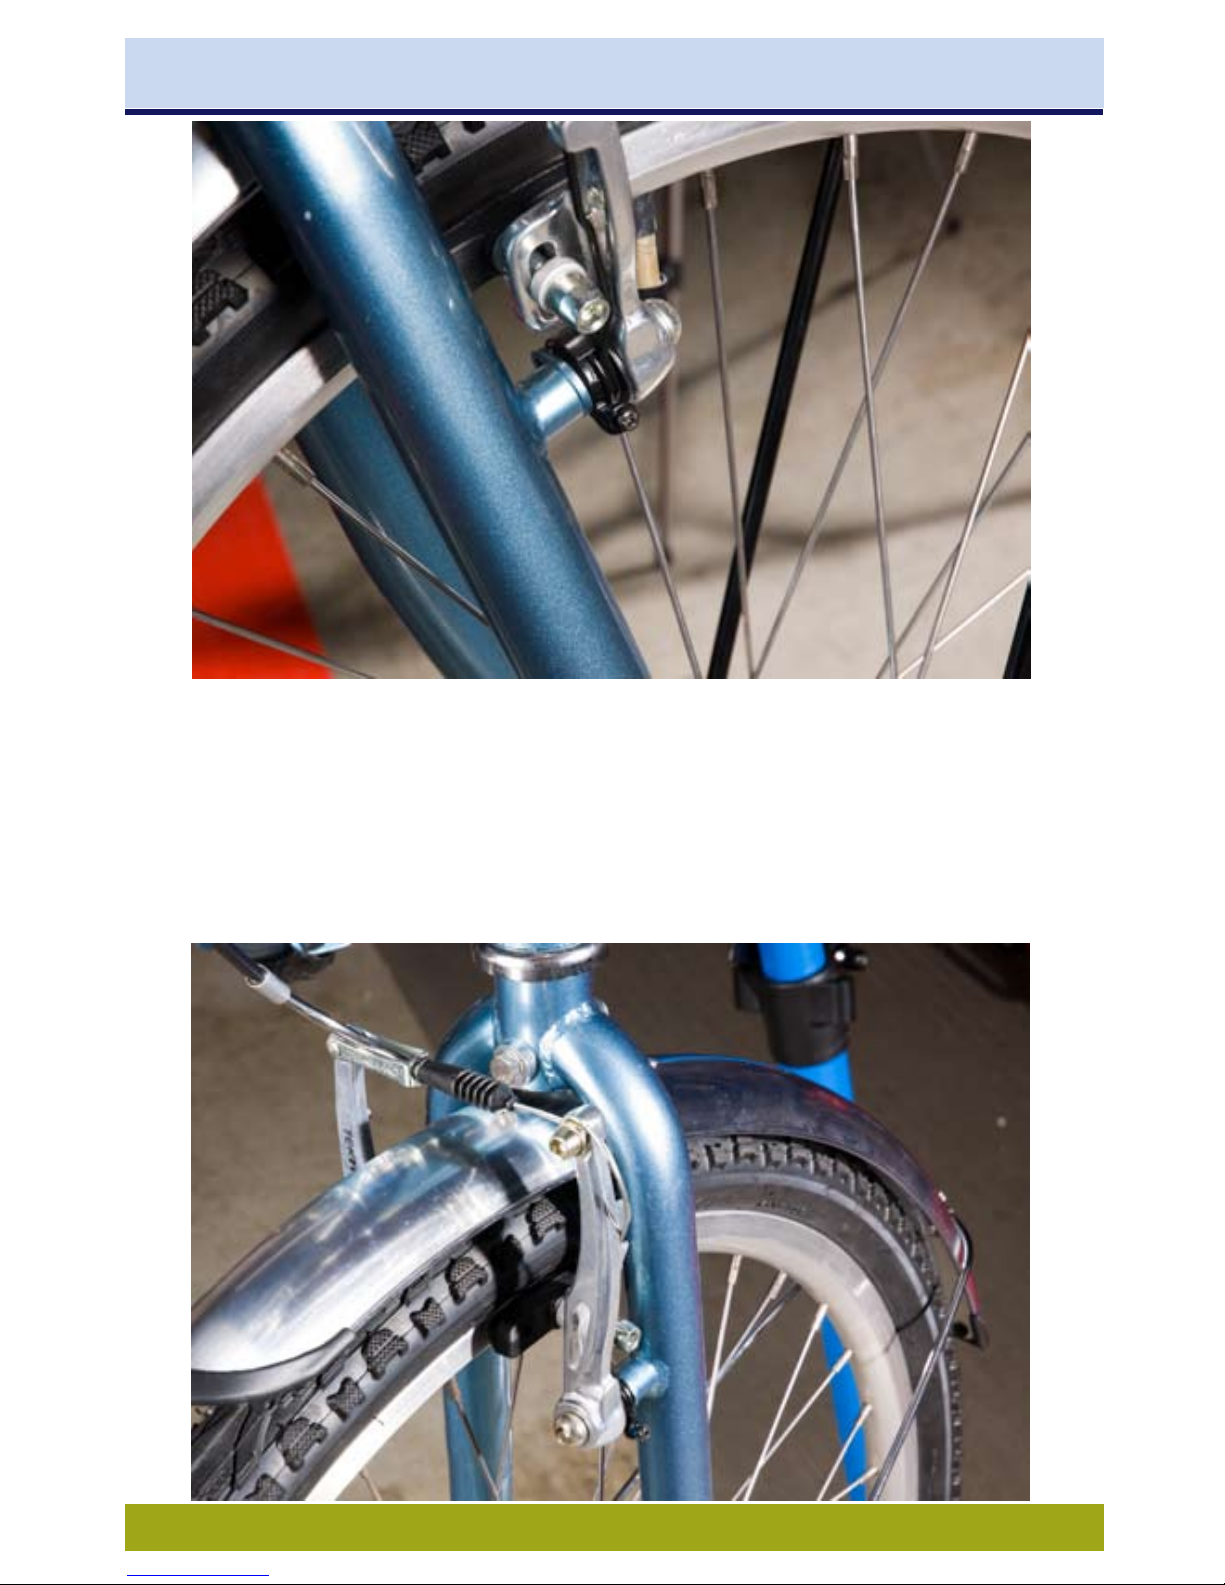
Installing the Fender
Next, using a #2 screwdriver, loosen the screws in the black plastic mounts
for the fender stays. With the screws loosened, push the bare metal ends of
the stays into the mounts, then retighten the screws. The mounts should be
parallel, and as close to the end of the fender as possible.

Using a M10 wrench, remove the bolt from the rear of each fork leg.
Use each bolt to afx the two fender stays, as shown in the photo below, and
tighten.
Installing the Fender

Installing the Front Wheel
Remove the acorn nut on the front wheel axle.
Slide the axle into the slots on the fork legs, reinstall the acorn nuts, and tighten
with a M15 wrench.
Installing the Front Wheel
On the right side of the front wheel is the wiring interface for the gyro front
hub. Rotate the connector until it is in line with the fork leg, then attach
the wiring harness. The wiring should be tight to the fork leg. If not, add
supplemental wire ties to secure the wire.
Note:
Pay close attention to the following segment about brake
adjustments. A well functioning brake is critical to the safe
operation of your new electric bike.
The directions in this manual are also applicable to brake
adjustments for future bike tune ups, so be sure to hang on to
this manual.

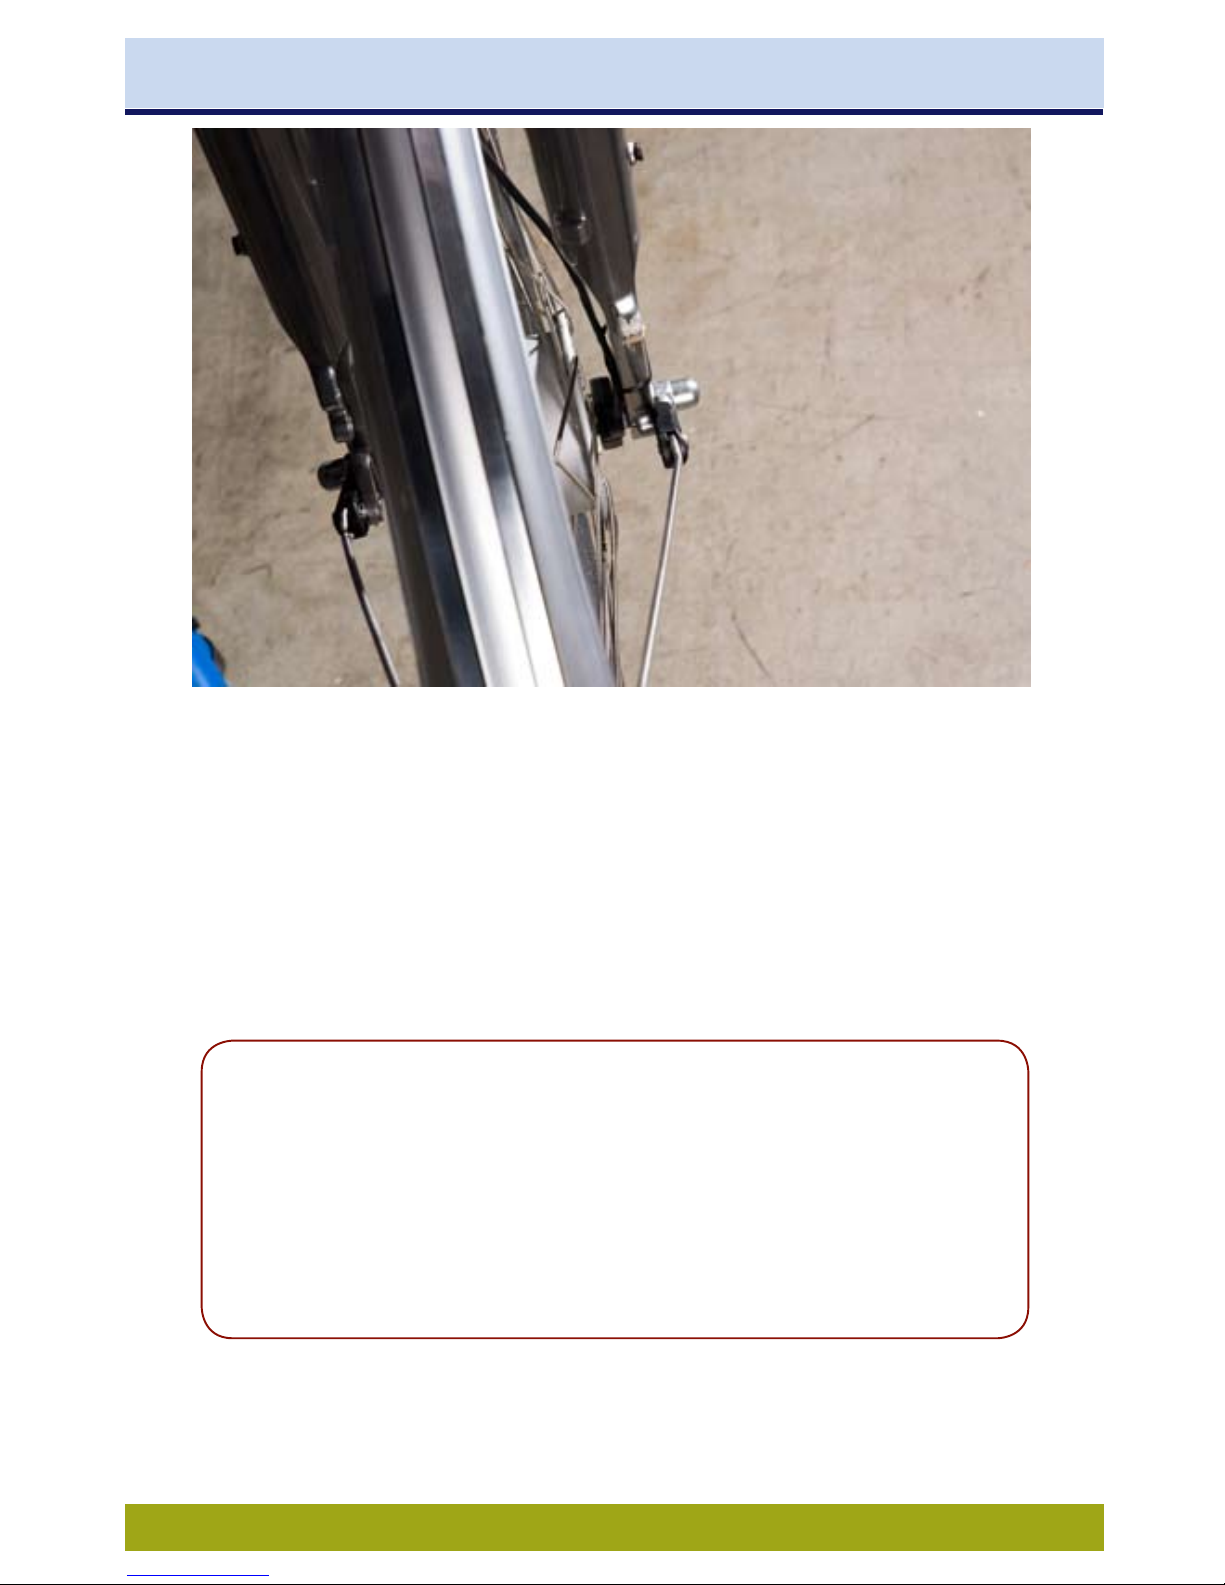
Adjusting the Brake
Loosen the M5 hex nut on the right side of the brake, then using your free
hand, pinch both brake arms together until there is approximately 2-3mm of gap
between the pad and the rim. Tighten the nut into this position, verify the gaps,
then squeeze the brake handle and check the feel of the brakes.
Repeat this process until you have afrmative brake feel, and the handle is tight.
Once good brake feel has been adjusted, use your #1 screwdriver to adjust the
small black screw shown above. This will allow you to adjust one pad inde-
pendent of the other to set a balanced gap on both sides and to prevent brake
squeal. Once there is a 2-3mm balanced gap, check the feel of the brake handle
again, and turn the wheel to make sure it spins freely.
Finally, tuck the loose wire end to the cleat on the brake arm, as shown below.
Adjusting the Brake

Wiring the Headlight
Rotate the headlight forward and install the wires for the headlight onto the
two terminals under the light.
Rotate the wheel in the direction of travel to verify the operation of the light. If
the light does not work, switch the connection of the two wires.

Installing the Pedals
Rotate the headlight to its normal orientation, and secure any loose lengths of
wire.
Next, look at the threaded ends of each pedal. The end will be stamped with
either a ‘L’ for left or a ‘R’ for right. Thread the pedals on to the correct arm,
and tighten with a M15 wrench. Note: The left pedal is reverse threaded. It
will tighten in the opposite direction from the right side.

Final Steps
Inate both the front and rear tires to 45psi. All e-Moto electric bicycles have
self sealing tubes, so use caution to clean any residue from the self-sealing com-
pound from around the valve stem.
Finally, install the rubber plugs and caps on the front and rear axles, as well as
the dust plug in the stem, as shown below.

Final Steps
Before you ride your new e-Moto Electric
Bicycle...
It is imperative for the long life of your new e-Moto bike battery
that it be charged before it is ever ridden. The rst charge after
your bike is unpacked may take as long as 8-hours, while subse-
quent charges will take approximately 4-hours.
Finally, be sure to completely ll out and return your warranty
registration card to e-Moto. The VIN number for your bike is
stamped into the frame, just below the headset bearing and above
the e-Moto logo. (See the photo above)

If you have any questions about this guide or your
e-Moto electric bike, contact e-Moto immediately.
e-Moto Electric Vehicles
22165 68th Avenue South
Kent, Washington, 98032
toll free: 888-443-6686
info@emotoev.com
Copyright 2009, e-Moto LLC. v2.0 11-2009
Specications subject to change without notice.
This manual suits for next models
1
Table of contents
Other E-MOTO Bicycle manuals


