7
Fork Setup Information
Read this first for a general under-
standing of fork set-up or skip straight
to the air pressure charts if you just
want to go ride.
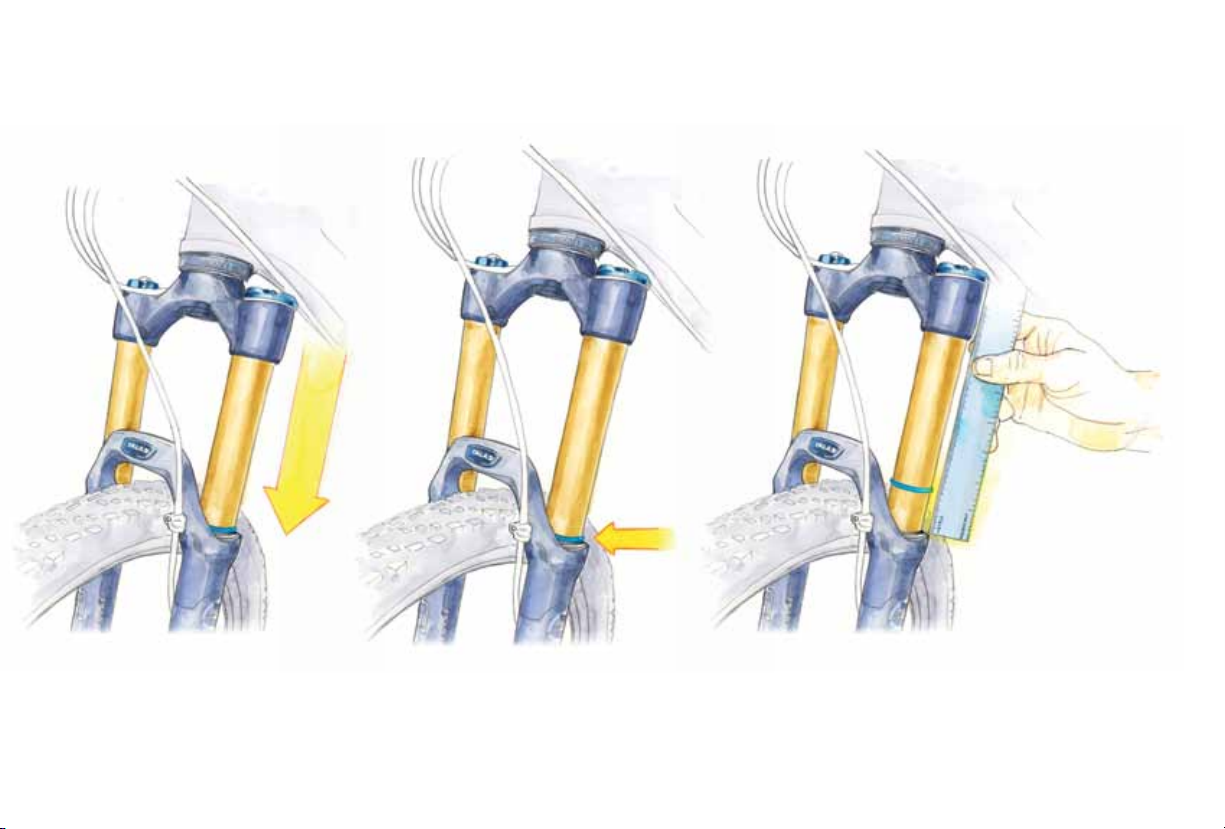
Positive Pressure
This is the main air spring that sup-
ports your weight. Adjust the air
pressure so that you come close to
using all the travel on a typical ride.
Usually you can mimic your maximum
impacts by grabbing the front brake
and pushing down HARD on the bars.
If you are getting 80–90% of the
fork’s travel doing this, your positive
air spring is in the right range. Actual
riding will often push the fork a little
further than this test.
Low Speed Compression Damping
Low speed compression damping is
used to reduced unwanted movement
and over travel due to low speed
changes like out of the saddle pedal-
ing and subtle variations in the trail
that can cause wallowing etc. Adjust
to your preference.
Lockout
As the name implies this turns the fork
rigid (or close to it) for out of the sad-
dle efforts or riding on the road. Most
forks have a “blowoff” so that the fork
will move if a large enough impact is
felt. The threshold or “blowoff” when
the lockout lets the fork start to move
is often adjustable. It’s called Gate
in Rock Shox parlance and Blowoff
Threshold in Fox’s language. Usually
the goal is to have the lockout at the
minimum setting needed to stop the
fork movement while pedaling out of
the saddle, but allowing it to still move
fairly easily when an impact is felt.
High Speed Compression Damping
If your fork has a high speed com-
pression damping control, this would
usually be used to slow things down
during big hits to avoid bottoming.
It would usually be set at the lowest
level needed to avoid bottoming out.
Rebound
Adjust the rebound so that the front
end does not bounce off the ground
after a drop off or large bump.
If adjusted too slow, the fork may
“pack down” and feel sluggish.
In order to conserve momentum and
remain compliant the suspension
needs to recover fairly quickly and
push off the back side of bumps and
holes. If the rebound is adjusted too
slow, rolling energy is lost to damping
and vibration. If it is adjusted too fast
the bike will bounce after bumps and
drops. Adjust to your preference.
Fox Float CTD
For 2013 Fox added features to
their line of Float forks and shocks to
make it easier for the user to adjust to
changing trail conditions. It’s called
CTD (Climb Trail Descend) and is
changed by the lever at the top of the
right fork leg. As with prior Fox forks,
cranking the blue lever clockwise
increases the amount of force it takes
to make the fork move. Just think of
‘Righty Tighty, Lefty Loosie’ (same
goes for the shock).
Fork Setup