manuals.online logo
Brands
  1. Home
  2. •
  3. Brands
  4. •
  5. EAGO
  6. •
  7. Bathtub
  8. •
  9. EAGO AM 213 User manual

EAGO AM 213 User manual

AM 213 Installation Introduction
E-mail:sales@eago.com.cn Http://www.eago.com.cn
National Service Hotline:+86 800-8301359
EAGO Sanitary Ware Co.,Ltd.
Factory Add:Shiling Development Zone,Xiaotang Town,Nanhai District,Foshan City,Guangdong,China
1 Please read carefully and follows all instruction when operating.
2 An earth leakage circuit-breaker must be installed in the power box an
please check it carefully before use.
3To avoid electric shock, the wires replacement must be done by the
electrical engineer or the retailer. Please do not change the wires by
2
yourself. The wire shall be 3×1.5mm
4 The earth wire of the water pump and air pump surface must be connected
well. The minimum of the copper must be
5 Please do not modify, append or eliminated the product.
6 Please do not use the product after alcohol or drug.
7 The children user shall be closely supervised by parents.
8 All the electrical spare parts except the remote controller must be stable to
avoid slip into the bathtub.
9Warming: the water temperature shall never exceed 60 degree centigrade.
10 Please do not use the strong causticity chemical liquid to clean the
product, such as vitriol, hydrochloric acid and lye.
11 Please do not touch the surface of the surface of the power generator
when it is running.
12 The water level must be higher than the jets before turning the product on.
13 Please do not drop anything into the pump or power generator connection.
14 Warning: to avoid electrical shock, the GFCI/RCD (Earth leakage circuit
Breaker) must be installed.
15. Warning: to avoid electrical shock, please do not use extended wire. The
socket must be installed near the product.
16. Bathtub working conditions: water pressure is 0.5-0.40MPa, and the ground
must have the ability to support the expected loading: AM213 is 550kg.
2
1.5mm
Safety Information
Contents
CONTENTS
01-02 Am213
03 AM213 Water and Wire Instruction Diagram
04 Installation Step
05 Wire Connection Diagram for Whirlpool Bathtub
06 Control Panel Usage Instruction
07-08 Maintenance Record
09 Troubleshooting Instructions
1. The cleaning of the acrylic surface:
The sponge and water could be used for the daily maintenance. If there are
scratches appear in the surface, please use the 1500 waterproof abrasive
paper to polish the surface. Then use toothpaste to polish again. Also some dirt
cleaning machine could be used. However, the strong causticity chemical liquid
could not be used fo the cleaning, such as vitriol, hydrochloric acid and lye.
2. Electroplate cleaning:
Please use the soft cloth for the cleaning. Please do not use the rough
cloth.
3 . Suction net cleaning:
Turn the screw out and take the suction net out, clean it to keep the water
going through smoothly. Please do not use strong the strong causticity
chemical liquid could not be used fo the cleaning, such as vitriol, hydrochloric
acid and lye.
Maintenance Instruction
1.Bathtub 2. Air pipe
3.PR0105-B401 Control panel
6.PR0105-B401 PC board
4.3623A-100 Drain 7.90 degree elbow
9.Stainless steel bracket
8. P700 Air pumpA
5.PC board clip
10.Adjustable foot
01 02
AM 213 Components Structure
Installation Instruction
03 04
770
AM 213Water and Wire Instruction Diagram
Installation Step
The product use the standard accessories. Please refer to the production tech parameter and follow the installation step as below:
1.Confirm the product install position→2. Adjust the product to horizontal 3.Connect the water inlet and drain pipe→4.Connect the power→
5.Check and confirm→6. Reposition→7.Water testing
→
Please refer to the product tech parameter to connect the water inlet pipe, power socket and drain tube, and check if there is enough space for the connection.
1. Confirm the product install position
The drain pipe is lay in the bottom of the bathtub, with diameter 38mm. The pipe could be elbow and extend easily. Please put the pipe into the drain system
and seal it well. Please keep the pipe running through to avoid water exhausted.
3. Connect the water inlet and drain pipe
6. Reposition
The product is suitable for the required power when purchasing. Please install the power socket according to the tech parameter. Pay attention to the water.
Connect the connector plugs into the socket. (Note: the yellow-green-color wire from the water pump is the earth wire, which the diameter is 8mm.)
4. Connect the power
Please check the connection parts are sealed or not after the installation. Clean the dirt in the bathtub and open the drain and then clean the bathtub. In order
not to stuff the drain pipe and jets, please clean the dirt before the cleaning.
5. Check and confirm
7. Water testing
Adjust the adjustable feet of the bathtub to make the product to horizontal.
2. Adjust the product to horizontal
Reposition the product to the install position.
Confirm the bathtub is clean and close the drain. Start storing the water and check if the bathtub is leak or not. When the water level is higher than
the probe, test the control panel function according to the instruction.
Installation Instruction
05 06
Spare part
Parameter
Rate voltage
Rate voltage
Rate power
Massage
Pump
Ozone
machine
Bottom
light Thermostat Electromagnetism
valve
PC control
panel Speaker Note
AC220-
240V/50HZ
AC110-
120V/60HZ
700W
DC12V
DC12V
12W
AC220V/
50HZ
AC120V/
60HZ
Electric parameter
Power ON/OFF Button
Bottom Light
Bubble Shower Speed
Bubble Shower
3. Bubble button
4. Bubble setting button
Turn on the system and press the key to turn on or turn off
the bottom light and the red light.
Turn on the system and press the key to turn on or turn off the
bubble function and the red light.
Turn on the system and the bubble function, press the key
to set the bubble power among the strong, middle and weak level.
1 The induced button clicks when valid operation, but there is no response if
invalid operation.
2. The power of the bubble: weak, middle and strong.
Turn off the system and the wait for the water in the bathtub is totally drained.
After 10 seconds (it is based on the water level detector which tests
if there is no water left in the bathtub in 10 seconds), the air pump will
be turned on automatically and blow dry the water left in the bathtub
pipes, and it will be turned off automatically after 90 seconds.
Bubble function instruction:
Cleaning function instruction
1 Power ON/OFF
Press the key for more than 1 second to turn on or turn off the system. The
control panel would be turned off automatically for each time it is turned on
in 60 minutes. The bottom lights would be turned on when the system is turn
on. Turn on the power and the light button the red light will be turned on. Press the key
again to turn off the system.
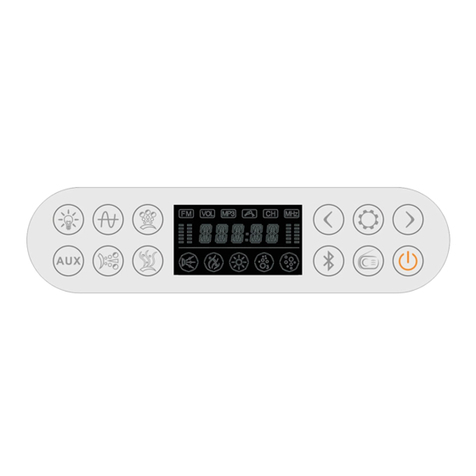
Control Panel Usage Instruction (AM213)
PC cont r ol pane l
Installation Instruction
2. Bottom light
Wire Connection Diagram for Whirlpool Bathtub
电源:~220-240V
控制 面板
水底 灯
水位 检测器
泡泡浴 电 箱
Electric cabinet
Bubble shower
Control panel
Bottom light
Water level detector
Power: 200-240V
Model No.
Manufacturing
Code
Customer
Name
Tel.
Add.
Agent Shop
Tel.
Purchase Date
Model No.
Purchasing
Date
Manufacturing
Code
Tel
Maintenance item:
1. Every purchase of the series products, get 1 year guarantee by the
maintenance service card and purchasing receipt since the purchasing date.
The following cases are not covered by the warranty.
A. Any damage caused by the misuse, improper maintenance.
B. Installation damage by neither the EAGO agent nor appointed installation
service organization.
C. Without 3 packets "proof, valid bill or proof of purchase.
D. Valid card, maintenance card do not match or alternation.
E. Damage by the irresistibility and irresistible natural calamities.
2. If it is the product quality problem, it will be free maintenance or change the
spare parts.
3. If the problem is not caused by the products itself or
over-exceed the one-year guarantee, it will charge the repairing fees and spare
parts costs.
The first page is kept for the customer.The second page is sent back to EAGO head office.
07 08
Maintenance
Date
Maintenance
Item
Maintenance
Unit
Maintence person
signature
Installation Instruction
Maintenance Card
Add
Maintenance Record
Maintenance Card
The massage
motor or the
air motor can’t
be started.
1. Voltage is abnormal or
electric power is disconnected.
2. The air pressure switch or the
micro pneumatic switch is broken
1. Take off the cover of the jet which
does not workand clean the air pipe.
2. Turn on the air pump.
3. Check the air pump as the air pump
motor failure instruction.
The bathtub
shaking and
‘make noise.
1. The steel stand at bottom
of bathtub is not balance.
2. The fasten screws for
motor and shockproof
rubber is incomplete close.
3. Problem of motor.
1. Adjust the leg to make the steel
stand even.
2. 4 Pieces of screw and 4 shockproof
rubbers shall be provided of the motor.
Fasten the nuts.
3. Contact with your dealer or the
manufacturer.
The pump is
running, but
poor jet
action.
1. The suction net partly
blocked.
2. Not adequate water
level.
3. Adjusting valve of
function is shut down.
4. The inlet pipe of pump
exist air.
5. Other probable cause.
1. Take off the suction net with
screwdriver. Clean it to keep the water
going through smoothly.
2. Pour more water until it over flow the
senor.
3. Open the adjusting valve of function.
4.a) Open the washout valve to exhaust
the air inside the pipe,
b) Check and tighten all connection part
of the inlet pipe.
c) Close the washout valve properly.
5. The water pipe and air pipe may be
mixed up. Please contact the professional
technician to fix it.
1. Plug is off.
2. Control circuit board is
burnt.
Chrometherapy
light doesn’t
work.
Slow water
outlet
1. Supply water pressure
is low.
2. Water inlet block.
1. Check supply water pressure.
2. Clean water inlet filter.
The filter
doesn’t work
1. The rubber ring in the
filter is damage. 1. Change a new one.
Troubleshooting
Solutions
Causes
Malfunctions Solutions
CausesMalfunctions
Some water left
inside the pipe
Some models of bathtub can not drain all water out from the
pipe because of its special construction.
1. Take off the stopper of pop-up water
outlet valve, fasten the screw or adjust
the mandril to the proper place.
2. Replace with new rubber.
3. Dismantle the water outlet, level the
washer and re-install it.
1. Take off the lid of the jet, clean the
small air hole by thin wire.
2. Turn on the air pump.
3. Follow the “air pump does not operate
instruction “process to check the air pump.
1. Air pipe block.
2. Air pump is switch off.
3. Air pump does not operate.
No bubble out
from the
Hydro-massage
jet
The pop-up
water outlet
valve can't
pop-up or it is
leaking
1. The waste cover is leakage,
the screw is loose or the water
divert adjust too low.
2. The pulling cord of water
outlet is broken.
3. The washer is uneven.
09 10
Installation Instruction
1. Re-plug in the plug or replace plug.
2. Contact with your dealer or the
manufacturer.

Other EAGO Bathtub manuals

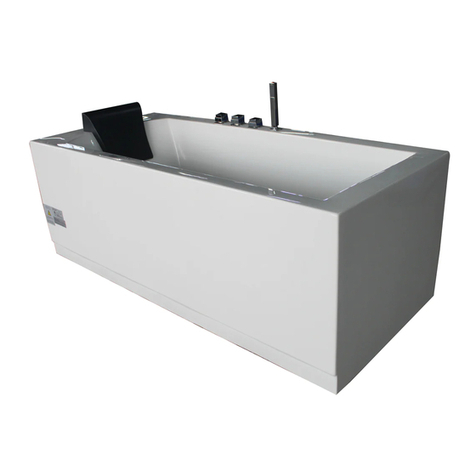
EAGO TS Series User manual

EAGO

EAGO TS Series User manual

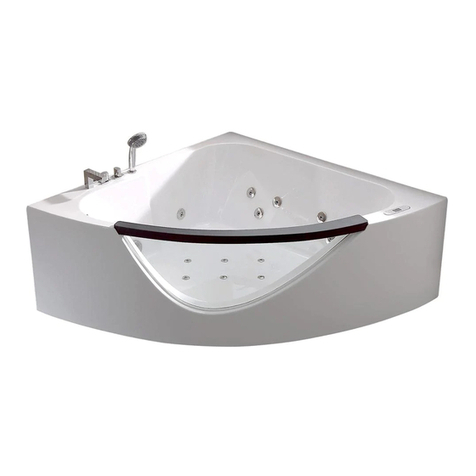
EAGO AM189ETL-R User manual

EAGO

EAGO AM189ETL-R User manual

EAGO AM154ETL-R5 User manual

EAGO

EAGO AM154ETL-R5 User manual

EAGO AM219 User manual

EAGO

EAGO AM219 User manual

EAGO TS Series User manual

EAGO

EAGO TS Series User manual

Popular Bathtub manuals by other brands

Toto NEOREST VPKZ1800E installation guide

Toto

Toto NEOREST VPKZ1800E installation guide

American Standard Whirlpool and Bathing Pool 2732.002 specification

American Standard

American Standard Whirlpool and Bathing Pool 2732.002 specification

glass 1989 petra 160/70 manual

glass 1989

glass 1989 petra 160/70 manual

CLEOPATRA WellPool Square 401 manual

CLEOPATRA

CLEOPATRA WellPool Square 401 manual

Kinedo COROLLA-170x70 Technical sheet

Kinedo

Kinedo COROLLA-170x70 Technical sheet

glass 1989 NUBEA Use and maintenance guide

glass 1989

glass 1989 NUBEA Use and maintenance guide

Jacuzzi Delfi Instructions for preinstallation

Jacuzzi

Jacuzzi Delfi Instructions for preinstallation

aquabrass Thasos B0002 installation guide

aquabrass

aquabrass Thasos B0002 installation guide

agape AVAS0910Z Assembly instructions

agape

agape AVAS0910Z Assembly instructions

Marbletrend ESTI 1700 installation instructions

Marbletrend

Marbletrend ESTI 1700 installation instructions

Kohler K-1131-HE Roughing-In Guide

Kohler

Kohler K-1131-HE Roughing-In Guide

glass 1989 petra 180/75 manual

glass 1989

glass 1989 petra 180/75 manual

American Standard Green Tea 3572.328 Specification sheet

American Standard

American Standard Green Tea 3572.328 Specification sheet

Poolspa GEMINI installation instructions

Poolspa

Poolspa GEMINI installation instructions

Jason International Integrity B3060 owner's manual

Jason International

Jason International Integrity B3060 owner's manual

American Standard Heritage 5'x42 Whirlpool 2805.018 parts list

American Standard

American Standard Heritage 5'x42 Whirlpool 2805.018 parts list

American Standard Town Square 2748.002 Specification sheet

American Standard

American Standard Town Square 2748.002 Specification sheet

Novellini Calypso Eco Installation, use and maintenance manual

Novellini

Novellini Calypso Eco Installation, use and maintenance manual

manuals.online logo
manuals.online logoBrands
  • About & Mission
  • Contact us
  • Privacy Policy
  • Terms and Conditions

Copyright 2025 Manuals.Online. All Rights Reserved.