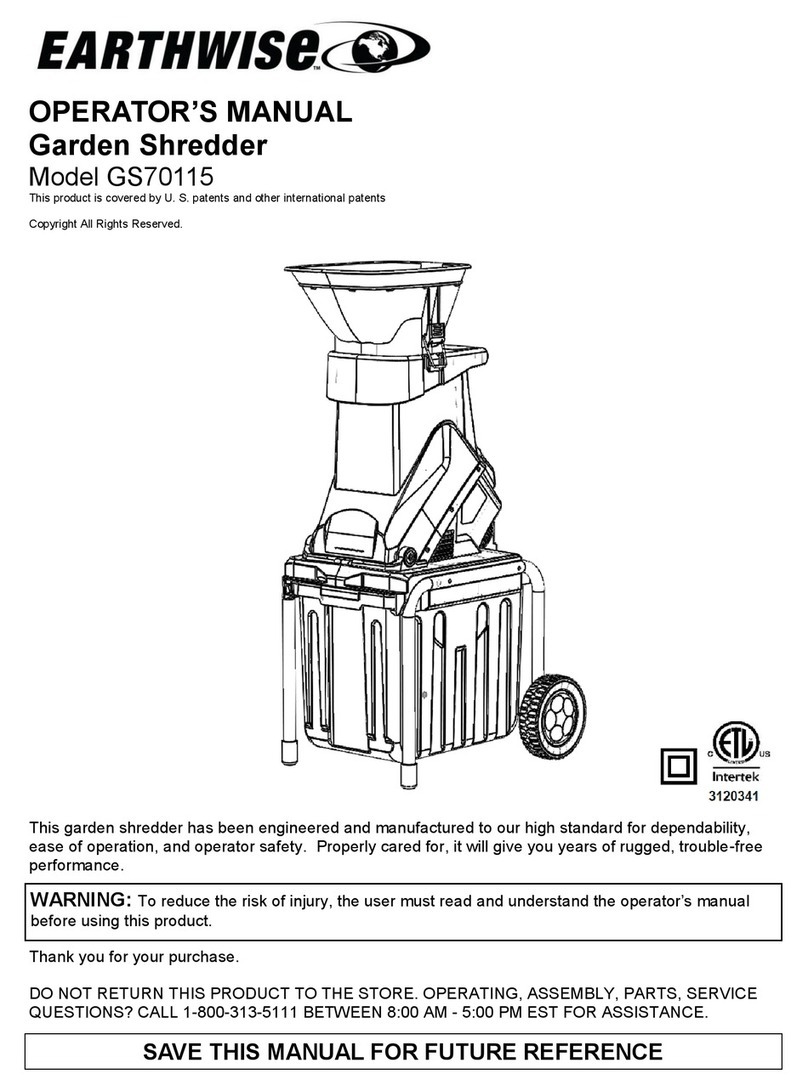
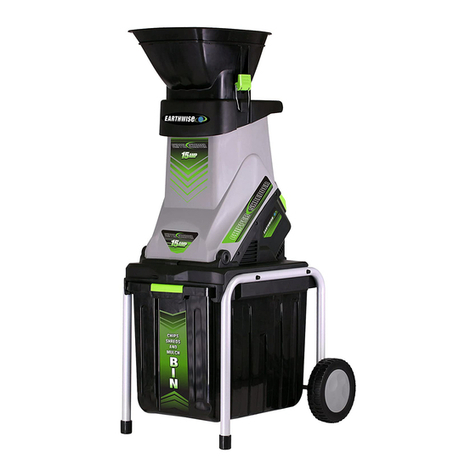
EarthWise GS015 User manual

OWNER’S MANUAL
Garden Shredder
Model GS015
Copyright All Rights Reserved.
WARNING: To reduce the risk of injury, the user must read and understand the owner’s manual
before using this product.
SAVE THIS MANUAL FOR FUTURE REFERENCE
This garden shredder has been engineered and manufactured to our high standard for dependability,
ease of operation, and operator safety. Properly cared for, it will give you years of rugged, trouble-free
performance.
DO NOT RETURN THIS PRODUCT TO THE STORE. OPERATING, ASSEMBLY, PARTS,
SERVICE QUESTIONS? GO TO WWW.AMERICANLAWNMOWER.COM, OR CALL
1-800-633-1501 BETWEEN 8:00AM-5:00PM EST FOR ASSISTANCE.
Thank you for your purchase.

IMPORTANT SAFETY WARNINGS
TO REDUCE RISK OF INJURY : Before any
use be sure everyone using this product reads
and understands all safety instructions and
other information contained in this manual.
CAUTION: Wear appropriate personal
hearing protection during use. Under some
conditions and duration of use, noise from
this product may contribute to hearing loss.
WARNING: When using electric gardening
appliances, basic safety precautions should
always be followed to reduce risk of fire, electric
shock, and/or personal injury.
Save these instructions and review frequently
prior to use and in instructing others.
GENERAL SAFETY
AVOID DANGEROUS ENVIRONMENTS-
Don’t use this product in rainy, stormy, damp
or wet locations. Do not operate in gaseous or
explosive atmospheres. Motors in these
products normally spark, and the sparks might
ignite fumes.
DRESS PROPERLY- Don’t wear loose
clothing or jewelry and wear protective hair
covering to contain long hair. They can be
caught in moving parts. Use of rubber gloves
and substantial footwear is recommended
when working outdoors.
USE SAFETY GLASSES- Wear safety
glasses with side shields or goggles that
are marked to comply with ANSI Z87.1
standard when operating this product.
USE DUST MASK - Wear face or dust mask
when operating this product.
USE HEARING PROTECTION - Wear ear
plugs or muffs when operating this product.
GROUND FAULT CIRCUIT INTERRUPTER-
(GFCI) protection should be provided on the
circuit (s) or outlet (s) to be used for this
product if you are using an extension cord.
Receptacles are available having built-in GFCI
protection and may be used.
DOUBLE INSULATION – This product has
double insulation. This means that all external
metal parts are insulated from the electrical
supply. This is achieved by introducing an
insulation layer between electrical and
mechanical parts. The double insulation
guarantees you the greatest possible safety.
EXTENSION CORD– Make sure your extension
cord is in good condition. Use only extension
cords having an electrical rating not less than the
rating of the product. An undersized extension
cord will cause a drop in line voltage resulting in
loss of power and overheating.
It is possible to tie the extension cord
and power cord in a knot to prevent
them from becoming disconnected
during use. Make the knot as shown,
then connect the plug end of the
power cord into the receptacle end
of the extension cord. This method can also be
used to tie two extension cords together.
POLARIZED PLUGS-To reduce the risk of
electric shock, this product has a polarized plug
(one blade is wider than the other). This product
must be used with a suitable polarized extension
cord. Polarized connections will fit together only
one way. Make sure that the receptacle end of
the extension cord has large and small blade slot
widths. If the plug does not fit fully into the
extension cord, reverse the plug. If it still does
not fit, obtain a suitable extension cord. If the
extension cord does not fit fully into the proper
outlet. Do not change the tool plug or extension
cord in any way.
WARNING: Use outdoor extension cords
marked SW-A, SOW-A, STW-A, STOW-A,
SJW-A, SJTW-A, or SJTOWA. These cords
are rated for outdoor use and reduce the risk
of electric shock.
2
Model GS015
Minimum Gage for Cord Sets
Volts Total Length of cord in Feet
120V 0-25 26-50 51-100 101-150
Ampere Rating
More Not More American wire Gage
Than Than
0 - 6 18 16 16 14
6 - 10 18 16 14 12
10 - 12 16 16 14 12
12 - 16 14 12 Not Recommended

DISCONNECT UNIT from the power supply
when not in use or when servicing or cleaning.
Do not leave unattended.
DON’T ABUSE CORD-Never carry or pull
this product by the cord or yank the cord to
disconnect from the receptacle. Keep cord
from heat, oil, and sharp edges.
STAY ALERT-Watch what you are doing. Use
common sense. Do not operate the garden
shredder when you are tired or under the
influence of drugs or medication.
STORE IDLE UNIT INDOORS-When not in
use, the garden shredder should be stored
indoors in a dry and high or locked-up place,
out of children’s reach.
MAINTAIN UNIT WITH CARE-Keep clean for
best performance and to reduce the risk of
injury. Inspect extension cord periodically and
replace if damaged. Keep handles dry, clean
and free from oil and grease.
CHECK FOR DAMAGED PARTS - Before
further use of the product, any part that is
damaged should be carefully checked to
determine that it will operate properly and
perform its intended function. Check for
alignment of moving parts, binding of moving
parts, breakage of parts, mounting and any
other condition that may affect its operation.
Any part that is damaged should be properly
repaired or replaced. Call our customer
service help line at 1-800-633-1501 for
assistance.
LIGHTING-Only operate your garden shredder
in daylight or good artificial light.
DON’T OVERREACH - Keep proper footing and
balance at all times. Wear oil resistant
rubber- soled footwear.
Never leave a running tool unattended. Turn the
garden shredder off and wait until it comes to a
complete stop before leaving the work area.
Avoid accidental start-ups. Make sure switch is
in off position before plugging in the power cord.
USE RIGHT APPLIANCE– Do not use this
product for any job except that for which it is
intended.
KEEP CHILDREN AWAY- All visitors, children
and pets should stay at a safe distance from the
work area.
WARNING: Some dust and debris created by
the use of this tool could contain chemicals
known to the State of California to cause cancer
and birth defects or other reproductive harm.
Some examples of these chemicals are:
- chemicals in fertilizers
- compounds in insecticides, herbicides and
pesticides
- arsenic and chromium from chemically
treated lumber
Your risk from exposure to these chemicals
varies depending on how often you do this
type of work. To reduce your exposure, work
in a well-ventilated area and with approved
safety equipment, such as dust masks that are
specifically designed to filter out microscopic
particles.
WARNING: California Proposition 65:
This product contains chemicals known to the
State of California to cause cancer ,birth
defects or other reproductive harm.
WARNING: Cancer and Reproductive Harm -
www.P65Warnings.ca.gov.
GENERAL SAFETY
3
Model GS015

SPECIFICATIONS
Model…………………………………………. GS015
Rated voltage………………………………… 120V AC 60Hz 15A
Loading speed……………………………….. 3700/RPM
Max cutting diameter………………………... 1-3/4 in. (45mm)
Protection level………………………………. IPX4
Net Weight…………………………………… 22.7 lb (10.3 kg)
Intended use
This garden shredder is designed for the cutting of fibrous and woody garden waste for composting.
4
Model GS015
1. Feeder hopper 9. Electromagnetic switch
2. Down housing 10. On/Off Switch
3. Wheel 11. Knob
4. Foot pad 12. Connecting pole
5. Supporting tube 13. Wheel cover
6. Collection bag 14. Blade defend block
7. Up housing 15. Blade plate
8. Paddle 16. Socket wrench
14
16

Precautions that involve your safety.
CAUTION! Read the manual carefully before using the shredder and familiarize
yourself with the controls and proper use of the equipment.
SWITCH OFF! Remove plug from outlet before cleaning or maintenance.
Do not use in wet weather conditions.
DANGER! Rotating blades. Keep hands, feet, clothing away from the moving parts
of garden shredder.
Wear eye protection, dust mask protection, and ear protection.
Wear glove protection.
Wear foot protection.
DANGER! Of being hit by thrown objects.
Keep bystanders at a safe distance.
WARNING! Do not stand nearby the shredder when the machine is operating.
SWITCH OFF! Remove plug from outlet immediately if the cord is damaged or cut.
SYMBOLS
Waste electrical products should not be disposed of with household waste. Please
recycle where facilities exist. Check with your Local Authority or retailer for recycling
advice.
5
Model GS015

OPERATING TIPS
1. Before starting the garden shredder, make
sure that the feeding chamber is empty.
2. Keep your face and body away from the
opening.
3. Do not allow hands or any other part of the
body or clothing near the hopper or
discharge chute.
4. Never put your hands into the hopper while
the garden shredder is running. Always use
the paddle supplied with your shredder to
push items into the hopper.
5. Do not try to force objects larger than the
recommended diameter of 1-3/4 in. into the
hopper.
6. Keep proper balance and footing at all
times. Do not overreach. Never stand at a
higher level than the base of the tool when
feeding material into garden shredder.
7. Always stand clear of the discharge zone
when operating the garden shredder. Never
reach under the shredder until it has come
to a complete stop.
8. When feeding material into the garden
shredder be careful to remove pieces
of metal, rocks, bottles, cans, cloth or other
foreign objects that may damage the
blades.
9If the cutting mechanism strikes a foreign
object or if the garden shredder should start
making any unusual noise or vibration, turn
it off and allow it to come to a complete
stop. Disconnect from power supply and
take the following steps:
-inspect for damage;
-check for and tighten any loose parts;
-repair or replace any damaged parts
WARNING: Never reach into the hopper until
the garden shredder has come to a complete
stop and is unplugged. The blades will
continue to rotate for a few seconds after the
shredder is turned off.
10. Do not allow processed material to build up
in the discharge zone; this may prevent
proper discharge and can result in
kickback of material through the hopper.
WARNING: Never put your hands near the
discharge chute. Failure to heed the warning
could result in serious injury.
11. If the shredder becomes clogged, turn it off
and disconnect from power supply before
clearing debris. Keep the power source
clear of debris and other accumulations to
prevent damage to the power source.
Remember that the starting mechanism on
engine powered tools will cause the cutting
mechanism to move.
12. Keep all guards and deflectors in place
and in good working condition.
13. Do not operate the garden shredder on a
paved or gravel surface where ejected
material could cause injury.
14. Turn off the garden shredder and
disconnect it from the power supply
whenever you leave the work area.
15. Do not tilt the garden shredder while it
is running.
16. Never reach into the hopper until the
garden shredder has come to a complete
stop and has been disconnected from the
power supply.
6
Model GS015

ASSEMBLING THE GARDEN SHREDDER (See Fig. 1.2.3)
1. Remove all parts from package.
Check all the parts against the list in the manual. If any parts are damaged or missing do not use
the garden shredder until the part is repaired or replaced. Call our customer service help line at
1-800-633-1501 for assistance.
2. Turn the shredder over.
3. Fold both legs(5) up and insert the wheel axle (12) through the openings on the legs, firmly fix
the legs with wheel axle on machine body with bolts.
4. Place the spacer and axle bush on both end side of the wheel axle (12), attach the wheels (3)
and firmly fix them with bolts. Fix the wheel cover (13).
5. Clamp the holding loops of the collection bag (6) in the holders on both sides of the product.
WARNING:
Be careful when leaning the device on the wheels, since the weight is unbalanced when tilted and
moved.
Fig. 3
7
Model GS015
ASSEMBLING

OPERATION INSTRUCTIONS
STARTING THE SHRREDDER: (See Fig. 4)
• Press the I/O switch to “I’’ to start the motor (Fig.4)
• Press the circuit breaker button if the machine
does not work, ensure you have connected to
power supply.
• When the motor has been running for a few
seconds you can commence shredding.
WARNING:
The circuit breaker will be activated in the following
circumstances:
• A build up of shredded material around the cutting
disc.
• If the material being shredded is greater than the
motor capacity.
• Where there is too much resistance against the
cutting blade.
When the circuit breaker has been activated, switch off
the shredder and disconnect the power supply.
a. Unscrew the reamer knob at the base of the turret
and open top section.
b. Remove the debris or obstruction from the cutting
area.
c. Return the top section and tighten the reamer knob.
d. Leave motor a few minutes to cool down.
e. Reconnect to the power supply and press the circuit
breaker button.
f. When ready to start shredding, switch to “I’’ .
STOPPING THE SHREDDER: (See Fig. 5)
• Push the I/O switch to “O” to turn the garden
shredder off.
• Disconnected to the power supply.
8
Model GS015
USING THE PADDLE
There is a paddle provided to aid feeding less bulky
material such as small twigs, leaves, other garden
waste and vegetation into the in-feed chute.
• Load the material into the hopper.(Fig.6)
• Insert the paddle(8) into in-feed chute pushing
material onto the blade disc.(Fig.7)
• Wait until all the material has been shredded
before adding more material.
NOTE: Your fingers must never enter the in-feed
chute.
NOTE: Never use the tool if the hopper is not
fitted.
NOTE: Do not over reach.
Start
Stop
WARNING:
Never slacken off the tightening knob(11) without
having turned off the On/Off switch and pulled the
plug out off the socket.
WARNING:
The shredder will stop within 5 seconds after
switching off.

9
Model GS015
OPERATION INSTRUCTIONS
REPLACE THE BLADEDS
1.Ensure that the shredder is switched off and
disconnected from the main supply.
2.Removed the top feed assembly by unscrewing
the rear cover knob securing it to the body of the
machine.
3.Uninstall the blade defend block(14)(Fig.8)
4.It is recommended that work gloves be used
when replacing the blades.
5.The blades have two cutting edges. When the
blades become worn they can be reserved to use
the second cutting edge.
6.Lock the blade disc. by screwdriver. Unscrew the
two inner hexagonal headed bolts(15) and note the
position of the cutting angle of the blade.(Fig.9)
7.Remove the blade and rotate it through 180
degrees and fit the blade to the blade disc ensuring
that the blunt cutting edge is facing downwards.
8.Repeat this for the other blades.
When both cutting edges of the blade have become
worn they must replaced as a pair. The blades can
be re-sharpened, but this must be done by an
experienced person using an oil stone. We do not
recommended this be done as the weight of each
blade is critical to maintain the balance of the
cutting disc. Any imbalance could cause damage to
the machine and possible injury to the operator.
WARNING! Always turn off the garden shredder
and unplug the power cord from the outlet before
maintaining the shredder.
1. If an extension cord is used it shall not be of
lighter grade than the supply cord already fitted
to the appliance.
2. Check the supply and any extension cord
regularly for damage or signs of aging. Do not
use the appliance, if the cords are damaged.
3. When servicing the cutting means be aware
that, even though the motor will not start due to
the interlock feature of the guard, the cutting
means can still be moved if the motor is turned
by hand.
4.Never attempt to override the interlock feature
of the guarding.
5. Remove deposited matter from the machine
using a brush.
MAINTENANCE AND STORAGE
6. Always wear gloves when cleaning.
Always clean the machine after use. Clean the
plastic body and plastic parts using soap
and a moist cloth. Do not use aggressive agents
or solvents for cleaning.
7. Never clean the shredder with a jet of water or
by rinsing. Make sure that no water is
allowed to enter into the shredder.
8. Use only the recommended accessories and
attachment for this shredder.
9. Always allow the machine to cool before
storing; When not in use, tools should be stored
in a dry, high or locked up place, out of reach of
children.
10. Keep the motor cooling vents clean of debris
and other accumulations to prevent damage
to the motor or possible fire.

Problem Possible cause Possible correction
The motor does not run Power failure / unit not
plugged into a working
receptacle.
The overload protection
has responded.
The hopper is open.
Check to make sure unit is plugged into a
working outlet. Make sure extension cord is
not damaged.
Remove any chips and press the reset
button. Wait five minutes before pressing
the ON/OFF switch to restart the unit.
Check to make sure the hopper is secured
and the lock knob is tightened.
The material to be chopped
is not pulled in.
The material is jammed in
the feed inlet.
The cutting blade is
blocked.
The discharge chute is
blocked.
Disconnect the power supply and open the
hopper. Pull the material from the feed inlet.
Replace the hopper.
Disconnect the power supply and open the
hopper. Open the blade cover. Remove the
blocked material and replace the blade
cover and hopper.
Disconnect the power supply and open the
hopper. Open the plate of the discharge
chute to clear the blocked material. Replace
the plate and hopper.
Blades becomes worn. Reverse the blades by first disconnecting
the unit from the power supply.
The reversible blade is fixed to the rotary
plate with two screws. Align the slots on
the board and the blade support, insert a
metal rod like a screw driver into the slots to
prevent rotating when reversing the blades
and use the supplied socket wrench to
unscrew the screws. Call our customer
service help line at 1-800-633-1501 for
assistance or to order replacement blades.
TROUBLE SHOOTING
10
Model GS015

PARTS AND SERVICE
For parts or service, please call 1-800-633-1501 or visit us online at
www.americanlawnmower.com.Be sure to provide all relevant information when you
call or visit.
REPAIR PARTS (KITS/ ITEMS)
The model/ serial number of this tool is found on a plate or label attached to the
housing. Please record the serial number in the space provided below.
MODEL NUMBER GS015 __ _
SERIAL NUMBER________________
Always mention the model number when ordering kits/items for this tool.
CALL US FIRST !!
Call us first with questions about operating or maintaining your tool
at 1-800-633-1501 between 8:00 a.m. – 5:00 p.m. Eastern
Standard Time, or get assistance on www.americanlawnmower.com.
No. Kit/Item Number Description QTY
1 GS015-BK-1 Blade Kit 1
11
Model GS015

The Great States Corporation
American Lawn Mower Company
7444 Shadeland Station Way
Indianapolis, IN 46256
Phone 1-800-633-1501
www.americanlawnmower.com
In a continued commitment to improve quality, the Manufacturer reserves the right to
make component changes or design changes when necessary. Rev. 08/19/2021
WARRANTY POLICY
Two (2) year limited warranty on Earthwise outdoor power equipment.
Earthwise warrants to the original owner that each new product and service part is free from defects in
materials and workmanship and agrees to repair or replace any defective product or part for the warranty
period as stated above from the original date of purchase except for the conditions and circumstances listed
below:
This warranty applies only to the original purchaser
at retail and may not be transferred.
Warranty applies if the product is used for personal,
household or family use. Warranty is void if product
is used for commercial, industrial or rental
purposes.
Warranty does not include repairs necessary due to
operator’s abuse or negligence (including
overloading the product beyond capacity or
immersion in water), or the failure to assemble,
operate, maintain or store the product according to
the instructions in the operator’s manual.
This warranty is not transferable and only applies to
product sold directly from an authorized retailer.
This warranty does not apply to any product, new or
used, purchased through unauthorized third-party
channels.
ANY INCIDENTAL, INDIRECT OR
CONSEQUENTIAL LOSS, DAMAGE, OR
EXPENSE THAT MAY RESULT FROM ANY
DEFECT, FAILURE OR MALFUNCTION OF
THE PRODUCT IS NOT COVERED BY THE
WARRANTY. Some states do not allow the
exclusion or limitation on how long an implied
warranty lasts, so the above limitation may not
apply to you.
Products sold damaged or incomplete, sold “as is”, or
sold as reconditioned are not covered under the
warranty.
Damage or liability caused by shipping, improper
handling, improper assembly, incorrect voltage,
improper wiring, improper maintenance, improper
modification or the use of accessories and/or
attachments not specifically recommended is not
covered by this warranty.
Expendable items that become worn during normal
use are not covered by the warranty.
Warranty does not cover damage caused by cold,
heat, rain, excessive humidity, corrosive environments
and materials, or other contaminants.
Warranty does not include installation, assembly or
normal adjustments explained in the operator’s
manual.
The expense of delivering the product to the vendor
and the expense of returning the product or
replacement parts to the owner is not covered by the
warranty.
The warranty does not cover normal deterioration of
the exterior finish, including but not limited to
scratches, dents, paint chips or any corrosion or
discoloration caused by heat, abrasive and chemical
cleaners.
Proof of purchase, original dated sales receipt, must accompany all warranty claims.
OWNER’S MANUAL
Model GS015 Garden Shredder
Copyright. All Rights Reserved.

MANUAL DEL OPERARIO
Trituradora de jardín
Modelo GS015
Copyright Todos los derechos reservados.
ADVERTENCIA: Para reducir el riesgo de sufrir alguna lesión, el usuario debe leer y comprender
el manual del operario antes de usar este producto.
Muchas gracias por su compra.
NO DEVUELVA ESTE PRODUCTO A LA TIENDA. ¿TIENE PREGUNTAS SOBRE EL FUNCIONAMIENTO,
EL MONTAJE, LAS PIEZAS Y EL MANTENIMIENTO? LLAME AL 1-800-633-1501 ENTRE LAS 8:00 Y
LAS 17:00, HORA DEL ESTE DE LOS ESTADOS UNIDOS.
GUARDE ESTE MANUAL PARA CONSULTAS FUTURAS
Esta trituradora de jardín fue diseñada y fabricada de acuerdo con nuestros altos estándares de
confiabilidad, facilidad de operación y seguridad para el operario. Si se trata con cuidado, esta
herramienta le otorgará años de óptimo rendimiento y resistencia.

PRECAUCIONES DE SEGURIDAD
PARA REDUCIR EL RIESGO DE LESIONES:
Antes de utilizar este producto, cerciórese de
que todos los usuarios lean y comprendan las
instrucciones de seguridad y la demás
información incluida en este manual.
PRECAUCIÓN: Use protección auditiva
apropiada mientras trabaja. En ciertas
condiciones y con cierta duración de uso, el
ruido generado por este producto puede
contribuir a la pérdida de la audición.
ADVERTENCIA: Al utilizar aparatos eléctricos para el
jardín, se recomienda respetar las precauciones de
seguridad básicas a fin de reducir riesgos de
incendios, descargas eléctricas y lesiones personales.
Guarde estas instrucciones y revíselas con frecuencia
antes de usar la herramienta y para impartirlas a otros.
NORMAS GENERALES DE SEGURIDAD
EVITE AMBIENTES PELIGROSOS. No utilice
este producto en condiciones de lluvia o
tormenta ni en lugares húmedos o mojados.
Tampoco trabaje en entornos donde existan
gases o sustancias explosivas. Por lo general,
los motores de estos productos producen
chispas que podrían inflamar los gases.
USE ROPA ADECUADA. No use prendas
sueltas ni artículos de joyería. Use protección
para cubrir y sujetar el cabello largo, ya que
puede quedar atrapado en las piezas móviles.
Se recomienda usar guantes de goma y calzado
resistente cuando se trabaja al aire libre.
USE GAFAS DE SEGURIDAD. Al trabajar con
este producto, use gafas de seguridad con
protectores laterales que cumplan con la norma
ANSI Z87.1.
USE UNA MASCARILLA ANTIPOLVO.
Protéjase el rostro con una mascarilla
antipolvo al utilizar este producto.
USE PROTECCIÓN AUDITIVA. Use tapones o
protectores auditivos mientras trabaja con esta
herramienta.
INTERRUPTOR DE CIRCUITO POR FALLA A
TIERRA (ICFT). Si utiliza un cable de extensión,
los circuitos o tomacorrientes que se usen para
este producto deben contar con esta protección.
Se pueden utilizar receptáculos que tengan la
protección de ICFT incorporada.
DOBLE AISLAMIENTO. Este producto tiene doble
aislamiento. Es decir que todas las piezas
metálicas externas están aisladas del suministro
eléctrico. Esto se logra con la introducción de una
capa de aislamiento entre las piezas
eléctricas y las mecánicas. El doble aislamiento
garantiza la mayor seguridad posible.
CABLE DE EXTENSIÓN. Asegúrese de que el
cable de extensión esté en buenas condiciones.
No utilice cables de extensión con una calificación
eléctrica inferior a la calificación del producto. Un
cable de extensión muy pequeño provocará
una disminución en la tensión de la línea y,
como resultado, una pérdida de potencia y
recalentamiento.
El cable de extensión y el cable de
alimentación se pueden atar para
evitar que se desconecten durante
el uso. Realice el nudo como se
muestra en la imagen y luego
conecte el enchufe del cable de
alimentación en el receptáculo del cable de
extensión. Este método también se puede aplicar
para unir dos cables de extensión.
ENCHUFES POLARIZADOS. Para reducir el riesgo
de una descarga eléctrica, este producto tiene un
enchufe polarizado (un contacto es más ancho que
el otro). Se debe utilizar un cable de extensión
polarizado adecuado. Las conexiones polarizadas
encajan de una sola manera. Cerciórese de que el
extremo del receptáculo del cable de extensión
tenga ranuras de anchos diferentes para los
contactos. Invierta el enchufe si no encaja
totalmente en el cable de extensión. Si aún así no
encaja, consiga un cable de extensión adecuado. Si
el cable de extensión no encaja totalmente en el
tomacorriente adecuado, no modifique el enchufe de
la herramienta ni el cable de extensión de ningún
modo.
ADVERTENCIA: Para el exterior, use cables
de extensión rotulados con las siguientes
inscripciones: SW-A, SOW-A, STW-A, STOW-A, SJW-
A, SJTW-A, o SJTOWA. Estos cables están
especificados para usar al aire libre y reducir el riesgo
de descarga eléctrica.
2
Modelo GS015
Calibre mínimo para los cables
Voltios Longitud total del cable en metros (pies)
120V 0-7,6 7,9-15,2 15,5-30,4 30,7-45,7
(0-25) (26-50) (51-100) (101-150)
Amperaje
Más No
de más de Calibre AWG
0 - 6 18 16 16 14
6 - 10 18 16 14 12
10 - 12 16 16 14 12
12 - 16 14 12 No se recomienda

DESCONECTE LA UNIDAD del suministro
eléctrico cuando no esté en uso o durante el
servicio de mantenimiento o la limpieza.
Manténgala bajo vigilancia constante.
NO MALTRATE EL CABLE. Nunca tire
del cable para trasladar el producto ni para
desconectarlo del receptáculo. Aleje el cable
del calor, el aceite y los bordes filosos.
PONGA ATENCIÓN. Ponga atención a lo que
está haciendo. Use el sentido común. No opere
la trituradora de jardín si está cansado o bajo la
influencia de drogas o medicamentos.
GUARDE LA UNIDAD BAJO TECHO. Cuando
no esté en uso, deberá guardar la trituradora en
un lugar cerrado, seco y elevado o fuera del
alcance de los niños.
MANTENGA LA UNIDAD EN CONDICIONES.
Consérvela limpia para lograr un óptimo
funcionamiento y reducir el riesgo de lesiones.
Revise el cable de extensión periódicamente y
reemplácelo si está dañado. Mantenga los
mangos secos, limpios y libres de grasa y aceite.
CONTROLE SI HAY PIEZAS DAÑADAS. Antes
de seguir usando el producto, se deberán
revisar las piezas dañadas en forma exhaustiva
para determinar si la herramienta funcionará
correctamente y realizará el trabajo previsto.
Compruebe la alineación y las uniones de
las piezas móviles, el montaje, averías de
componentes y otros factores que puedan
afectar el funcionamiento. Se debe reparar o
reemplazar cualquier pieza dañada en forma
adecuada. Comuníquese con nuestra línea de
ayuda de atención al cliente al 1-800-633-1501
para recibir asistencia.
ILUMINACIÓN. Trabaje con la trituradora sólo
con luz natural o buena luz artificial.
NO ADOPTE UNA POSTURA INCÓMODA.
Mantenga una base de apoyo firme y buen
equilibro en todo momento. Utilice calzado con
suela de goma y resistente al aceite.
Nunca deje la herramienta en marcha sin
vigilancia. Apague la trituradora y espere hasta
que se detenga por completo antes de retirarse
del área de trabajo.
Evite arranques accidentales. Asegúrese de que
el interruptor esté en la posición de apagado
antes de enchufar el cable de alimentación.
USE LA HERRAMIENTA CORRECTA. No utilice
este producto en trabajos para los que no esté
indicado.
MANTENGA ALEJADOS A LOS NIÑOS. Todos
los visitantes, niños y mascotas deben mantenerse
a una distancia segura de la zona de trabajo.
ADVERTENCIA: Parte del polvo y los desechos
generados por el uso de esta herramienta
contienen químicos reconocidos por el Estado de
California como causantes de cáncer, defectos
de nacimiento u otros efectos nocivos para el
aparato reproductor. Algunos ejemplos de estos
productos químicos son:
- químicos presentes en fertilizantes
- compuestos presentes en insecticidas,
herbicidas y pesticidas; y
- arsénico y cromo de maderas tratadas
químicamente
El riesgo que usted corre al exponerse a estos
químicos varía según la frecuencia con la que
realiza este tipo de trabajo. Para reducir la
exposición, trabaje en una zona bien ventilada
yutilice equipo de protección aprobado, como
mascarillas antipolvo especialmente diseñadas
para filtrar partículas microscópicas.
ADVERTENCIA: Disposición 65 del estado de
California: Este producto contiene químicos
reconocidos por el estado de California como
causantes de cáncer, defectos de nacimiento u
otros efectos nocivos para el aparato
reproductor.
ADVERTENCIA: Cáncer y Daño Reproductivo -
www.P65Warnings.ca.gov.
NORMAS GENERALES DE SEGURIDAD
3
Modelo GS015

ESPECIFICACIONES
Modelo………………………………………. GS015
Tensión nominal …………………………… 120V AC 60 Hz 15 A
Sin velocidad de carga …………………….. 3700/RPM
Diámetro máximo de corte ………………... 45 mm (1 3/4 pulg.)
Nivel de protección …………………………. IPX4
Peso neto …………………………………… 10.3 kg (22.7 libras)
Uso indicado
Esta trituradora está diseñada para cortar desechos de jardín, como hojas y ramas,
para elaborar composta.
1. Tolva de alimentación 9. Interruptor electromagnético
2. Vivienda abajo 10. Interruptor encendido / apagado
3. Rueda 11. Mando
4. Almohadilla para el pie 12. Polo de conexión
5. Tubo de apoyo 13. Cubierta de la rueda
6. Bolsa de colección 14. Bloque de defensa de la hoja
7. Hasta vivienda 15. Placa de la cuchilla
8. Palo de empuje plano 16. Llave de tubo
14
16
4
Modelo GS015

Precauciones para su seguridad.
AVERTIR! Lisez attentivement le manuel avant d'utiliser la déchiqueteuse et
familiarisez-vous avec les commandes et l'utilisation appropriée de l'équipement.
¡DESCONECTAR! Retire el enchufe del tomacorriente antes de realizar una
limpieza o un mantenimiento.
No trabaje en condiciones de humedad.
¡PELIGRO! Cuchillas giratorias. Mantenga manos y pies lejos de las aberturas
mientras la trituradora está en funcionamiento.
Use protección para ojos y oídos, y una mascarilla antipolvo.
Utilice guantes de protección.
Utilice calzado de protección.
¡PELIGRO! Cuchillas giratorias. Mantenga manos y pies lejos de las aberturas
mientras la trituradora está en funcionamiento.
¡PELIGRO! Puede ser golpeado por objetos que salen despedidos.
Mantenga a las personas que se encuentran en el lugar a una distancia segura.
AVERTISSEMENT!Ne vous tenez pas à proximité de la déchiqueteuse lorsque la
machine fonctionne.
¡DESCONECTAR! Retire el enchufe del tomacorriente de inmediato si el cable
está dañado o cortado.
SÍMBOLOS
Los productos eléctricos no se deben desechar junto con los residuos domésticos.
Recicle donde haya centros para tal fin. Consulte a la autoridad local o al distribuidor
minorista para obtener asesoramiento sobre reciclado.
5
Modelo GS015

CONSEJOS ÚTILES SOBRE EL FUNCIONAMIENTO
1. Antes de arrancar la trituradora, verifique
que la entrada de la tolva esté vacía.
2. Mantenga la cara y el cuerpo lejos de
la abertura.
3. No acerque ninguna parte de su cuerpo, ni
prendas de vestir a la tolva o al canal de
descarga.
4. Nunca introduzca sus manos en la tolva
mientras la trituradora está funcionando.
Utilice siempre la paleta que viene con la
trituradora para empujar los elementos a
la tolva.
5. No fuerce objetos que tengan un diámetro
superior al recomendado, es decir mayor
a45 mm (1 3/4 pulg.).
6. Mantenga una base de apoyo firme y buen
equilibrio en todo momento. No adopte una
postura incómoda. Cuando eche material en
la trituradora, nunca se pare a un nivel más
alto que el de la base de la herramienta.
7. Al trabajar con la trituradora, siempre
mantenga una distancia segura de la zona
de descarga. No coloque las manos debajo
de la trituradora hasta que esta se haya
detenido por completo.
8. Antes de echar material en la trituradora,
retire piezas de metal, piedras, botellas,
latas u otros objetos extraños que puedan
dañar las cuchillas.
9. Si el mecanismo de corte golpea un objeto
extraño o si la trituradora comienza a realizar
un ruido o una vibración fuera de lo común,
apáguela y espere hasta que se detenga
por completo. Desconecte la herramienta
del suministro eléctrico y siga los siguientes
pasos:
- controle que la unidad no esté dañada;
- si hay partes flojas, ajústelas;
- repare o reemplace todas las piezas
dañadas.
ADVERTENCIA: No coloque las manos dentro
de la tolva hasta que la trituradora se haya
detenido por completo y esté desenchufada.
Las cuchillas siguen girando durante algunos
segundos después de apagar la herramienta.
10. No permita que el material procesado se
acumule en la zona de descarga. Esto
puede impedir una descarga adecuada y
hacer que el material salga despedido de
la tolva.
ADVERTENCIA: Nunca acerque las manos
al canal de descarga. De lo contrario, podría
sufrir lesiones graves.
11. Si la trituradora se tapa, apáguela y
desconéctela del suministro eléctrico antes
de quitar los desechos. Mantenga la fuente
de alimentación libre de desechos y otras
acumulaciones a fin de evitar que se dañe.
Recuerde que el mecanismo de arranque
de las herramientas a motor provocará
que el mecanismo de corte se ponga en
funcionamiento.
12. Mantenga todos los protectores y deflectores
en su lugar y en buenas condiciones.
13. No opere la trituradora en superficies
pavimentadas o de grava donde el material
expulsado pudiese ocasionar lesiones.
14. Apague la trituradora y desconéctela del
suministro eléctrico cada vez que se retire
del área de trabajo.
15. No incline la herramienta mientras está
funcionando.
16. Nunca coloque las manos dentro de la tolva
hasta que la trituradora se haya detenido
por completo y esté desenchufada del
suministro eléctrico.
6
Modelo GS015

MONTAJE DE LA TRITURADORA DE JARDÍN (Ver Fig. 1.2.3)
• Retire todas las piezas del paquete.
Verifique todas las piezas con la lista del manual. Si alguna pieza está dañada o falta, no use la
trituradora de jardín hasta que la pieza sea reparada o reemplazada. Llame a nuestra línea de ayuda de
servicio al cliente al 1-800-633-1501 para obtener ayuda.
• Dé la vuelta a la trituradora.
• Doble ambas patas (5) hacia arriba e inserte el eje de la rueda (12) a través de las aberturas de
las patas, fije firmemente las patas con el eje de la rueda en el cuerpo de la máquina con pernos.
• Coloque el espaciador y el casquillo del eje en ambos lados del eje de la rueda (12), coloque las
ruedas (3) y fíjelas firmemente con pernos. Fije la tapa de la rueda (13).
• Sujete los lazos de sujeción de la bolsa de recolección (6) en los soportes a ambos lados del
producto.
ADVERTENCIA:
Tenga cuidado al apoyar el dispositivo sobre las ruedas, ya que el peso se desequilibra al inclinarlo y
moverlo.
MONTAJE
7
Modelo GS015
Casquillo del eje Espaciador Tornillo

INSTRUCCIONES DE OPERACIÓN
ARRANQUE DE LA TRITURADORA: (Ver Fig.4)
• Presione el interruptor de E / S a "I" para arrancar
el motor (Fig.4)
• Presione el botón del disyuntor si la máquina no
funciona, asegúrese de haber conectado a la
fuente de alimentación.
• Cuando el motor haya estado funcionando
durante unos segundos, puede comenzar a
triturar.
ADVERTENCIA:
El disyuntor se activará en las siguientes
circunstancias:
• Una acumulación de material triturado alrededor
del disco de corte.
• Si el material que se está triturando es mayor que
la capacidad del motor.
• Donde hay demasiada resistencia contra la hoja
de corte.
Cuando se haya activado el disyuntor, apague la
trituradora y desconecte la fuente de alimentación.
a. Desatornille la perilla del escariador en la base de
la torreta y abra la sección superior
b. Retire la suciedad u obstrucción del área de corte.
c. Vuelva a colocar la sección superior y apriete la
perilla del escariador.
d. Deje que el motor se enfríe unos minutos.
e. Vuelva a conectarlo a la fuente de alimentación y
presione el botón del disyuntor.
f. Cuando esté listo para comenzar a triturar,cambie a
"I".
DETENER LA TRITURADORA: (Ver Fig.5)
• Empuje el interruptor de E / S a la posición "O"
para apagar la trituradora de jardín.
• Desconectado a la fuente de alimentación
USANDO LA PALETA
Se proporciona una paleta para ayudar a alimentar
material menos voluminoso, como ramitas
pequeñas, hojas, otros desechos del jardín y
vegetación en el conducto de alimentación.
• Cargue el material en la tolva (Fig.6)
• Inserte la paleta (8) en el conducto de
alimentación empujando el material hacia el
disco de la cuchilla. (Fig.7)
• Espere hasta que todo el material se haya
triturado antes de agregar más material.
NOTA: Sus dedos nunca deben entrar en el
conducto de alimentación.
NOTA: Nunca use la herramienta si la tolva no está
instalada.
NOTA: No se exceda.
8
Modelo GS015
ADVERTENCIA:
Nunca afloje el pomo de apriete (11) sin haber
apagado el interruptor de encendido / apagado y
desconectado el enchufe de la toma.
ADVERTENCIA:
La trituradora se detendrá en 5 segundos después
de apagarse.
Start
Stop
Table of contents
Languages:
Other EarthWise Paper Shredder manuals