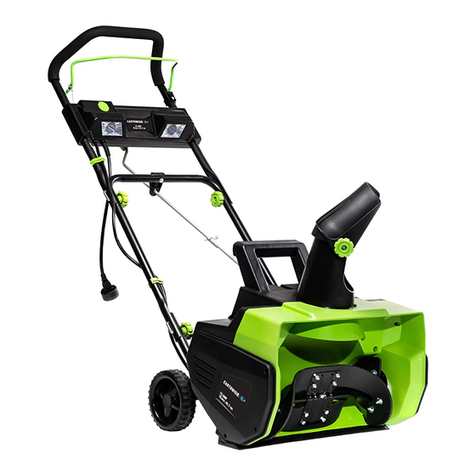
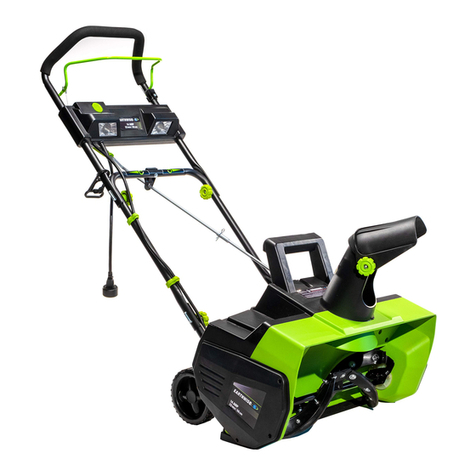
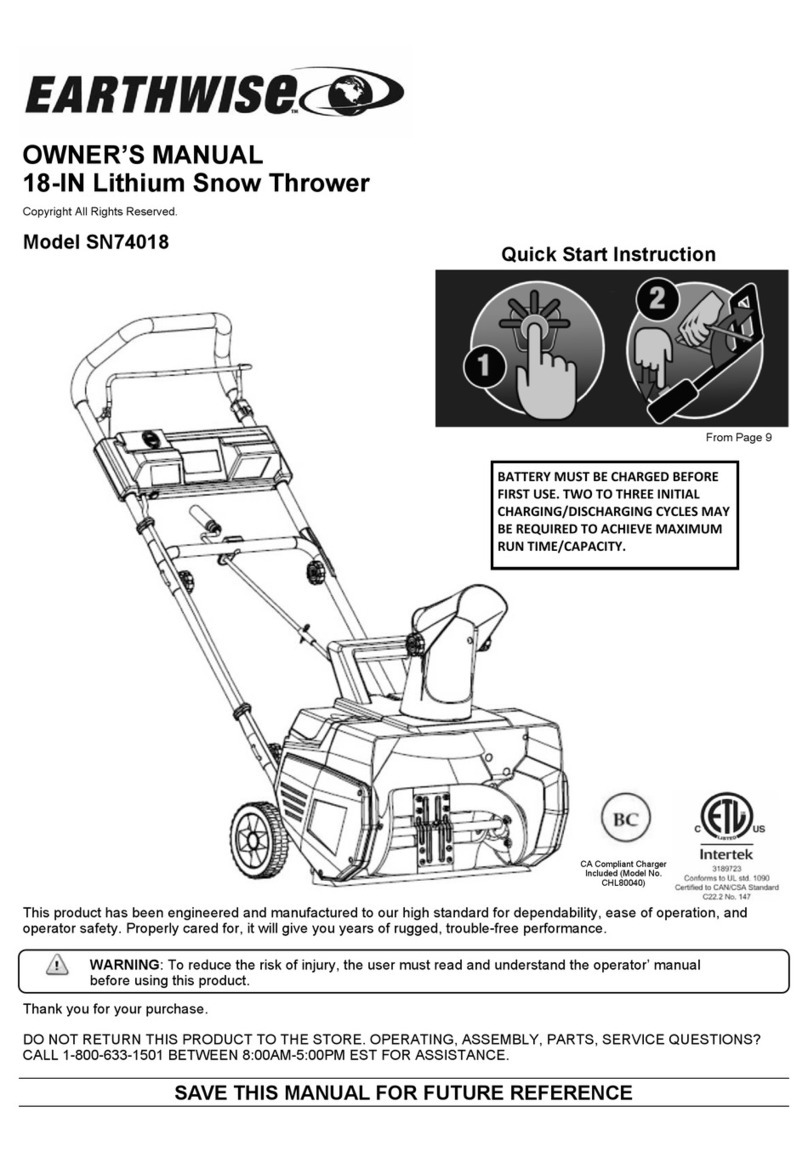
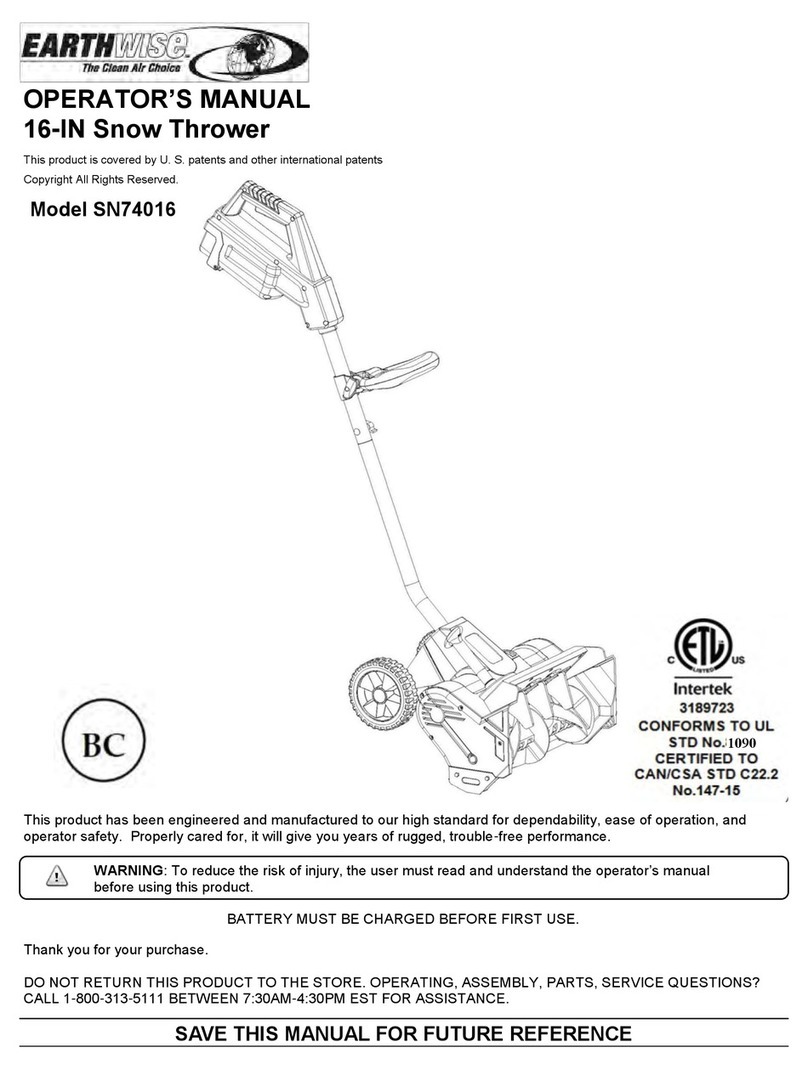
EarthWise SN70016 User manual

Model SN70016
OPERATOR’S MANUAL
16-IN Snow Thrower
This product is covered by U. S. patents and other international patents
Copyright All Rights Reserved.
Thank you for your purchase.
DO NOT RETURN THIS PRODUCT TO THE STORE. OPERATING, ASSEMBLY, PARTS, SERVICE QUESTIONS?
CALL 1-800-313-5111 BETWEEN 7:30AM-4:30PM EST FOR ASSISTANCE.
SAVE THIS MANUAL FOR FUTURE REFERENCE
This product has been engineered and manufactured to our high standard for dependability, ease of operation, and
operator safety. Properly cared for, it will give you years of rugged, trouble-free performance.
WARNING: To reduce the risk of injury, the user must read and understand the operator’s manual before
using this product.

Precautions that involve your safety.
CAUTION! Read the instruction manual and follow the warning and safety instructions!
CAUTION! Remove plug from outlet immediately if the cable is damaged or cut.
SWITCH OFF! the machine, wait until it comes to a complete standstill and remove plug from outlet prior to
maintenance, cleaning or repair work!
CAUTION! Always wear eye and ear protection.
Wear safe, sturdy, nonskid footwear!
DANGER! objects may be thrown out at high speed when motor is running. Do not walk in front of running
machine.
Keep bystanders at a safe distance.
DANGER! Rotating blades. Keep hands and feet at a safe distance.
Do not place hand under auger.
Keep the electrical cord free of the auger. The auger may damage the cord and cause contact with live
parts.
Do not place hand in front of chute deflector.
Do not place feet under auger.
DANGER! Risk of electric shock.
Do not use in rain or electrical storms.
Waste electrical products should not be disposed of with household waste. Please recycle
where facilities exist. Check with your Local Authority or retailer for recycling advice.
Some of the following symbols may be used on this product. Please study them and learn their meaning. Proper
interpretation of these symbols will allow you to operate the product better and safer.
2
SYMBOLS

TO REDUCE RISK OF INJURY: Before any use
be sure everyone using this product reads and
understands all safety instructions and other
information contained in this manual.
CAUTION: Wear appropriate personal hearing
protection during use. Under some conditions
and duration of use, noise from this product may
contribute to hearing loss.
Save these instructions and review frequently prior
to use and in instructing others.
WARNING: When using electric appliances, basic
safety precautions should always be followed to
reduce risk of fire, electric shock, and personal
injury, including the following:
READ ALL INSTRUCTIONS
CHECK FOR DAMAGED PARTS - Before further
use of the product, any part that is damaged should
be carefully checked to determine that it will operate
properly and perform its intended function. Check
for alignment of moving parts, binding of moving
parts, breakage of parts, mounting and any other
condition that may affect its operation. Any part that
is damaged should be properly repaired or replaced.
For assistance call our customer service help line at
1-800-313-5111.
AVOID DANGEROUS ENVIRONMENTS - Don’t
use this product in rainy or stormy conditions. Do
not operate in gaseous or explosive atmospheres.
Motors in these products normally spark, and the
sparks might ignite fumes.
KEEP CHILDREN AWAY - All visitors, children and
pets should stay at a safe distance from the work
area.
DRESS PROPERLY- Don’t wear loose clothing or
jewelry and wear protective hair covering to contain
long hair. They can be caught in moving parts.
Wear rubber boots when operating the snow
thrower. Maintain good footing at all times,
especially on slopes.
USE SAFETY GLASSES - Wear safety glasses
with side shields or goggles that are marked to
comply with ANSI Z87.1 standard when operating
this product.
DOUBLE INSULATION – The snow thrower has
double insulation. This means that all external
metal parts are insulated from the electrical supply.
This is achieved by introducing an insulation layer
between electrical and mechanical parts. The
double insulation guarantees you the greatest
possible safety.
WARNING: Use outdoor extension cords marked
SW-A, SOW-A, STW-A, STOW-A, SJW-A, SJTW-A,
or SJTOWA. These cords are rated for outdoor use
and reduce the risk of electric shock.
POLARIZED PLUGS-To reduce the risk of electric
shock, this product has a polarized plug. Polarized
connections will fit together only one way. Make
sure that the receptacle end of the extension cord
has large and small blade slot widths. If the plug
does not fit fully into the extension cord, reverse
the plug. If it still does not fit, obtain a suitable
extension cord. If the extension cord does not fit
fully into the outlet, contact a qualified electrician to
install the proper outlet. Do not change the plug on
the tool or the extension cord in any way.
EXTENSION CORD. Make sure your extension
cord is in good condition. When using an extension
cord be sure it is heavy enough to carry the current
your product will draw. An undersized extension
cord will cause a drop in line voltage resulting in
loss of power and overheating. The following table
shows the correct size to use depending on cord
length and nameplate ampere rating. If in doubt,
use the next heavier gage. The smaller the gage
number, the heavier the cord.
It is possible to tie two extension
cords together in a knot to prevent
them from becoming disconnected
during use. Make the knot as
shown, then connect the plug end of
the power cord into the receptacle
end of the extension cord.
WARNING: Keep all connections dry and off the
ground. Do not touch plug with wet hands.
Be aware of the extension cord while operating the
snow thrower. Be careful not to trip on the cord.
Always keep the cord away from the auger.
IMPORTANT SAFETY WARNINGS
GENERAL SAFETY
3
Minimum Gage for Cord Sets
Volts Total Length of cord in Feet
120V 0-25 26-50 51-100 101-150
240V 0-50 51-100 101-200 201-300
Ampere Rating
More Not More American wire Gage
Than Than
0 - 6 18 16 16 14
6 - 10 18 16 14 12
10 - 12 16 16 14 12
12 - 16 14 12 Not Recommended

DO NOT FORCE SNOW THROWER - It will per-
form better and safer at the rate for which it was
designed.
CAUTION: Never throw snow towards people, pets
or cars and never allow anyone in front of the snow
thrower while in operation.
Objects that might clog the snow thrower or cause
other damage can be hidden in the snow. Clear
the area of doormats, sleds, boards, wires and
other debris prior to use.
If the auger strikes a foreign body, examine the
snow thrower for signs of damage and make any
necessary repairs before restarting and continuing
to work.
STAY ALERT - Watch what you are doing. Use
common sense. Do not operate the snow thrower
when you are tired or under the influence of drugs,
alcohol or medications.
If the snow thrower starts to vibrate abnormally,
turn it off immediately and check for the cause.
Vibration is generally a warning of trouble.
Always turn off the snow thrower, disconnect from
the power supply and wait until the auger comes
to a complete stop before carrying out maintenance
or repairs.
Do not use on graveled surface unless the
snow thrower is adjusted for such a surface in
accordance with the operator’s manual.
Operation of the snow thrower in the hand-held
position is unsafe, except in accordance with the
special instructions for such use provided in the
operator’s manual.
CAUTION: Auger does not stop immediately after
the snow thrower is turned off.
CAUTION: Risk of injury. Do not put hands, feet or
any body part or clothing near the rotating auger.
WARNING: California Proposition 65:
This product contains chemicals known to the State
of California to cause cancer, birth defects or other
reproductive harm.
GROUND FAULT CIRCUIT INTERRUPTER (GFCI)
protection should be provided on the circuit or outlet
to be used for the snow thrower. Receptacles are
available having built-in GFCI protection and may
be used.
WARNING: Keep hands away from moving parts.
Never put your hands near the auger to remove
snow, sticks or other debris. Blocked auger can
“spring back” when cleared and may cause per-
sonal injury even when the snow thrower is stopped.
Always use a wooden stick such as a broom handle
to clear blockages.
DISCONNECT UNIT from the power supply when
not in use or when servicing or cleaning. Do not
leave unattended.
DON’T ABUSE CORD - Never carry this product
by the cord or yank the cord to disconnect from the
receptacle. Keep cord from heat, oil, and sharp
edges.
USE RIGHT APPLIANCE - Do not use this product
for any job except that for which it is intended.
DO NOT OVERLOAD the snow thrower by using at
too fast a rate to clear the snow.
DON’T OVERREACH - Guide the snow thrower at a
walking pace only. Keep proper footing and balance
at all times.
LIGHTING - Only operate your snow thrower in
daylight or good artificial light.
STORE IDLE UNIT INDOORS-When not in use, the
snow thrower should be stored indoors in a dry area
out of children’s reach.
MAINTAIN UNIT WITH CARE-Keep clean for best
performance and to reduce the risk of injury. Inspect
extension cord periodically and replace if damaged.
Keep handles dry, clean and free from oil.
Do not operate the snow thrower on a slope that is
too steep for safe operation. When on slopes, slow
down and make sure you have good footing.
Before starting the snow thrower make sure the
auger is not touching any object and is free to move.
AVOID UNINTENTIONAL STARTING – Don’t carry
plugged in hedge trimmer with finger on switch. Be
sure switch is off when plugging in.
GENERAL SAFETY
4

PRODUCT SPECIFICATIONS
Model: SN70016
Power Supply Voltage: 120V-60Hz Sweep Width: 16 in. (406 mm)
Idle Speed: 4500 RPM Max Clearing Depth: 8 in. (200 mm)
Power Consumption: 12 Amp Throwing Distance: Up to 30 ft.
Weight: 14.5 lbs. Clearing Capacity: 430 lbs./minute
5
PACKING LIST
UNPACKING
Carefully remove the product from the box.
Make sure that all items listed in the packing
list are included.
Inspect all items carefully to make sure no
breakage or damage occurred during shipping.
Do not discard the packing material until you
have carefully inspected and satisfactorily
operated the snow thrower.
If any parts are damaged or missing please
call our customer service help line at
1-800-313-5111 for assistance.
QTY DESCRIPTION
1 Snow Thrower
1 Lower & Upper Handle
1 M6x45 Carriage Bolt & Wing Nut
4 ST4.2x30 Philips Head Self Tapping Screw
1 Adjust Knob
1 ST4.2x50 Philips Head Self Tapping Screw
1 Adjust Knob Cover
1 Wheel Bracket
2 Wheel
2 Hub Cap
2 ST3.9x45 Philips Head Self Tapping Screw
2 ST3.9x55 Philips Head Self Tapping Screw
1 Auxiliary Handle
1 M6x50 Hex Head Bolt & Wing Nut
1 Operator’s Manual

6
PARTS LIST
1
3
2
4
6
22
5
23
8
9 10
11
12 13 14
15 16 17 18 19 20 21 24
25
26 27
7
No. Description Qty
1 Electrical Plug 1
2 Safety lock off button 1
3 On/Off trigger switch 1
4 Handle 1
5 Auxiliary handle 1
6 Upper cover 1
7 Motor housing 1
8 Adjusting knob 1
9 Acorn nut M8 1
10 Steel wave washer 1
11 Baffle 3
12 Drive shaft assembly 1
13 Drive belt, small 1
14 Flat-head screw ST3.9 x 14 4
15 Drive pulley 1
16 Shaft end ring 1
17 Drive belt, large 1
18 Pulley frame 1
19 Washer 1
20 Screw M5 x 12 1
21 Left cover plate assembly 1
22 Wing nut (M6x50 Hex Head Bolt) 1
23 Wing nut (M6x45 Carriage Bolt) 1
24 Friction plate 2
25 Scraper blade 1
26 Auger 1
27 Auger axle 1

This product must be correctly assembled before use.
Handle (Fig. 1A)
Slide the lower section (C) into the upper section (B).
Line up the holes on each tube, and make sure the
cable (A) is clear of the mounting holes. Secure the two
sections together with the M6x45 carriage bolt and wing
nut.
Motor housing (Fig. 1B)
Remove the plug guard and connect socket (B) on the
upper cover (6) to the plug on the motor housing (7).
Secure the upper cover to the motor housing with the
ST4.2 x 30 Philips head self tapping screws.
ASSEMBLY
7
Adjust knob (Fig. 1C)
Align the rib on the spindle with the notch on the adjust
knob and push the adjust knob onto the spindle. Secure
the knob with the ST4.2x50 Philips head self tapping
screw. Place the adjust knob cover onto the top and push
to secure into place.
Wheel (Fig. 1D)
Remove the screws and washers from the wheel bracket.
Install the wheels (13) and secure into place with the
washers and M5 x 12 screws. Push wheel covers into
place.
M6x45 Carriage
Bolt
B
C
A

Connecting the electrical cord (Fig. 3)
Loop the extension cord and feed it through the rear
handle. Rest the cord around the cord hook. This will
help prevent you from disconnecting the extension cord
from the product during operation.
WARNING: Do not handle the plug or the snow
thrower with wet hands or while standing in water.
DANGER: Electric shock can cause serious injury
or death.
8
Wheel bracket (Fig. 1E)
Align the holes on the wheel bracket with the holes on
the upper cover. Secure into place with ST3.9x45 Philips
head self tapping screws in the two (2) top holes and the
ST3.9x55 Philips head self tapping screws in the two (2)
bottom holes.
Auxiliary handle (Fig. 2)
Position the auxiliary handle so that the holes are in
alignment with the holes in the handle support bracket.
Insert the M6X50 hex head bolt into the hex shaped bolt
hole of the bracket. Secure by tightening the wing nut
onto the bolt.
Loosen the wing nut and adjust the angle and height of
the handle to a safe and comfortable position. Secure
into place by tightening the wing nut onto the bolt.
M6x50 Hex
Head Bolt
2
3
ASSEMBLY

Clear snow often, before it gets too deep. It is best to
remove the snow as soon as possible after it falls.
Lift the auger up slightly before starting the snow thrower.
Switch on and tilt the snow thrower forward until the
scraper blade contacts the ground. Push the snow
thrower forward at a comfortable rate of speed, yet slow
enough to clear the path completely. The width and depth
of the snow determines your forward speed.
Pull up and turn the adjust knob to direct the snow to the
right or to the left. For the most efficient snow removal
throw the snow downwind and slightly overlap each
swath.
The snow thrower can remove up to 8” deep in one pass.
When clearing deeper drifts, hold the snow thrower by
the upper and lower handles and use a swinging or
sweeping motion. Shave off the top layer and make
multiple passes. (Fig. 6).
OPERATING
9
This snow thrower is intended to be used to sweep snow
from sidewalks, steps, patios, decks and other hard flat
surfaces such as paved driveways. Use it only on hard,
flat surfaces free of sand, stone and debris, wires or any
other objects. The manufacturer is not liable for any
damage or injury resulting from misuse.
On/Off Switch (Fig. 4)
WARNING: The auger starts rotating immediately
after the snow thrower is switched on. Keep hands
and feet away from the auger.
To switch ON, hold the snow thrower firmly with two
hands, make sure the auger is not touching any surface
and press the Safety Lock Off Button (2) while squeezing
the On/Off trigger switch (3).
Once the snow thrower is started you can release the
Safety Lock Off Button.
To switch Off simply release the trigger.
Removing snow
WARNING: Before starting work, make sure that
the area to be cleared is free of stones, debris,
wires and any other objects.
Make sure all fasteners on the snow thrower (screws,
nuts, etc.) are fully tightened.
Check the auger for wear and tear at regular intervals.
Position the snow thrower so that snow will discharge in
a safe direction away from the operator and bystanders.
6
Correct
Incorrect
5
4
8”

For large areas a definite pattern of operation is required
to thoroughly clean an area of snow. These patterns
will avoid throwing snow in unwanted places as well as
eliminating a second removal of snow. (Fig. 7)
Pattern A: Throw the snow to the right or left side where
it is possible. For areas such as a long driveway it is
advantageous to start in the middle. Plow from one end
to the other, throwing snow to both sides.
Pattern B: If the snow can only be thrown to one side of
the area to be cleared, start on the opposite side.
Scraping the snow all the way down to the pavement will
wear out the scraper and auger. To protect these parts,
one or two inches of snow can be left behind and cleared
with de-icing salt or a shovel.
After clearing the snow, continue to run the snow thrower
for a few minutes to prevent ice from freezing on moving
parts. Then switch off the motor, wait for all moving parts
to stop, and wipe the ice and snow from the snow thrower
with a clean rag.
WARNING: To avoid serious personal injury, do not
use hands or feet to unclog the chute.
The snow thrower is equipped with a thermal safety
switch that will automatically shut off the motor in the
event the motor overheats. Should this occur, unplug
the unit and wait for the motor to cool down. This should
take about two minutes. The switch will reset itself after
the motor has cooled down and you can resume normal
operation.
10
7
OPERATING

Regular cleaning and maintenance of your snow thrower
will ensure efficiency and prolong the life of the product.
After each use, take apart and clean out the ice and
debris from the ventilator and its slots, the auger and
the housing.
Only use a cloth soaked with hot water and a soft brush
to clean the snow thrower. Never wet or spray water on
the machine!
Do not use detergents or solvents as these could cause
irreparable damage to the snow thrower. Chemicals can
destroy the plastic parts.
To protect the snow thrower from corrosion when storing
for long periods, lightly oil the metal parts.
Store the appliance in a dry area out of reach of children.
For the user’s safety, worn or damaged parts must be
replaced. Replace with original replacement parts only.
Parts from another snow thrower may not fit properly
causing an unsafe situation.
Changing the belt (Fig. 8, 9)
The drive belts (17) and (13) need to be replaced when
worn.
Drive Belt (17)
1. Remove screws and take off the cover (21) and
friction plate (24).
2. Remove screw (20), washer (19), pulley frame (18),
and the belt (17) from the pulleys.
3. Install the new belt in the same groove as the old
one.
4. Replace the screw (20), washer (19) and pulley
frame (18).
5. Replace the cover (21) and friction plate (24). Secure
with screws.
Drive Belt (13) small
1. Repeat steps 1 and 2 above.
2. Remove screws (14) and remove the drive shaft (12)
and drive belt (13).
3. Install new belt (13) with the drive shaft (12).
4. Secure with screws (14).
5. Replace belt (17), screw (20), washer (19) and pulley
frame (18).
6. Replace the cover (21) and friction plate (24). Secure
with screws.
Before carrying out maintenance operations, disconnect power supply.
11
8
9
21
7
17
18
19
24
12
13
14
20
MAINTENANCE AND STORAGE

Auger (Fig. 8, 10)
CAUTION Check fasteners before each use. A
loose auger can result is excessive vibration and
damage the snow thrower.
To replace the auger:
1. Remove cover (21) and friction plate (24). Remove
screw (20), washer (19), pulley frame (18), and the
belt (17).
Loosen the nut (9) from the other side of the auger
(26) and dismount the pulley (15) and auger axle
(27).
Replace the auger with a new one.
4. When reassembled ensure all screws and nuts are
properly tightened.
Scraper blade (Fig. 11)
The scraper blade is a wear item and should be replaced
when necessary. A worn scraper blade can cause
extreme vibration and damage the auger.
To replace the scraper blade:
1. Remove the three screws from the bottom of the
blade and slide the blade forward to remove.
2. Install new scraper blade.
3. Secure with the three screws.
4. Ensure the screws are properly tightened.
12
10
11
16
15
27
26
10
9
1XM8
25
MAINTENANCE AND STORAGE

Problem Possible causes Remedy
Motor does not start Unit not plugged in.
No electricity.
Defective cable.
Plug in the unit.
Check power supply.
Check cable. Repair or replace if required.
Poor results Drive belt worn or damaged.
Auger worn or damaged.
Discharge blocked.
Replace the drive belt.
Replace the auger. Ensure the screws and nuts are
properly tightened.
Switch off the snow thrower and clean the discharge.
Abnormal vibrations Drive belt worn or damaged.
Auger worn or damaged.
Scraper blade worn or damaged.
Replace the drive belt.
Replace the auger. Ensure the screws and nuts are
properly tightened.
Replace the scraper blade. Ensure the screws are
properly tightened.
CALL US FIRST !!
Call us first with questions about operating or maintaining this product at 1.800.313.5111
The Great States Corporation
American Lawn Mower Company
830 Webster Street
Shelbyville, IN 46176
www.earthwisetools.com
13
SERVICE
Should you need repair parts or service, simply contact us at 1-800-313-5111.
Be sure to provide all pertinent facts when you call.
REPAIR PARTS
Please record your serial number in the space provided below.
• NAME OF ITEM Snow Thrower
• MODEL NUMBER SN70016
• SERIAL NUMBER
TROUBLESHOOTING

The Great States Corporation
American Lawn Mower Company
830 Webster Street
Shelbyville, IN 46176
Phone 1-800-313-5111
www.earthwisetools.com
In a continued commitment to improve quality, the Manufacturer reserves the right to
make component changes or design changes when necessary.
OPERATOR’S MANUAL
16-IN Snow Thrower
This product is covered by U. S. patents and other international patents
Copyright All Rights Reserved.
Rev. 05/30/2016
WARRANTY
This product is manufactured for The Great States Corporation/American Lawn Mower Company. The
Great States Corporation/American Lawn Mower Company, Shelbyville, Indiana, has been making
lawn mowers for over 100 years and it warrants to the original owner that each new product and
service part is free from defects in material and workmanship and agrees to repair or replace under
this warranty any defective product or part from the original date of purchase for two (2) years except
for the conditions and circumstances listed below. Proof of purchase (original dated sales receipt)
must accompany all warranty claims.
THIS WARRANTY IS NOT TRANSFERABLE AND DOES NOT COVER:
Products sold damaged or incomplete, sold
“as is”, sold reconditioned, or used as rental
equipment.
Delivery, installation, or normal adjustments
explained in the operator’s manual.
Damage or liability caused by shipping,
improper handling, improper installation,
incorrect voltage or improper wiring,
improper maintenance, improper
modification, or the use of accessories and/
or attachments not specifically
recommended.
Repairs necessary because of operator
abuse or negligence, or the failure to install,
operate, maintain, or store the product
according to the instructions in the
operator’s manual.
Damage caused by cold, heat, rain,
excessive humidity, corrosive environments
and materials, or other contaminants.
Expendable items that become worn
during normal use, including but not limited
to, belts, auger, and scraper blade.
Cosmetic defects that do not interfere with
product functionality.
Freight costs from customer to vendor.
Repair and transportation costs of products
or parts determined not to be defective.
ANY INCIDENTAL, INDIRECT, OR
CONSEQUENTIAL LOSS, DAMAGE, OR
EXPENSE THAT MAY RESULT FROM
ANY DEFECT, FAILURE, OR
MALFUNCTION OF THE PRODUCT.
Some states do not allow the exclusion or
limitation on how long an implied warranty
lasts, so the above limitations may not
apply to you.
ANY NON-RESIDENTIAL USE OR
COMMERCIAL USE VOIDS ALL
WARRANTIES.

Modelo SN70016
MANUAL DEL OPERARIO
Sopladora de nieve de 406 mm (16 pulg.)
Este producto está amparado por patentes de EE. UU. y otras patentes internacionales.
Copyright. Todos los derechos reservados.
Muchas gracias por su compra.
NO DEVUELVA ESTE PRODUCTO A LA TIENDA. ¿TIENE PREGUNTAS SOBRE EL FUNCIONAMIENTO,
EL MONTAJE, LAS PIEZAS Y EL MANTENIMIENTO? LLAME AL 1-800-313-5111 ENTRE LAS 7:30 Y LAS 16:30 HS.,
HORA DEL ESTE DE LOS ESTADOS UNIDOS.
GUARDE ESTE MANUAL PARA CONSULTAS FUTURAS
Este producto fue diseñado y fabricado de acuerdo con nuestros altos estándares de confiabilidad, facilidad de operación y
seguridad para el operario. Si se trata con cuidado, esta herramienta le otorgará años de óptimo rendimiento y resistencia.
ADVERTENCIA: Para reducir el riesgo de sufrir alguna lesión, el usuario debe leer y comprender el
manual del operario antes de usar este producto.

SÍMBOLOS
Algunos de los siguientes símbolos pueden aparecer en este producto. Tenga a bien estudiarlos y aprender su significado.
La adecuada interpretación de estos símbolos le permitirá operar el producto mejor y de manera más segura.
2
Precauciones para su seguridad.
PRECAUCIÓN: Lea el manual de instrucciones y atienda las instrucciones se seguridad y advertencia.
PRECAUCIÓN: Retire el enchufe del tomacorriente de inmediato si el cable está dañado o cortado.
APAGUE la máquina, espere hasta que se detenga por completo y retire el enchufe del tomacorriente
antes de realizar alguna tarea de mantenimiento, limpieza o reparación.
PRECAUCIÓN: Use siempre protecciones para sus ojos y oídos.
Use calzado seguro, resistente y antideslizante.
¡PELIGRO! Pueden ser lanzados objetos a gran velocidad cuando el motor está en funcionamiento. No
pase delante de la máquina cuando está funcionando.
Mantenga a las personas que se encuentran en el lugar a una distancia segura.
¡PELIGRO! Cuchillas giratorias. Mantenga manos y pies a una distancia segura.
No colocar la mano debajo de la barrena.
Mantenga el cable eléctrico lejos de la barrena. La barrena puede dañar el cable y producir un contacto con
piezas activas.
No colocar la mano enfrente del deflector de descarga.
No colocar la pie debajo de la barrena.
¡PELIGRO! Riesgos de descargas eléctricas.
No usar en la lluvia. No usar durante tormentas eléctricas.
Los productos eléctricos no se deben desechar junto con los residuos domésticos. Recicle donde haya
centros para tal fin. Consulte a la autoridad local o al distribuidor minorista para obtener asesoramiento
sobre reciclado.

PARA REDUCIR EL RIESGO DE LESIONES: Antes
de utilizar este producto, cerciórese de que todos los
usuarios lean y comprendan las instrucciones
de seguridad y la demás información incluida en
este manual.
PRECAUCIÓN: Use protección auditiva apropiada
mientras trabaja. En ciertas condiciones y con cierta
duración de uso, el ruido generado por este producto
puede contribuir a la pérdida de la audición.
Guarde estas instrucciones y revíselas con
frecuencia antes de usar la herramienta y para
impartirlas a otros.
ADVERTENCIA: Al utilizar aparatos eléctricos,
se recomienda respetar siempre las precauciones
de seguridad básicas que se detallan a continuación,
a fin de reducir riesgos de incendios, descargas
eléctricas y lesiones personales.
LEA TODAS LAS INSTRUCCIONES
CONTROLE SI HAY PIEZAS DAÑADAS. Antes de
seguir usando el producto, se deberán revisar las
piezas dañadas en forma exhaustiva para
determinar si la herramienta funcionará
correctamente y realizará el trabajo previsto.
Compruebe la alineación y las uniones de las
piezas móviles, el montaje, averías de componentes
y otros factores que puedan afectar el
funcionamiento. Se debe reparar o reemplazar
cualquier pieza dañada en forma adecuada. Para
recibir asistencia, comuníquese con nuestra línea
de ayuda de atención al cliente al 1-800-313-5111.
EVITE AMBIENTES PELIGROSOS. No utilice este
producto en condiciones de lluvia o tormenta.
Tampoco trabaje en entornos donde existan gases
o sustancias explosivas. Por lo general, los motores
de estos productos producen chispas que podrían
inflamar los gases.
MANTENGA ALEJADOS A LOS NIÑOS. Todos los
visitantes, niños y mascotas deben mantenerse a
una distancia segura de la zona de trabajo.
USE ROPA ADECUADA. No use prendas sueltas
ni artículos de joyería. Use protección para cubrir y
sujetar el cabello largo, ya que puede quedar
atrapado en las piezas móviles.
Utilice botas de goma al operar el quitanieves.
En todo momento mantenga una buena base de
apoyo, especialmente en pendientes.
USE GAFAS DE SEGURIDAD. Al trabajar con este
producto, use gafas de seguridad con protectores
laterales que cumplan con la norma ANSI Z87.1.
DOBLE AISLAMIENTO. La sopladora de nieve tiene
doble aislamiento. Es decir que todas las piezas
metálicas externas están aisladas del suministro
eléctrico. Esto se logra con la introducción de una
capa de aislamiento entre las piezas eléctricas y las
mecánicas. El doble aislamiento garantiza la mayor
seguridad posible.
ADVERTENCIA: Para el exterior, use cables de
extensión rotulados con las siguientes inscripciones:
SW-A, SOW-A, STW-A, STOW-A, SJW-A, SJTW-A,
o SJTOWA. Estos cables están especificados para
usar al aire libre y reducir el riesgo de descarga
eléctrica.
ENCHUFES POLARIZADOS. Para reducir el riesgo
de descarga eléctrica, este producto tiene un enchufe
polarizado. Las conexiones polarizadas encajan de
una sola manera. Cerciórese de que el extremo del
receptáculo del cable de extensión tenga ranuras de
anchos diferentes para los contactos. Invierta el
enchufe si no encaja totalmente en el cable de
extensión. Si aún así no encaja, consiga un cable de
extensión adecuado. Si el cable de extensión no se
adapta bien al tomacorriente, llame a un electricista
competente para que instale un tomacorriente
adecuado. No modifique el enchufe de la herramienta
ni el cable de extensión de ningún modo.
CABLE DE EXTENSIÓN. Asegúrese de que el cable
de extensión esté en buenas condiciones. Además,
compruebe que tenga el grosor suficiente para
transportar la corriente que necesitará el producto.
Un cable de extensión muy pequeño provocará una
disminución en la tensión de la línea y, como
resultado, una pérdida de potencia y recalentamiento.
La siguiente tabla muestra el tamaño correcto que se
debe usar según la longitud del cable y el amperaje
de la etiqueta. Ante la duda, utilice el siguiente calibre
más grueso. Cuanto más bajo es el número de
calibre, más grueso es el cable.
Es posible unir dos cables de extensión con
un nudo para evitar que se
desconecten durante el uso. Realice
el nudo como se muestra en la
imagen y luego conecte el enchufe
del cable de alimentación en el
receptáculo del cable de extensión.
ADVERTENCIA: Mantenga todas las conexiones
secas y alejadas del suelo. No toque el enchufe
con las manos mojadas.
Tenga presente el cable de extensión mientras
opera la sopladora de nieve. Tenga cuidado de
no tropezar con el cable y siempre manténgalo
alejado de la barrena.
ADVERTENCIAS DE SEGURIDAD IMPORTANTES
NORMAS GENERALES DE SEGURIDAD
3
Calibre mínimo para los cables
Voltios Longitud total del cable en pies
120V 0-25 26-50 51-100 101-150
240V 0-50 51-100 101-200 201-300
Amperaje
Más de No más de Calibre AWG
0 - 6 18 16 16 14
6 - 10 18 16 14 12
10 - 12 16 16 14 12
12 - 16 14 12 No se recomienda

NO FUERCE EL QUITANIEVES - Funcionará
mejor y de manera más segura a la velocidad para
la que fue diseñado.
PRECAUCIÓN: Nunca arroje nieve a las personas,
mascotas o automóviles y no permita que nadie
esté frente a la sopladora de nieve mientras está
en funcionamiento.
Los objetos que pueden tapar la sopladora de
nieve o causar daños pueden estar escondidos en
la nieve. Antes de usar la máquina, despeje el área
de felpudos, trineos, tablas, cables y otros
desechos.
Si la barrena golpea un cuerpo extraño, verifique
que no haya signos de daños en la sopladora de
nieve y haga las reparaciones necesarias antes de
volver a empezar y continuar el trabajo.
PONGA ATENCIÓN. Ponga atención a lo que está
haciendo. Use el sentido común. No opere la
sopladora de nieve si está cansado o bajo la
influencia de drogas, alcohol o medicamentos.
Si la sopladora de nieve comienza a vibrar de
manera inusual, apáguela de inmediato y revísela
para detectar la causa. Generalmente, la vibración
advierte la existencia de un problema.
Siempre apáguela; desconéctela del suministro
eléctrico y espere hasta que la barrena se detenga
por completo antes de realizar tareas de
mantenimiento o reparaciones.
No utilice el quitanieves en superficies cubiertas
con gravilla a menos que se haya ajustado para
tales superficies, según el manual del operario.
El funcionamiento del quitanieves en posición
manual no es seguro a menos que se utilice
conforme a las instrucciones especiales provistas
en el manual del operario.
PRECAUCIÓN: La barrena no se detiene de
inmediato cuando se apaga la sopladora de nieve.
PRECAUCIÓN: Riesgo de lesiones. No acerque
ninguna parte de su cuerpo, ni prendas de vestir a
la barrena giratoria.
ADVERTENCIA: Proposición 65 de California:
Este producto contiene sustancias químicas al
estado de California como causantes de cáncer,
defectos de nacimiento u otros problemas
reproductivos .
NORMAS GENERALES DE SEGURIDAD
4
INTERRUPTOR DE CIRCUITO POR FALLA A
TIERRA (ICFT). El circuito o tomacorriente que se
usen para la sopladora de nieve deben contar con
esta protección. Se pueden utilizar receptáculos que
tengan la protección de ICFT incorporada.
ADVERTENCIA: Mantenga las manos lejos de las
piezas en movimiento. Nunca coloque las manos
cerca de la barrena para quitar nieve, palos u otro
desecho. Al limpiar la barrena, esta puede
destrabarse repentinamente y provocar lesiones,
aún cuando la sopladora de nieve se haya detenido.
Para destapar, use siempre un palo de madera
como el del mango de una escoba.
DESCONECTE LA UNIDAD del suministro eléctrico
cuando no esté en uso o durante el servicio de
mantenimiento o la limpieza. Manténgala bajo
vigilancia constante.
NO MALTRATE EL CABLE. Nunca tire del cable
para trasladar este producto ni para desconectarlo
del receptáculo. Aleje el cable del calor, el aceite y
los bordes filosos.
USE LA HERRAMIENTA CORRECTA. No utilice
este producto en trabajos para los que no esté
indicado.
NO SOBRECARGUE la sopladora de nieve
usándola a una velocidad excesiva.
NO ADOPTE UNA POSTURA INCÓMODA.
Guíe la sopladora de nieve sólo a paso de hombre.
Mantenga una base de apoyo firme y buen
equilibrio en todo momento.
ILUMINACIÓN. Trabaje con la sopladora de nieve
sólo con luz natural o buena luz artificial.
GUARDE LA UNIDAD BAJO TECHO. Cuando no
esté en uso, la sopladora de nieve se deberá
guardar en un lugar seco, fuera del alcance de
los niños.
MANTENGA LA UNIDAD EN CONDICIONES.
Consérvela limpia para lograr un óptimo
funcionamiento y reducir el riesgo de lesiones.
Revise el cable de extensión periódicamente y
reemplácelo si está dañado. Mantenga los mangos
secos, limpios y libres de aceite.
Para un funcionamiento seguro, no utilice la
sopladora de nieve en pendientes demasiado
pronunciadas. Cuando trabaje en pendientes,
disminuya la velocidad y asegúrese de tener una
buena base de apoyo.
Antes de arrancar la sopladora de nieve, asegúrese
de que la barrena no toque ningún objeto y esté
libre para moverse.
EVITE EL ENCENDIDO ACCIDENTAL. No
transporte el cortasetos enchufado, con el dedo en el
interruptor. Asegúrese de que el interruptor esté en la
posición de apagado al enchufar el cable de la
herramienta.

ESPECIFICACIONES DEL PRODUCTO
Modelo: SN70016
Voltaje del suministro eléctrico: 120 V - 60 HZ
Velocidad de ralenti: 4500 RPM
Consumo: 12 amperios
Peso: 6.6 kg (14.5 libras)
5
Ancho de barrido: 406 mm (16 pulg.)
Profundidad máx. de barrido: 200 mm (8 pulg.)
Distancia de lanzamiento: Hasta 9.14 m (30 pies)
Capacidad de barrido: 195 kg (430 libras)/minuto
DESEMBALAJE
Extraiga la herramienta de la caja con cuidado.
Asegúrese de que estén incluidos todos los
elementos detallados en la lista de embalaje.
Inspeccione el producto detenidamente para
corroborar que no existan roturas ni averías
ocurridas durante el envío.
No deseche el material de embalaje hasta
haber inspeccionado exhaustivamente el
producto y comprobar que funciona en forma
satisfactoria.
Si alguna pieza falta o está dañada, llame al
1-800-313-5111 para obtener asistencia.
LISTA DE EMBALAJE
LISTA DE EMBALAJE
1 Sopladora de nieve
1 Mango inferior y el mango superior
1 Perno de carruaje (6 x 45) y tuerca de mariposa
4 Tornillo autorroscante (4,2 x 30)
1 Perilla de ajuste
1 Tornillo autorroscante (4,2 x 50)
1 Tapa de la perilla de ajuste
1 Soporte de ruedas
2 Ruedas
2 Cubierta de ruedas
2 Tornillo autorroscante (3,9 x 45)
2 Tornillo autorroscante (3,9 x 55)
1 Mango auxiliar
1 Manual del operario
1 Perno de cabeza hexagonal (6 x 50) y tuerca de mariposa

LISTA DE PIEZAS
6
Pos. Description Qty
1 Enchufe 1
2 Botón de bloqueo de seguridad 1
3 Interruptor del gatillo de encendido/apagado 1
4 Mango 1
5 Mango auxiliar completo 1
6 Cubierta superior 1
7 Caja del motor 1
8 Perilla de ajuste 1
9 Tuerca ciega M8 1
10 Arandela elástica 1
11 Deflector 3
12 Eje de accionamiento 1
13 Correa de transmisión, pequeña 1
14 Tornillo de cabeza plana ST3.9 x 14 4
15 Polea de mando 1
16 Anillo de extremo de eje 1
17 Correa de transmisión 1
18 Soporte de la polea 1
19 Arandela 1
20 Tornillo M5 x 12 1
21 Cubierta, izquierda 1
22 Tuerca de mariposa (M6 x 50) 1
23 Tuerca de mariposa (M6 x 45) 1
24 Placa de fricción 2
25 Cuchilla raspadora 1
26 Barrena 1
27 Eje de la barrena 1
1
3
2
4
6
22
5
23
8
9 10
11
12 13 14
15 16 17 18 19 20 21 24
25
26 27
7
Table of contents
Languages:
Other EarthWise Snow Blower manuals

EarthWise
EarthWise SN70112 User manual

EarthWise
EarthWise SN74018 User manual

EarthWise
EarthWise SN70010 User manual

EarthWise
EarthWise SN74016 User manual

EarthWise
EarthWise SN72018 User manual

EarthWise
EarthWise SN75018 User manual

EarthWise
EarthWise SN75022 User manual

EarthWise
EarthWise SN71022 User manual

EarthWise
EarthWise SN74014 User manual

EarthWise
EarthWise SN74016 User manual
Popular Snow Blower manuals by other brands

Toro
Toro SnowMaster 724 ZXR 36001 Operator's manual

Troy-Bilt
Troy-Bilt 500 series Operator's manual

Craftsman
Craftsman 88957 - 179 CC 24" 2 Stage Snow Thrower Operation manual

Pulsar
Pulsar PTG3418 owner's manual

Toro
Toro 1500 Power Curve 38375 Operator's manual

Poulan Pro
Poulan Pro 96194000503 owner's manual